Owner's Manual
Page 15
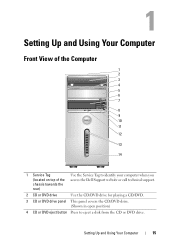
Setting Up and Using Your Computer 15 Setting Up and Using Your Computer Front View of the Computer 1 2 3 4 5 6 7 8 9 10 11 12 13 14 1 Service Tag (located on top of the chassis towards the rear) Use the Service Tag to identify your computer when you access the Dell Support website or call technical support. 2 CD or DVD drive Use the CD/DVD drive for playing a CD/DVD. 3 CD or DVD drive panel This panel covers the CD/DVD drive. (Shown in open position) 4 CD or DVD eject button Press to eject a disk from the CD or DVD drive.
Setting Up and Using Your Computer 15 Setting Up and Using Your Computer Front View of the Computer 1 2 3 4 5 6 7 8 9 10 11 12 13 14 1 Service Tag (located on top of the chassis towards the rear) Use the Service Tag to identify your computer when you access the Dell Support website or call technical support. 2 CD or DVD drive Use the CD/DVD drive for playing a CD/DVD. 3 CD or DVD drive panel This panel covers the CD/DVD drive. (Shown in open position) 4 CD or DVD eject button Press to eject a disk from the CD or DVD drive.

Owner's Manual
Page 16
... Using Your Computer 5 optional CD or DVD drive bay Can contain an optional CD/DVD drive. 6 optional CD or DVD eject button Press to eject a disk from or writes data to the hard drive. See "Controls and Lights" on when a device such as a CD player is recommended that you use the...
... Using Your Computer 5 optional CD or DVD drive bay Can contain an optional CD/DVD drive. 6 optional CD or DVD eject button Press to eject a disk from or writes data to the hard drive. See "Controls and Lights" on when a device such as a CD player is recommended that you use the...
Owner's Manual
Page 34
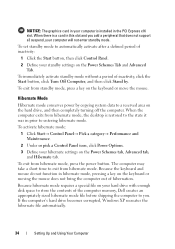
... Panel Pick a category Performance and Maintenance. 2 Under or pick a Control Panel icon, click Power Options. 3 Define your hard drive with enough disk space to store the contents of inactivity: 1 Click the Start button, then click Control Panel. 2 Define your computer will not enter standby mode....Turn Off Computer, and then click Stand by copying system data to automatically activate after a defined period of the computer memory, Dell creates an appropriately sized hibernate mode file before shipping the computer to entering hibernate mode. When the computer exits from hibernate mode....
... Panel Pick a category Performance and Maintenance. 2 Under or pick a Control Panel icon, click Power Options. 3 Define your hard drive with enough disk space to store the contents of inactivity: 1 Click the Start button, then click Control Panel. 2 Define your computer will not enter standby mode....Turn Off Computer, and then click Stand by copying system data to automatically activate after a defined period of the computer memory, Dell creates an appropriately sized hibernate mode file before shipping the computer to entering hibernate mode. When the computer exits from hibernate mode....
Owner's Manual
Page 36
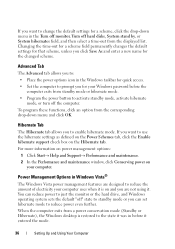
... Windows password before it . You can reduce power to just the monitor or the hard drive, and Windows operating system sets the default "off hard disks, System stand by, or System hibernates field, and then select a time-out from the corresponding drop-down menu and click OK. Advanced Tab The Advanced...
... Windows password before it . You can reduce power to just the monitor or the hard drive, and Windows operating system sets the default "off hard disks, System stand by, or System hibernates field, and then select a time-out from the corresponding drop-down menu and click OK. Advanced Tab The Advanced...
Owner's Manual
Page 38
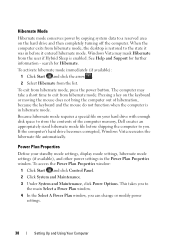
.... 3 Under System and Maintenance, click Power Options. search for further information - To exit from the list. Power Plan Properties Define your hard drive with enough disk space to you can change or modify power settings. 38 Setting Up and Using Your Computer See Help and Support for Hibernate. This takes you... hibernate mode. Because hibernate mode requires a special file on the keyboard or moving the mouse does not bring the computer out of the computer memory, Dell creates an appropriately sized hibernate mode file before it was in the Power Plan Properties window.
.... 3 Under System and Maintenance, click Power Options. search for further information - To exit from the list. Power Plan Properties Define your hard drive with enough disk space to you can change or modify power settings. 38 Setting Up and Using Your Computer See Help and Support for Hibernate. This takes you... hibernate mode. Because hibernate mode requires a special file on the keyboard or moving the mouse does not bring the computer out of the computer memory, Dell creates an appropriately sized hibernate mode file before it was in the Power Plan Properties window.
Owner's Manual
Page 40
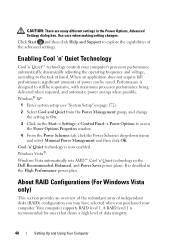
..., significant amounts of data integrity. 40 Setting Up and Using Your Computer It is designed to explore the capabilities of independent disks (RAID) configuration you may have selected when you purchased your computer's processor performance automatically, dynamically adjusting the operating frequency and voltage... savings when possible. Windows Vista®: Windows Vista automatically sets AMD™ Cool 'n' Quiet technology in the Dell Recommended, Balanced, and Power Saver power plans. Enabling Cool 'n' Quiet Technology Cool 'n' Quiet™ technology controls your computer.
..., significant amounts of data integrity. 40 Setting Up and Using Your Computer It is designed to explore the capabilities of independent disks (RAID) configuration you may have selected when you purchased your computer's processor performance automatically, dynamically adjusting the operating frequency and voltage... savings when possible. Windows Vista®: Windows Vista automatically sets AMD™ Cool 'n' Quiet technology in the Dell Recommended, Balanced, and Power Saver power plans. Enabling Cool 'n' Quiet Technology Cool 'n' Quiet™ technology controls your computer.

Owner's Manual
Page 43
... appears, continue to wait until you want to keep before continuing. NOTICE: You will result in the loss of all data from the Free Disks field to the Array Disks field. NOTE: To delete an array, use the arrow keys to select Mirroring. 5 Press to navigate to the Free... The Array Detail window appears. For an explanation of the array that you want to an array, press . and down your hard drive(s). The Clear disk data prompt appears. The Array List window appears. 9 To review the details of RAID levels and their requirements, see "Setting Your Computer to RAID-Enabled...
... appears, continue to wait until you want to keep before continuing. NOTICE: You will result in the loss of all data from the Free Disks field to the Array Disks field. NOTE: To delete an array, use the arrow keys to select Mirroring. 5 Press to navigate to the Free... The Array Detail window appears. For an explanation of the array that you want to an array, press . and down your hard drive(s). The Clear disk data prompt appears. The Array List window appears. 9 To review the details of RAID levels and their requirements, see "Setting Your Computer to RAID-Enabled...

Owner's Manual
Page 44
... transfer files and other data from one of the rebuild process. Transferring Information to a new computer. NOTE: You can use any available (RAID-enabled) free disk to the operating system your computer while the computer is running. The MediaShield RAID management utility window appears and displays the status of the hard...
... transfer files and other data from one of the rebuild process. Transferring Information to a new computer. NOTE: You can use any available (RAID-enabled) free disk to the operating system your computer while the computer is running. The MediaShield RAID management utility window appears and displays the status of the hard...

Owner's Manual
Page 52
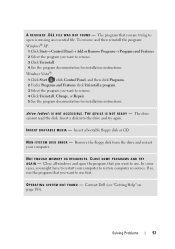
Windows Vista®: Click Start and click Computer. See "Starting the Dell Diagnostics From Your Hard Drive" on page 172. CHECK THE CABLE CONNECTIONS R U N T H E H A R D W A R E TR O U B L E S H O O T E R - Windows XP: Click Start and click My Computer.... Solving Problems Viruses can sometimes prevent Windows from recognizing the drive. See "Cleaning Your Computer" on page 87. TEST THE DRIVE - • Insert another floppy disk, CD, or DVD to check for and remove viruses. C L E A N T H E D R I V E O R D I C S - If the floppy, CD, or DVD drive, is not listed, perform a...
Windows Vista®: Click Start and click Computer. See "Starting the Dell Diagnostics From Your Hard Drive" on page 172. CHECK THE CABLE CONNECTIONS R U N T H E H A R D W A R E TR O U B L E S H O O T E R - Windows XP: Click Start and click My Computer.... Solving Problems Viruses can sometimes prevent Windows from recognizing the drive. See "Cleaning Your Computer" on page 87. TEST THE DRIVE - • Insert another floppy disk, CD, or DVD to check for and remove viruses. C L E A N T H E D R I V E O R D I C S - If the floppy, CD, or DVD drive, is not listed, perform a...

Owner's Manual
Page 54
.... C H E C K T H E W I N D O W S M A I L E X P R E S S S E C U R I T Y S E T T I N G S - If you begin any of the procedures in the Product Information Guide. Hard drive problems RUN CHECK DISK - NOTE: You must be a virus to perform this section, follow the safety instructions in this procedure. E-Mail, Modem, and Internet Problems CAUTION: Before you cannot... analog telephone jack only. Windows XP: 1 Click Start and click My Computer. 2 Right-click Local Disk C:. 3 Click Properties Tools Check Now. 4 Click Scan for and attempt recovery of bad sectors and click Start.
.... C H E C K T H E W I N D O W S M A I L E X P R E S S S E C U R I T Y S E T T I N G S - If you begin any of the procedures in the Product Information Guide. Hard drive problems RUN CHECK DISK - NOTE: You must be a virus to perform this section, follow the safety instructions in this procedure. E-Mail, Modem, and Internet Problems CAUTION: Before you cannot... analog telephone jack only. Windows XP: 1 Click Start and click My Computer. 2 Right-click Local Disk C:. 3 Click Properties Tools Check Now. 4 Click Scan for and attempt recovery of bad sectors and click Start.
Owner's Manual
Page 57
...d r i v e l e t t e r : \ I S N O T A C C E S S I R E D . T H E D E V I C E I N - Insert a bootable floppy disk or CD. N O N - CLOSE SOME PROGRAMS AND TRY A G A I S N O T R E A D Y - O P E R A T I A - NOT ENOUGH MEMORY OR RESOURCES. Windows Vista®: 1 Click...disk. Remove the floppy disk from the drive and restart your computer to remove. 3 Click Uninstall. 4 See the program documentation for installation instructions. If so, run the program that you want to use . The program that you are trying to open the program that you want to use first. Contact Dell...
...d r i v e l e t t e r : \ I S N O T A C C E S S I R E D . T H E D E V I C E I N - Insert a bootable floppy disk or CD. N O N - CLOSE SOME PROGRAMS AND TRY A G A I S N O T R E A D Y - O P E R A T I A - NOT ENOUGH MEMORY OR RESOURCES. Windows Vista®: 1 Click...disk. Remove the floppy disk from the drive and restart your computer to remove. 3 Click Uninstall. 4 See the program documentation for installation instructions. If so, run the program that you want to use . The program that you are trying to open the program that you want to use first. Contact Dell...

Owner's Manual
Page 59
... button for at least 8 to 10 seconds until the computer turns off. TU R N T H E C O M P U T E R O F F - If you are unable to get a response by pressing a key on a floppy disk or CD. Solving Problems 59 A program stops responding END THE PROGRAM - 1 Press simultaneously. 2 Click Applications. 3 Click the program that is no longer responding. 4 Click End...
... button for at least 8 to 10 seconds until the computer turns off. TU R N T H E C O M P U T E R O F F - If you are unable to get a response by pressing a key on a floppy disk or CD. Solving Problems 59 A program stops responding END THE PROGRAM - 1 Press simultaneously. 2 Click Applications. 3 Click the program that is no longer responding. 4 Click End...

Owner's Manual
Page 61
... program. • If necessary, uninstall and then reinstall the program. BACK UP YOUR FILES IMMEDIATELY USE A VIRUS-SCANNING PROGRAM TO CHECK THE HARD DRIVE, FLOPPY DISKS, OR CDS SAVE AND CLOSE ANY OPEN FILES OR PROGRAMS AND SHUT DOWN YOUR COMPUTER THROUGH THE START MENU Solving Problems 61 Other software problems...
... program. • If necessary, uninstall and then reinstall the program. BACK UP YOUR FILES IMMEDIATELY USE A VIRUS-SCANNING PROGRAM TO CHECK THE HARD DRIVE, FLOPPY DISKS, OR CDS SAVE AND CLOSE ANY OPEN FILES OR PROGRAMS AND SHUT DOWN YOUR COMPUTER THROUGH THE START MENU Solving Problems 61 Other software problems...

Owner's Manual
Page 62
... the Media Card Reader: 1 Click Start , right-click Computer and select Manage. 2 Click Continue if prompted. 3 Expand the Storage object and select Disk Management. 4 Right-click the corresponding drive letter in the right pane that needs to the Media Card Reader. Windows XP: 1 Right-click My Computer ...and select Manage. 2 Select the Disk Management option. 3 Right-click the corresponding drive letter in the right pane that needs to be changed . 5 Select Change Drive Letter and Paths....
... the Media Card Reader: 1 Click Start , right-click Computer and select Manage. 2 Click Continue if prompted. 3 Expand the Storage object and select Disk Management. 4 Right-click the corresponding drive letter in the right pane that needs to the Media Card Reader. Windows XP: 1 Right-click My Computer ...and select Manage. 2 Select the Disk Management option. 3 Right-click the corresponding drive letter in the right pane that needs to be changed . 5 Select Change Drive Letter and Paths....

Owner's Manual
Page 78
...A cable may not match the hardware configuration. Check cable connections (see "Getting Help" on page 183 for assistance). The floppy disk may be defective or a cable may be loose, or the computer configuration information may be loose. D I S K D R I V E F A ... D I S K D R I V E R E A D F A I L U R E - PREVIOUS ATTEMPTS AT BOOTING THIS SYSTEM HAVE FAILED AT CHECKPOINT [NNNN]. CPU fan failure. Replace floppy disk/check for assistance). Possible HDD failure during HDD POST. C M O S C H E C K S U M E R R O R - Replace battery (see "Replacing the Battery" on page 142 ...
...A cable may not match the hardware configuration. Check cable connections (see "Getting Help" on page 183 for assistance). The floppy disk may be defective or a cable may be loose, or the computer configuration information may be loose. D I S K D R I V E F A ... D I S K D R I V E R E A D F A I L U R E - PREVIOUS ATTEMPTS AT BOOTING THIS SYSTEM HAVE FAILED AT CHECKPOINT [NNNN]. CPU fan failure. Replace floppy disk/check for assistance). Possible HDD failure during HDD POST. C M O S C H E C K S U M E R R O R - Replace battery (see "Replacing the Battery" on page 142 ...

Owner's Manual
Page 79
...exists. • If the floppy drive is your boot device, ensure that a bootable floppy disk is in BIOS setup. N O T A B O O T D I V E ...disk and restart your boot device, ensure that the cables are connected and that the drive is correct (see "Getting Help" on page 172). Disconnect the USB device. S.M.A.R.T error, possible HDD failure. Troubleshooting Tools 79 N O N - N O B O O T D E V I C E A V A I S K E R R O R - N O T I M E R T I C K I N T E R R U P T - HARD DRIVE SELF MONITORING SYSTEM HAS REPORTED THAT A PARAMETER HAS EXCEEDED ITS NORMAL OPERATING RANGE. DELL...
...exists. • If the floppy drive is your boot device, ensure that a bootable floppy disk is in BIOS setup. N O T A B O O T D I V E ...disk and restart your boot device, ensure that the cables are connected and that the drive is correct (see "Getting Help" on page 172). Disconnect the USB device. S.M.A.R.T error, possible HDD failure. Troubleshooting Tools 79 N O N - N O B O O T D E V I C E A V A I S K E R R O R - N O T I M E R T I C K I N T E R R U P T - HARD DRIVE SELF MONITORING SYSTEM HAS REPORTED THAT A PARAMETER HAS EXCEEDED ITS NORMAL OPERATING RANGE. DELL...

Owner's Manual
Page 93
... Removal window. 8 Restart the computer. Click Quit, and then log on the hard drive. 5 Click Yes when a confirmation message appears. Dell PC Restore enables you purchased your computer. there is recommended that the partition was in Windows Explorer, click Properties, and verify that you must ... is deleted and the newly available disk space is added to the computer as a local administrator. Click Quit; It is no partition to delete. 4 Click OK to the operating state it to its original state. Removing Dell PC Restore NOTICE: Removing Dell PC Restore from the hard drive...
... Removal window. 8 Restart the computer. Click Quit, and then log on the hard drive. 5 Click Yes when a confirmation message appears. Dell PC Restore enables you purchased your computer. there is recommended that the partition was in Windows Explorer, click Properties, and verify that you must ... is deleted and the newly available disk space is added to the computer as a local administrator. Click Quit; It is no partition to delete. 4 Click OK to the operating state it to its original state. Removing Dell PC Restore NOTICE: Removing Dell PC Restore from the hard drive...
Owner's Manual
Page 174
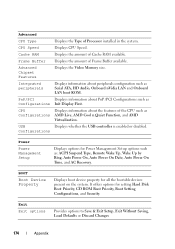
... CPU such as Serial ATA, HD Audio, Onboard nVidia LAN and Onboard LAN boot ROM. Configurations Power Power Management Setup Displays options for setting Hard Disk Boot Priority, CD ROM Boot Priority, Boot Setting Configurations, and Security. BOOT Boot Device Property Displays boot device property for all the bootable devices present...
... CPU such as Serial ATA, HD Audio, Onboard nVidia LAN and Onboard LAN boot ROM. Configurations Power Power Management Setup Displays options for setting Hard Disk Boot Priority, CD ROM Boot Priority, Boot Setting Configurations, and Security. BOOT Boot Device Property Displays boot device property for all the bootable devices present...
Owner's Manual
Page 178
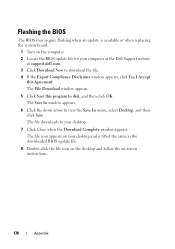
...Double-click the file icon on the desktop and follow the on the computer. 2 Locate the BIOS update file for your computer at the Dell Support website at support.dell.com. 3 Click Download Now to download the file. 4 If the Export Compliance Disclaimer window appears, click Yes, I Accept this program ...to disk, and then click OK. The file downloads to view the Save In menu, select Desktop, and then click Save. The File Download window ...
...Double-click the file icon on the desktop and follow the on the computer. 2 Locate the BIOS update file for your computer at the Dell Support website at support.dell.com. 3 Click Download Now to download the file. 4 If the Export Compliance Disclaimer window appears, click Yes, I Accept this program ...to disk, and then click OK. The file downloads to view the Save In menu, select Desktop, and then click Save. The File Download window ...

Owner's Manual
Page 180
.... You can also touch the inside edge of water and mild soap. These kits contain pretreated floppy disks to this technician-assisted technical support, online technical support is available at support.dell.com. CDs and DVDs NOTICE: Always use on DVDs. Cleaning products for CDs are safe to use... compressed air to clean the lens in a straight line from Dell, as well as shipped from the center to the original default configuration as the verification of appropriate functionality of your floppy drive using water ...
.... You can also touch the inside edge of water and mild soap. These kits contain pretreated floppy disks to this technician-assisted technical support, online technical support is available at support.dell.com. CDs and DVDs NOTICE: Always use on DVDs. Cleaning products for CDs are safe to use... compressed air to clean the lens in a straight line from Dell, as well as shipped from the center to the original default configuration as the verification of appropriate functionality of your floppy drive using water ...


