
Owner's Manual
Page 7
... 97 Turning Off Your Computer 98 Before Working Inside Your Computer 98 Removing the Computer Cover 99 Inside View of Your Computer 101 System Board Components 102 Power Supply DC Connector Pin Assignments . . . . . 104 Memory 107 Memory Installation Guidelines 108 Installing Memory 109 Removing Memory 111 Cards 111 PCI and PCI Express Cards 112 Bezel 118 Removing the Bezel 118 Replacing the Bezel 119 Drives 120 Recommended Drive Cable Connections . . . . . 121 Connecting Drive Cables 121 Drive Interface Connectors 121 Connecting and Disconnecting Drive Cables . . . 122 Hard...
... 97 Turning Off Your Computer 98 Before Working Inside Your Computer 98 Removing the Computer Cover 99 Inside View of Your Computer 101 System Board Components 102 Power Supply DC Connector Pin Assignments . . . . . 104 Memory 107 Memory Installation Guidelines 108 Installing Memory 109 Removing Memory 111 Cards 111 PCI and PCI Express Cards 112 Bezel 118 Removing the Bezel 118 Replacing the Bezel 119 Drives 120 Recommended Drive Cable Connections . . . . . 121 Connecting Drive Cables 121 Drive Interface Connectors 121 Connecting and Disconnecting Drive Cables . . . 122 Hard...
Owner's Manual
Page 13
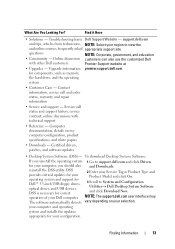
... asked appropriate support site. Certified drivers, patches, and software updates • Desktop System Software (DSS)- DSS is necessary for correct operation of your operating system and support for Dell™ 3.5-inch USB floppy drives, optical drives, and USB devices. support.dell.com and tips, articles from technicians, NOTE: Select your region to System and Configuration Utilities Dell Desktop System Software and click Download Now. Online discussion customers can also use the customized Dell with technical support • Reference...
... asked appropriate support site. Certified drivers, patches, and software updates • Desktop System Software (DSS)- DSS is necessary for correct operation of your operating system and support for Dell™ 3.5-inch USB floppy drives, optical drives, and USB devices. support.dell.com and tips, articles from technicians, NOTE: Select your region to System and Configuration Utilities Dell Desktop System Software and click Download Now. Online discussion customers can also use the customized Dell with technical support • Reference...

Owner's Manual
Page 18
... 5 wiring and connectors for your network or broadband device. It is recommended that the network cable has been securely attached. Connect the other end of the network cable to the network adapter connector on the back panel of a network cable to ensure reliable operation. 3 link integrity light • Green - If you use Category 3 wiring, force the network speed to 10 Mbps to either a network port or your network. NOTE: Do not plug a telephone cable into the network connector.
... 5 wiring and connectors for your network or broadband device. It is recommended that the network cable has been securely attached. Connect the other end of the network cable to the network adapter connector on the back panel of a network cable to ensure reliable operation. 3 link integrity light • Green - If you use Category 3 wiring, force the network speed to 10 Mbps to either a network port or your network. NOTE: Do not plug a telephone cable into the network connector.
Owner's Manual
Page 27
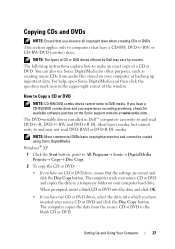
... source CD or DVD and click the Disc Copy button. NOTE: The types of CD or DVD drives offered by Dell may not read DVD-RAM or DVD-R DL media. The following instructions explain how to make an exact copy of the window. The DVD-writable drives installed in the upper-right corner of a CD or DVD. When prompted, insert a blank CD or DVD into the drive and click OK...
... source CD or DVD and click the Disc Copy button. NOTE: The types of CD or DVD drives offered by Dell may not read DVD-RAM or DVD-R DL media. The following instructions explain how to make an exact copy of the window. The DVD-writable drives installed in the upper-right corner of a CD or DVD. When prompted, insert a blank CD or DVD into the drive and click OK...
Owner's Manual
Page 31
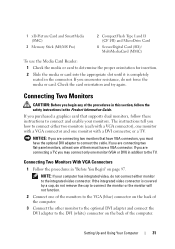
... optional DVI adapter to connect the cable. If you begin any of the computer. Connecting Two Monitors With VGA Connectors 1 Follow the procedures in "Before You Begin" on the back of the procedures in the Product Information Guide. If the integrated video connector is completely seated in addition to the TV. If you purchased a graphics card that have a VGA connector. NOTE: If your monitors. Setting Up and Using...
... optional DVI adapter to connect the cable. If you begin any of the computer. Connecting Two Monitors With VGA Connectors 1 Follow the procedures in "Before You Begin" on the back of the procedures in the Product Information Guide. If the integrated video connector is completely seated in addition to the TV. If you purchased a graphics card that have a VGA connector. NOTE: If your monitors. Setting Up and Using...
Owner's Manual
Page 33
.... Changing the Display Settings 1 After you connect the monitor(s) or TV, turn on the primary monitor. 2 Enable extended desktop mode in prior to your computer uses when it is connected to a network, different options related to security and networking appear in prior to the S-video input connector on and you are not using it. When the computer exits from one screen to the other end of the S-video cable to entering standby mode. Setting...
.... Changing the Display Settings 1 After you connect the monitor(s) or TV, turn on the primary monitor. 2 Enable extended desktop mode in prior to your computer uses when it is connected to a network, different options related to security and networking appear in prior to the S-video input connector on and you are not using it. When the computer exits from one screen to the other end of the S-video cable to entering standby mode. Setting...
Owner's Manual
Page 39
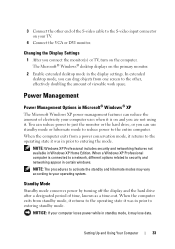
... the Power Options dialog box. To access the advanced settings: 1 Choose the Power Plan you to set , then leave settings at the default. Power Management Modes Windows Vista has three main default power management modes: • Balanced • Power Saver • High Performance Dell has added a fourth Dell-Recommended mode that sets power management to the most typical settings for the majority of our customers.This is the active Power Plan for a plan: 1 Click Start and click Control Panel. 2 Under...
... the Power Options dialog box. To access the advanced settings: 1 Choose the Power Plan you to set , then leave settings at the default. Power Management Modes Windows Vista has three main default power management modes: • Balanced • Power Saver • High Performance Dell has added a fourth Dell-Recommended mode that sets power management to the most typical settings for the majority of our customers.This is the active Power Plan for a plan: 1 Click Start and click Control Panel. 2 Under...
Owner's Manual
Page 49
... any open programs. 2 Click the Start button, then click Internet Explorer. The New Connection Wizard appears. 3 Click Connect to select one . NOTE: Have your desktop or if you want to the Internet. 4 In the next window, click the appropriate option: • If you get one , click Choose from a list of Internet service providers (ISPs). If you do not have an ISP icon on the screen...
... any open programs. 2 Click the Start button, then click Internet Explorer. The New Connection Wizard appears. 3 Click Connect to select one . NOTE: Have your desktop or if you want to the Internet. 4 In the next window, click the appropriate option: • If you get one , click Choose from a list of Internet service providers (ISPs). If you do not have an ISP icon on the screen...

Owner's Manual
Page 51
... the problem started, review the installation procedures and ensure that the part is correctly installed. • If a peripheral device does not work properly, contact Dell (see "Getting Help" on the screen, write down the exact message. Replace the battery only with the same or equivalent type recommended by a certified service technician only and are not custom replaceable. CAUTION: Before you have to the manufacturer's instructions. R E P L A C E T H E B A T T E R Y - Discard used batteries...
... the problem started, review the installation procedures and ensure that the part is correctly installed. • If a peripheral device does not work properly, contact Dell (see "Getting Help" on the screen, write down the exact message. Replace the battery only with the same or equivalent type recommended by a certified service technician only and are not custom replaceable. CAUTION: Before you have to the manufacturer's instructions. R E P L A C E T H E B A T T E R Y - Discard used batteries...

Owner's Manual
Page 72
... running the monitor self-test. If the power light is lit or blinking, the monitor has power. See the monitor documentation for monitor cable connectors to read C H E C K T H E M O N I T O R S E T T I G H T - If the screen is difficult to have missing pins.) C H E C K T H E M O N I T O R P O W E R L I N G S - If your computer. Ensure that the monitor is turned on. If an optional video card is installed, check that the monitor cable is connected to the card, rather than the video connector on the system board. • If you are using a graphics extension cable...
... running the monitor self-test. If the power light is lit or blinking, the monitor has power. See the monitor documentation for monitor cable connectors to read C H E C K T H E M O N I T O R S E T T I G H T - If the screen is difficult to have missing pins.) C H E C K T H E M O N I T O R P O W E R L I N G S - If your computer. Ensure that the monitor is turned on. If an optional video card is installed, check that the monitor cable is connected to the card, rather than the video connector on the system board. • If you are using a graphics extension cable...
Owner's Manual
Page 77
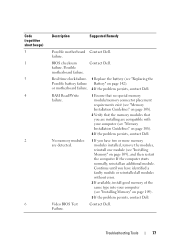
..., install good memory of the same type into your computer (see "Installing Memory" on page 108). 3 If the problem persists, contact Dell. Contact Dell. No memory modules are detected. 1 If you are installing are compatible with your computer (see "Memory Installation Guidelines" on page 109). 3 If the problem persists, contact Dell. or motherboard failure. 2 If the problem persists, contact Dell. Code (repetitive short beeps) 3 1 5 4 2 6 Description Suggested Remedy Possible motherboard Contact Dell. Video BIOS Test Failure. Contact Dell.
..., install good memory of the same type into your computer (see "Installing Memory" on page 108). 3 If the problem persists, contact Dell. Contact Dell. No memory modules are detected. 1 If you are installing are compatible with your computer (see "Memory Installation Guidelines" on page 109). 3 If the problem persists, contact Dell. or motherboard failure. 2 If the problem persists, contact Dell. Code (repetitive short beeps) 3 1 5 4 2 6 Description Suggested Remedy Possible motherboard Contact Dell. Video BIOS Test Failure. Contact Dell.
Owner's Manual
Page 84
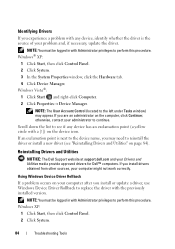
... Start, then click Control Panel. 2 Click System. 3 In the System Properties window, click the Hardware tab. 4 Click Device Manager. Windows Vista®: 1 Click Start and right-click Computer. 2 Click Properties Device Manager. Identifying Drivers If you experience a problem with Administrator privileges to perform this procedure. otherwise, contact your computer after you install or update a driver, use Windows Device Driver Rollback to the left under Tasks window) may need to reinstall the driver or install a new driver (see...
... Start, then click Control Panel. 2 Click System. 3 In the System Properties window, click the Hardware tab. 4 Click Device Manager. Windows Vista®: 1 Click Start and right-click Computer. 2 Click Properties Device Manager. Identifying Drivers If you experience a problem with Administrator privileges to perform this procedure. otherwise, contact your computer after you install or update a driver, use Windows Device Driver Rollback to the left under Tasks window) may need to reinstall the driver or install a new driver (see...
Owner's Manual
Page 85
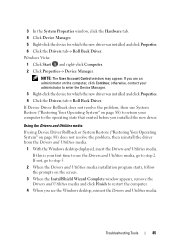
... the computer. 4 When you installed the new driver. If not, go to enter the Device Manager. 3 Right-click the device for which the new driver was installed and click Properties. 6 Click the Drivers tab Roll Back Driver. If this is your first time to use System Restore ("Restoring Your Operating System" on the screen. 3 When the InstallShield Wizard Complete window appears, remove the Drivers and Utilities media and click Finish to the...
... the computer. 4 When you installed the new driver. If not, go to enter the Device Manager. 3 Right-click the device for which the new driver was installed and click Properties. 6 Click the Drivers tab Roll Back Driver. If this is your first time to use System Restore ("Restoring Your Operating System" on the screen. 3 When the InstallShield Wizard Complete window appears, remove the Drivers and Utilities media and click Finish to the...

Owner's Manual
Page 86
... Utilities media has identified these components in with the device. The drivers that are used by your computer. If you are not displayed, exit the Drivers and Utilities media program. If those drivers are installing the driver. 5 Click the Driver tab, then click Update Driver. 6 Click Install from a list or specific location (Advanced), then click Next. 7 Click Browse and browse to the location to which you installed additional hardware, the drivers for the new hardware...
... Utilities media has identified these components in with the device. The drivers that are used by your computer. If you are not displayed, exit the Drivers and Utilities media program. If those drivers are installing the driver. 5 Click the Driver tab, then click Update Driver. 6 Click Install from a list or specific location (Advanced), then click Next. 7 Click Browse and browse to the location to which you installed additional hardware, the drivers for the new hardware...
Owner's Manual
Page 87
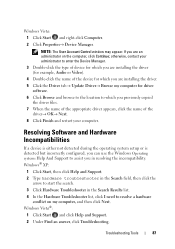
... detected during the operating system setup or is detected but incorrectly configured, you can use the Windows Operating systems Help And Support to enter the Device Manager. 3 Double-click the type of device for which you are installing the driver (for driver software. 6 Click Browse and browse to the location to resolve a hardware conflict on the computer, click Continue; Windows® XP: 1 Click Start, then click Help and Support. 2 Type hardware troubleshooter in the...
... detected during the operating system setup or is detected but incorrectly configured, you can use the Windows Operating systems Help And Support to enter the Device Manager. 3 Double-click the type of device for which you are installing the driver (for driver software. 6 Click Browse and browse to the location to resolve a hardware conflict on the computer, click Continue; Windows® XP: 1 Click Start, then click Help and Support. 2 Type hardware troubleshooter in the...
Owner's Manual
Page 89
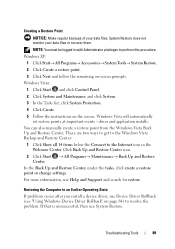
... a restore point or change settings. Restoring the Computer to an Earlier Operating State If problems occur after you install a device driver, use Device Driver Rollback (see "Using Windows Device Driver Rollback" on page 84) to the Internet icon in with Administrator privileges to perform this procedure. You can also manually create a restore point from the Windows Vista Back Up and Restore Center. Click Back Up and Restore Center icon. 2 Click Start Center. Troubleshooting Tools 89 driver and application installs. NOTE...
... a restore point or change settings. Restoring the Computer to an Earlier Operating State If problems occur after you install a device driver, use Device Driver Rollback (see "Using Windows Device Driver Rollback" on page 84) to the Internet icon in with Administrator privileges to perform this procedure. You can also manually create a restore point from the Windows Vista Back Up and Restore Center. Click Back Up and Restore Center icon. 2 Click Start Center. Troubleshooting Tools 89 driver and application installs. NOTE...
Owner's Manual
Page 117
... card's driver from the operating system. 11 If you removed a sound card: a Enter system setup (see "Back Panel Connectors" on page 172), go to Onboard Devices and select Integrated Audio, and then change the setting to maintain FCC certification of the card or filler bracket fits around the alignment guide. 8 Fix the card retention bracket by its connector. • For PCI Express card, pull the securing tab, grasp the card by replacing...
... card's driver from the operating system. 11 If you removed a sound card: a Enter system setup (see "Back Panel Connectors" on page 172), go to Onboard Devices and select Integrated Audio, and then change the setting to maintain FCC certification of the card or filler bracket fits around the alignment guide. 8 Fix the card retention bracket by its connector. • For PCI Express card, pull the securing tab, grasp the card by replacing...
Owner's Manual
Page 143
... turn them from being pinched or crimped. 4 Remove the hard drive cable, CD or DVD drive data cable, front panel ribbon cable, and any of the procedures in this section, follow the safety instructions located in "Before You Begin" on page 97. 2 Remove the computer cover (see "Replacing the Computer Cover" on page 164). NOTICE: To connect a network cable, first plug the cable into the network device and then plug it into the computer. 8 Connect...
... turn them from being pinched or crimped. 4 Remove the hard drive cable, CD or DVD drive data cable, front panel ribbon cable, and any of the procedures in this section, follow the safety instructions located in "Before You Begin" on page 97. 2 Remove the computer cover (see "Replacing the Computer Cover" on page 164). NOTICE: To connect a network cable, first plug the cable into the network device and then plug it into the computer. 8 Connect...
Owner's Manual
Page 201
... service or technical support. A SIM card contains a microchip that shuts down all unnecessary computer operations to install and configure hardware and software. S/PDIF - A power management mode that encrypts voice and data transmissions. A connector used programs, files, folders, and drives. Smart cards can rename a shortcut icon. An audio transfer file format that allows the transfer of audio from entering the computer through the electrical outlet. super-video graphics array - A video standard for smart cards...
... service or technical support. A SIM card contains a microchip that shuts down all unnecessary computer operations to install and configure hardware and software. S/PDIF - A power management mode that encrypts voice and data transmissions. A connector used programs, files, folders, and drives. Smart cards can rename a shortcut icon. An audio transfer file format that allows the transfer of audio from entering the computer through the electrical outlet. super-video graphics array - A video standard for smart cards...
Owner's Manual
Page 208
... extended desktop mode, 33 hard to read, 72 motherboard. See system board mouse problems, 64 N network Network Setup Wizard, 47 problems, 65 setting up, 47 Network Setup Wizard, 47 208 Index P password clearing, 176 jumper, 176 PCI cards installing, 112 removing, 116 phone numbers, 188 playing CDs and DVDs, 24 power button, 16 hibernate mode, 38 options, advanced, 39 problems, 66 standby mode, 33 power light conditions, 66 Power Plan in Vista, 38 printer cable, 22 connecting, 22 problems, 67 setting up, 22 USB, 22 problems battery, 51 beep codes, 76 blue screen...
... extended desktop mode, 33 hard to read, 72 motherboard. See system board mouse problems, 64 N network Network Setup Wizard, 47 problems, 65 setting up, 47 Network Setup Wizard, 47 208 Index P password clearing, 176 jumper, 176 PCI cards installing, 112 removing, 116 phone numbers, 188 playing CDs and DVDs, 24 power button, 16 hibernate mode, 38 options, advanced, 39 problems, 66 standby mode, 33 power light conditions, 66 Power Plan in Vista, 38 printer cable, 22 connecting, 22 problems, 67 setting up, 22 USB, 22 problems battery, 51 beep codes, 76 blue screen...


