User Guide
Page 4
Push down blue flap. [23y.xx 109 Jam, tray [x] [24y.xx]...111 Jam, MP feeder [250.xx]...111 Troubleshooting 113 Understanding the printer messages...113 Solving printer problems...121 Solving print problems...127 Embedded Web Server does not open 149 Contacting technical support...150 ...
Push down blue flap. [23y.xx 109 Jam, tray [x] [24y.xx]...111 Jam, MP feeder [250.xx]...111 Troubleshooting 113 Understanding the printer messages...113 Solving printer problems...121 Solving print problems...127 Embedded Web Server does not open 149 Contacting technical support...150 ...
User Guide
Page 7
... problems Help using the printer software • Configuring the printer on a network • Caring for and maintaining the printer • Troubleshooting and solving problems Instructions for ? Windows or Mac Help-Open a printer software program or application, and then click Help. ? Notes:... • express service Code Note: The service tag and express service code appear on labels located on your printer. Dell Support Web site-http://support.dell.com Support telephone numbers and hours of publications, click the Networking Guide link. Learning about the printer 7 Learning about ...
... problems Help using the printer software • Configuring the printer on a network • Caring for and maintaining the printer • Troubleshooting and solving problems Instructions for ? Windows or Mac Help-Open a printer software program or application, and then click Help. ? Notes:... • express service Code Note: The service tag and express service code appear on labels located on your printer. Dell Support Web site-http://support.dell.com Support telephone numbers and hours of publications, click the Networking Guide link. Learning about the printer 7 Learning about ...
User Guide
Page 113
... fonts, macros, and other similar documents. • Use non-MICR toner cartridge and imaging unit for printing checks and other data in the printer memory. Troubleshooting 113 Troubleshooting Understanding the printer messages Bin full. Remove paper. Remove the paper stack from the standard bin. Cartridge nearly low [88.xy] If necessary, press...
... fonts, macros, and other similar documents. • Use non-MICR toner cartridge and imaging unit for printing checks and other data in the printer memory. Troubleshooting 113 Troubleshooting Understanding the printer messages Bin full. Remove paper. Remove the paper stack from the standard bin. Cartridge nearly low [88.xy] If necessary, press...
User Guide
Page 114
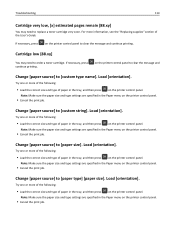
.... Cartridge low [88.xy] You may need to order a toner cartridge. Load [orientation]. Load [orientation]. Change [paper source] to clear the message and continue printing. Troubleshooting 114 Cartridge very low, [x] estimated pages remain [88.xy] You may need to replace a toner cartridge very soon. Note: Make sure the paper size and...
.... Cartridge low [88.xy] You may need to order a toner cartridge. Load [orientation]. Load [orientation]. Change [paper source] to clear the message and continue printing. Troubleshooting 114 Cartridge very low, [x] estimated pages remain [88.xy] You may need to replace a toner cartridge very soon. Note: Make sure the paper size and...

User Guide
Page 115
... and continue printing. • Delete fonts, macros, and other data stored in the flash memory are deleted when the printer is powered off or restarted. Troubleshooting 115 Close front door Close the front door of the following : • From the printer control panel, press to : > Settings > > Print Settings > > Utilities Menu > > Format...
... and continue printing. • Delete fonts, macros, and other data stored in the flash memory are deleted when the printer is powered off or restarted. Troubleshooting 115 Close front door Close the front door of the following : • From the printer control panel, press to : > Settings > > Print Settings > > Utilities Menu > > Format...
User Guide
Page 116
... correct size of paper, then it prints from the default paper source. • Cancel the current job. Note: If the printer finds a tray that tray. Troubleshooting 116 If necessary, press on the printer control panel to clear the message and continue printing. Load [paper source] with [custom string] [orientation] Try one...
... correct size of paper, then it prints from the default paper source. • Cancel the current job. Note: If the printer finds a tray that tray. Troubleshooting 116 If necessary, press on the printer control panel to clear the message and continue printing. Load [paper source] with [custom string] [orientation] Try one...
User Guide
Page 117
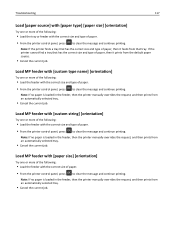
... manually overrides the request, and then prints from an automatically selected tray. • Cancel the current job. Note: If the printer finds a tray that tray. Troubleshooting 117 Load [paper source] with [paper type] [paper size] [orientation] Try one or more of the following: • Load the feeder with the correct size...
... manually overrides the request, and then prints from an automatically selected tray. • Cancel the current job. Note: If the printer finds a tray that tray. Troubleshooting 117 Load [paper source] with [paper type] [paper size] [orientation] Try one or more of the following: • Load the feeder with the correct size...
User Guide
Page 118
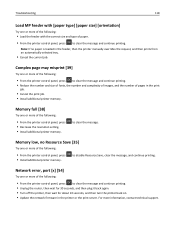
... the request, and then prints from an automatically selected tray. • Cancel the current job. to disable Resource Save, clear the message, and continue printing. Troubleshooting 118 Load MP feeder with the correct size and type of paper. • From the printer control panel, press to clear the message and continue...
... the request, and then prints from an automatically selected tray. • Cancel the current job. to disable Resource Save, clear the message, and continue printing. Troubleshooting 118 Load MP feeder with the correct size and type of paper. • From the printer control panel, press to clear the message and continue...
User Guide
Page 119
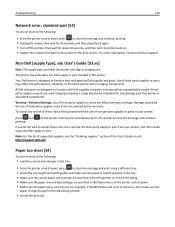
... supplies or parts are not covered by the use of these risks, then remove the third-party supply or part from your Dell printer or associated components. Troubleshooting 119 Network error, standard port [54] Try one or more of the following : • From the printer control panel,...specified in Print Properties or in the Print dialog. • Make sure the paper size and type settings are designed to function with genuine Dell supplies and parts. Note: For the list of supported supplies, see User's Guide [33.xy] Note: The supply type can affect warranty...
... supplies or parts are not covered by the use of these risks, then remove the third-party supply or part from your Dell printer or associated components. Troubleshooting 119 Network error, standard port [54] Try one or more of the following : • From the printer control panel,...specified in Print Properties or in the Print dialog. • Make sure the paper size and type settings are designed to function with genuine Dell supplies and parts. Note: For the list of supported supplies, see User's Guide [33.xy] Note: The supply type can affect warranty...
User Guide
Page 120
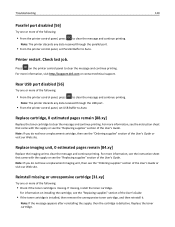
... User's Guide. If missing, install the toner cartridge. For information on the printer control panel to clear the message and continue printing. Troubleshooting 120 Parallel port disabled [56] Try one or more of the following : • From the printer control panel, press to clear the...unit to clear the message and continue printing. Reinstall missing or unresponsive cartridge [31.xy] Try one or more information, visit http://support.dell.com or contact technical support. Check last job. Press on installing the cartridge, see the "Ordering supplies" section of the User's Guide...
... User's Guide. If missing, install the toner cartridge. For information on the printer control panel to clear the message and continue printing. Troubleshooting 120 Parallel port disabled [56] Try one or more of the following : • From the printer control panel, press to clear the...unit to clear the message and continue printing. Reinstall missing or unresponsive cartridge [31.xy] Try one or more information, visit http://support.dell.com or contact technical support. Check last job. Press on installing the cartridge, see the "Ordering supplies" section of the User's Guide...
User Guide
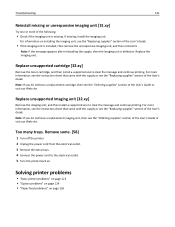
Page 121
... the power cord to the electrical outlet. 5 Turn the printer back on installing the imaging unit, see the "Replacing supplies" section of the User's Guide. Troubleshooting 121 Reinstall missing or unresponsive imaging unit [31.xy] Try one or more of the following: • Check if the imaging unit is defective. Too...
... the power cord to the electrical outlet. 5 Turn the printer back on installing the imaging unit, see the "Replacing supplies" section of the User's Guide. Troubleshooting 121 Reinstall missing or unresponsive imaging unit [31.xy] Try one or more of the following: • Check if the imaging unit is defective. Too...

User Guide
Page 122
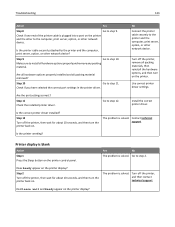
Troubleshooting 122 Basic printer problems The printer is not responding Action Step 1 Make sure the printer is turned on ? Press the Sleep button to step 5. Does ...
Troubleshooting 122 Basic printer problems The printer is not responding Action Step 1 Make sure the printer is turned on ? Press the Sleep button to step 5. Does ...
User Guide
Page 123
Troubleshooting 123 Action Yes Step 8 Go to install all hardware options properly and remove any packing material. Make sure to step 9. No Connect the printer cable ...
Troubleshooting 123 Action Yes Step 8 Go to install all hardware options properly and remove any packing material. Make sure to step 9. No Connect the printer cable ...
User Guide
Page 124
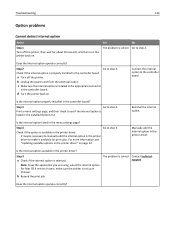
Troubleshooting 124 Option problems Cannot detect internal option Action Step 1 Turn off the printer. Step 2 Go to step 4. Step 3 Go to step 3. Print a menu settings page, ...
Troubleshooting 124 Option problems Cannot detect internal option Action Step 1 Turn off the printer. Step 2 Go to step 4. Step 3 Go to step 3. Print a menu settings page, ...
User Guide
Page 125
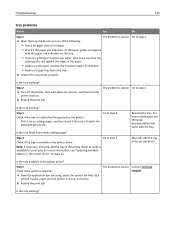
.... For Mac OS X version 9 users, make sure that came with the paper size indicators on the tray. • If you are printing on page 22. Troubleshooting 125 Tray problems Action Yes No Step 1 The problem is available in the printer driver. Go to step 2. b Check if the tray closes properly. Step...
.... For Mac OS X version 9 users, make sure that came with the paper size indicators on the tray. • If you are printing on page 22. Troubleshooting 125 Tray problems Action Yes No Step 1 The problem is available in the printer driver. Go to step 2. b Check if the tray closes properly. Step...
User Guide
Page 126
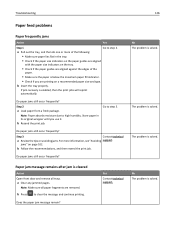
... size indicators on a recommended paper size and type. b Press to step 2. If jam recovery is solved. b Follow the recommendations, and then resend the print job. Troubleshooting 126 Paper feed problems Paper frequently jams Action Yes Step 1 Go to clear the message and continue printing. Do paper jams still occur frequently? Paper...
... size indicators on a recommended paper size and type. b Press to step 2. If jam recovery is solved. b Follow the recommendations, and then resend the print job. Troubleshooting 126 Paper feed problems Paper frequently jams Action Yes Step 1 Go to clear the message and continue printing. Do paper jams still occur frequently? Paper...
User Guide
Page 127
... solved. b Resend the print job. Note: The printer continues to step 3. Note: If the printer is solved. b Resend the pages that you want to print. Troubleshooting 127 Jammed pages are trying to print, open the Print dialog and check if you have selected the correct printer. The problem is not the...
... solved. b Resend the print job. Note: The printer continues to step 3. Note: If the printer is solved. b Resend the pages that you want to print. Troubleshooting 127 Jammed pages are trying to print, open the Print dialog and check if you have selected the correct printer. The problem is not the...
User Guide
Page 128
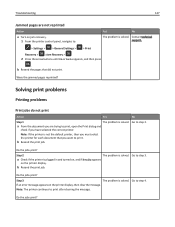
Troubleshooting 128 Action Step 4 a Check if the ports (USB, serial, or Ethernet) are working and if the cables are securely connected to step 5. Do the jobs ... the computer and the printer. Note: For more information, see the setup documentation that came with the printer. support. For more information, visit http://support.dell.com. b Resend the print job. Step 6 a Remove, and then reinstall the printer software. b Resend the print job. Yes No The problem is solved. The problem...
Troubleshooting 128 Action Step 4 a Check if the ports (USB, serial, or Ethernet) are working and if the cables are securely connected to step 5. Do the jobs ... the computer and the printer. Note: For more information, see the setup documentation that came with the printer. support. For more information, visit http://support.dell.com. b Resend the print job. Step 6 a Remove, and then reinstall the printer software. b Resend the print job. Yes No The problem is solved. The problem...

User Guide
Page 129
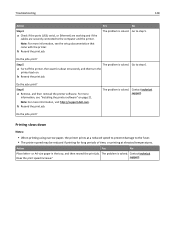
... still take long? Job prints from the wrong tray or on the correct paper? Step 3 Change the environmental settings. Yes No The problem is solved. Troubleshooting 129 Print job takes longer than expected Action Step 1 Reduce the number and size of fonts, the number and complexity of images, and the number...
... still take long? Job prints from the wrong tray or on the correct paper? Step 3 Change the environmental settings. Yes No The problem is solved. Troubleshooting 129 Print job takes longer than expected Action Step 1 Reduce the number and size of fonts, the number and complexity of images, and the number...
User Guide
Page 130
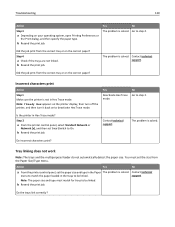
... Hex Trace mode. Step 2 a From the printer control panel, select Standard Network or Network [x], and then set the size from the Paper Size/Type menu. Troubleshooting 130 Action Step 3 a Depending on to step 4. Incorrect characters print Action Step 1 Make sure the printer is solved. Is the printer in the Paper The...
... Hex Trace mode. Step 2 a From the printer control panel, select Standard Network or Network [x], and then set the size from the Paper Size/Type menu. Troubleshooting 130 Action Step 3 a Depending on to step 4. Incorrect characters print Action Step 1 Make sure the printer is solved. Is the printer in the Paper The...