Owner's Manual
Page 13
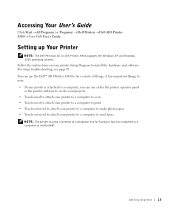
... Your Printer NOTE: The Dell Personal All-In-One Printer A960 supports the Windows XP and Windows 2000 operating systems. Follow the instructions on your printer to a computer to install the hardware and software. A few important things to note: • If your printer is attached to a computer, you can use either the printer operator panel or the printer software to...
... Your Printer NOTE: The Dell Personal All-In-One Printer A960 supports the Windows XP and Windows 2000 operating systems. Follow the instructions on your printer to a computer to install the hardware and software. A few important things to note: • If your printer is attached to a computer, you can use either the printer operator panel or the printer software to...

Owner's Manual
Page 33
... screen. 5 Click See More Copy Settings. 6 Select a quantity and color for your image or press Black to create a color photocopy of your photocopies. For help , see page 28 or page 30. 4 Click Start → All Programs (or Programs) → Dell Printers → Dell AIO Printer A960 → Dell All-In-One Center. Copying You can also choose a paper size or...
... screen. 5 Click See More Copy Settings. 6 Select a quantity and color for your image or press Black to create a color photocopy of your photocopies. For help , see page 28 or page 30. 4 Click Start → All Programs (or Programs) → Dell Printers → Dell AIO Printer A960 → Dell All-In-One Center. Copying You can also choose a paper size or...

Owner's Manual
Page 34
...loading photo paper, see page 28 or page 30. 3 Click Start → All Programs (or Programs) → Dell Printers → Dell AIO Printer A960 → Dell All-In-One Center. www.dell.com/supplies | support.dell.com Copy Photos 1 Load paper. For help , see page 28 or page 30. 3 From the Mode area on...More Copy Settings. 9 When you are on, and the printer is connected to the computer. 2 Load your document on your printer to begin a black and white scan or Color to scan using the printer operator panel or the printer software. Using the Operator Panel 1 Make sure your computer and...
...loading photo paper, see page 28 or page 30. 3 Click Start → All Programs (or Programs) → Dell Printers → Dell AIO Printer A960 → Dell All-In-One Center. www.dell.com/supplies | support.dell.com Copy Photos 1 Load paper. For help , see page 28 or page 30. 3 From the Mode area on...More Copy Settings. 9 When you are on, and the printer is connected to the computer. 2 Load your document on your printer to begin a black and white scan or Color to scan using the printer operator panel or the printer software. Using the Operator Panel 1 Make sure your computer and...

Owner's Manual
Page 35
... are on your computer screen. 4 Click Preview Now to see page 28 or page 30. 3 Click Start → All Programs (or Programs) → Dell Printers → Dell AIO Printer A960 → Dell All-In-One Center. To correct this problem, either reduce your resolution or the size of your scan area. 5 Adjust the dotted lines to fit around...
... are on your computer screen. 4 Click Preview Now to see page 28 or page 30. 3 Click Start → All Programs (or Programs) → Dell Printers → Dell AIO Printer A960 → Dell All-In-One Center. To correct this problem, either reduce your resolution or the size of your scan area. 5 Adjust the dotted lines to fit around...

Owner's Manual
Page 36
... can customize your image. 1 From the Dell All-In-One Center, scan your image to see your graphics program. 36 Using the Printer Edit Scanned Images With most graphics programs, you have selected. www.dell.com/supplies | support.dell.com Scan Photos 1 Make sure your computer... lines to the computer. 2 Place your photo on , and the printer is connected to fit around the portion of your image For help , see the documentation that came with the arrow. 3 Click Start → All Programs (or Programs) → Dell Printers → Dell AIO Printer A960 → Dell All-In-One Center.
... can customize your image. 1 From the Dell All-In-One Center, scan your image to see your graphics program. 36 Using the Printer Edit Scanned Images With most graphics programs, you have selected. www.dell.com/supplies | support.dell.com Scan Photos 1 Make sure your computer... lines to the computer. 2 Place your photo on , and the printer is connected to fit around the portion of your image For help , see the documentation that came with the arrow. 3 Click Start → All Programs (or Programs) → Dell Printers → Dell AIO Printer A960 → Dell All-In-One Center.

Owner's Manual
Page 37
... Click Start → All Programs (or Programs) → Dell Printers → Dell AIO Printer A960 → Dell All-In-One Center. NOTE: You are finished customizing your settings, click Scan Now. Using the Printer 37 The All-In-One Main Page appears on your computer screen. 3 Select your scan .... 1 Put the first sheet on the scanner glass. 2 Click Start → All Programs (or Programs) → Dell Printers → Dell AIO Printer A960 → Dell All-In-One Center. The Advanced Scan Settings dialog box appears. 6 On the Scan tab, select Scan multiple items before output. 7 Click...
... Click Start → All Programs (or Programs) → Dell Printers → Dell AIO Printer A960 → Dell All-In-One Center. NOTE: You are finished customizing your settings, click Scan Now. Using the Printer 37 The All-In-One Main Page appears on your computer screen. 3 Select your scan .... 1 Put the first sheet on the scanner glass. 2 Click Start → All Programs (or Programs) → Dell Printers → Dell AIO Printer A960 → Dell All-In-One Center. The Advanced Scan Settings dialog box appears. 6 On the Scan tab, select Scan multiple items before output. 7 Click...

Owner's Manual
Page 38
...menu, select Photo. 8 Follow the instructions on Your Computer 1 Click Start → All Programs (or Programs) → Dell Printers → Dell AIO Printer A960 → Dell All-In-One Center. The All-In-One Main Page appears on your computer screen. 2 From the Productivity Tools section, click Save an image on my computer. 3 Follow... image on the scanner glass. 3 Close the top cover. 4 Click Start → All Programs (or Programs) → Dell Printers → Dell AIO Printer A960 → Dell All-In-One Center. NOTE: If the size of the scan (found in red, you do not have selected.
...menu, select Photo. 8 Follow the instructions on Your Computer 1 Click Start → All Programs (or Programs) → Dell Printers → Dell AIO Printer A960 → Dell All-In-One Center. The All-In-One Main Page appears on your computer screen. 2 From the Productivity Tools section, click Save an image on my computer. 3 Follow... image on the scanner glass. 3 Close the top cover. 4 Click Start → All Programs (or Programs) → Dell Printers → Dell AIO Printer A960 → Dell All-In-One Center. NOTE: If the size of the scan (found in red, you do not have selected.

Owner's Manual
Page 39
The All-In-One Main Page appears on the scanner glass or into the ADF. To correct this problem, either reduce your resolution or the size of your scan ... (found in the paper support. For help , see page 28 or page 30. 3 Click Start → All Programs (or Programs) → Dell Printers → Dell AIO Printer A960 → Dell All-In-One Center. Using the Printer 39 Enlarge or Reduce Images or Documents 1 Load paper in the lower right of your new image. 7 When you have the system...
The All-In-One Main Page appears on the scanner glass or into the ADF. To correct this problem, either reduce your resolution or the size of your scan ... (found in the paper support. For help , see page 28 or page 30. 3 Click Start → All Programs (or Programs) → Dell Printers → Dell AIO Printer A960 → Dell All-In-One Center. Using the Printer 39 Enlarge or Reduce Images or Documents 1 Load paper in the lower right of your new image. 7 When you have the system...

Owner's Manual
Page 42
.... 14 Click Next, click Next, and then click Finish. 42 Using the Printer Change these settings as desired. 1 Click Start → All Programs (or Programs). 2 Click Dell AIO Printer A960 → Fax Tools (or Classic PhoneTools). www.dell.com/supplies | support.dell.com Configure Dell Printer Fax Tools Fax Software NOTE: Fax service is set by default to automatically...
.... 14 Click Next, click Next, and then click Finish. 42 Using the Printer Change these settings as desired. 1 Click Start → All Programs (or Programs). 2 Click Dell AIO Printer A960 → Fax Tools (or Classic PhoneTools). www.dell.com/supplies | support.dell.com Configure Dell Printer Fax Tools Fax Software NOTE: Fax service is set by default to automatically...

Owner's Manual
Page 43
...appropriate information, and then click Next. 4 Select your data/fax modem in the drop-down menu to the right of this field to select Dell AIO Printer A960 if you want to print all received faxes. 9 To create an archive copy of each fax, click to select Store a copy in a... then click Next. 8 Click to receive faxes. 6 Enter your TSID information, and then click Next. 7 Enter your settings, and click Finish. Using the Printer 43 Configure Fax Console 1 Click Start → All Programs (or Programs) → Accessories → Communications → Fax → Fax Console. Selecting the...
...appropriate information, and then click Next. 4 Select your data/fax modem in the drop-down menu to the right of this field to select Dell AIO Printer A960 if you want to print all received faxes. 9 To create an archive copy of each fax, click to select Store a copy in a... then click Next. 8 Click to receive faxes. 6 Enter your TSID information, and then click Next. 7 Enter your settings, and click Finish. Using the Printer 43 Configure Fax Console 1 Click Start → All Programs (or Programs) → Accessories → Communications → Fax → Fax Console. Selecting the...

Owner's Manual
Page 44
www.dell.com/supplies | support.dell.com Access the Fax Setup Utility • Click Start → All Programs (or Programs) → Dell Printers → Dell AIO Printer A960 → Fax Setup Utility • From the Dell All-In-One Center, click the Maintain/Troubleshoot tab, and then click Display the Fax Setup Utility. 44 Using the Printer
www.dell.com/supplies | support.dell.com Access the Fax Setup Utility • Click Start → All Programs (or Programs) → Dell Printers → Dell AIO Printer A960 → Fax Setup Utility • From the Dell All-In-One Center, click the Maintain/Troubleshoot tab, and then click Display the Fax Setup Utility. 44 Using the Printer

Owner's Manual
Page 47
... to an active telephone line. 4 Click Start → All Programs (or Programs) → Dell Printers, → Dell AIO Printer A960 → Dell All-In-One Center. 5 Place the document you are sending the fax must also support color faxes. The document is being scanned. 8 Select No under the lid of the... printer. 6 From the Productivity Tools section, select Fax an image or document. 7 Select the ...
... to an active telephone line. 4 Click Start → All Programs (or Programs) → Dell Printers, → Dell AIO Printer A960 → Dell All-In-One Center. 5 Place the document you are sending the fax must also support color faxes. The document is being scanned. 8 Select No under the lid of the... printer. 6 From the Productivity Tools section, select Fax an image or document. 7 Select the ...

Owner's Manual
Page 48
...; "Receive Faxes Through an Answering Machine" on your computer screen to send your fax. www.dell.com/supplies | support.dell.com Using Dell Printer Fax Tools Fax Software 1 Click Start → All Programs (or Programs) → Dell Printers → Dell AIO Printer A960 → Dell All-In-One Center. 2 Click See More Scan Settings. 3 Click Advanced. 4 Click to select Scan multiple items...
...; "Receive Faxes Through an Answering Machine" on your computer screen to send your fax. www.dell.com/supplies | support.dell.com Using Dell Printer Fax Tools Fax Software 1 Click Start → All Programs (or Programs) → Dell Printers → Dell AIO Printer A960 → Dell All-In-One Center. 2 Click See More Scan Settings. 3 Click Advanced. 4 Click to select Scan multiple items...

Owner's Manual
Page 52
... Using Special Fax Features There are several fax features on the Speed Dial tab to add a new number to your Dell A960 that can enter up to five phone numbers each. You can enter 80 individual fax numbers and 20 groups that make sending faxes easier... hold up to enter the two-digit speed dial number. Speed Dial To make sending faxes more efficient. Using the Printer Software 1 Click Start → All Programs (or Programs) → Dell Printers → Dell AIO Printer A960 → Fax Setup Utility. 2 Click the Speed Dial tab. 3 Follow the instructions on your speed dial list. 52 ...
... Using Special Fax Features There are several fax features on the Speed Dial tab to add a new number to your Dell A960 that can enter up to five phone numbers each. You can enter 80 individual fax numbers and 20 groups that make sending faxes easier... hold up to enter the two-digit speed dial number. Speed Dial To make sending faxes more efficient. Using the Printer Software 1 Click Start → All Programs (or Programs) → Dell Printers → Dell AIO Printer A960 → Fax Setup Utility. 2 Click the Speed Dial tab. 3 Follow the instructions on your speed dial list. 52 ...

Owner's Manual
Page 56
... (or Programs) → Dell Printers → Dell AIO Printer A960 → Dell All-In-One Center. 56 Understanding the Software NOTE: Your language may not be supported. www.dell.com/supplies | support.dell.com Understanding the Printer Software The printer software includes the: • Dell All-In-One Center-helps you perform various scan... system. • Fax Setup Utility (page 44) Using the Dell All-In-One Center You can use the Dell All-In-One Center to: • Select a scan destination. • Select a photocopy quantity and color. • Scan, copy, print, fax, and do creative ...
... (or Programs) → Dell Printers → Dell AIO Printer A960 → Dell All-In-One Center. 56 Understanding the Software NOTE: Your language may not be supported. www.dell.com/supplies | support.dell.com Understanding the Printer Software The printer software includes the: • Dell All-In-One Center-helps you perform various scan... system. • Fax Setup Utility (page 44) Using the Dell All-In-One Center You can use the Dell All-In-One Center to: • Select a scan destination. • Select a photocopy quantity and color. • Scan, copy, print, fax, and do creative ...

Owner's Manual
Page 61
Access the Dell Printer Solution Center Click Start → All Programs (or Programs) → Dell Printers → Dell AIO Printer A960 → Dell Printer Solution Center. To learn more about the Dell Printer Solution Center, see your User's Guide. Understanding the Software 61 Using the Dell Printer Solution Center The Dell Printer Solution Center is a guide you can refer to for printer help and to check the current printer status.
Access the Dell Printer Solution Center Click Start → All Programs (or Programs) → Dell Printers → Dell AIO Printer A960 → Dell Printer Solution Center. To learn more about the Dell Printer Solution Center, see your User's Guide. Understanding the Software 61 Using the Dell Printer Solution Center The Dell Printer Solution Center is a guide you can refer to for printer help and to check the current printer status.

Owner's Manual
Page 65
... the display, and an alignment page prints. An alignment page prints. For help , see page 25. 2 Click Start → All Programs (or Programs) → Dell Printers → Dell AIO Printer A960 → Dell Printer Solution Center. 3 From the Maintenance tab, click Align to solve print quality problems. Using the Operator Panel 1 Load plain paper. Ink Cartridge Maintenance 65...
... the display, and an alignment page prints. An alignment page prints. For help , see page 25. 2 Click Start → All Programs (or Programs) → Dell Printers → Dell AIO Printer A960 → Dell Printer Solution Center. 3 From the Maintenance tab, click Align to solve print quality problems. Using the Operator Panel 1 Load plain paper. Ink Cartridge Maintenance 65...

Owner's Manual
Page 66
... → All Programs (or Programs) → Dell Printers → Dell AIO Printer A960 → Dell Printer Solution Center. 3 From the Maintenance tab, click Align to Manually Align Ink Cartridges When manually aligning your ink cartridges, a page prints with arrows followed by numbers. 1 Load paper. www.dell.com/supplies | support.dell.com Using the Printer Software to fix blurry edges. 4 Click Manual...
... → All Programs (or Programs) → Dell Printers → Dell AIO Printer A960 → Dell Printer Solution Center. 3 From the Maintenance tab, click Align to Manually Align Ink Cartridges When manually aligning your ink cartridges, a page prints with arrows followed by numbers. 1 Load paper. www.dell.com/supplies | support.dell.com Using the Printer Software to fix blurry edges. 4 Click Manual...

Owner's Manual
Page 67
...nozzles to clean them. 6 Print your User's Guide. If you are not satisfied with wiping the ink cartridge nozzles and contacts. Using the Printer Software 1 Load paper. For help , see page 25. 2 Press Copy. 3 Press Options until Maintenance appears on the display. 4 Press...or they differ from the colors on the display. 5 Press Select. For help , see your print quality has improved. 6 If you are not smooth. For help , see page 25. 2 Click Start → All Programs (or Programs) → Dell Printers → Dell AIO Printer A960 → Dell Printer Solution Center. 3 From the...
...nozzles to clean them. 6 Print your User's Guide. If you are not satisfied with wiping the ink cartridge nozzles and contacts. Using the Printer Software 1 Load paper. For help , see page 25. 2 Press Copy. 3 Press Options until Maintenance appears on the display. 4 Press...or they differ from the colors on the display. 5 Press Select. For help , see your print quality has improved. 6 If you are not smooth. For help , see page 25. 2 Click Start → All Programs (or Programs) → Dell Printers → Dell AIO Printer A960 → Dell Printer Solution Center. 3 From the...

Owner's Manual
Page 70
... is plugged into your printer and an electrical outlet. The Dell AIO Printer A960 supports Windows XP and Windows 2000. "Fax Settings Are Unsatisfactory" on page 74. • You only have one Dell AIO Printer A960 attached to your printer. • Both your computer and your printer are on the display.... • The power supply is compatible with your printer. "Date and Time on the Display Are Incorrect" on...
... is plugged into your printer and an electrical outlet. The Dell AIO Printer A960 supports Windows XP and Windows 2000. "Fax Settings Are Unsatisfactory" on page 74. • You only have one Dell AIO Printer A960 attached to your printer. • Both your computer and your printer are on the display.... • The power supply is compatible with your printer. "Date and Time on the Display Are Incorrect" on...


