User Guide
Page 32
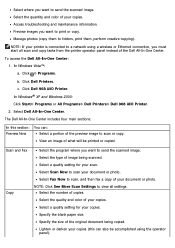
..., you must start all settings. Click ® Programs. b. Click Dell Printers. Click Dell 968 AIO Printer. Select Dell All-In-One Center. Lighten or darken your copies (this section: You can also be printed or copied. Manage photos (copy them , perform creative copying). To access the Dell All-In-One Center: 1. Select the number of image being copied. NOTE: Click...
..., you must start all settings. Click ® Programs. b. Click Dell Printers. Click Dell 968 AIO Printer. Select Dell All-In-One Center. Lighten or darken your copies (this section: You can also be printed or copied. Manage photos (copy them , perform creative copying). To access the Dell All-In-One Center: 1. Select the number of image being copied. NOTE: Click...
User Guide
Page 35
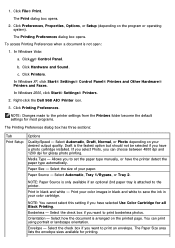
...Print. Click ® Control Panel. b. In Windows XP, click Start® Settings® Control Panel® Printers and Other Hardware® Printers and Faxes. Right-click the Dell 968 AIO Printer icon. 3. Media Type - Select the size of your color cartridge. NOTE: Paper Source is only available if an... optional 2nd paper tray is arranged on your color images in black and white to print borderless photos. Print ...
...Print. Click ® Control Panel. b. In Windows XP, click Start® Settings® Control Panel® Printers and Other Hardware® Printers and Faxes. Right-click the Dell 968 AIO Printer icon. 3. Media Type - Select the size of your color cartridge. NOTE: Paper Source is only available if an... optional 2nd paper tray is arranged on your color images in black and white to print borderless photos. Print ...

User Guide
Page 118
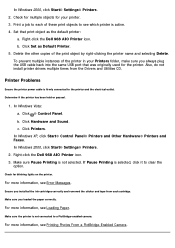
... or photo to print, you can make your printing preferences each time you can: Change the default print quality to cancel from the Printers folder. 1. In Windows XP, click Start ® Settings® Control Panel® Printers and Other Hardware® Printers and Faxes. Click Open. 4. Click Hardware and Sound. c. Right-click the Dell 968 AIO Printer...
... or photo to print, you can make your printing preferences each time you can: Change the default print quality to cancel from the Printers folder. 1. In Windows XP, click Start ® Settings® Control Panel® Printers and Other Hardware® Printers and Faxes. Click Open. 4. Click Hardware and Sound. c. Right-click the Dell 968 AIO Printer...
User Guide
Page 122
... multiple objects for blinking lights on the printer. Print a job to see Printing Photos From a PictBridge-Enabled Camera. Click Hardware and Sound. For more information, see Loading Paper. Delete the other copies of the printer in your printer. 3. Right-click the Dell 968 AIO Printer icon. 3. Also, do not install printer drivers multiple times from each of these...
... multiple objects for blinking lights on the printer. Print a job to see Printing Photos From a PictBridge-Enabled Camera. Click Hardware and Sound. For more information, see Loading Paper. Delete the other copies of the printer in your printer. 3. Right-click the Dell 968 AIO Printer icon. 3. Also, do not install printer drivers multiple times from each of these...
User Guide
Page 133
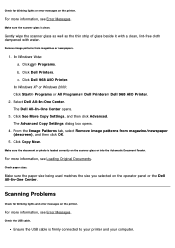
...firmly connected to your printer and your computer. Click Dell 968 AIO Printer. Select Dell All-In-One Center. The Dell All-In-One Center opens. 3. For more information, see Loading Original Documents. Check for blinking lights and error messages on the operator panel or the Dell All-In-One Center. Gently wipe ...the scanner glass as well as the thin strip of glass beside it with a clean, lint-free cloth dampened with water. Click Dell Printers. Make sure the document or photo is loaded correctly on the printer. Make sure the...
...firmly connected to your printer and your computer. Click Dell 968 AIO Printer. Select Dell All-In-One Center. The Dell All-In-One Center opens. 3. For more information, see Loading Original Documents. Check for blinking lights and error messages on the operator panel or the Dell All-In-One Center. Gently wipe ...the scanner glass as well as the thin strip of glass beside it with a clean, lint-free cloth dampened with water. Click Dell Printers. Make sure the document or photo is loaded correctly on the printer. Make sure the...
User Guide
Page 136
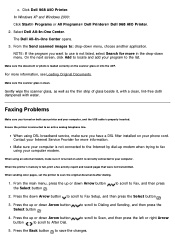
Make sure the document or photo is properly inserted. Faxing Problems Make sure you turned on both your printer and your computer, and the USB cable is loaded correctly on the scanner glass or into the ADF. Ensure the printer is not connected to the Internet ...your computer modem. In Windows XP and Windows 2000: Click Start® Programs or All Programs® Dell Printers® Dell 968 AIO Printer. 2. Click Dell 968 AIO Printer. Select Dell All-In-One Center. The Dell All-In-One Center opens. 3. On the next screen, click Add to After Dial. to scroll to Dialing and ...
Make sure the document or photo is properly inserted. Faxing Problems Make sure you turned on both your printer and your computer, and the USB cable is loaded correctly on the scanner glass or into the ADF. Ensure the printer is not connected to the Internet ...your computer modem. In Windows XP and Windows 2000: Click Start® Programs or All Programs® Dell Printers® Dell 968 AIO Printer. 2. Click Dell 968 AIO Printer. Select Dell All-In-One Center. The Dell All-In-One Center opens. 3. On the next screen, click Add to After Dial. to scroll to Dialing and ...

User Guide
Page 152
... opens. 9. Load the paper. Click ® Programs. b. Click Dell Printers. NOTE: You must make sure they are connected. 2. On the Print tab, select the Collate Copies check box. 10. Copying Photos Using the Operator Panel 1. Load your settings, click Copy Now. After...Copy Settings to customize your computer and printer, and make more information, see Loading Paper. 3. Turn on the printer. In Windows® XP or Windows 2000: Click Start® Programs or All Programs® Dell Printers® Dell 968 AIO Printer. 5. The Dell All-In-One Center opens. 6. In Windows Vista:...
... opens. 9. Load the paper. Click ® Programs. b. Click Dell Printers. NOTE: You must make sure they are connected. 2. On the Print tab, select the Collate Copies check box. 10. Copying Photos Using the Operator Panel 1. Load your settings, click Copy Now. After...Copy Settings to customize your computer and printer, and make more information, see Loading Paper. 3. Turn on the printer. In Windows® XP or Windows 2000: Click Start® Programs or All Programs® Dell Printers® Dell 968 AIO Printer. 5. The Dell All-In-One Center opens. 6. In Windows Vista:...
User Guide
Page 153
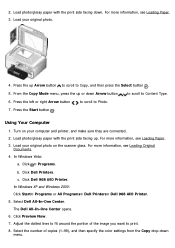
... the Start button . For more information, see Loading Original Documents. 4. The Dell All-In-One Center opens. 6. Load your computer and printer, and make sure they are connected. 2. Click ® Programs. b. Click Dell 968 AIO Printer. 2. Turn on the scanner glass. Load your original photo on your original photo. 4. Select the number of the image you want to...
... the Start button . For more information, see Loading Original Documents. 4. The Dell All-In-One Center opens. 6. Load your computer and printer, and make sure they are connected. 2. Click ® Programs. b. Click Dell 968 AIO Printer. 2. Turn on the scanner glass. Load your original photo on your original photo. 4. Select the number of the image you want to...
User Guide
Page 159
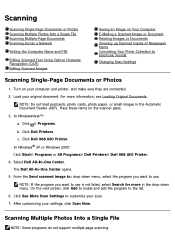
... you want to Electronic Format Changing Scan Settings Scanning Single-Page Documents or Photos 1. Click Dell Printers. The Dell All-In-One Center opens. 5. Click Dell 968 AIO Printer. NOTE: If the program you want to the list. 6. Scanning Scanning Single-Page Documents or Photos Scanning Multiple Photos Into a Single File Scanning Multiple-Page Documents Scanning Across a Network Setting the...
... you want to Electronic Format Changing Scan Settings Scanning Single-Page Documents or Photos 1. Click Dell Printers. The Dell All-In-One Center opens. 5. Click Dell 968 AIO Printer. NOTE: If the program you want to the list. 6. Scanning Scanning Single-Page Documents or Photos Scanning Multiple Photos Into a Single File Scanning Multiple-Page Documents Scanning Across a Network Setting the...
User Guide
Page 168
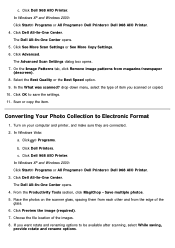
... on the scanner glass, spacing them from each other and from magazine/newspaper (descreen). 8. Save multiple photos. 5. Place the photos on your computer and printer, and make sure they are connected. 2. Click Dell 968 AIO Printer. Click Dell All-In-One Center. The Advanced Scan Settings dialog box opens. 7. Scan or copy the item. Choose the file location...
... on the scanner glass, spacing them from each other and from magazine/newspaper (descreen). 8. Save multiple photos. 5. Place the photos on your computer and printer, and make sure they are connected. 2. Click Dell 968 AIO Printer. Click Dell All-In-One Center. The Advanced Scan Settings dialog box opens. 7. Scan or copy the item. Choose the file location...


