User Guide
Page 5
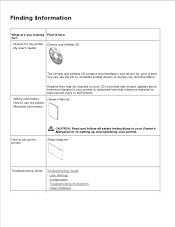
... instructions in your Owner's Manual prior to setting up and operating your printer. Finding Information What are you looking Find it here for? · Drivers for my printer Drivers and Utilities CD · My User's Guide The Drivers and Utilities CD contains documentation and drivers for experienced users or technicians. · Safety information Owner's Manual ·...
... instructions in your Owner's Manual prior to setting up and operating your printer. Finding Information What are you looking Find it here for? · Drivers for my printer Drivers and Utilities CD · My User's Guide The Drivers and Utilities CD contains documentation and drivers for experienced users or technicians. · Safety information Owner's Manual ·...
User Guide
Page 6
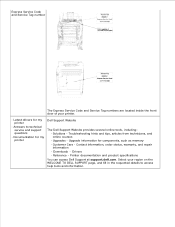
... Website provides several online tools, including: · Solutions - Contact information, order status, warranty, and repair information · Downloads - Drivers · Reference - Printer documentation and product specifications You can access Dell Support at support.dell.com. Troubleshooting hints and tips, articles from technicians, and online courses · Upgrades - Express Service Code and Service Tag number...
... Website provides several online tools, including: · Solutions - Contact information, order status, warranty, and repair information · Downloads - Drivers · Reference - Printer documentation and product specifications You can access Dell Support at support.dell.com. Troubleshooting hints and tips, articles from technicians, and online courses · Upgrades - Express Service Code and Service Tag number...
User Guide
Page 16
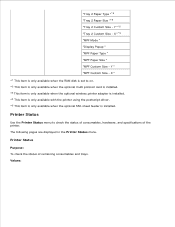
... only available when the optional multi protocol card is installed. *3 This item is only available when the optional wireless printer adapter is installed. *4 This item is only available with the printer using the postscript driver. *5 This item is only available when the optional 550-sheet feeder is installed. Y " "MPF Custom Size - Y "*5 "Tray 2 ... disk is set to check the status of consumables, hardware, and specifications of remaining consumables and trays. The following pages are displayed in the Printer Status menu. "Tray 2 Paper Type "*5 "Tray 2 Paper Size "*5 "Tray 2 Custom Size...
... only available when the optional multi protocol card is installed. *3 This item is only available when the optional wireless printer adapter is installed. *4 This item is only available with the printer using the postscript driver. *5 This item is only available when the optional 550-sheet feeder is installed. Y " "MPF Custom Size - Y "*5 "Tray 2 ... disk is set to check the status of consumables, hardware, and specifications of remaining consumables and trays. The following pages are displayed in the Printer Status menu. "Tray 2 Paper Type "*5 "Tray 2 Paper Size "*5 "Tray 2 Custom Size...
User Guide
Page 67
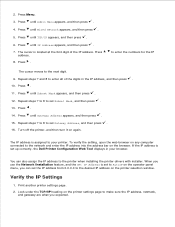
.... Repeat steps 7 to 8 to the network and enter the IP address into the address bar on any computer connected to set up correctly, the Dell Printer Configuration Web Tool displays in the IP address, and then press . 10. To verify the setting, open the web browser on the browser. You ...Press until IP Address appears, and then press . 7. If the IP address is assigned to the desired IP address on the printer settings page to the printer when installing the printer drivers with installer. 2. The cursor is set to AutoIP on again. to enter the numbers for the IP The cursor moves to...
.... Repeat steps 7 to 8 to the network and enter the IP address into the address bar on any computer connected to set up correctly, the Dell Printer Configuration Web Tool displays in the IP address, and then press . 10. To verify the setting, open the web browser on the browser. You ...Press until IP Address appears, and then press . 7. If the IP address is assigned to the desired IP address on the printer settings page to the printer when installing the printer drivers with installer. 2. The cursor is set to AutoIP on again. to enter the numbers for the IP The cursor moves to...
User Guide
Page 69
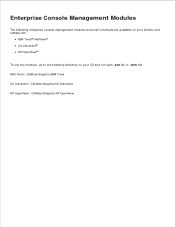
Enterprise Console Management Modules The following enterprise console management modules and user's manuals are available on your Drivers and Utilities CD: IBM Tivoli® NetView® CA Unicenter® HP OpenView® To use the modules, go to the following directory on your CD and run each .exe file or .chm file. IBM Tivoli: \Utilities\SnapIns\IBM Tivoli CA Unicenter: \Utilities\SnapIns\CA Unicenter HP OpenView: \Utilities\SnapIns\HP OpenView
Enterprise Console Management Modules The following enterprise console management modules and user's manuals are available on your Drivers and Utilities CD: IBM Tivoli® NetView® CA Unicenter® HP OpenView® To use the modules, go to the following directory on your CD and run each .exe file or .chm file. IBM Tivoli: \Utilities\SnapIns\IBM Tivoli CA Unicenter: \Utilities\SnapIns\CA Unicenter HP OpenView: \Utilities\SnapIns\HP OpenView
User Guide
Page 73
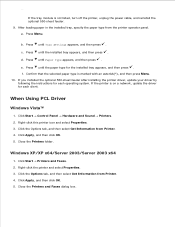
... x64/Server 2003/Server 2003 x64 1. Click the Options tab, and then select Get Information from Printer. 4. c. If you installed the optional 550-sheet feeder after installing the printer driver, update your driver by following the instructions for each operating system. a. Press until the installed tray appears, and then... each client. After loading paper in the installed tray, specify the paper type from the printer operator panel. When Using PCL Driver Windows Vista™ 1. Click Apply, and then click OK. 5. Press until the paper type for the installed tray appears, ...
... x64/Server 2003/Server 2003 x64 1. Click the Options tab, and then select Get Information from Printer. 4. c. If you installed the optional 550-sheet feeder after installing the printer driver, update your driver by following the instructions for each operating system. a. Press until the installed tray appears, and then... each client. After loading paper in the installed tray, specify the paper type from the printer operator panel. When Using PCL Driver Windows Vista™ 1. Click Apply, and then click OK. 5. Press until the paper type for the installed tray appears, ...
User Guide
Page 74
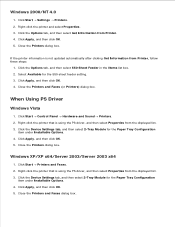
...-sheet feeder setting. 3. Close the Printers dialog box. If the printer information is using the PS driver, and then select Properties from the displayed list. 3. Right-click the printer that is not updated automatically after clicking Get Information from Printer. 4. Click the Device Settings tab,...the Items list box. 2. Click Apply, and then click OK. 5. Click Start Settings Printers. 2. Click Apply, and then click OK. 5. Right-click the printer that is using the PS driver, and then select Properties from the displayed list. 3. Windows 2000/NT 4.0 1. Click Start...
...-sheet feeder setting. 3. Close the Printers dialog box. If the printer information is using the PS driver, and then select Properties from the displayed list. 3. Right-click the printer that is not updated automatically after clicking Get Information from Printer. 4. Click the Device Settings tab,...the Items list box. 2. Click Apply, and then click OK. 5. Click Start Settings Printers. 2. Click Apply, and then click OK. 5. Right-click the printer that is using the PS driver, and then select Properties from the displayed list. 3. Windows 2000/NT 4.0 1. Click Start...
User Guide
Page 75
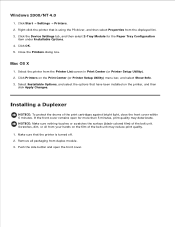
...displayed list. 3. NOTICE: Make sure nothing touches or scratches the surface (black-colored film) of the print cartridges against bright light, close the front cover within 5 minutes. Windows 2000/NT 4.0 1. Click Printers on the film of the belt unit may deteriorate. Select Installable Options, and select... the options that is turned off. 2. Make sure that the printer is using the PS driver, and then select Properties from your hands on the Print Center (or Printer Setup Utility) menu bar, and select Show Info. 3. Push the side button and open...
...displayed list. 3. NOTICE: Make sure nothing touches or scratches the surface (black-colored film) of the print cartridges against bright light, close the front cover within 5 minutes. Windows 2000/NT 4.0 1. Click Printers on the film of the belt unit may deteriorate. Select Installable Options, and select... the options that is turned off. 2. Make sure that the printer is using the PS driver, and then select Properties from your hands on the Print Center (or Printer Setup Utility) menu bar, and select Show Info. 3. Push the side button and open...
User Guide
Page 79
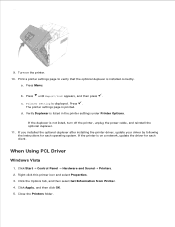
.... 11. Verify Duplexer is on the printer. 10. If you installed the optional duplexer after installing the printer driver, update your driver by following the instructions for each operating system. Right-click this printer icon and select Properties. 3. Turn on a network, update the driver for each client. c. When Using PCL Driver Windows Vista 1. Click Start Control Panel...
.... 11. Verify Duplexer is on the printer. 10. If you installed the optional duplexer after installing the printer driver, update your driver by following the instructions for each operating system. Right-click this printer icon and select Properties. 3. Turn on a network, update the driver for each client. c. When Using PCL Driver Windows Vista 1. Click Start Control Panel...
User Guide
Page 80
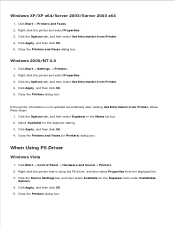
... click OK. 5. Click the Options tab, and then select Get Information from Printer. 4. Close the Printers and Faxes (or Printers) dialog box. If the printer information is using the PS driver, and then select Properties from Printer, follow these steps: 1. Right-click the printer that is not updated automatically after clicking Get Information from the displayed list...
... click OK. 5. Click the Options tab, and then select Get Information from Printer. 4. Close the Printers and Faxes (or Printers) dialog box. If the printer information is using the PS driver, and then select Properties from Printer, follow these steps: 1. Right-click the printer that is not updated automatically after clicking Get Information from the displayed list...
User Guide
Page 81
..., and then click OK. 5. Make sure that have been installed on the printer, and then click Apply Changes. 4. Windows 2000/NT 4.0 1. Click Start Settings Printers. 2. Right-click the printer that is using the PS driver, and then select Properties from the Printer List screen in a counterclockwise direction and open the cover. Click the Device Settings...
..., and then click OK. 5. Make sure that have been installed on the printer, and then click Apply Changes. 4. Windows 2000/NT 4.0 1. Click Start Settings Printers. 2. Right-click the printer that is using the PS driver, and then select Properties from the Printer List screen in a counterclockwise direction and open the cover. Click the Device Settings...
User Guide
Page 84
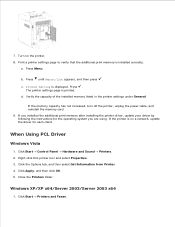
... the operating system you installed the additional print memory after installing the printer driver, update your driver by following the instructions for each client. b. Printer Setting is installed correctly. Verify the capacity of the installed memory listed in the printer settings under General. Click Apply, and then click OK. 5. Press until Report/List appears, and...
... the operating system you installed the additional print memory after installing the printer driver, update your driver by following the instructions for each client. b. Printer Setting is installed correctly. Verify the capacity of the installed memory listed in the printer settings under General. Click Apply, and then click OK. 5. Press until Report/List appears, and...
User Guide
Page 85
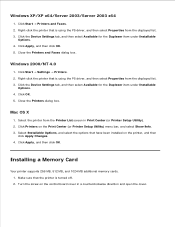
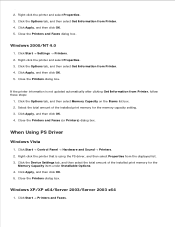
... Get Information from the displayed list. 3. Select the total amount of the installed print memory for the memory capacity setting. 3. When Using PS Driver Windows Vista 1. Close the Printers dialog box. Windows XP/XP x64/Server 2003/Server 2003 x64 1. Click Apply, and then click OK. 5. Windows 2000/NT 4.0 1. Click Apply, and...
... Get Information from the displayed list. 3. Select the total amount of the installed print memory for the memory capacity setting. 3. When Using PS Driver Windows Vista 1. Close the Printers dialog box. Windows XP/XP x64/Server 2003/Server 2003 x64 1. Click Apply, and then click OK. 5. Windows 2000/NT 4.0 1. Click Apply, and...
User Guide
Page 86
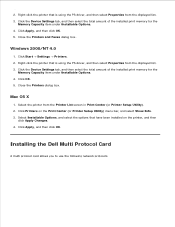
... and select the options that have been installed on the Print Center (or Printer Setup Utility) menu bar, and select Show Info. 3. Right-click the printer that is using the PS driver, and then select Properties from the displayed list. 3. Click Apply, and ...Printers and Faxes dialog box. Click Start Settings Printers. 2. Right-click the printer that is using the PS driver, and then select Properties from the Printer List screen in Print Center (or Printer Setup Utility). 2. Close the Printers dialog box. Select the printer from the displayed list. 3. Installing the Dell...
... and select the options that have been installed on the Print Center (or Printer Setup Utility) menu bar, and select Show Info. 3. Right-click the printer that is using the PS driver, and then select Properties from the displayed list. 3. Click Apply, and ...Printers and Faxes dialog box. Click Start Settings Printers. 2. Right-click the printer that is using the PS driver, and then select Properties from the Printer List screen in Print Center (or Printer Setup Utility). 2. Close the Printers dialog box. Select the printer from the displayed list. 3. Installing the Dell...
User Guide
Page 91
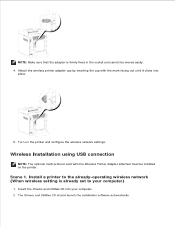
... set to your computer. 2. Insert the Drivers and Utilities CD into place. 5. The Drivers and Utilities CD should launch the installation software automatically. Attach the wireless printer adapter cap by inserting the cap with the Wireless Printer Adapter attached must be moved easily. 4. Turn on the printer. Install a printer to the already-operating wireless network (When...
... set to your computer. 2. Insert the Drivers and Utilities CD into place. 5. The Drivers and Utilities CD should launch the installation software automatically. Attach the wireless printer adapter cap by inserting the cap with the Wireless Printer Adapter attached must be moved easily. 4. Turn on the printer. Install a printer to the already-operating wireless network (When...
User Guide
Page 92
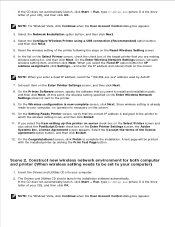
... is set each item on the Enter Printer Settings screen, the Adobe Systems Inc. When you select the I accept the terms of your CD), and then click OK. NOTE: When you want to your computer. 2. Scene 2. The Drivers and Utilities CD should launch the installation .... 11. At this point, the wireless setting specified on this printer on server check box on the Select Printer screen and also select the PostScript Driver check box on the Enter Printer Settings screen, and then click Next. 8. Insert the Drivers and Utilities CD into your computer) 1. 1. 2. Select the ...
... is set each item on the Enter Printer Settings screen, the Adobe Systems Inc. When you select the I accept the terms of your CD), and then click OK. NOTE: When you want to your computer. 2. Scene 2. The Drivers and Utilities CD should launch the installation .... 11. At this point, the wireless setting specified on this printer on server check box on the Select Printer screen and also select the PostScript Driver check box on the Enter Printer Settings screen, and then click Next. 8. Insert the Drivers and Utilities CD into your computer) 1. 1. 2. Select the ...
User Guide
Page 94
...am setting up to move the setting to your Web browser. NOTE: The Dell Printer Configuration Web Tool is not available when the printer is set to the top of your network printer without leaving your computer provides a wireless LAN adapter tool, change the wireless ...using this printer on server check box on the Select Printer screen and also select the PostScript Driver check box on the Enable Communication with the installed printer by the operating system. Select the Configure Wireless Printer using wireless connection Scene 1. Insert the Drivers and Utilities ...
...am setting up to move the setting to your Web browser. NOTE: The Dell Printer Configuration Web Tool is not available when the printer is set to the top of your network printer without leaving your computer provides a wireless LAN adapter tool, change the wireless ...using this printer on server check box on the Select Printer screen and also select the PostScript Driver check box on the Enable Communication with the installed printer by the operating system. Select the Configure Wireless Printer using wireless connection Scene 1. Insert the Drivers and Utilities ...

User Guide
Page 96
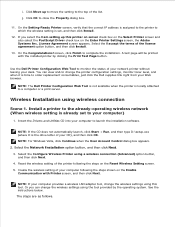
... screen appears. Construct new wireless network environment for both computer and printer (When wireless setting needs to the printer: Select Access point (Infrastructure) networks only and close the Advanced dialog box. Insert the Drivers and Utilities CD into your computer) 1. NOTE: If your CD...provides a wireless LAN adapter tool, change the wireless settings using this printer on server check box on the Select Printer screen and also select the PostScript Driver check box on the Enter Printer Settings screen, the Adobe Systems Inc. Right-click Wireless Network Connection ...
... screen appears. Construct new wireless network environment for both computer and printer (When wireless setting needs to the printer: Select Access point (Infrastructure) networks only and close the Advanced dialog box. Insert the Drivers and Utilities CD into your computer) 1. NOTE: If your CD...provides a wireless LAN adapter tool, change the wireless settings using this printer on server check box on the Select Printer screen and also select the PostScript Driver check box on the Enter Printer Settings screen, the Adobe Systems Inc. Right-click Wireless Network Connection ...
User Guide
Page 98
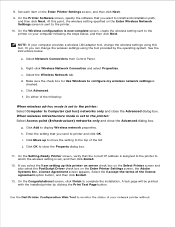
... server check box on the Select Printer screen and also select the PostScript Driver check box on your network printer without c. Select the Wireless Network tab. When wireless infrastructure mode is now complete screen, create the wireless setting sent to the printer. 10. Select the I am ...Click OK to monitor the status of the license agreement option button, and then click Install. 13. Use the Dell Printer Configuration Web Tool to close the Advanced dialog box. On the Printer Software screen, specify the software that the correct IP address is assigned to the...
... server check box on the Select Printer screen and also select the PostScript Driver check box on your network printer without c. Select the Wireless Network tab. When wireless infrastructure mode is now complete screen, create the wireless setting sent to the printer. 10. Select the I am ...Click OK to monitor the status of the license agreement option button, and then click Install. 13. Use the Dell Printer Configuration Web Tool to close the Advanced dialog box. On the Printer Software screen, specify the software that the correct IP address is assigned to the...
User Guide
Page 108
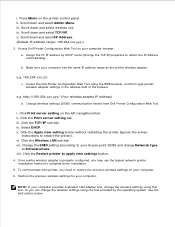
...to restart the printer). b. e.g. 169.254.xxx.zzz c. Access the Dell Printer Configuration Web Tool using this tool. Select DHCP. Click the Apply new setting button without restarting the printer (Ignore the screen instructions to Infrastructure. vii. viii. Or you need to complete driver installation. 5.... computer. e.g. http://169.254.xxx.yyy/ (Your wireless adapter IP address) d. Change wireless settings (SSID/ communication mode) from Dell Printer Configuration Web Tool. i. ii. Click the Print server setting tab. Click the TCP/IP sub-tab. Change the SSID setting (...
...to restart the printer). b. e.g. 169.254.xxx.zzz c. Access the Dell Printer Configuration Web Tool using this tool. Select DHCP. Click the Apply new setting button without restarting the printer (Ignore the screen instructions to Infrastructure. vii. viii. Or you need to complete driver installation. 5.... computer. e.g. http://169.254.xxx.yyy/ (Your wireless adapter IP address) d. Change wireless settings (SSID/ communication mode) from Dell Printer Configuration Web Tool. i. ii. Click the Print server setting tab. Click the TCP/IP sub-tab. Change the SSID setting (...

