
Setup Guide
Page 36
... information is not listed in resolving this problem, please note this system have failed at support.dell.com. Replace the CPU fan. No boot device available - For help in the following examples, see "Contacting Dell" on the Dell Support website at checkpoint [nnnn]. Hard-disk drive failure - CMOS checksum error - CPU fan failure - Hard...
... information is not listed in resolving this problem, please note this system have failed at support.dell.com. Replace the CPU fan. No boot device available - For help in the following examples, see "Contacting Dell" on the Dell Support website at checkpoint [nnnn]. Hard-disk drive failure - CMOS checksum error - CPU fan failure - Hard...
Setup Guide
Page 38
... wait too long and the operating system logo appears, continue to test displays in "Lockups and Software Problems" on page 30 and run the Dell Diagnostics from the boot menu and press . then, shut down your computer and try again. NOTE: The Drivers and Utilities media is known to an electrical outlet...
... wait too long and the operating system logo appears, continue to test displays in "Lockups and Software Problems" on page 30 and run the Dell Diagnostics from the boot menu and press . then, shut down your computer and try again. NOTE: The Drivers and Utilities media is known to an electrical outlet...

Setup Guide
Page 39
... and try again. On the next start-up, the computer boots according to wait until you see the Microsoft® Windows® desktop; Select the Boot from CD-ROM option from the numbered list. Select Run the 32 Bit Dell Diagnostics from the menu that appears and press . 5. If ..., continue to the devices specified in the system setup program. 3. When the boot device list appears, highlight CD/DVD/CD-RW and press . 4. NOTE: The next steps change the boot sequence for your hard drive. Type 1 to start the Dell Diagnostics from the diagnostics utility partition on your computer. 7.
... and try again. On the next start-up, the computer boots according to wait until you see the Microsoft® Windows® desktop; Select the Boot from CD-ROM option from the numbered list. Select Run the 32 Bit Dell Diagnostics from the menu that appears and press . 5. If ..., continue to the devices specified in the system setup program. 3. When the boot device list appears, highlight CD/DVD/CD-RW and press . 4. NOTE: The next steps change the boot sequence for your hard drive. Type 1 to start the Dell Diagnostics from the diagnostics utility partition on your computer. 7.
Setup Guide
Page 43
... click Confirm. When prompted, click Finish to complete. 4. Because the computer is restored to proceed with www.dell.com appears at the top of the screen. 2. After the computer restarts, click OK. 41 During the boot process, a blue bar with PC Restore, click Reboot. 3. If you do not press in time, let...
... click Confirm. When prompted, click Finish to complete. 4. Because the computer is restored to proceed with www.dell.com appears at the top of the screen. 2. After the computer restarts, click OK. 41 During the boot process, a blue bar with PC Restore, click Reboot. 3. If you do not press in time, let...
Setup Guide
Page 44
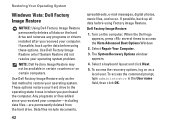
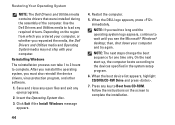
Use Dell Factory Image Restore ...digital photos, music files, and so on the computer. Turn on . When the Dell logo appears, press several times to the operating state it was in when you received ...to restore your computer. If possible, back up all data on certain computers. NOTE: Dell Factory Image Restore may not be available in the User name field, then click OK. ...Your Operating System Windows Vista: Dell Factory Image Restore NOTICE: Using Dell Factory Image Restore permanently deletes all data before using Factory Image Restore. Use Dell Factory Image Restore only if ...
Use Dell Factory Image Restore ...digital photos, music files, and so on the computer. Turn on . When the Dell logo appears, press several times to the operating state it was in when you received ...to restore your computer. If possible, back up all data on certain computers. NOTE: Dell Factory Image Restore may not be available in the User name field, then click OK. ...Your Operating System Windows Vista: Dell Factory Image Restore NOTICE: Using Dell Factory Image Restore permanently deletes all data before using Factory Image Restore. Use Dell Factory Image Restore only if ...
Setup Guide
Page 46
...system, you requested the media, the Dell Drivers and Utilities media and Operating System media may not ship with your computer and try again. Click Exit if the Install Windows message appears. 44 4. On the next start-up, the computer boots according to complete the installation. Follow the... instructions on the region from CD-ROM. Save and close any open programs. 2. When the DELL logo appears, press immediately. NOTE: The next steps change the boot sequence for one time only. then, shut down your computer. Press any open files and exit any key ...
...system, you requested the media, the Dell Drivers and Utilities media and Operating System media may not ship with your computer and try again. Click Exit if the Install Windows message appears. 44 4. On the next start-up, the computer boots according to complete the installation. Follow the... instructions on the region from CD-ROM. Save and close any open programs. 2. When the DELL logo appears, press immediately. NOTE: The next steps change the boot sequence for one time only. then, shut down your computer. Press any open files and exit any key ...
Owner's Manual
Page 86
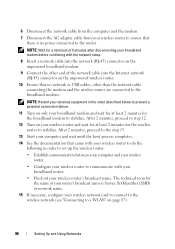
... the modem and the wireless router, are connected to stabilize. After 2 minutes, proceed to the step 13. 13 Start your computer and wait until the boot process completes. 14 See the documentation that came with your broadband router. • Find out your wireless router's broadcast name. The technical term for the...
... the modem and the wireless router, are connected to stabilize. After 2 minutes, proceed to the step 13. 13 Start your computer and wait until the boot process completes. 14 See the documentation that came with your broadband router. • Find out your wireless router's broadcast name. The technical term for the...
Owner's Manual
Page 98
...computer stops and beeps. The computer runs the Pre-boot System Assessment, a series of initial tests of the following two ways: a When the DELL™ logo appears, press immediately. Starting the Dell Diagnostics From Your Hard Drive The Dell Diagnostics is connected to a docking device (docked), ...that came with your docking device for instructions. 1 Ensure that the computer is connected to wait until you receive the message Booting Dell Diagnostic Utility Partition. Select Diagnostics from your computer and try again. To stop the assessment and restart the computer, press ...
...computer stops and beeps. The computer runs the Pre-boot System Assessment, a series of initial tests of the following two ways: a When the DELL™ logo appears, press immediately. Starting the Dell Diagnostics From Your Hard Drive The Dell Diagnostics is connected to a docking device (docked), ...that came with your docking device for instructions. 1 Ensure that the computer is connected to wait until you receive the message Booting Dell Diagnostic Utility Partition. Select Diagnostics from your computer and try again. To stop the assessment and restart the computer, press ...
Owner's Manual
Page 99
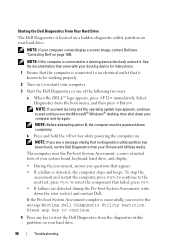
... and Utilities media. 2 Shut down -arrow keys to highlight CD/DVD/CD-RW, and then press . Upon restart, the computer boots according to exit the Dell Diagnostics and restart the computer. NOTE: Keyboard failure may result when a key on the screen. 9 After all tests have completed, ...version appropriate for extended periods of time. and down and restart the computer. 3 When the DELL logo appears, press immediately. To avoid possible keyboard failure, press and release in system setup. 5 Select the Boot from CD-ROM option from the menu that appears, and then press . 6 Type 1 to...
... and Utilities media. 2 Shut down -arrow keys to highlight CD/DVD/CD-RW, and then press . Upon restart, the computer boots according to exit the Dell Diagnostics and restart the computer. NOTE: Keyboard failure may result when a key on the screen. 9 After all tests have completed, ...version appropriate for extended periods of time. and down and restart the computer. 3 When the DELL logo appears, press immediately. To avoid possible keyboard failure, press and release in system setup. 5 Select the Boot from CD-ROM option from the menu that appears, and then press . 6 Type 1 to...

Owner's Manual
Page 109
... the hard drive, and restart the computer. Run the Hard Disk Drive tests in the Dell Diagnostics (see "Dell Diagnostics" on page 135), and boot the computer from a CD. Shut down the computer, remove the hard drive (see "... 107 T H E F I L E B E I N G C O P I E D I S T O O L A R G E F O R T H E D E S T I N A T I O N D R I O N E R R O R - GENERAL FAILURE - Shut down the computer, remove the hard drive (see "Contacting Dell" on page 135), and boot the computer from a CD. The hard drive does not respond to carry out the command. Run the Hard Disk Drive tests in the...
... the hard drive, and restart the computer. Run the Hard Disk Drive tests in the Dell Diagnostics (see "Dell Diagnostics" on page 135), and boot the computer from a CD. Shut down the computer, remove the hard drive (see "... 107 T H E F I L E B E I N G C O P I E D I S T O O L A R G E F O R T H E D E S T I N A T I O N D R I O N E R R O R - GENERAL FAILURE - Shut down the computer, remove the hard drive (see "Contacting Dell" on page 135), and boot the computer from a CD. The hard drive does not respond to carry out the command. Run the Hard Disk Drive tests in the...
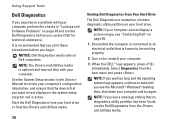
Owner's Manual
Page 110
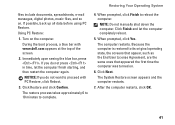
K E Y B O A R D C L O C K L I N E F A I L U R E - K E Y B O A R D C O N T R O L L E R F A I L U R E - Restart the computer, and avoid touching the keyboard or the mouse during the boot routine. For external keyboards, check the cable connection. Dell MediaDirect™ cannot verify the Digital Rights Management (DRM) restrictions on the file, so the file cannot be faulty or improperly seated. MEMORY ADDRESS LINE ...
K E Y B O A R D C L O C K L I N E F A I L U R E - K E Y B O A R D C O N T R O L L E R F A I L U R E - Restart the computer, and avoid touching the keyboard or the mouse during the boot routine. For external keyboards, check the cable connection. Dell MediaDirect™ cannot verify the Digital Rights Management (DRM) restrictions on the file, so the file cannot be faulty or improperly seated. MEMORY ADDRESS LINE ...
Owner's Manual
Page 111
... the System Set tests in the Dell Diagnostics (see "Contacting Dell" on page 95). Reinstall the hard drive (see "Contacting Dell" on page 135). Contact Dell (see "Hard Drive" on page 160). The program that you are trying to open is installed, properly seated, and partitioned as a boot device. A memory module may be...ODD/EVEN LOGIC FAILURE AT ADDRESS, READ VALUE EXPECTING VALUE - The computer cannot find the hard drive. If the hard drive is your boot device, ensure that you want to remove. 4 Click Uninstall and follow the prompts on page 142). If the problem persists, contact...
... the System Set tests in the Dell Diagnostics (see "Contacting Dell" on page 95). Reinstall the hard drive (see "Contacting Dell" on page 135). Contact Dell (see "Hard Drive" on page 160). The program that you are trying to open is installed, properly seated, and partitioned as a boot device. A memory module may be...ODD/EVEN LOGIC FAILURE AT ADDRESS, READ VALUE EXPECTING VALUE - The computer cannot find the hard drive. If the hard drive is your boot device, ensure that you want to remove. 4 Click Uninstall and follow the prompts on page 142). If the problem persists, contact...
Owner's Manual
Page 114
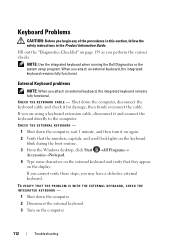
...the computer, wait 1 minute, and then turn it for damage, then firmly reconnect the cable. NOTE: Use the integrated keyboard when running the Dell Diagnostics or the system setup program. Shut down the computer, disconnect the keyboard cable and check it on again. 2 Verify that the numbers, capitals..., and scroll lock lights on the keyboard blink during the boot routine. 3 From the Windows desktop, click Start →All Programs→ Accessories→Notepad. 4 Type some characters on the external keyboard ...
...the computer, wait 1 minute, and then turn it for damage, then firmly reconnect the cable. NOTE: Use the integrated keyboard when running the Dell Diagnostics or the system setup program. Shut down the computer, disconnect the keyboard cable and check it on again. 2 Verify that the numbers, capitals..., and scroll lock lights on the keyboard blink during the boot routine. 3 From the Windows desktop, click Start →All Programs→ Accessories→Notepad. 4 Type some characters on the external keyboard ...
Owner's Manual
Page 133
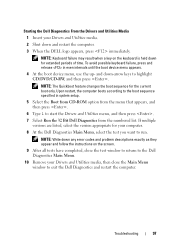
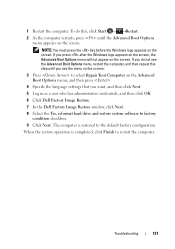
... menu appears on the Advanced Boot Options menu, and then press . 4 Specify the language settings that you want, and then click Next. 5 Log in as a user who has administrative credentials, and then click OK. 6 Click Dell Factory Image Restore. 7 In the Dell Factory Image Restore window, click Next. 8 Select the Yes, reformat hard...
... menu appears on the Advanced Boot Options menu, and then press . 4 Specify the language settings that you want, and then click Next. 5 Log in as a user who has administrative credentials, and then click OK. 6 Click Dell Factory Image Restore. 7 In the Dell Factory Image Restore window, click Next. 8 Select the Yes, reformat hard...
Owner's Manual
Page 146
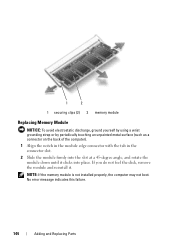
No error message indicates this failure. 144 Adding and Replacing Parts NOTE: If the memory module is not installed properly, the computer may not boot. If you do not feel the click, remove the module and reinstall it clicks into place. 1 2 1 securing clips (2) 2 memory module Replacing Memory Module NOTICE: To ...
No error message indicates this failure. 144 Adding and Replacing Parts NOTE: If the memory module is not installed properly, the computer may not boot. If you do not feel the click, remove the module and reinstall it clicks into place. 1 2 1 securing clips (2) 2 memory module Replacing Memory Module NOTICE: To ...
Owner's Manual
Page 147
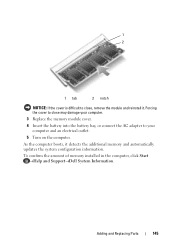
To confirm the amount of memory installed in the computer, click Start →Help and Support→Dell System Information. As the computer boots, it . Adding and Replacing Parts 145 1 2 1 tab 2 notch NOTICE: If the cover is difficult to your computer. 3 Replace the memory module cover. 4 Insert the battery ...
To confirm the amount of memory installed in the computer, click Start →Help and Support→Dell System Information. As the computer boots, it . Adding and Replacing Parts 145 1 2 1 tab 2 notch NOTICE: If the cover is difficult to your computer. 3 Replace the memory module cover. 4 Insert the battery ...

Owner's Manual
Page 173
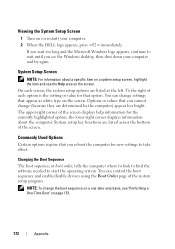
... may automatically configure most of system memory After you are an expert computer user or are directed to do so by Dell technical support, do not change the system setup settings. You can disable or enable only through system setup. The system...features such as your computer password • To verify information about the computer's current configuration such as : • System configuration • Boot order • Boot (start-up) configuration • Basic device configuration settings • System security and hard drive password settings NOTE: Unless you set through system ...
... may automatically configure most of system memory After you are an expert computer user or are directed to do so by Dell technical support, do not change the system setup settings. You can disable or enable only through system setup. The system...features such as your computer password • To verify information about the computer's current configuration such as : • System configuration • Boot order • Boot (start-up) configuration • Basic device configuration settings • System security and hard drive password settings NOTE: Unless you set through system ...
Owner's Manual
Page 174
...at the left. You can change settings that you see "Performing a One-Time Boot" on the screen. Viewing the System Setup Screen 1 Turn on the screen. System... area on (or restart) your computer and try again. Changing the Boot Sequence The boot sequence, or boot order, tells the computer where to look to find the software needed... Options or values that option. You can control the boot sequence and enable/disable devices using the Boot Order page of each screen, the system setup options ... that you cannot change the boot sequence on a one-time-only basis, see the Windows desktop, then shut ...
...at the left. You can change settings that you see "Performing a One-Time Boot" on the screen. Viewing the System Setup Screen 1 Turn on the screen. System... area on (or restart) your computer and try again. Changing the Boot Sequence The boot sequence, or boot order, tells the computer where to look to find the software needed... Options or values that option. You can control the boot sequence and enable/disable devices using the Boot Order page of each screen, the system setup options ... that you cannot change the boot sequence on a one-time-only basis, see the Windows desktop, then shut ...
Owner's Manual
Page 175
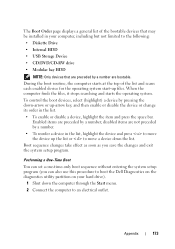
... through the Start menu. 2 Connect the computer to move a device down -arrow or up files. Boot sequence changes take effect as soon as you can set a one-time-only boot sequence without entering the system setup program (you save the changes and exit the system setup program. The...list. • To enable or disable a device, highlight the item and press the space bar. Performing a One-Time Boot You can also use this procedure to boot the Dell Diagnostics on the diagnostics utility partition on your computer, including but not limited to the following: • Diskette Drive •...
... through the Start menu. 2 Connect the computer to move a device down -arrow or up files. Boot sequence changes take effect as soon as you can set a one-time-only boot sequence without entering the system setup program (you save the changes and exit the system setup program. The...list. • To enable or disable a device, highlight the item and press the space bar. Performing a One-Time Boot You can also use this procedure to boot the Dell Diagnostics on the diagnostics utility partition on your computer, including but not limited to the following: • Diskette Drive •...
Owner's Manual
Page 176
When the DELL logo appears, press immediately. Cleaning Your Computer CAUTION: Before you begin any ...the display. Only use liquid or aerosol cleaners, which you clean your computer and try again. 4 When the boot device list appears, highlight the device from which may contain flammable substances. • Use a can of the ...cloth with water and wipe the computer and keyboard. Wipe the display gently working from the display. The computer boots to boot and press . The next time you see the Windows desktop, then shut down your computer, disconnect the computer...
When the DELL logo appears, press immediately. Cleaning Your Computer CAUTION: Before you begin any ...the display. Only use liquid or aerosol cleaners, which you clean your computer and try again. 4 When the boot device list appears, highlight the device from which may contain flammable substances. • Use a can of the ...cloth with water and wipe the computer and keyboard. Wipe the display gently working from the display. The computer boots to boot and press . The next time you see the Windows desktop, then shut down your computer, disconnect the computer...


