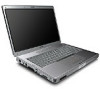
Wireless Setup Guide
Page 3
...any time during this setup. 2 Make sure that you have tested your setup with the router. Record this process your computer is on, turn on page 2. Ensure that the computer is connected to AC power during the router setup, contact your router manufacturer for technical assistance. 6 ...-PSK. router manufacturer or your ISP for technical assistance. Location of the network and to configure the wireless router. 1 Set up and turn it off . After you Do not continue with these instructions until you when to connect and disconnect the cable.) DSL Modem Internet or ...
Wireless Setup Guide
Page 4
...WPA-PSK On the Wireless Network Connection screen: 1 Select the check box for technical assistance. PROGRESS CHECK After step 1, the blue wireless light turns on. 1 Press the wireless on/off button on the screen. If you continue to have problems accessing a Web site, contact your router... to add to your network. Highlight your network name in the Available wireless networks list. 3 Complete the following steps that correspond with wireless notebooks and wired desktop PROGRESS CHECK If you successfully complete step 6, all computers on your network can access a Web site. 4 6 Run the...
Wireless Setup Guide
Page 5
...displayed.) c Select the Wireless Networks tab. DHCP (Dynamic Host Configuration Protocol)-A specification for more of someone piggybacking on each computer in turn connects to the Internet. Chance of the following security measures: ■ Enable encryption on your Web browser. WEP and WPA are... change the SSID on your router, refer to the router instructions. 2 To change the SSID on your wireless account: 1 in turn connects to the Internet. If you . Chance of securing your wireless network. encryption-The process of Web sites into cyberspace without security...
Wireless Setup Guide
Page 6
..., hotels, and universities, with each location for free or at these locations. SSID (Services Set Identifier)-The name you . Go wireless in public Now you turn it before you 're ready to go outside and experience the freedom and flexibility of your computer displays available networks. In some environments, the use...
HP USB Digital Drive
Page 5
If the status light does not turn on when the connection is successful. The status light on the Digital Drive turns on , remove the Digital Drive from the USB port, then reinsert the USB connector. 4 User Guide To connect the Digital Drive to a USB port directly (with the connector cable in the unextended position): » Insert the USB connector on the Digital Drive into a USB port on your computer.
HP USB Digital Drive
Page 7
If the status light does not turn on when the connection is successful. 2. The status light on the Digital Drive turns on , remove the Digital Drive from the USB port, then reinsert the USB connector. 6 User Guide Insert the USB connector on the Digital Drive into a USB port on your computer.
Compaq Presario V5000 Notebook PC - Maintenance and Service Guide
Page 10
... Prepare the computer for disassembly (refer to the computer. Connect AC power to Section 5.3, "Preparing the Computer for Disassembly," for more information.) 3. Wait approximately 5 minutes. 4. Turn on the computer. Replace the RTC battery and reassemble the computer. 5. These steps also clear CMOS: 1. Remove the real-time clock (RTC) battery (refer to...
Compaq Presario V5000 Notebook PC - Maintenance and Service Guide
Page 13
...pack is charging or is close to full charge capacity. ■ Off: If the computer is plugged into an external power source, the light is turned off until the battery reaches a low-battery condition. ■ Blinking: A battery pack that is the only available power source has reached a low... sound. Maintenance and Service Guide 1-7 Product Description Item 1 2 3 4 5 Table 1-1 Front Components Component Function Power light Battery light ■ On: Computer is turned on. ■ Off: Computer is off or in hibernation. ■ Blinking: Computer is in the computer are fully charged.
Compaq Presario V5000 Notebook PC - Maintenance and Service Guide
Page 19
... key Displays a shortcut menu for items beneath the pointer. caps lock key Enables caps lock and turns on the num lock light. num lock key Enables numeric lock, turns on the embedded numeric keypad, and turns on the caps lock light. Windows logo key Displays the Microsoft Windows Start menu. Numeric keypad keys...
Compaq Presario V5000 Notebook PC - Maintenance and Service Guide
Page 21
...Function caps lock light On: Caps lock is enabled. Power button When the computer is ■ Off, press to exit hibernation. Wireless button Turns the wireless functionality on the computer. ■ On, press to enter hibernation. ■ In standby, briefly press to exit standby. ■...; In hibernation, briefly press to turn off , but does not create a wireless connection. ✎ To establish a wireless connection, a wireless network must already be used, press and hold...
Compaq Presario V5000 Notebook PC - Maintenance and Service Guide
Page 26
...Digital media card ■ Display ■ ExpressCard ■ Hard drive ■ Keyboard ■ Memory module ■ Mini Card devices ■ PC Card ■ TouchPad Ä CAUTION: To properly ventilate the computer, allow at least a 7.6-cm (3-inch) clearance on automatically when high temperature... conditions exist. Refer to Chapter 3, "Illustratdocking deviceed Parts Catalog," to turn on the left side of the computer. 1-20 Maintenance and Service Guide These conditions are affected by a temperature sensor and ...
Compaq Presario V5000 Notebook PC - Maintenance and Service Guide
Page 28
... To view navigation information, press f1. 2. Your preferences are accessed from the File, Security, Tools, and Advanced menus. 1. Open Computer Setup by turning on the screen. ❏ To exit and save all settings in Computer Setup to select File > Save changes and exit, and then follow the...arrow keys to select File > Ignore changes and exit, and then follow the instructions on or restarting the computer. Open Computer Setup by turning on the screen. Computer Setup Defaults To restore all the settings you have entered, use the arrow keys to select File > Restore defaults...
Compaq Presario V5000 Notebook PC - Maintenance and Service Guide
Page 30
... (not restarting) the computer. change , or delete an HP Administrator password. Enable/disable DriveLock; Enable NIC for smart cards. ✎ This feature is supported by turning on authentication credential ✎ Embedded Security settings are accessible only if the computer is equipped with an embedded security chip. Enable/Disable devices in MultiBoot...
Compaq Presario V5000 Notebook PC - Maintenance and Service Guide
Page 49
N Undock N Go to "Flowchart 2.16-No Audio, Part 2." Y Go to Internal "Flowchart audio? 2.16-No Audio, Part 2." N Y Audio? Test replacement docking device with new computer. Go to "Flowchart 2.17-Nonfunctioning Device." Done Maintenance and Service Guide 2-23 N Y Computer in docking device (if applicable)? Done externally. Y Turn up audio internally or Audio? Troubleshooting Flowchart 2.15-No Audio, Part 1 No audio.
Compaq Presario V5000 Notebook PC - Maintenance and Service Guide
Page 85
... the drive and ensure that the optical drive tray is closed. ■ Before handling a drive, ensure that a diskette or disc is off or in hibernation, turn the computer on surfaces covered with care. While handling a drive, avoid touching the connector. ■ Handle drives on , and then shut it in a static-proof...
Compaq Presario V5000 Notebook PC - Maintenance and Service Guide
Page 88
... a grounded system. To provide proper ground, wear a strap snugly against the skin at static-free workstations. ■ Avoid contact with pins, leads, or circuitry. ■ Turn off power and input signals before inserting or removing connectors or test equipment. 4.7 Grounding Equipment and Methods Grounding equipment must directly contact dissipative surfaces, use...
Compaq Presario V5000 Notebook PC - Maintenance and Service Guide
Page 95
Removal and Replacement Procedures 5.3 Preparing the Computer for Disassembly Before you are unsure whether the computer is off or in hibernation, turn the computer on, and then shut it down the computer. Disconnect the power cord. Disconnect all external devices connected to the computer. 3. Battery Pack Spare Part Number Information 12-cell, 8.8-Amp hour 6-cell, 4.0-Amp hour 407835-001 407834-001 Maintenance and Service Guide 5-5 Shut down through the operating system. 2. If you begin any removal or installation procedures: 1.
Compaq Presario V5000 Notebook PC - Maintenance and Service Guide
Page 96
b. Remove the battery pack by following these steps: a. Lift the front edge of the battery pack 2 and swing it back to install the battery pack. 5-6 Maintenance and Service Guide Turn the computer upside down with the front toward you. Removing the Battery Pack Reverse the above procedure to remove it. Slide the battery pack release latch 1 to the left. (The battery pack disengages from the computer.) c. Removal and Replacement Procedures 4.
Compaq Presario V5000 Notebook PC - Maintenance and Service Guide
Page 112
Turn the computer display-side up until the switch cover 2 disengages from the computer. 6. Open the computer as far as possible. 5. Remove the switch cover. Removing the Switch Cover Reverse the above procedure to install the switch cover. 5-22 Maintenance and Service Guide Insert a flat-bladed tool into the switch cover notches behind the f1, f5, f11, and insert keys 1 and lift up with the front toward you. 4. Removal and Replacement Procedures 3.
Compaq Presario V5000 Notebook PC - Maintenance and Service Guide
Page 132
Removal and Replacement Procedures 4. Turn the computer upside down with the front toward you. 5. Remove the eleven Phillips PM2.5×13.0 screws that secure the base enclosure to the computer. Removing the Base Enclosure Screws, Part 2 5-42 Maintenance and Service Guide