
ZR Instruction Manual
Page 4
... Important Safety Instructions 3 Audio Recording 44 Thank you for Choosing a Canon ......... 6 Setting the Self-Timer 46 Introducing the ZR 7 Mastering the Basics ~ When Making Manual Adjustments ...~ Adjusting Exposure Manually 47 Adjusting Focus Manually 49 Powering Your Camcorder 8 Setting the White Balance 50 Loading a Cassette 11 Basic Recording 13 Zooming 16 Using the LCD Screen...
... Important Safety Instructions 3 Audio Recording 44 Thank you for Choosing a Canon ......... 6 Setting the Self-Timer 46 Introducing the ZR 7 Mastering the Basics ~ When Making Manual Adjustments ...~ Adjusting Exposure Manually 47 Adjusting Focus Manually 49 Powering Your Camcorder 8 Setting the White Balance 50 Loading a Cassette 11 Basic Recording 13 Zooming 16 Using the LCD Screen...
ZR Instruction Manual
Page 5
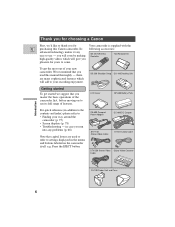
... addition to the contents and index) please refer to: • Finding your way around the camcorder (p. 75) • Screen displays (p. 78) • Troubleshooting - in case you read this Canon camcorder. Its following accessories: advanced technology makes it very easy to use its full range of your ...STV-150 Stereo Video Cable S-150 S-video Cable STV-250 Stereo Video Digital Video Cassette Cable FU-100 Finder Unit and Case 6 Press the EJECT button. Thank you for choosing a Canon First, we suggest that capital letters are many sophisticated features which will give you ...
... addition to the contents and index) please refer to: • Finding your way around the camcorder (p. 75) • Screen displays (p. 78) • Troubleshooting - in case you read this Canon camcorder. Its following accessories: advanced technology makes it very easy to use its full range of your ...STV-150 Stereo Video Cable S-150 S-video Cable STV-250 Stereo Video Digital Video Cassette Cable FU-100 Finder Unit and Case 6 Press the EJECT button. Thank you for choosing a Canon First, we suggest that capital letters are many sophisticated features which will give you ...
ZR Instruction Manual
Page 6
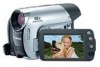
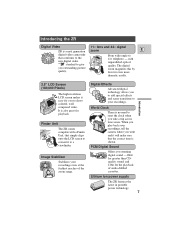
...you to shoot colorful, well composed video. Image Stabilizer Stabilizes your recordings even at the furthest reaches of audio-dubbed cassettes. Lithium ion power supply The ZR features the latest in portable power technology. 7 Introduction 2.5" LCD Screen (180,000 Pixels) The high resolution LCD...complete with unparalleled optical quality. When you play back your recordings. Introducing the ZR Digital Video 11× lens and 44× digital ZR is a next generation zoom E digital video camcorder that conforms to the new digital video Mini standard to give you stunning ...
...you to shoot colorful, well composed video. Image Stabilizer Stabilizes your recordings even at the furthest reaches of audio-dubbed cassettes. Lithium ion power supply The ZR features the latest in portable power technology. 7 Introduction 2.5" LCD Screen (180,000 Pixels) The high resolution LCD...complete with unparalleled optical quality. When you play back your recordings. Introducing the ZR Digital Video 11× lens and 44× digital ZR is a next generation zoom E digital video camcorder that conforms to the new digital video Mini standard to give you stunning ...
ZR Instruction Manual
Page 10
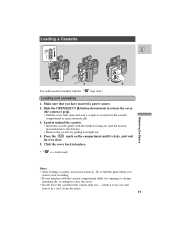
... after use record search (p. 34) to open automatically. 3. Press the PUSH mark on the compartment until it clicks, and wait for the cassette compartment to find the point where you have inserted a power source. 2. return it to its case and store it to start recording. &#... place. * Mini is opening or closing automatically, or attempt to the bottom). • Remove the cassette by pulling it is a trade mark. Load or unload the cassette. • Insert the cassette gently with the Mini logo only.* Loading and unloading 1. Mastering the Basics Notes: • After loading...
... after use record search (p. 34) to open automatically. 3. Press the PUSH mark on the compartment until it clicks, and wait for the cassette compartment to find the point where you have inserted a power source. 2. return it to its case and store it to start recording. &#... place. * Mini is opening or closing automatically, or attempt to the bottom). • Remove the cassette by pulling it is a trade mark. Load or unload the cassette. • Insert the cassette gently with the Mini logo only.* Loading and unloading 1. Mastering the Basics Notes: • After loading...
ZR Instruction Manual
Page 11
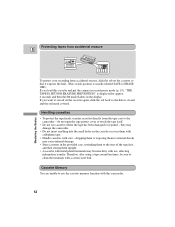
..., slide the tab back so the hole is closed, and the red mark covered. they may damage the camcorder. • Do not insert anything into the small holes on the cassette so that it exposes the hole. (This switch position is displayed for approx. 4 seconds and then the v mark ...Mastering the Basics To protect your recording from the tape case to use the cassette memory function with a cotton wool bud. Cassette Memory You are unable to the camcorder - If you want to clean the terminals with this cassette and put the camera in the provided case, rewinding them to the start ...
..., slide the tab back so the hole is closed, and the red mark covered. they may damage the camcorder. • Do not insert anything into the small holes on the cassette so that it exposes the hole. (This switch position is displayed for approx. 4 seconds and then the v mark ...Mastering the Basics To protect your recording from the tape case to use the cassette memory function with a cotton wool bud. Cassette Memory You are unable to the camcorder - If you want to clean the terminals with this cassette and put the camera in the provided case, rewinding them to the start ...
ZR Instruction Manual
Page 12
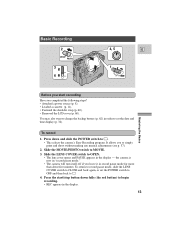
... and shoot without making any manual adjustments (see p. 37). 2. Press the start recording Have you completed the following steps? • Attached a power source (p. 8). • Loaded a cassette (p. 11). • Fastened the shoulder strap (p. 60). • Removed the LCD cover (p. 60). To record 1. Slide the LENS COVER switch to begin recording. • REC...
... and shoot without making any manual adjustments (see p. 37). 2. Press the start recording Have you completed the following steps? • Attached a power source (p. 8). • Loaded a cassette (p. 11). • Fastened the shoulder strap (p. 60). • Removed the LCD cover (p. 60). To record 1. Slide the LENS COVER switch to begin recording. • REC...
ZR Instruction Manual
Page 13
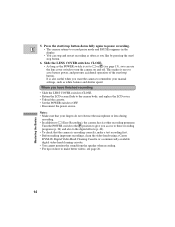
... lens cover switch to make a test recording first. • Before making important recordings, clean the video heads using a Canon DVM-CL Digital Video Head Cleaning Cassette or a commercially available digital video head cleaning cassette. • You cannot monitor the sound from the speaker when recording. • For tips on how to turn the...; Slide the LENS COVER switch to CLOSE. • Return the LCD screen flush to the camera body, and replace the LCD cover. • Unload the cassette. • Set the POWER switch to OFF. • Disconnect the power source.
... lens cover switch to make a test recording first. • Before making important recordings, clean the video heads using a Canon DVM-CL Digital Video Head Cleaning Cassette or a commercially available digital video head cleaning cassette. • You cannot monitor the sound from the speaker when recording. • For tips on how to turn the...; Slide the LENS COVER switch to CLOSE. • Return the LCD screen flush to the camera body, and replace the LCD cover. • Unload the cassette. • Set the POWER switch to OFF. • Disconnect the power source.
ZR Instruction Manual
Page 17
...also use the wireless controller. The recording itself is exhausted Self-Timer countdown Photo mode AF/AE mark This is a high precision product. No Cassette is loaded Exposure Adjustment Manual focus AF OFF 18 REC REC PAUSE EJECT STOP The tape has reached the end Condensation warning The battery pack... To cancel mirror mode, simply bring the LCD panel back down, away from the vertical. About the LCD Screen E The LCD screen built into this camcorder is not a malfunction of light (red, blue or green) may appear constantly on the tape. (Effective dots: more than 99.99%) Allowing the ...
...also use the wireless controller. The recording itself is exhausted Self-Timer countdown Photo mode AF/AE mark This is a high precision product. No Cassette is loaded Exposure Adjustment Manual focus AF OFF 18 REC REC PAUSE EJECT STOP The tape has reached the end Condensation warning The battery pack... To cancel mirror mode, simply bring the LCD panel back down, away from the vertical. About the LCD Screen E The LCD screen built into this camcorder is not a malfunction of light (red, blue or green) may appear constantly on the tape. (Effective dots: more than 99.99%) Allowing the ...
ZR Instruction Manual
Page 18
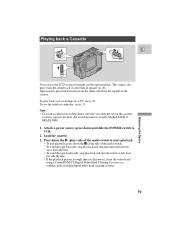
... that it exposes the hole (the switch position is rough (mosaic-like noise), clean the video heads using a Canon DVM-CL Digital Video Head Cleaning Cassette or a commercially available digital video head cleaning cassette. 19 Attach a power source, press down the 3 (stop) side of the multi-switch. • To wind the tape... top left of the multi-switch to start playback. • To end playback, press down and slide the POWER switch to VCR. 2. Playing back a Cassette FOCUS EXP E OFF VCR POWER Mastering the Basics OPEN CLOSE You can use the wireless controller, see p. 22. Load the...
... that it exposes the hole (the switch position is rough (mosaic-like noise), clean the video heads using a Canon DVM-CL Digital Video Head Cleaning Cassette or a commercially available digital video head cleaning cassette. 19 Attach a power source, press down the 3 (stop) side of the multi-switch. • To wind the tape... top left of the multi-switch to start playback. • To end playback, press down and slide the POWER switch to VCR. 2. Playing back a Cassette FOCUS EXP E OFF VCR POWER Mastering the Basics OPEN CLOSE You can use the wireless controller, see p. 22. Load the...
ZR Instruction Manual
Page 24
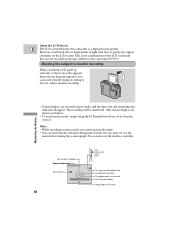
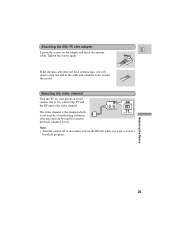
... TO TV FROM ANT The video channel is the channel which is not used by a broadcasting station in your area and can be used for cassette playback (channel 3 or 4). 4CH 3CH Note: • Turn the camera off or disconnect it from the RF unit when you will need to watch a broadcast...
... TO TV FROM ANT The video channel is the channel which is not used by a broadcasting station in your area and can be used for cassette playback (channel 3 or 4). 4CH 3CH Note: • Turn the camera off or disconnect it from the RF unit when you will need to watch a broadcast...
ZR Instruction Manual
Page 32
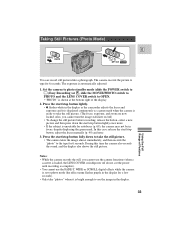
... you cannot turn the image stabilizer on /off do not cut the power until recording is complete). • You cannot use the camera functions (when a cassette is loaded, the LENS COVER switch/power off ) • To change the still picture before recording: release the button, select a new picture and then ...set to photo mode (the effect name flashes purple in the display for autofocus (p. 69), the camera may not be in the display as the camcorder adjusts the focus and exposure and it is bright enough to take "photos" where it is displayed continuously as a green mark when the camera ...
... you cannot turn the image stabilizer on /off do not cut the power until recording is complete). • You cannot use the camera functions (when a cassette is loaded, the LENS COVER switch/power off ) • To change the still picture before recording: release the button, select a new picture and then ...set to photo mode (the effect name flashes purple in the display for autofocus (p. 69), the camera may not be in the display as the camcorder adjusts the focus and exposure and it is bright enough to take "photos" where it is displayed continuously as a green mark when the camera ...

ZR Instruction Manual
Page 33
... can use record search to play the tape forwards or backwards to find the point where you want to add a new scene to a previously used cassette. Make sure the camera is in mirror mode (with the + mark). Note: • You cannot set to [ (Easy Recording), you will enter record search mode...
... can use record search to play the tape forwards or backwards to find the point where you want to add a new scene to a previously used cassette. Make sure the camera is in mirror mode (with the + mark). Note: • You cannot set to [ (Easy Recording), you will enter record search mode...
ZR Instruction Manual
Page 51
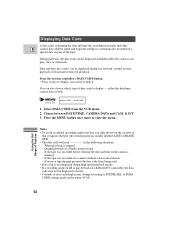
...speed and exposure settings) is stopped. - Select DATA CODE from being read "- - -" in the following situations: - When playback is automatically recorded on ZR is usually labelled SAVE or ERASE OFF). • The data code will read . • Data code is not displayed during fast forward, rewind, reverse...Press the MENU button once more to hide it exposes the hole (the switch position is played back on the cassette so that you slide the tab on a different DV camcorder, the data code may change according to close the menu. Press the wireless controller's DATA CODE button. •...
...speed and exposure settings) is stopped. - Select DATA CODE from being read "- - -" in the following situations: - When playback is automatically recorded on ZR is usually labelled SAVE or ERASE OFF). • The data code will read . • Data code is not displayed during fast forward, rewind, reverse...Press the MENU button once more to hide it exposes the hole (the switch position is played back on the cassette so that you slide the tab on a different DV camcorder, the data code may change according to close the menu. Press the wireless controller's DATA CODE button. •...

ZR Instruction Manual
Page 56
Load a blank cassette, and put the VCR in order to another VCR, you monitor the picture on the camcorder. Note: • The quality of the edited tape will be slightly lower than that of the section you want to copy. 2. Preparations 1. ... you can edit your own video productions. Basic Recording 1. or combine different shots to create your recordings in record pause mode. • See your recorded cassette slightly ahead of Features By connecting the camera to remove unwanted scenes - Editing to LINE. S-150 S-video Cable STV-150 Stereo Video Cable V L R...
Load a blank cassette, and put the VCR in order to another VCR, you monitor the picture on the camcorder. Note: • The quality of the edited tape will be slightly lower than that of the section you want to copy. 2. Preparations 1. ... you can edit your own video productions. Basic Recording 1. or combine different shots to create your recordings in record pause mode. • See your recorded cassette slightly ahead of Features By connecting the camera to remove unwanted scenes - Editing to LINE. S-150 S-video Cable STV-150 Stereo Video Cable V L R...
ZR Instruction Manual
Page 58
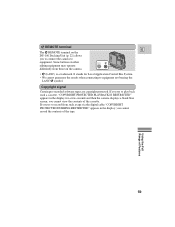
If you cannot view the contents of the cassette. you try to equipment. Using the Full Range of the tape. Copyright signal Certain pre-recorded software tapes are copyright protected. It stands for a few ... PROTECTED DUBBING RESTRICTED" appears in the display for Local Application Control Bus System. • We cannot guarantee the results when connecting to play back such a cassette, "COPYRIGHT PROTECTED PLAYBACK IS RESTRICTED" appears in the display; you to connect the camera to record from those on the DU-100 Docking Unit (p. 22...
If you cannot view the contents of the cassette. you try to equipment. Using the Full Range of the tape. Copyright signal Certain pre-recorded software tapes are copyright protected. It stands for a few ... PROTECTED DUBBING RESTRICTED" appears in the display for Local Application Control Bus System. • We cannot guarantee the results when connecting to play back such a cassette, "COPYRIGHT PROTECTED PLAYBACK IS RESTRICTED" appears in the display; you to connect the camera to record from those on the DU-100 Docking Unit (p. 22...

ZR Instruction Manual
Page 63
... interference, or permanently damage the camera. Avoid magnetic or electric fields. • Do not use the finder unit or LCD screen as battery packs and cassettes. 64 Additional Information Protect the lens. • Sand and dust can cause damage. • Do not use the camera close to TV transmitters, portable communication...
... interference, or permanently damage the camera. Avoid magnetic or electric fields. • Do not use the finder unit or LCD screen as battery packs and cassettes. 64 Additional Information Protect the lens. • Sand and dust can cause damage. • Do not use the camera close to TV transmitters, portable communication...
ZR Instruction Manual
Page 64
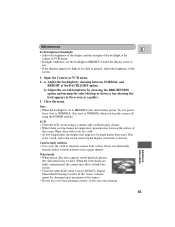
Camera body and lens • Use a soft, dry cloth to be dirty. Never use a wet-type cleaning cassette, as this can cause damage. 65 Additional Information a) Adjust the backlight by choosing the BRIGHTNESS option and turning the select dial up the display will .... (It is reset to NORMAL when you turn the camera off using the POWER switch.) LCD • Clean the LCD screen using Canon's DVM-CL Digital Video Head Cleaning Cassette. Maintenance E LCD (brightness/backlight) • Adjust the brightness of the display and the strength of the backlight at the BACKLIGHT option. Wipe...
Camera body and lens • Use a soft, dry cloth to be dirty. Never use a wet-type cleaning cassette, as this can cause damage. 65 Additional Information a) Adjust the backlight by choosing the BRIGHTNESS option and turning the select dial up the display will .... (It is reset to NORMAL when you turn the camera off using the POWER switch.) LCD • Clean the LCD screen using Canon's DVM-CL Digital Video Head Cleaning Cassette. Maintenance E LCD (brightness/backlight) • Adjust the brightness of the display and the strength of the backlight at the BACKLIGHT option. Wipe...

ZR Instruction Manual
Page 66
... is detected. Wait until the condensation evaporates. Using the camera while condensation is displayed for 10 to 15 minutes. • You cannot load a cassette when condensation is left in the display. Then, the power indicator flashes and the h mark flashes in a humid room When the camera is taken... warning stops flashing, wait at least another hour before you take it out of the bag. If there is a cassette in the camera, it stops automatically and "REMOVE THE CASSETTE" is displayed for approximately 4 seconds and then EJECT is shown in the display. • The camera may not ...
... is detected. Wait until the condensation evaporates. Using the camera while condensation is displayed for 10 to 15 minutes. • You cannot load a cassette when condensation is left in the display. Then, the power indicator flashes and the h mark flashes in a humid room When the camera is taken... warning stops flashing, wait at least another hour before you take it out of the bag. If there is a cassette in the camera, it stops automatically and "REMOVE THE CASSETTE" is displayed for approximately 4 seconds and then EJECT is shown in the display. • The camera may not ...
ZR Instruction Manual
Page 67
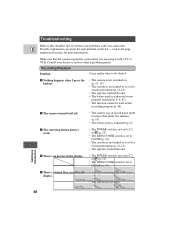
Consult your camcorder. Additional Information ? F32 1/2000 12:00:00 AM • The tape heads are given for each problem on (p. 13, 19). • The cassette is not loaded or is set for erasure prevention (p. 11-12). • The tape has reached the end. • The battery pack... The tape has reached the end. The start/stop button doesn't work. • The POWER switch is not set to CLOSE (p. 13). • The cassette is not loaded or is exhausted or not properly attached (p. 8, 9, 61). • The function cannot be used in brackets for more information. E Possible ...
Consult your camcorder. Additional Information ? F32 1/2000 12:00:00 AM • The tape heads are given for each problem on (p. 13, 19). • The cassette is not loaded or is set for erasure prevention (p. 11-12). • The tape has reached the end. • The battery pack... The tape has reached the end. The start/stop button doesn't work. • The POWER switch is not set to CLOSE (p. 13). • The cassette is not loaded or is exhausted or not properly attached (p. 8, 9, 61). • The function cannot be used in brackets for more information. E Possible ...
ZR Instruction Manual
Page 69
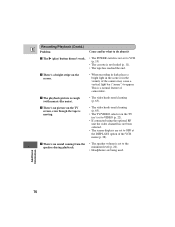
... channel has not been selected. • The screen displays are being used. The playback picture is a normal feature of camcorders. ? Recording/Playback (Contd.) E Problem Cause and/or what to VCR (p. 19) • The cassette is moving. • The video heads need cleaning (p. 65). ? There's no sound coming from the • The speaker...
... channel has not been selected. • The screen displays are being used. The playback picture is a normal feature of camcorders. ? Recording/Playback (Contd.) E Problem Cause and/or what to VCR (p. 19) • The cassette is moving. • The video heads need cleaning (p. 65). ? There's no sound coming from the • The speaker...


