User Manual
Page 1
ENGLISH Camera User Guide • Make sure you read this guide, including the Safety Precautions before using the camera. • Reading this guide will help you learn to use the camera properly. • Store this guide safely so that you can use it in the future.
ENGLISH Camera User Guide • Make sure you read this guide, including the Safety Precautions before using the camera. • Reading this guide will help you learn to use the camera properly. • Store this guide safely so that you can use it in the future.
User Manual
Page 2
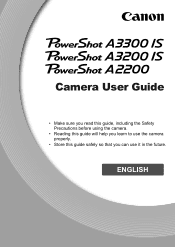
...Contents Check if the following PDF manuals are included in the Readme folder of the CD-ROM: When the software is installed on your camera package. Camera Battery Pack NB-8L (with Terminal Cover) Battery Charger CB-2LA/CB-2LAE Interface Cable IFC-400PCU A3300 IS A3200 IS AV Cable AVC...-DC400 Wrist Strap WS-800 A2200 AV Cable AVC-DC300 Getting Started DIGITAL CAMERA Solution Disk Warranty Card Using the PDF Manuals The following items are included in your computer, the PDF manuals will be...
...Contents Check if the following PDF manuals are included in the Readme folder of the CD-ROM: When the software is installed on your camera package. Camera Battery Pack NB-8L (with Terminal Cover) Battery Charger CB-2LA/CB-2LAE Interface Cable IFC-400PCU A3300 IS A3200 IS AV Cable AVC...-DC400 Wrist Strap WS-800 A2200 AV Cable AVC-DC300 Getting Started DIGITAL CAMERA Solution Disk Warranty Card Using the PDF Manuals The following items are included in your computer, the PDF manuals will be...

User Manual
Page 3
For Canon Customer Support contacts, please see the customer support list supplied with this camera are not liable for any consequential damages arising from any malfunction of a camera or accessory, including memory cards, that results in the failure of an image to be recorded or to be recorded in ... take care when operating the camera for personal use . Please be covered with a warranty claim to make sure the images were recorded correctly. Read This First Test Shots and Disclaimer Take some initial test shots and play them back to a Canon Customer Support Help Desk. Do...
For Canon Customer Support contacts, please see the customer support list supplied with this camera are not liable for any consequential damages arising from any malfunction of a camera or accessory, including memory cards, that results in the failure of an image to be recorded or to be recorded in ... take care when operating the camera for personal use . Please be covered with a warranty claim to make sure the images were recorded correctly. Read This First Test Shots and Disclaimer Take some initial test shots and play them back to a Canon Customer Support Help Desk. Do...
User Manual
Page 4
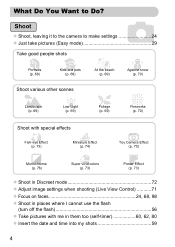
What Do You Want to Do? 4 Shoot z Shoot, leaving it to the camera to make settings 24 z Just take pictures (Easy mode 29 Take good people shots IV Portraits Kids and pets (p. 68) (p. 69) w At the beach (p. 69) P... Shoot various other scenes J Landscape Low Light (p. 69) (p. 69) O Foliage (p. 69) t Fireworks (p. 70) Shoot with special effects Fish-eye Effect (p. 73) Miniature Effect (p. 74) Toy Camera Effect (p. 75) Monochrome (p. 76) Super vivid colors (p. 73) Poster Effect (p. 73) z Shoot in Discreet mode 72 z Adjust image settings when shooting (Live View Control 71...
What Do You Want to Do? 4 Shoot z Shoot, leaving it to the camera to make settings 24 z Just take pictures (Easy mode 29 Take good people shots IV Portraits Kids and pets (p. 68) (p. 69) w At the beach (p. 69) P... Shoot various other scenes J Landscape Low Light (p. 69) (p. 69) O Foliage (p. 69) t Fireworks (p. 70) Shoot with special effects Fish-eye Effect (p. 73) Miniature Effect (p. 74) Toy Camera Effect (p. 75) Monochrome (p. 76) Super vivid colors (p. 73) Poster Effect (p. 73) z Shoot in Discreet mode 72 z Adjust image settings when shooting (Live View Control 71...
User Manual
Page 5
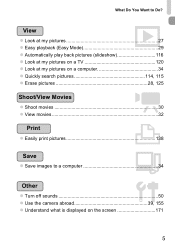
What Do You Want to Do? 1 View z Look at my pictures 27 z Easy playback (Easy Mode 29 z Automatically play back pictures (slideshow 116 z Look at my pictures on a TV 120 z Look at my pictures on a computer 34 z Quickly search pictures 114, 115 z Erase pictures 28, 125 E Shoot/View Movies z Shoot movies 30 z View movies 32 2 Print z Easily print pictures 138 Save z Save images to a computer 34 3 Other z Turn off sounds 50 z Use the camera abroad 39, 155 z Understand what is displayed on the screen 171 5
What Do You Want to Do? 1 View z Look at my pictures 27 z Easy playback (Easy Mode 29 z Automatically play back pictures (slideshow 116 z Look at my pictures on a TV 120 z Look at my pictures on a computer 34 z Quickly search pictures 114, 115 z Erase pictures 28, 125 E Shoot/View Movies z Shoot movies 30 z View movies 32 2 Print z Easily print pictures 138 Save z Save images to a computer 34 3 Other z Turn off sounds 50 z Use the camera abroad 39, 155 z Understand what is displayed on the screen 171 5
User Manual
Page 6
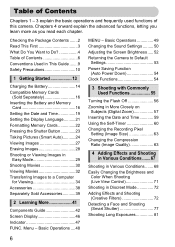
... Basic Operations ....48 MENU - Basic Operations 49 Changing the Sound Settings ......... 50 Adjusting the Screen Brightness ..... 52 Returning the Camera to Default Settings 53 Power Saving Function (Auto Power Down 54 Clock Functions 54 3 Shooting with Commonly Used Functions 55 Turning ...Shooting (Live View Control 71 Shooting in Easy Mode 29 Shooting Movies 30 Viewing Movies 32 Transferring Images to Do 4 Table of this camera. Table of Contents Chapters 1 - 3 explain the basic operations and frequently used functions of Contents 6 Conventions Used in This Guide ...
... Basic Operations ....48 MENU - Basic Operations 49 Changing the Sound Settings ......... 50 Adjusting the Screen Brightness ..... 52 Returning the Camera to Default Settings 53 Power Saving Function (Auto Power Down 54 Clock Functions 54 3 Shooting with Commonly Used Functions 55 Turning ...Shooting (Live View Control 71 Shooting in Easy Mode 29 Shooting Movies 30 Viewing Movies 32 Transferring Images to Do 4 Table of this camera. Table of Contents Chapters 1 - 3 explain the basic operations and frequently used functions of Contents 6 Conventions Used in This Guide ...
User Manual
Page 8
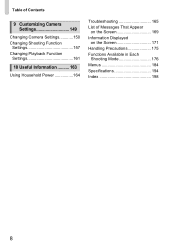
Table of Contents 9 Customizing Camera Settings 149 Changing Camera Settings............150 Changing Shooting Function Settings 157 Changing Playback Function Settings 161 10 Useful Information .......... 163 Using Household Power 164 Troubleshooting 165 List of Messages That Appear on the Screen 169 Information Displayed on the Screen 171 Handling Precautions 175 Functions Available in Each Shooting Mode 176 Menus 184 Specifications 194 Index 198 8
Table of Contents 9 Customizing Camera Settings 149 Changing Camera Settings............150 Changing Shooting Function Settings 157 Changing Playback Function Settings 161 10 Useful Information .......... 163 Using Household Power 164 Troubleshooting 165 List of Messages That Appear on the Screen 169 Information Displayed on the Screen 171 Handling Precautions 175 Functions Available in Each Shooting Mode 176 Menus 184 Specifications 194 Index 198 8
User Manual
Page 9
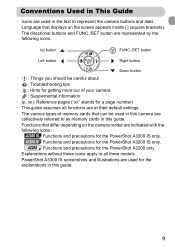
... This Guide • Icons are used in the text to represent the camera buttons and dials. • Language that can be careful about • : Troubleshooting tips • : Hints for the PowerShot A3300 IS only. A3200 IS Functions and precautions for the PowerShot A2200 only. xx): Reference pages ("xx" stands for a page number) • This...
... This Guide • Icons are used in the text to represent the camera buttons and dials. • Language that can be careful about • : Troubleshooting tips • : Hints for the PowerShot A3300 IS only. A3200 IS Functions and precautions for the PowerShot A2200 only. xx): Reference pages ("xx" stands for a page number) • This...
User Manual
Page 10
In particular, remain at least one meter (39 inches) away from the outlet and consult your camera distributor or a Canon Customer Support Help Desk. • Use only the recommended battery. • Do not place the battery near or in direct flame. • Unplug the power... intense light produced by the flash could cause injury and damage the surroundings. If liquids or foreign objects come into contact with the camera interior, immediately turn the camera power off and remove the battery. Exposure to clean the equipment. • Do not let the product come into contact with water (e.g....
In particular, remain at least one meter (39 inches) away from the outlet and consult your camera distributor or a Canon Customer Support Help Desk. • Use only the recommended battery. • Do not place the battery near or in direct flame. • Unplug the power... intense light produced by the flash could cause injury and damage the surroundings. If liquids or foreign objects come into contact with the camera interior, immediately turn the camera power off and remove the battery. Exposure to clean the equipment. • Do not let the product come into contact with water (e.g....
User Manual
Page 11
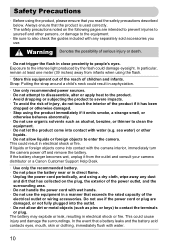
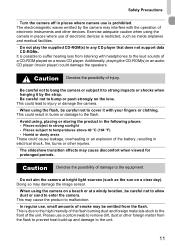
...unit. 11 Places subject to strong sunlight - Caution Denotes the possibility of injury. • Be careful not to bang the camera or subject it to cover it by the camera may interfere with your fingers or clothing. Caution Denotes the possibility of damage to the equipment. • Do not aim the... camera at bright light sources (such as inside airplanes and medical facilities. • Do not play the supplied CD-ROM(s) in electrical shock, fire, ...
...unit. 11 Places subject to strong sunlight - Caution Denotes the possibility of injury. • Be careful not to bang the camera or subject it to cover it by the camera may interfere with your fingers or clothing. Caution Denotes the possibility of damage to the equipment. • Do not aim the... camera at bright light sources (such as inside airplanes and medical facilities. • Do not play the supplied CD-ROM(s) in electrical shock, fire, ...

User Manual
Page 12
... explosion, resulting in fire. • Do not place the battery near pets. Doing so may cause malfunctions or damage the screen. • When putting the camera in your pocket. Doing so may occur. • Before you discard the battery, cover the terminals with tape or other metal materials may lead to...when you are not using it. • Do not place anything, such as cloth on top of time may cause it is left inside the camera, damage caused by leakage may cause malfunctions or damage the screen. 12 Safety Precautions • Remove and store the battery when you are not using...
... explosion, resulting in fire. • Do not place the battery near pets. Doing so may cause malfunctions or damage the screen. • When putting the camera in your pocket. Doing so may occur. • Before you discard the battery, cover the terminals with tape or other metal materials may lead to...when you are not using it. • Do not place anything, such as cloth on top of time may cause it is left inside the camera, damage caused by leakage may cause malfunctions or damage the screen. 12 Safety Precautions • Remove and store the battery when you are not using...

User Manual
Page 13
... explains how to shoot and view images in A mode, and then how to view and erase the images you take. Attaching the Strap/Holding the Camera • Attach the included strap and wrap it around your fingers do not block the flash. 1 Getting Started This chapter explains preparations before shooting, ...how to shoot in Easy mode, how to shoot and view movies, and how to transfer images to avoid dropping the camera during use. • Keep your arms tight against your body while holding the camera firmly by the sides when shooting. Be sure that your wrist to a computer.
... explains how to shoot and view images in A mode, and then how to view and erase the images you take. Attaching the Strap/Holding the Camera • Attach the included strap and wrap it around your fingers do not block the flash. 1 Getting Started This chapter explains preparations before shooting, ...how to shoot in Easy mode, how to shoot and view movies, and how to transfer images to avoid dropping the camera during use. • Keep your arms tight against your body while holding the camera firmly by the sides when shooting. Be sure that your wrist to a computer.
User Manual
Page 15
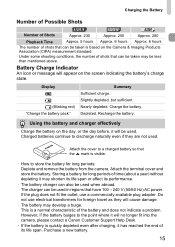
...the battery and charger effectively • Charge the battery on the day, or the day before, it will no longer fit into the camera, please contact a Canon Customer Support Help Desk. • If the battery is quickly depleted even after charging, it has reached the end of its performance. ...Indicator An icon or message will cause damage. • The battery may develop a bulge. Charging the Battery Number of Possible Shots A3300 IS A3200 IS A2200 Number of Shots Approx. 230 Approx. 250 Approx. 280 Playback Time Approx. 5 hours Approx. 6 hours Approx. 6 hours • The number ...
...the battery and charger effectively • Charge the battery on the day, or the day before, it will no longer fit into the camera, please contact a Canon Customer Support Help Desk. • If the battery is quickly depleted even after charging, it has reached the end of its performance. ...Indicator An icon or message will cause damage. • The battery may develop a bulge. Charging the Battery Number of Possible Shots A3300 IS A3200 IS A2200 Number of Shots Approx. 230 Approx. 250 Approx. 280 Playback Time Approx. 5 hours Approx. 6 hours Approx. 6 hours • The number ...

User Manual
Page 17
... oriented correctly. z Be sure the memory card is in the wrong direction could damage the camera. What if [Memory card locked] appears on the screen and you slide it until it clicks into place with a click. A2200 Terminal Label Close the cover. A3300 IS A3200 IS Inserting the Battery and Memory Card...
... oriented correctly. z Be sure the memory card is in the wrong direction could damage the camera. What if [Memory card locked] appears on the screen and you slide it until it clicks into place with a click. A2200 Terminal Label Close the cover. A3300 IS A3200 IS Inserting the Battery and Memory Card...
User Manual
Page 18
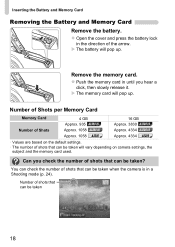
... pop up . z Push the memory card in the direction of the arrow. You can check the number of shots that can be taken when the camera is in a Shooting mode (p. 24). Number of shots that can be taken 18 Can you hear a click, then slowly release it. Number of Shots...Number of Shots Approx. 1058 A3200 IS Approx. 4334 A3200 IS Approx. 1058 A2200 Approx. 4334 A2200 • Values are based on the default settings. • The number of shots that can be taken will vary depending on camera settings, the subject and the memory card used. Inserting the Battery and Memory ...
... pop up . z Push the memory card in the direction of the arrow. You can check the number of shots that can be taken when the camera is in a Shooting mode (p. 24). Number of shots that can be taken 18 Can you hear a click, then slowly release it. Number of Shots...Number of Shots Approx. 1058 A3200 IS Approx. 4334 A3200 IS Approx. 1058 A2200 Approx. 4334 A2200 • Values are based on the default settings. • The number of shots that can be taken will vary depending on camera settings, the subject and the memory card used. Inserting the Battery and Memory ...
User Manual
Page 19
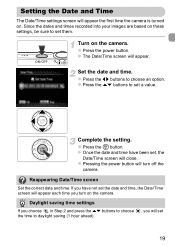
... appear each time you will set them. Setting the Date and Time The Date/Time settings screen will appear the first time the camera is turned on the camera. Turn on . X Once the date and time have not set , the Date/Time screen will close. Reappearing Date/Time screen Set the correct... and time. z Press the qr buttons to set a value. Complete the setting. Since the dates and times recorded into your images are based on the camera. Daylight saving time settings If you choose in Step 2 and press the op buttons to choose the time to set 19 z Press the m button. z Press...
... appear each time you will set them. Setting the Date and Time The Date/Time settings screen will appear the first time the camera is turned on the camera. Turn on . X Once the date and time have not set , the Date/Time screen will close. Reappearing Date/Time screen Set the correct... and time. z Press the qr buttons to set a value. Complete the setting. Since the dates and times recorded into your images are based on the camera. Daylight saving time settings If you choose in Step 2 and press the op buttons to choose the time to set 19 z Press the m button. z Press...

User Manual
Page 20
Change the date and time. z Follow Steps 2 and 3 on . Date/Time battery • The camera has a built-in date/time battery (backup battery) that allows the date/time settings to be charged in about three weeks after the battery pack ... p. 19 to close the menu. Setting the Date and Time Changing the Date and Time You can be retained for about 4 hours even if the camera is not turned on. • If the date/time battery is depleted, the Date/Time screen will appear when you turn the...
Change the date and time. z Follow Steps 2 and 3 on . Date/Time battery • The camera has a built-in date/time battery (backup battery) that allows the date/time settings to be charged in about three weeks after the battery pack ... p. 19 to close the menu. Setting the Date and Time Changing the Date and Time You can be retained for about 4 hours even if the camera is not turned on. • If the date/time battery is depleted, the Date/Time screen will appear when you turn the...

User Manual
Page 22
... before formatting the memory card. Format the memory card. z Press the op buttons to choose the 3 tab. As you should format the card with this camera.
... before formatting the memory card. Format the memory card. z Press the op buttons to choose the 3 tab. As you should format the card with this camera.
User Manual
Page 23
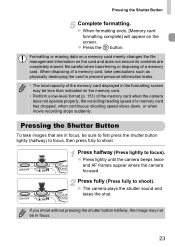
... The total capacity of the memory card displayed in focus. 23 z Press the m button. z Press lightly until the camera beeps twice and AF frames appear where the camera focused. Press fully (Press fully to focus). Formatting or erasing data on a memory card merely changes the file management information... on the screen. X The camera plays the shutter sound and takes the shot. Pressing the Shutter Button To take precautions such as physically destroying the card to shoot....
... The total capacity of the memory card displayed in focus. 23 z Press the m button. z Press lightly until the camera beeps twice and AF frames appear where the camera focused. Press fully (Press fully to focus). Formatting or erasing data on a memory card merely changes the file management information... on the screen. X The camera plays the shutter sound and takes the shot. Pressing the Shutter Button To take precautions such as physically destroying the card to shoot....
User Manual
Page 24
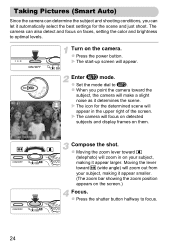
... toward i (telephoto) will make a slight noise as it appear larger. Taking Pictures (Smart Auto) Since the camera can determine the subject and shooting conditions, you point the camera toward the subject, the camera will zoom in the upper right of the screen. X The start-up screen will appear in on the... screen.) Focus. z Press the power button. X The icon for the scene and just shoot. The camera can let it appear smaller. (The zoom bar showing the zoom position appears on your subject, making it determines the scene. X The...
... toward i (telephoto) will make a slight noise as it appear larger. Taking Pictures (Smart Auto) Since the camera can determine the subject and shooting conditions, you point the camera toward the subject, the camera will zoom in the upper right of the screen. X The start-up screen will appear in on the... screen.) Focus. z Press the power button. X The icon for the scene and just shoot. The camera can let it appear smaller. (The zoom bar showing the zoom position appears on your subject, making it determines the scene. X The...


