User Manual
Page 53
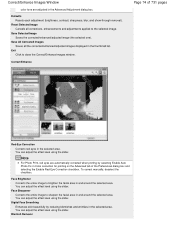
... to all images checkbox. Important The corrections will be lost if you like, click Save Selected Image. You can compare and check the result. Click Reset Selected Image to apply corrections based on Note Click (Compare) to all the selected images at once, select the Apply to display the images before...
... to all images checkbox. Important The corrections will be lost if you like, click Save Selected Image. You can compare and check the result. Click Reset Selected Image to apply corrections based on Note Click (Compare) to all the selected images at once, select the Apply to display the images before...
User Manual
Page 55
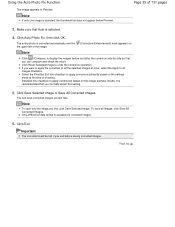
... Auto Correction 3. Note Effect levels can compare and check the result. Make sure that you want to apply the correction to all images checkbox. Click Reset Selected Image to undo the correction operation. Click Red-Eye Correction. 5.
... Auto Correction 3. Note Effect levels can compare and check the result. Make sure that you want to apply the correction to all images checkbox. Click Reset Selected Image to undo the correction operation. Click Red-Eye Correction. 5.
User Manual
Page 61
... the slider below Face Sharpener. Click OK. If you can be changed using the slider below Face Sharpener. Move the cursor over the image. Click Reset Selected Image to all images checkbox. Note Effect levels can compare and check the result. Drag to select the area you want to apply the...
... the slider below Face Sharpener. Click OK. If you can be changed using the slider below Face Sharpener. Move the cursor over the image. Click Reset Selected Image to all images checkbox. Note Effect levels can compare and check the result. Drag to select the area you want to apply the...
User Manual
Page 64
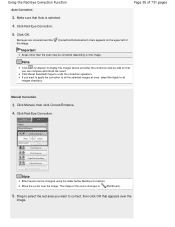
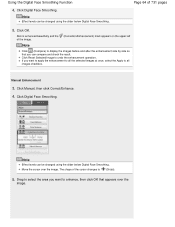
.... Skin is enhanced beautifully and the (Correction/Enhancement) mark appears on the upper left of 731 pages 5. Click OK. Page 64 of the image. Click Reset Selected Image to (Cross). 5. Click Digital Face Smoothing. Move the cursor over the image. Using the Digital Face Smoothing Function 4. The shape of the cursor...
.... Skin is enhanced beautifully and the (Correction/Enhancement) mark appears on the upper left of 731 pages 5. Click OK. Page 64 of the image. Click Reset Selected Image to (Cross). 5. Click Digital Face Smoothing. Move the cursor over the image. Using the Digital Face Smoothing Function 4. The shape of the cursor...
User Manual
Page 69
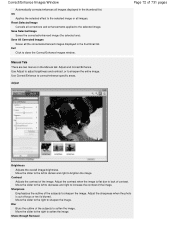
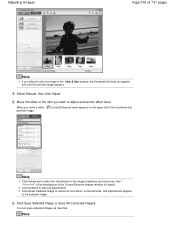
... Images Contrast Sharpness Blur Show-through Removal Page 69 of the Correct/Enhance Images window for adjusted images. 6. Click Advanced to make fine adjustments to reset all images, click Save All Corrected Images. Important The adjustments will be lost if you exit before and after the adjustment side by side so...
... Images Contrast Sharpness Blur Show-through Removal Page 69 of the Correct/Enhance Images window for adjusted images. 6. Click Advanced to make fine adjustments to reset all images, click Save All Corrected Images. Important The adjustments will be lost if you exit before and after the adjustment side by side so...
User Manual
Page 72
... Images window. Correct/Enhance Images Window Automatically corrects/enhances all images displayed in the thumbnail list. OK Applies the selected effect to the selected image. Reset Selected Image Cancels all corrections and enhancements applied to the selected image or all images. Move the slider to the left to decrease and right...
... Images window. Correct/Enhance Images Window Automatically corrects/enhances all images displayed in the thumbnail list. OK Applies the selected effect to the selected image. Reset Selected Image Cancels all corrections and enhancements applied to the selected image or all images. Move the slider to the left to decrease and right...
User Manual
Page 73
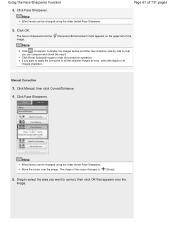
.... Move the Contrast slider to the left or right to correct the image completely by reducing the cast color and increasing the complementary color. Defaults Resets all three color pairs so that you can reproduce the natural colors of the image.
.... Move the Contrast slider to the left or right to correct the image completely by reducing the cast color and increasing the complementary color. Defaults Resets all three color pairs so that you can reproduce the natural colors of the image.
User Manual
Page 74
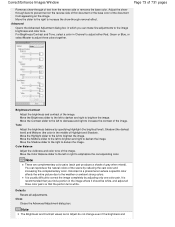
... correction for printing on the Advanced tab of 731 pages Red-Eye Correction Corrects red eyes in the selected area. Blemish Remover Defaults Resets each adjustment (brightness, contrast, sharpness, blur, and show-through removal). Exit Click to sharpen the facial area in the Advanced Adjustment... the selected image. You can adjust the effect level using the slider. You can adjust the effect level using the slider. Reset Selected Image Cancels all the corrected/enhanced/adjusted images displayed in the selected area. Correct/Enhance Page 74 of the Preferences dialog ...
... correction for printing on the Advanced tab of 731 pages Red-Eye Correction Corrects red eyes in the selected area. Blemish Remover Defaults Resets each adjustment (brightness, contrast, sharpness, blur, and show-through removal). Exit Click to sharpen the facial area in the Advanced Adjustment... the selected image. You can adjust the effect level using the slider. You can adjust the effect level using the slider. Reset Selected Image Cancels all the corrected/enhanced/adjusted images displayed in the selected area. Correct/Enhance Page 74 of the Preferences dialog ...
User Manual
Page 75
... Cancels the latest correction/enhancement. Exit Click to the specified area. The image before and after the correction/enhancement/adjustment is displayed on the right. Reset Selected Image Cancels all the corrected/enhanced/adjusted images displayed in Preview. (Compare) Displays the Compare Images window. You can compare the images before the...
... Cancels the latest correction/enhancement. Exit Click to the specified area. The image before and after the correction/enhancement/adjustment is displayed on the right. Reset Selected Image Cancels all the corrected/enhanced/adjusted images displayed in Preview. (Compare) Displays the Compare Images window. You can compare the images before the...
User Manual
Page 199
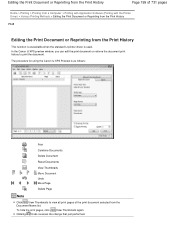
... XPS Preview is used. To hide the print pages, click View Thumbnails again. In the Canon IJ XPS preview window, you can edit the print document or retrieve the document print history to view all print pages of 731 pages Home > ... Document or Reprinting from the Print History This function is unavailable when the standard IJ printer driver is as follows: Print Combine Documents Delete Document Reset Documents View Thumbnails Move Document Undo Move Page Delete Page Note Click View Thumbnails to print the document. Clicking Undo reverses the change that just...
... XPS Preview is used. To hide the print pages, click View Thumbnails again. In the Canon IJ XPS preview window, you can edit the print document or retrieve the document print history to view all print pages of 731 pages Home > ... Document or Reprinting from the Print History This function is unavailable when the standard IJ printer driver is as follows: Print Combine Documents Delete Document Reset Documents View Thumbnails Move Document Undo Move Page Delete Page Note Click View Thumbnails to print the document. Clicking Undo reverses the change that just...
User Manual
Page 200
... the print documents to their original condition before the combining are deleted from the list and the combined document is added to be deleted. The Canon IJ XPS Preview will start and the print result will be moved. You can also click a blank area in the preview, on the Edit menu..., select Reset Documents from Documents. Changing the sequence of print documents or print pages To change the sequence of the print documents, go to the Document Name...
... the print documents to their original condition before the combining are deleted from the list and the combined document is added to be deleted. The Canon IJ XPS Preview will start and the print result will be moved. You can also click a blank area in the preview, on the Edit menu..., select Reset Documents from Documents. Changing the sequence of print documents or print pages To change the sequence of the print documents, go to the Document Name...
User Manual
Page 271
... to the paper loaded in the front tray between A4 and Letter When the Fit-to "20". To make 1 to copy. 1. Note Pressing the Stop/Reset button returns the number of copies is set to -Page copy function is copied with borders on the plain paper and without borders on the...
... to the paper loaded in the front tray between A4 and Letter When the Fit-to "20". To make 1 to copy. 1. Note Pressing the Stop/Reset button returns the number of copies is set to -Page copy function is copied with borders on the plain paper and without borders on the...
User Manual
Page 272
To make 10 to release the error. Press the Stop/Reset button to 19 copies The paper-out error will occur when all of the loaded paper runs out. To set the print quality to "Fast" (... selected for 2 or more seconds in the print quality "Standard". The LED flashes once. 2. The machine starts copying. Note To cancel copying, press the Stop/Reset button. Press and hold down the Color or Black button for the page size and media type. 1. Page top When the print quality is complete...
To make 10 to release the error. Press the Stop/Reset button to 19 copies The paper-out error will occur when all of the loaded paper runs out. To set the print quality to "Fast" (... selected for 2 or more seconds in the print quality "Standard". The LED flashes once. 2. The machine starts copying. Note To cancel copying, press the Stop/Reset button. Press and hold down the Color or Black button for the page size and media type. 1. Page top When the print quality is complete...

User Manual
Page 274
...Color button for color copying, or the Black button for 2 or more seconds in the print quality "Standard". Note To cancel copying, press the Stop/Reset button. To give priority to quality, press the Color or Black button for the page size and media type. 1. Reducing or Enlarging a Copy According ...to the Paper Size Page 274 of 731 pages Note Pressing the Stop/Reset button returns the number of the loaded paper runs out. Release the button. Page top Remove the original on the platen glass after copying is...
...Color button for color copying, or the Black button for 2 or more seconds in the print quality "Standard". Note To cancel copying, press the Stop/Reset button. To give priority to quality, press the Color or Black button for the page size and media type. 1. Reducing or Enlarging a Copy According ...to the Paper Size Page 274 of 731 pages Note Pressing the Stop/Reset button returns the number of the loaded paper runs out. Release the button. Page top Remove the original on the platen glass after copying is...
User Manual
Page 311
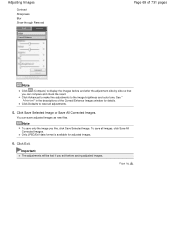
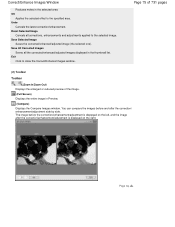
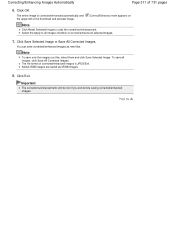
... images are saved as new files. Correcting/Enhancing Images Automatically Page 311 of the thumbnail and preview image. (Correct/Enhance) mark appears on Note Click Reset Selected Image to correct/enhance all selected images. 7.
... images are saved as new files. Correcting/Enhancing Images Automatically Page 311 of the thumbnail and preview image. (Correct/Enhance) mark appears on Note Click Reset Selected Image to correct/enhance all selected images. 7.
User Manual
Page 314
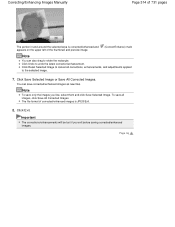
... images is corrected/enhanced and appears on the upper left of 731 pages The portion in and around the selected area is JPEG/Exif. 8. Click Reset Selected Image to undo the latest correction/enhancement. Note To save only the images you exit before saving corrected/enhanced images. To save corrected/enhanced...
... images is corrected/enhanced and appears on the upper left of 731 pages The portion in and around the selected area is JPEG/Exif. 8. Click Reset Selected Image to undo the latest correction/enhancement. Note To save only the images you exit before saving corrected/enhanced images. To save corrected/enhanced...
User Manual
Page 316
Note Click Advanced to make fine adjustments to the selected image. 6. Click Save Selected Image or Save All Corrected Images. Click Reset Selected Image to adjust and set the effect level. You can save adjusted images as new files. See " Advanced" in the View & Use... window, the thumbnail list does not appear and only the preview image appears. 4. Click Defaults to reset all corrections, enhancements, and adjustments applied to the image brightness and color tone. Adjusting Images Page 316 of 731 pages Note If you move a slider...
Note Click Advanced to make fine adjustments to the selected image. 6. Click Save Selected Image or Save All Corrected Images. Click Reset Selected Image to adjust and set the effect level. You can save adjusted images as new files. See " Advanced" in the View & Use... window, the thumbnail list does not appear and only the preview image appears. 4. Click Defaults to reset all corrections, enhancements, and adjustments applied to the image brightness and color tone. Adjusting Images Page 316 of 731 pages Note If you move a slider...
User Manual
Page 330
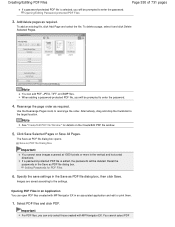
... pages 3. Opening PDF Files in an Application You can open PDF files created with MP Navigator EX. Add/delete pages as PDF file dialog box. Reset the passwords in the vertical and horizontal directions. Important For PDF files, you can add PDF, JPEG, TIFF, and BMP files. Save as PDF file...
... pages 3. Opening PDF Files in an Application You can open PDF files created with MP Navigator EX. Add/delete pages as PDF file dialog box. Reset the passwords in the vertical and horizontal directions. Important For PDF files, you can add PDF, JPEG, TIFF, and BMP files. Save as PDF file...
User Manual
Page 342
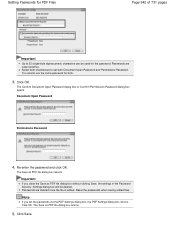
... box returns. You cannot use the same password for the password. The Confirm Document Open Password dialog box or Confirm Permissions Password dialog box opens. Reset the passwords when saving edited files. Passwords are deleted once the file is edited. Re-enter the password and click OK. Click OK. Note If...
... box returns. You cannot use the same password for the password. The Confirm Document Open Password dialog box or Confirm Permissions Password dialog box opens. Reset the passwords when saving edited files. Passwords are deleted once the file is edited. Re-enter the password and click OK. Click OK. Note If...
User Manual
Page 346
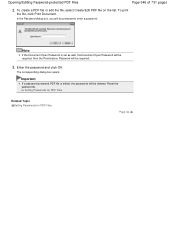
... PDF file is set as well, the Document Open Password will be required, then the Permissions Password will be required. 3. The corresponding dialog box opens. Reset the passwords. To print the file, click Print Document. Setting Passwords for PDF Files Related Topic Setting Passwords for PDF Files Page top Enter the...
... PDF file is set as well, the Document Open Password will be required, then the Permissions Password will be required. 3. The corresponding dialog box opens. Reset the passwords. To print the file, click Print Document. Setting Passwords for PDF Files Related Topic Setting Passwords for PDF Files Page top Enter the...


