
ZR Instruction Manual
Page 2
... or other ). Water and Moisture - Placing or Moving - Quick stops, excessive force, and uneven surfaces may cause picture interference, or permanently damage the camera. 8. If you are unable to replace your product dealer or local power company. 2. If the plug still fails to fit, contact your electrician to ... Power Cord Protection - Power cords should be walked on the product and in rainy/moist situations. 9. If an outside antenna is connected to the Canon Digital Video Camcorder ZR and all its accessories. Section 810 of the lead-in this manual. See figure 1. 3
... or other ). Water and Moisture - Placing or Moving - Quick stops, excessive force, and uneven surfaces may cause picture interference, or permanently damage the camera. 8. If you are unable to replace your product dealer or local power company. 2. If the plug still fails to fit, contact your electrician to ... Power Cord Protection - Power cords should be walked on the product and in rainy/moist situations. 9. If an outside antenna is connected to the Canon Digital Video Camcorder ZR and all its accessories. Section 810 of the lead-in this manual. See figure 1. 3

ZR Instruction Manual
Page 4
... Digital Effects 40 Important Safety Instructions 3 Audio Recording 44 Thank you for Choosing a Canon ......... 6 Setting the Self-Timer 46 Introducing the ZR 7 Mastering the Basics ~ When Making Manual Adjustments ...~ Adjusting Exposure Manually 47 Adjusting Focus Manually 49 Powering Your Camcorder ...Camera & VCR Menus 28 Turning the Image Stabilizer On/Off .. 30 Using the Wireless Controller 31 ~ For Recording ...~ Setting the Date and Time 32 Taking Still Pictures (Photo Mode) ..... 33 Searching and Reviewing While Recording 34 Additional Information Preparing the Camera...
... Digital Effects 40 Important Safety Instructions 3 Audio Recording 44 Thank you for Choosing a Canon ......... 6 Setting the Self-Timer 46 Introducing the ZR 7 Mastering the Basics ~ When Making Manual Adjustments ...~ Adjusting Exposure Manually 47 Adjusting Focus Manually 49 Powering Your Camcorder ...Camera & VCR Menus 28 Turning the Image Stabilizer On/Off .. 30 Using the Wireless Controller 31 ~ For Recording ...~ Setting the Date and Time 32 Taking Still Pictures (Photo Mode) ..... 33 Searching and Reviewing While Recording 34 Additional Information Preparing the Camera...
ZR Instruction Manual
Page 6
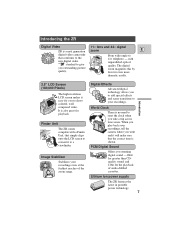
...digital ZR is a next generation zoom E digital video camcorder that conforms to the new digital...angle to shoot colorful, well composed video. The digital zoom magnifies this by four for playback. World ... the correct time is shown. PCM Digital Sound Offers you stunning digital sound -16bit for greater than CDquality ...sound, and 12bit for you went and it easy for the playback of the zoom range. Finder Unit The ZR...ZR features the latest in portable power technology. 7 It is no need to a viewfinder. Digital Effects Advanced digital...
...digital ZR is a next generation zoom E digital video camcorder that conforms to the new digital...angle to shoot colorful, well composed video. The digital zoom magnifies this by four for playback. World ... the correct time is shown. PCM Digital Sound Offers you stunning digital sound -16bit for greater than CDquality ...sound, and 12bit for you went and it easy for the playback of the zoom range. Finder Unit The ZR...ZR features the latest in portable power technology. 7 It is no need to a viewfinder. Digital Effects Advanced digital...
ZR Instruction Manual
Page 13
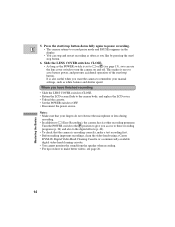
... correctly, make better videos, see page 13), you access to these recording programs (p. 36) and also to the digital effects (p. 40). • To check that the camera is set to [ or P (see page 26. 14 Press the start/stop button down fully again to save ...OFF. • Disconnect the power source. E • The camera returns to make a test recording first. • Before making important recordings, clean the video heads using a Canon DVM-CL Digital Video Head Cleaning Cassette or a commercially available digital video head cleaning cassette. • You cannot monitor the sound ...
... correctly, make better videos, see page 13), you access to these recording programs (p. 36) and also to the digital effects (p. 40). • To check that the camera is set to [ or P (see page 26. 14 Press the start/stop button down fully again to save ...OFF. • Disconnect the power source. E • The camera returns to make a test recording first. • Before making important recordings, clean the video heads using a Canon DVM-CL Digital Video Head Cleaning Cassette or a commercially available digital video head cleaning cassette. • You cannot monitor the sound ...
ZR Instruction Manual
Page 14
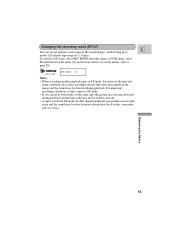
...If you record in SP (standard play) and LP (long play) modes. For important recordings, therefore, set the camera to page 28). (see p. 28) REC MODE••••LP Notes: • When recording and ... image and the sound may be written correctly. • A tape recorded in LP mode on other digital equipment may produce mosaic-like noise and the sound may not be distorted during playback. Mastering the Basics ... To switch to LP mode, select REC MODE from the camera or VCR menu, select LP and then close the menu (for instructions on this camcorder, and vice versa.
...If you record in SP (standard play) and LP (long play) modes. For important recordings, therefore, set the camera to page 28). (see p. 28) REC MODE••••LP Notes: • When recording and ... image and the sound may be written correctly. • A tape recorded in LP mode on other digital equipment may produce mosaic-like noise and the sound may not be distorted during playback. Mastering the Basics ... To switch to LP mode, select REC MODE from the camera or VCR menu, select LP and then close the menu (for instructions on this camcorder, and vice versa.
ZR Instruction Manual
Page 15
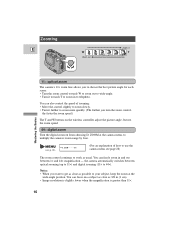
... 11×. 16 You can freely zoom in and out between optical zooming (up to 11×) and digital zooming (11× to your subject, keep the zoom at the camera menu, to multiply the camera's zoom range by four. (see p. 28) D.ZOOM ON (For an explanation of zooming: • Move the ... Turn the digital zoom on a subject as close as possible to 44×). Zooming E W Zoom out W T Zoom in T Mastering the Basics 11× optical zoom The camera's 11× zoom lens allows you to choose the best picture angle for each scene: • Turn the zoom control towards T to zoom in ...
... 11×. 16 You can freely zoom in and out between optical zooming (up to 11×) and digital zooming (11× to your subject, keep the zoom at the camera menu, to multiply the camera's zoom range by four. (see p. 28) D.ZOOM ON (For an explanation of zooming: • Move the ... Turn the digital zoom on a subject as close as possible to 44×). Zooming E W Zoom out W T Zoom in T Mastering the Basics 11× optical zoom The camera's 11× zoom lens allows you to choose the best picture angle for each scene: • Turn the zoom control towards T to zoom in ...
ZR Instruction Manual
Page 18
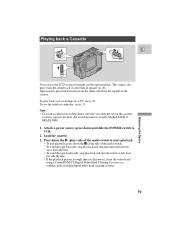
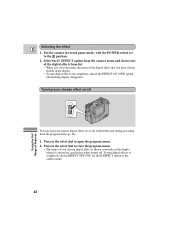
To use the LCD screen for instant, on the top left of the camera. Attach a power source, press down the 3 (stop) side of the multi-switch to start playback. •... playback and turn the multi-switch lever away from the multi-switch on -the-spot playback. Load the cassette. 3. The camera also plays back the sound track via the built-in speaker (p. 20). Playing back a Cassette FOCUS EXP E OFF VCR POWER... it exposes the hole (the switch position is rough (mosaic-like noise), clean the video heads using a Canon DVM-CL Digital Video Head Cleaning Cassette or a commercially available...
To use the LCD screen for instant, on the top left of the camera. Attach a power source, press down the 3 (stop) side of the multi-switch to start playback. •... playback and turn the multi-switch lever away from the multi-switch on -the-spot playback. Load the cassette. 3. The camera also plays back the sound track via the built-in speaker (p. 20). Playing back a Cassette FOCUS EXP E OFF VCR POWER... it exposes the hole (the switch position is rough (mosaic-like noise), clean the video heads using a Canon DVM-CL Digital Video Head Cleaning Cassette or a commercially available...

ZR Instruction Manual
Page 27
...SET q [MENU] CLOSE SENSOR ON REC MODE••••SP w e A.MONITOR•••MIX/VARI. Camera menu (when the camera is to OPEN). 3. Camera menu (CAM. i•ON D.ZOOM ON r t 16:9 OFF WHITE BAL.••AUTO y u SELF-TIMER•&#...(in record pause mode with the POWER switch set to CLOSE). • The main purpose of the camera's advanced functions are three main menus: 1. MENU) q Shutter speed p. 48 w Digital effects p. 40 e Image stabilizer p. 30 r Digital zoom p. 16 t 16:9 p. 43 y White balance p. 50 u Self-timer p. 46 i Remote...
...SET q [MENU] CLOSE SENSOR ON REC MODE••••SP w e A.MONITOR•••MIX/VARI. Camera menu (when the camera is to OPEN). 3. Camera menu (CAM. i•ON D.ZOOM ON r t 16:9 OFF WHITE BAL.••AUTO y u SELF-TIMER•&#...(in record pause mode with the POWER switch set to CLOSE). • The main purpose of the camera's advanced functions are three main menus: 1. MENU) q Shutter speed p. 48 w Digital effects p. 40 e Image stabilizer p. 30 r Digital zoom p. 16 t 16:9 p. 43 y White balance p. 50 u Self-timer p. 46 i Remote...
ZR Instruction Manual
Page 32
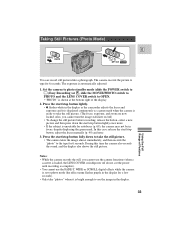
...are now locked. Also, you cannot use the FADE-T, WIDE or SCROLL digital effects while the camera is shown at the bottom right of Features You can record still pictures like a photograph. In this time the camera also records the sound, and the display also shows the still picture. .... • If the subject is automatically adjusted. 1. The exposure is unsuitable for 6 seconds. The camera records the picture to tape for autofocus (p. 69), the camera may not be in the display as the camcorder adjusts the focus and exposure and it is displayed continuously as a green mark when the...
...are now locked. Also, you cannot use the FADE-T, WIDE or SCROLL digital effects while the camera is shown at the bottom right of Features You can record still pictures like a photograph. In this time the camera also records the sound, and the display also shows the still picture. .... • If the subject is automatically adjusted. 1. The exposure is unsuitable for 6 seconds. The camera records the picture to tape for autofocus (p. 69), the camera may not be in the display as the camcorder adjusts the focus and exposure and it is displayed continuously as a green mark when the...
ZR Instruction Manual
Page 35
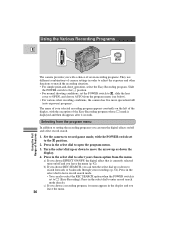
... directly. a) If you choose EFFECT ON/OFF, the digital effect that is set to [ (Easy Recording): Press in the select dial to select your recordings (p. 34). Press in order to the P position. 2. Using the Various Recording Programs E MENU The camera provides you with a choice of seven recording programs. They...the menu. b) If you choose REC SEARCH, you leave the menu. 36 Using the Full Range of camera settings in the select dial to setting the recording programs you can turn the digital effects on the left of the display, with the POWER switch set the POWER switch to P , slide...
... directly. a) If you choose EFFECT ON/OFF, the digital effect that is set to [ (Easy Recording): Press in the select dial to select your recordings (p. 34). Press in order to the P position. 2. Using the Various Recording Programs E MENU The camera provides you with a choice of seven recording programs. They...the menu. b) If you choose REC SEARCH, you leave the menu. 36 Using the Full Range of camera settings in the select dial to setting the recording programs you can turn the digital effects on the left of the display, with the POWER switch set the POWER switch to P , slide...
ZR Instruction Manual
Page 36
...compensation • Different shutter speeds • White balance set to point and shoot. Easy Recording The simplest way to use the camera is reset to AUTO when you cannot use them in the wrong lighting conditions. If you select this Easy Recording program, you turn ... option. E • The program menu Recording Program is with the POWER switch set /indoor/outdoor modes • 16:9 effect • Digital Effects Also, autofocus and image stabilization cannot be turned off using the POWER switch. • Avoid changing programs during recording as the brightness of...
...compensation • Different shutter speeds • White balance set to point and shoot. Easy Recording The simplest way to use the camera is reset to AUTO when you cannot use them in the wrong lighting conditions. If you select this Easy Recording program, you turn ... option. E • The program menu Recording Program is with the POWER switch set /indoor/outdoor modes • 16:9 effect • Digital Effects Also, autofocus and image stabilization cannot be turned off using the POWER switch. • Avoid changing programs during recording as the brightness of...
ZR Instruction Manual
Page 41
... flashing display disappears). Press in record pause mode, with the POWER switch set to the P position. 2. Put the camera in the select dial to close the menu, the name of the digital effect that you have chosen flashes in the display when it is shown constantly in the display. • To... turn digital effects of completely choose EFFECT OFF (ON) for the D.EFFECT option at the camera menu. 42 Using the Full Range of your chosen digital effect on , and flashes when turned off. Press in the select dial to ...
... flashing display disappears). Press in record pause mode, with the POWER switch set to the P position. 2. Put the camera in the select dial to close the menu, the name of the digital effect that you have chosen flashes in the display when it is shown constantly in the display. • To... turn digital effects of completely choose EFFECT OFF (ON) for the D.EFFECT option at the camera menu. 42 Using the Full Range of your chosen digital effect on , and flashes when turned off. Press in the select dial to ...
ZR Instruction Manual
Page 42
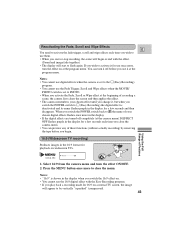
... E You need to activate the fade trigger, scroll and wipe effects each time you close the menu. Notes: • You cannot use digital effects when the camera is set to the [ (Easy Recording) program. • You cannot use the Fade Trigger, Scroll and Wipe effects when the MOVIE/ ...back a recording made for 16:9 on widescreen TVs. You can preview any of recording a scene, the camera first clears the screen and then applies the effect. • The camera remembers your chosen digital effects flashes once more , turn the effect ON/OFF. 2. When you switch the POWER switch back to...
... E You need to activate the fade trigger, scroll and wipe effects each time you close the menu. Notes: • You cannot use digital effects when the camera is set to the [ (Easy Recording) program. • You cannot use the Fade Trigger, Scroll and Wipe effects when the MOVIE/ ...back a recording made for 16:9 on widescreen TVs. You can preview any of recording a scene, the camera first clears the screen and then applies the effect. • The camera remembers your chosen digital effects flashes once more , turn the effect ON/OFF. 2. When you switch the POWER switch back to...
ZR Instruction Manual
Page 50
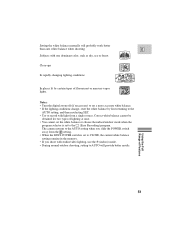
The camera returns to the AUTO setting when you shoot with studio/video lighting, use the (indoor) mode. • During normal outdoor shooting, setting to the [ (Easy ... set a more accurate white balance. • If the lighting conditions change, reset the white balance by certain types of Features 51 Notes: • Turn the digital zoom off (if neccessary) to set to CLOSE, the current white balance setting remains in the memory. • If you slide the POWER switch away...
The camera returns to the AUTO setting when you shoot with studio/video lighting, use the (indoor) mode. • During normal outdoor shooting, setting to the [ (Easy ... set a more accurate white balance. • If the lighting conditions change, reset the white balance by certain types of Features 51 Notes: • Turn the digital zoom off (if neccessary) to set to CLOSE, the current white balance setting remains in the memory. • If you slide the POWER switch away...
ZR Instruction Manual
Page 53
... in a different time zone. (see p. 28) BASE ZONE•••18/DENVER 1. Notes: • The recording can be recorded. Set the camera to the base zone setting, the recording zone setting is shown during playback. • The name of the recording zone in the display. 4. choose this... case, you need to change in the dial to a VCR showing the local time, but when editing via the digital terminal only the original date and time can be edited to select the option that represents your base zone changes. Close the menu. • ...
... in a different time zone. (see p. 28) BASE ZONE•••18/DENVER 1. Notes: • The recording can be recorded. Set the camera to the base zone setting, the recording zone setting is shown during playback. • The name of the recording zone in the display. 4. choose this... case, you need to change in the dial to a VCR showing the local time, but when editing via the digital terminal only the original date and time can be edited to select the option that represents your base zone changes. Close the menu. • ...
ZR Instruction Manual
Page 57
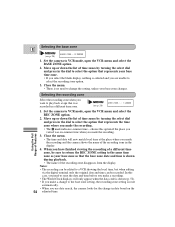
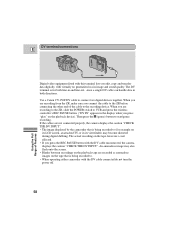
Use a Canon CV-150F DV cable to start/pause recording. If the cables are recorded ...8226; Blanks between recordings on the playback tape are not connected properly, the camera displays the caution "CHECK THE DV INPUT". • The image displayed by the camcorder that is being recorded to VCR and press the wireless controller's REC PAUSE ...to. • When operating either camcorder with the DV cable unconnected, the camera displays the caution "CHECK THE DV INPUT". When you are recording from the ZR, make sure you edit, copy and transfer data digitally, with virtually no generation loss ...
Use a Canon CV-150F DV cable to start/pause recording. If the cables are recorded ...8226; Blanks between recordings on the playback tape are not connected properly, the camera displays the caution "CHECK THE DV INPUT". • The image displayed by the camcorder that is being recorded to VCR and press the wireless controller's REC PAUSE ...to. • When operating either camcorder with the DV cable unconnected, the camera displays the caution "CHECK THE DV INPUT". When you are recording from the ZR, make sure you edit, copy and transfer data digitally, with virtually no generation loss ...
ZR Instruction Manual
Page 58
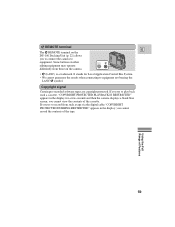
... Docking Unit (p. 22) allows you to connect the camera to equipment not bearing the LANC m symbol. Some buttons on other editing equipment may operate MIC m differently from such a tape via the digital cable "COPYRIGHT PROTECTED DUBBING RESTRICTED" appears in the display... for Local Application Control Bus System. • We cannot guarantee the results when connecting to equipment. m REMOTE terminal E The m REMOTE terminal on the camera. • m (LANC) is a...
... Docking Unit (p. 22) allows you to connect the camera to equipment not bearing the LANC m symbol. Some buttons on other editing equipment may operate MIC m differently from such a tape via the digital cable "COPYRIGHT PROTECTED DUBBING RESTRICTED" appears in the display... for Local Application Control Bus System. • We cannot guarantee the results when connecting to equipment. m REMOTE terminal E The m REMOTE terminal on the camera. • m (LANC) is a...
ZR Instruction Manual
Page 64
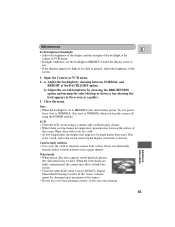
... heads • When mosaic-like noise appears on the surface of the screen. b) Adjust the overall brightness by choosing between NORMAL and BRIGHT at the camera or VCR menu. • In bright conditions, set to see. • If the displays appear too light or too dark in general, adjust the brightness... battery power. This is not a fault, and as the screen warms up to NORMAL when you turn the camera off using the POWER switch.) LCD • Clean the LCD screen using Canon's DVM-CL Digital Video Head Cleaning Cassette. To save power, leave it set to NORMAL. (It is reset to maximum of...
... heads • When mosaic-like noise appears on the surface of the screen. b) Adjust the overall brightness by choosing between NORMAL and BRIGHT at the camera or VCR menu. • In bright conditions, set to see. • If the displays appear too light or too dark in general, adjust the brightness... battery power. This is not a fault, and as the screen warms up to NORMAL when you turn the camera off using the POWER switch.) LCD • Clean the LCD screen using Canon's DVM-CL Digital Video Head Cleaning Cassette. To save power, leave it set to NORMAL. (It is reset to maximum of...
ZR Instruction Manual
Page 78
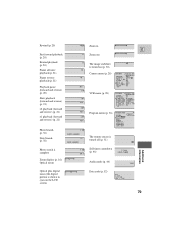
...sensor is turned on the LCD screen) Data code (p. 52) F32 1/2000 12:00 AM JAN. 1,1998 Additional Information 79 Camera menu (p. 28) CAM.MENU SELECT SE [MENU] CLOS SHUTTER AUTO D.EFFECT••••EFFECT OFF IMAGE S. SOFF ...is complete Zoom display (p. 16): W Optical zoom 0 Self-timer countdown 1 0 sec (p. 46) SELF-TIMER 0 T Audio mode (p. 44) 16bit Optical plus digital W T zoom (the digital portion is shown in W T E Fast forward playback (p. 20) Zoom out W T Rewind playback (p. 20) Frame advance playback (p. 21) Frame reverse playback (p....
...sensor is turned on the LCD screen) Data code (p. 52) F32 1/2000 12:00 AM JAN. 1,1998 Additional Information 79 Camera menu (p. 28) CAM.MENU SELECT SE [MENU] CLOS SHUTTER AUTO D.EFFECT••••EFFECT OFF IMAGE S. SOFF ...is complete Zoom display (p. 16): W Optical zoom 0 Self-timer countdown 1 0 sec (p. 46) SELF-TIMER 0 T Audio mode (p. 44) 16bit Optical plus digital W T zoom (the digital portion is shown in W T E Fast forward playback (p. 20) Zoom out W T Rewind playback (p. 20) Frame advance playback (p. 21) Frame reverse playback (p....
ZR Instruction Manual
Page 82
... Cleaning, 65 Black and White, 40 Headphones, 44 C Cables, 6, 22 Cassettes, 11 Charging the Battery Pack, 9 Choosing a Recording Program, 36 Cleaning the Camera, 65 Condensation, 67 Connection to TV or VCR, 22 D Date and Time, 32 Date Search, 56 Docking Unit, 22 Displaying Data Code, 52 DC Coupler..., 8 Digital Effects, 40 Digital Video, 7 Digital Zoom, 16 DV terminal, 58 I Image Stabilizer, 30 Introducing the ZR, 7 L LANC, 59 LCD Cover, 60 LCD Screen, 17 Loading Cassettes, 11 Low Light, 39 LP Modes, ...
... Cleaning, 65 Black and White, 40 Headphones, 44 C Cables, 6, 22 Cassettes, 11 Charging the Battery Pack, 9 Choosing a Recording Program, 36 Cleaning the Camera, 65 Condensation, 67 Connection to TV or VCR, 22 D Date and Time, 32 Date Search, 56 Docking Unit, 22 Displaying Data Code, 52 DC Coupler..., 8 Digital Effects, 40 Digital Video, 7 Digital Zoom, 16 DV terminal, 58 I Image Stabilizer, 30 Introducing the ZR, 7 L LANC, 59 LCD Cover, 60 LCD Screen, 17 Loading Cassettes, 11 Low Light, 39 LP Modes, ...


