Brother MFC 9460CDN Maintenance - International
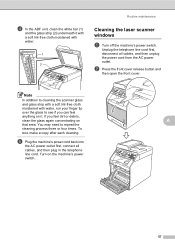
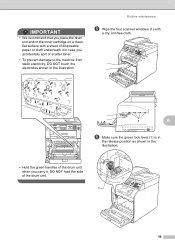
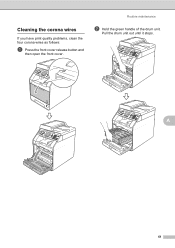
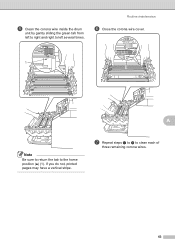
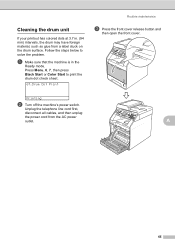
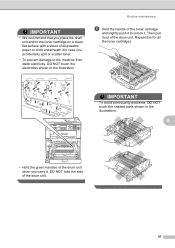
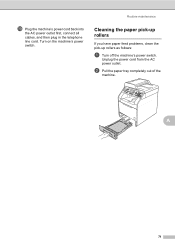
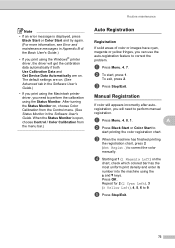
Brother MFC 9460CDN Maintenance

View Results Below
Free Brother International MFC-9460CDN manuals!
Problems with Brother International MFC-9460CDN?
Ask a Question
Free Brother International MFC-9460CDN manuals!
Problems with Brother International MFC-9460CDN?
Ask a Question
Related Manual Pages


Similar Questions

In Maintenance Mode How Do I Know Which Is The Ok Button???
how do I know which is the ok button in brother mfc790cw when in maintenance mode??
how do I know which is the ok button in brother mfc790cw when in maintenance mode??
(Posted by Miguelangelbanuet 1 year ago)

Mfc-j415w Flashing Maintenance
I tore down my printer and cleaned all ink lines and print head and jet nozzles. I used isopropyl al...
I tore down my printer and cleaned all ink lines and print head and jet nozzles. I used isopropyl al...
(Posted by hondahog 2 years ago)

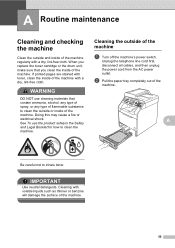
Unable To Print Routine Maintenance
black is new and will no t print. i have tried to test it but will not allow it repeating routine m...
black is new and will no t print. i have tried to test it but will not allow it repeating routine m...
(Posted by euegene47g 12 years ago)