User Manual
Page 11
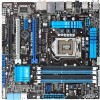
P8P67-M PRO specifications summary Internal connectors/ switches/ buttons BIOS features Accessories Support DVD Form factor 4 x USB 2.0/1.1 connectors support additional 8 USB 2.0/1.1 ports 4 x SATA 3.0 Gb/s connectors 3 x SATA 6.0 Gb/s connectors 1 x CPU fan connector 2 x Chassis fan connectors 1 x Power fan... cables 2 x Serial ATA 3.0Gb/s cables 1 x Q-shield 1 x Q-Connector (retail version only) 1 x User Manual 1 x Support DVD Drivers ASUS utilities ASUS Update Anti-virus software (OEM version) uATX form factor: 9.6 in x 9.6 in (24.4 cm x 24.4 cm) * Specifications are subject to change without ...
P8P67-M PRO specifications summary Internal connectors/ switches/ buttons BIOS features Accessories Support DVD Form factor 4 x USB 2.0/1.1 connectors support additional 8 USB 2.0/1.1 ports 4 x SATA 3.0 Gb/s connectors 3 x SATA 6.0 Gb/s connectors 1 x CPU fan connector 2 x Chassis fan connectors 1 x Power fan... cables 2 x Serial ATA 3.0Gb/s cables 1 x Q-shield 1 x Q-Connector (retail version only) 1 x User Manual 1 x Support DVD Drivers ASUS utilities ASUS Update Anti-virus software (OEM version) uATX form factor: 9.6 in x 9.6 in (24.4 cm x 24.4 cm) * Specifications are subject to change without ...
User Manual
Page 34
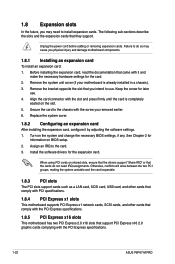
...assignments. Failure to the chassis with it by adjusting the software settings. 1. Install the software drivers for information on the slot. 5. Before installing the expansion card, read the documentation that ...BIOS settings, if any. Align the card connector with the PCI Express specifications. 1-22 ASUS P8P67-M PRO Assign an IRQ to install expansion cards. Otherwise, conflicts will arise between the two PCI... 1.8.3 PCI slots The PCI slots support cards such as a LAN card, SCSI card, USB card, and other cards that comply with PCI specifications. 1.8.4 PCI Express x1 slots This...
...assignments. Failure to the chassis with it by adjusting the software settings. 1. Install the software drivers for information on the slot. 5. Before installing the expansion card, read the documentation that ...BIOS settings, if any. Align the card connector with the PCI Express specifications. 1-22 ASUS P8P67-M PRO Assign an IRQ to install expansion cards. Otherwise, conflicts will arise between the two PCI... 1.8.3 PCI slots The PCI slots support cards such as a LAN card, SCSI card, USB card, and other cards that comply with PCI specifications. 1.8.4 PCI Express x1 slots This...
User Manual
Page 38
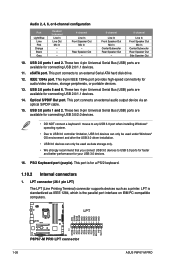
...connecting USB 3.0/2.0 devices. • DO NOT connect a keyboard / mouse to any USB 3.0 port when installing Windows® operating system. • Due to USB 3.0 controller limitation, USB 3.0 devices can only be used under Windows® OS environment and after the USB 3.0 driver installation. • USB ...GND GND GND GND 1-26 P8P67-M PRO P8P67-M PRO LPT connector PIN 1 STB# PD0 PD1 PD2 PD3 PD4 PD5 PD6 PD7 ACK# BUSY PE SLCT ASUS P8P67-M PRO USB 2.0 ports 1 and 2. eSATA port. These two 4-pin Universal Serial Bus (USB) ports are available for your USB 3.0 devices. 16. PS...
...connecting USB 3.0/2.0 devices. • DO NOT connect a keyboard / mouse to any USB 3.0 port when installing Windows® operating system. • Due to USB 3.0 controller limitation, USB 3.0 devices can only be used under Windows® OS environment and after the USB 3.0 driver installation. • USB ...GND GND GND GND 1-26 P8P67-M PRO P8P67-M PRO LPT connector PIN 1 STB# PD0 PD1 PD2 PD3 PD4 PD5 PD6 PD7 ACK# BUSY PE SLCT ASUS P8P67-M PRO USB 2.0 ports 1 and 2. eSATA port. These two 4-pin Universal Serial Bus (USB) ports are available for your USB 3.0 devices. 16. PS...
User Manual
Page 51
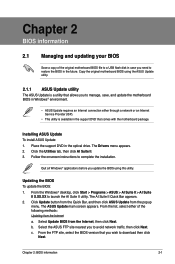
...AI Suite II X.XX.XX to complete the installation. c. Chapter 2: BIOS information 2-1 Quit all Windows® applications before you to a USB flash disk in the support DVD that comes with the motherboard package. Follow the onscreen instructions to launch the AI Suite II utility. From ...of the original motherboard BIOS file to avoid network traffic, then click Next. The AI Suite II Quick Bar appears. 2. The ASUS Update main screen appears. Copy the original motherboard BIOS using this utility. The Drivers menu appears. 2. Click the Utilities tab, then click AI Suite II. 3.
...AI Suite II X.XX.XX to complete the installation. c. Chapter 2: BIOS information 2-1 Quit all Windows® applications before you to a USB flash disk in the support DVD that comes with the motherboard package. Follow the onscreen instructions to launch the AI Suite II utility. From ...of the original motherboard BIOS file to avoid network traffic, then click Next. The AI Suite II Quick Bar appears. 2. The ASUS Update main screen appears. Copy the original motherboard BIOS using this utility. The Drivers menu appears. 2. Click the Utilities tab, then click AI Suite II. 3.


