Service Guide
Page 7
... 42 Removing the RAM Covers 44 Removing the RAM 46 Removing the Rear Covers 47 Removing the Back Cover 48 Removing the Hinge 50 Removing the Mainboard Shielding 51 Removing the Hard Disk Drive 55 Removing the Power Supply 58 Removing the Touchscreen Control Board 59 Removing the Card Reader Board 62 Removing the Audio Board 63 Removing the ODD Eject Board 65 Removing the...
... 42 Removing the RAM Covers 44 Removing the RAM 46 Removing the Rear Covers 47 Removing the Back Cover 48 Removing the Hinge 50 Removing the Mainboard Shielding 51 Removing the Hard Disk Drive 55 Removing the Power Supply 58 Removing the Touchscreen Control Board 59 Removing the Card Reader Board 62 Removing the Audio Board 63 Removing the ODD Eject Board 65 Removing the...
Service Guide
Page 37
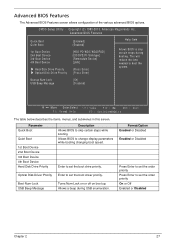
... Quick Boot Quiet Boot 1st Boot Device 2nd Boot Device 3rd Boot Device 4th Boot Device Hard Disk Drive Priority Optical Disk Drive Priority [Enabled] [Enabled] [HDD PO-WDC WD20FAD] [CD/DVD:P1-Slimtype] [Removable Device] [LAN] [Press Enter] [Press Enter] Help Item Allows BIOS to change display parameters while booting changing...
... Quick Boot Quiet Boot 1st Boot Device 2nd Boot Device 3rd Boot Device 4th Boot Device Hard Disk Drive Priority Optical Disk Drive Priority [Enabled] [Enabled] [HDD PO-WDC WD20FAD] [CD/DVD:P1-Slimtype] [Removable Device] [LAN] [Press Enter] [Press Enter] Help Item Allows BIOS to change display parameters while booting changing...
Service Guide
Page 47
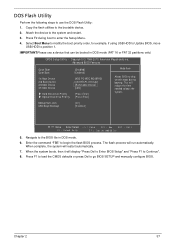
... Quick Boot Quiet Boot 1st Boot Device 2nd Boot Device 3rd Boot Device 4th Boot Device Hard Disk Drive Priority Optical Disk Drive Priority [Enabled] [Enabled] [HDD PO-WDC WD20FAD] [CD/DVD:P1-Slimtype] [Removable Device] [LAN] [Press Enter] [Press Enter] Help Item Allows BIOS to begin the flash BIOS process. Enter...
... Quick Boot Quiet Boot 1st Boot Device 2nd Boot Device 3rd Boot Device 4th Boot Device Hard Disk Drive Priority Optical Disk Drive Priority [Enabled] [Enabled] [HDD PO-WDC WD20FAD] [CD/DVD:P1-Slimtype] [Removable Device] [LAN] [Press Enter] [Press Enter] Help Item Allows BIOS to begin the flash BIOS process. Enter...
Service Guide
Page 65
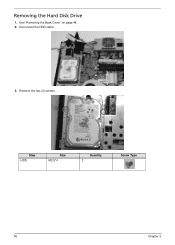
Disconnect the HDD cable. 3. Remove the two (2) screws. See "Removing the Back Cover" on page 48. 2. Removing the Hard Disk Drive 1. Step HDD Size M2.5*4 Quantity 2 Screw Type 55 Chapter 3
Disconnect the HDD cable. 3. Remove the two (2) screws. See "Removing the Back Cover" on page 48. 2. Removing the Hard Disk Drive 1. Step HDD Size M2.5*4 Quantity 2 Screw Type 55 Chapter 3
Service Guide
Page 177
... 2. If any problems are incorrect, whether a short circuit is suspected, or whether the system is inoperative. If no more errors. Remove or disconnect all attached devices are no error is detected, replace the FRU. Determine if the problem has changed. 6. Undetermined Problems The ...Rerun the test to isolate the failing FRU (do the following devices: • Non-Acer devices • Printer, mouse, and other external devices • Hard disk drive • DIMM • CD-ROM/Diskette drive Module 4. If the Issue is operating correctly. 1. When analyzing an intermittent problem, do...
... 2. If any problems are incorrect, whether a short circuit is suspected, or whether the system is inoperative. If no more errors. Remove or disconnect all attached devices are no error is detected, replace the FRU. Determine if the problem has changed. 6. Undetermined Problems The ...Rerun the test to isolate the failing FRU (do the following devices: • Non-Acer devices • Printer, mouse, and other external devices • Hard disk drive • DIMM • CD-ROM/Diskette drive Module 4. If the Issue is operating correctly. 1. When analyzing an intermittent problem, do...


