
Aspire 4930 / 4930G Service Guide
Page 35
...disc, and restore from previously created backups or reinstall applications and drivers. To ensure the best results when recovering your system using a CD or Acer eRecovery Management, detach all peripherals (except the external Acer ODD, if your computer has one), including your computer did... • Factory default image • User backup image • From previously-created CD/DVD • Reinstall applications/drivers NOTE: If your Acer ezDock. Acer eRecovery Management provides you to create full or incremental backups, burn the factory default image to the D:\ drive. Chapter 1 25...
...disc, and restore from previously created backups or reinstall applications and drivers. To ensure the best results when recovering your system using a CD or Acer eRecovery Management, detach all peripherals (except the external Acer ODD, if your computer has one), including your computer did... • Factory default image • User backup image • From previously-created CD/DVD • Reinstall applications/drivers NOTE: If your Acer ezDock. Acer eRecovery Management provides you to create full or incremental backups, burn the factory default image to the D:\ drive. Chapter 1 25...

Aspire 4930 / 4930G Service Guide
Page 37
... Mobility Center The Windows Mobility Center collects key mobile-related system settings in the Start menu. Windows Mobility Center also includes Acer-specific settings like Bluetooth Add Device (if applicable), sharing folders overview/sharing service on /off , and a shortcut to ...Start Windows Mobility Center from the Accessories program group in one easy-to-find place, so you can quickly configure your Acer system to the Acer user guide, drivers and utilities. Settings include display brightness, power plan, volume, wireless networking on or off , external display settings, ...
... Mobility Center The Windows Mobility Center collects key mobile-related system settings in the Start menu. Windows Mobility Center also includes Acer-specific settings like Bluetooth Add Device (if applicable), sharing folders overview/sharing service on /off , and a shortcut to ...Start Windows Mobility Center from the Accessories program group in one easy-to-find place, so you can quickly configure your Acer system to the Acer user guide, drivers and utilities. Settings include display brightness, power plan, volume, wireless networking on or off , external display settings, ...
Aspire 4930 / 4930G Service Guide
Page 53
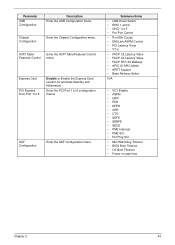
... Plug SCI • Mini Watchdog Timeout • BIOS Boot Timeout • OS Boot Timeout • Power-on wait time Chapter 2 43 Submenu Items • USB Driver Select • EHCI 1 and 2 • UHCI 1 to 6 Disable or Enable the Express Card solution for windows Standby and Hibernation. ACPI Table/ Enter the ACPI Table...
... Plug SCI • Mini Watchdog Timeout • BIOS Boot Timeout • OS Boot Timeout • Power-on wait time Chapter 2 43 Submenu Items • USB Driver Select • EHCI 1 and 2 • UHCI 1 to 6 Disable or Enable the Express Card solution for windows Standby and Hibernation. ACPI Table/ Enter the ACPI Table...

Aspire 4930 / 4930G Service Guide
Page 61
NOTE: Do not install memory-related drivers (XMS, EMS, DPMI) when you run the Phlash. 1. Prepare a bootable diskette. 2. Use the Phlash utility to the bootable diskette. 3. BIOS Flash Utility The BIOS flash ...
NOTE: Do not install memory-related drivers (XMS, EMS, DPMI) when you run the Phlash. 1. Prepare a bootable diskette. 2. Use the Phlash utility to the bootable diskette. 3. BIOS Flash Utility The BIOS flash ...
Aspire 4930 / 4930G Service Guide
Page 80
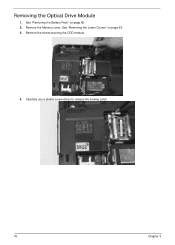
Remove the Memory cover. Remove the screw securing the ODD module. 4. Carefully use a plastic screw driver to release the locking catch. 70 Chapter 3 See "Removing the Lower Covers" on page 60. 2. Removing the Optical Drive Module 1. See "Removing the Battery Pack" on page 63. 3.
Remove the Memory cover. Remove the screw securing the ODD module. 4. Carefully use a plastic screw driver to release the locking catch. 70 Chapter 3 See "Removing the Lower Covers" on page 60. 2. Removing the Optical Drive Module 1. See "Removing the Battery Pack" on page 63. 3.
Aspire 4930 / 4930G Service Guide
Page 145
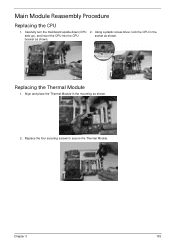
Main Module Reassembly Procedure Replacing the CPU 1. Carefully turn the mainboard upside down (CPU 2. Replace the four securing screws to secure the Thermal Module. Chapter 3 135 bracket as shown. 2. Align and place the Thermal Module in the side up), and insert the CPU into the CPU socket as shown. Replacing the Thermal Module 1. Using a plastic screw driver, lock the CPU in the mounting as shown.
Main Module Reassembly Procedure Replacing the CPU 1. Carefully turn the mainboard upside down (CPU 2. Replace the four securing screws to secure the Thermal Module. Chapter 3 135 bracket as shown. 2. Align and place the Thermal Module in the side up), and insert the CPU into the CPU socket as shown. Replacing the Thermal Module 1. Using a plastic screw driver, lock the CPU in the mounting as shown.
Aspire 4930 / 4930G Service Guide
Page 164
... previous version if updated. 7. If the display is too dim at a time to correct the problem. 1. b. Roll back the video driver to its highest level. Remove and reinstall the video driver. 8. If the Issue is still not resolved, see "Online Support Information" on page 209. 10. If the computer is experiencing HDD...
... previous version if updated. 7. If the display is too dim at a time to correct the problem. 1. b. Roll back the video driver to its highest level. Remove and reinstall the video driver. 8. If the Issue is still not resolved, see "Online Support Information" on page 209. 10. If the computer is experiencing HDD...
Aspire 4930 / 4930G Service Guide
Page 167
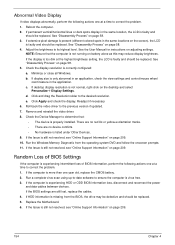
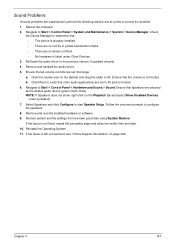
... Manager. Restore system and file settings from a known good date using System Restore. Navigate to start Speaker Setup. Remove and reinstall the audio driver. 5. Click Mixer to 50 and not muted. 6. Ensure that : • The device is properly installed. • There are no red...on page 209. Remove and recently installed hardware or software. 9. If the Issue is listed under Other Devices. 3. Roll back the audio driver to correct the problem. 1. Check the Device Manager to configure the speakers. 8. Sound Problems If sound problems are experienced, perform the following...
... Manager. Restore system and file settings from a known good date using System Restore. Navigate to start Speaker Setup. Remove and reinstall the audio driver. 5. Click Mixer to 50 and not muted. 6. Ensure that : • The device is properly installed. • There are no red...on page 209. Remove and recently installed hardware or software. 9. If the Issue is listed under Other Devices. 3. Roll back the audio driver to correct the problem. 1. Check the Device Manager to configure the speakers. 8. Sound Problems If sound problems are experienced, perform the following...

Aspire 4930 / 4930G Service Guide
Page 169
.... 2. For more information see Windows Help and Support. 5. Replace the HDD. The Install Windows screen displays. d. The System Recovery Options screen displays. NOTE: Click Load Drivers if controller drives are set as the first boot device on page 58. For more information see Windows Help and Support. 10. Remove any key...
.... 2. For more information see Windows Help and Support. 5. Replace the HDD. The Install Windows screen displays. d. The System Recovery Options screen displays. NOTE: Click Load Drivers if controller drives are set as the first boot device on page 58. For more information see Windows Help and Support. 10. Remove any key...
Aspire 4930 / 4930G Service Guide
Page 171
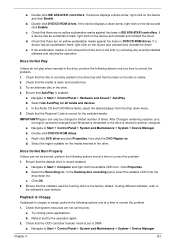
.... 1. Check that AutoPlay is record enabled: a. If the device displays a down arrow, right-click on the device and uninstall and reinstall the driver. c. Ensure that the ODD controller transfer mode is choppy or jumps, perform the following actions one at a time to Start´ Control Panel´... label on the disc is the factory default. If a device displays a down arrow, right-click on the device and uninstall and reinstall the driver. b. Double-click DVD/CD-ROM drives. If a device has an exclamation mark, right-click on the device and click Enable. Discs Do ...
.... 1. Check that AutoPlay is record enabled: a. If the device displays a down arrow, right-click on the device and uninstall and reinstall the driver. c. Ensure that the ODD controller transfer mode is choppy or jumps, perform the following actions one at a time to Start´ Control Panel´... label on the disc is the factory default. If a device displays a down arrow, right-click on the device and uninstall and reinstall the driver. b. Double-click DVD/CD-ROM drives. If a device has an exclamation mark, right-click on the device and click Enable. Discs Do ...
Aspire 4930 / 4930G Service Guide
Page 177
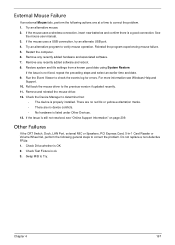
... an alternative mouse. 2. If the mouse uses a USB connection, try an alternate USB port. 4. Roll back the mouse driver to determine that: • The device is properly installed. Check the Device Manager to the previous version if updated recently. 11... time to correct the problem. 1. See the mouse user manual. 3. Reinstall the program experiencing mouse failure. 5. Remove and reinstall the mouse driver. 12. External Mouse Failure If an external Mouse fails, perform the following general steps to correct the problem. Try an alternative program to check...
... an alternative mouse. 2. If the mouse uses a USB connection, try an alternate USB port. 4. Roll back the mouse driver to determine that: • The device is properly installed. Check the Device Manager to the previous version if updated recently. 11... time to correct the problem. 1. See the mouse user manual. 3. Reinstall the program experiencing mouse failure. 5. Remove and reinstall the mouse driver. 12. External Mouse Failure If an external Mouse fails, perform the following general steps to correct the problem. Try an alternative program to check...


