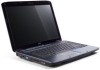
Aspire 4330 / 4370Z / 4370ZG / 4930 User's Guide EN
Page 9
Note: Do not cover or obstruct the opening of the fan. 9 Base view English # Icon Item 1 Battery bay Description Houses the computer's battery pack. 2 Battery release latch Releases the battery for removal. 3 Memory compartment Houses the computer's main memory. 4 Hard disk bay Houses the computer's hard disk (secured with screws). 5 Battery lock Locks the battery in position. 6 Ventilation slots and Enable the computer to stay cool, even cooling fan after prolonged use.
Aspire 4330 / 4370Z / 4370ZG / 4930 User's Guide EN
Page 10
...; Nplify™ 802.11b/g/Draft-N* Acer InviLink™ 802.11b/g* Dual-Channel DDR2 SDRAM support Up to 2 GB of DDR2 667 MHz memory, upgradeable to 4 GB using two soDIMM modules* 14.1" WXGA 1280 x 800 Mobile Intel® GL40 Express Chipset* ATI Mobility Radeon™ HD 3470* 2.5" hard disk drive Optical drive options: •...
Aspire 4930 / 4930G Service Guide
Page 8
... 61 Removing the ExpressCard dummy card 62 Removing the Lower Covers 63 Removing the DIMM Module 65 Removing the WLAN Board Module 66 Removing the Hard Disk Drive Module 68 Removing the Optical Drive Module 70 Main Unit Disassembly Process 73 Main Unit Disassembly Flowchart 73 Removing the Switch Cover 74 Removing...
Aspire 4930 / 4930G Service Guide
Page 9
...Replacing the Speaker Module 144 Replacing the Keyboard 144 Replacing the Switch Cover 145 Replacing the WLAN Module 145 Replacing the Hard Disk Drive Module 146 Replacing the DIMM Modules 147 Replacing the ODD Module 148 Replacing the Lower Covers 148 Replacing the ...Password Check and BIOS Recovery 171 Clearing Password Check 171 BIOS Recovery by Crisis Disk 172 FRU (Field Replaceable Unit) List 173 Aspire 4930 Exploded Diagram 174 Model Definition and Configuration 182 Aspire 4930 Series 182 Test Compatible Components 205 Microsoft® Windows® Vista Environment ...
Aspire 4930 / 4930G Service Guide
Page 11
...and graphics • 14.1" WXGA 1280 x 800 • Mobile Intel® GM45 Express Chipset • NVIDIA GeForce 9300M GS / 9600M GT (For Aspire 4390G only) Storage subsystem • 2.5" hard disk drive • Optical drive options: • Blu-ray Disc™ /DVD-Super Multi double-layerdrive • DVD-Super Multi double-layer drive •...surround sound system with two built-in stereo speakers and one subwoofer supporting low-frequency effects S/PDIF (Sony/Philips Digital Interface) support for digital speakers Acer PureZone technology with two built-in stereo microphones Chapter 1 1
Aspire 4930 / 4930G Service Guide
Page 19
Houses the computer's hard disk (secured with screws). Battery release latch Memory compartment Hard disk bay Battery lock Ventilation slots and cooling fan Releases the battery for removal. Locks the battery in position. Chapter 1 9 Houses the computer's main memory. Note: Do not cover or obstruct the opening of the fan. Bottom View No. 1 2 3 4 5 6 Icon Item Battery bay Description Houses the computer's battery pack. Enable the computer to stay cool, even after prolonged use.
Aspire 4930 / 4930G Service Guide
Page 20
Lights up when Caps Lock is activated. Battery HDD Num Lock Caps Lock Indicates the computer's battery status. Fully charged: The light shows green when in AC mode. 10 Chapter 1 Icon Function Power Description Indicates the computer's power status. NOTE: 1. Indicators The computer has several easy-to-read status indicators: The front panel indicators are visible even when the computer cover is active. Lights up when Num Lock is charging. 2. Indicates when the hard disk drive is closed. Charging: The light shows amber when the battery is activated.
Aspire 4930 / 4930G Service Guide
Page 35
It allows you with a Recovery CD or System CD, please use Acer eRecovery Management's "System backup to optical disc" feature to burn a backup image to hard disk or optical disc • Creation of backups: • Factory default image • User backup image • Current system configuration • Application backup • Restore and ...
Aspire 4930 / 4930G Service Guide
Page 43
... Features Bluetooth Interface Item Chipset Data throughput Protocol Interface Connector type Wireless Module 802.11b/g Item Chipset Data throughput Protocol Interface Hard Disk Drive Interface Item Vendor & Model Name HGST 2.5" HTS542580K9SA0 0 BRONCO-B SATA II, WD 2.5" WD800BEVS22RST0 ML80 SATA Capacity (...MB) 80000 Bytes per 512 sector Data heads 2 Drive Format Disks 1 Spindle speed (RPM) 5400 RPM Performance Specifications Buffer size 8MB Interface SATA Specification Realtek RTL8111C-GR 10/100/1000 Mbps RJ45...
Aspire 4930 / 4930G Service Guide
Page 47
Individual devices such as the CPU and hard disk may be power managed in the system are turned off completely. Chapter 1 37...Inrush current Efficiency System Power Management ACPI mode Mech. CPU set power down VGA Suspend PCMCIA Suspend Audio Power Down Hard Disk Power Down CD-ROM Power Down Super I/O Low Power mode Also called Hibernation Mode. Off (G3) Soft Off... Suspend to RAM (S3) Save to power off completely. System saves all system states and data onto the disc prior to Disk (S4) YEC YNV-C01H N/A 9~20(V) Typical 0.33(mA) Typical 650 Vrms MAX. 6.8mA 45~65 (KHz) Specification...
Aspire 4930 / 4930G Service Guide
Page 54
... the Setup menu nor change the value of password must be grayed out if the user password was used to change the value of the hard disk password. If you forget your password, you may have three tries before the system halts. Press Enter to reset it. 44 Chapter 2 Shows the setting...
Aspire 4930 / 4930G Service Guide
Page 59
Bootable devices includes the USB diskette drives, the onboard hard disk drive and the DVD drive in the module bay. Press to move it down the list, or to escape the menu F1 Help ESC Exit ...
Aspire 4930 / 4930G Service Guide
Page 78
Use the mylar tab to slide and lift up the hard disk drive module to the carrier. 68 Chapter 3 Remove the four screws securing the hard disk to remove. Removing the Hard Disk Drive Module 1. NOTE: To prevent damage to device, avoid pressing down on it or placing heavy objects on page 60. 2. See "Removing the Battery Pack" on top of it. 4. Remove the HDD cover, See "Removing the Lower Covers" on page 63. 3.
Aspire 4930 / 4930G Service Guide
Page 94
... SD dummy card" on page 76. 11. See "Removing the Keyboard" on page 61. 3. See "Removing the Lower Covers" on page 68. 8. See "Removing the Hard Disk Drive Module" on page 63. 5. See "Removing the Optical Drive Module" on page 66. 7. Step 12 Size (Quantity) M2.5*8 NL (8) Color Black Torque 84 Chapter...
Aspire 4930 / 4930G Service Guide
Page 98
... Pad board. 88 Chapter 3 See "Removing the Optical Drive Module" on page 63. 5. See "Removing the WLAN Board Module" on page 68. 8. See "Removing the Hard Disk Drive Module" on page 66. 7. See "Removing the Upper Cover" on page 84. 12. Removing the Touch Pad Bracket 1.
Aspire 4930 / 4930G Service Guide
Page 101
... page 66. 7. Remove the securing screw from the Finger Print Reader board. See "Removing the WLAN Board Module" on page 84. 12. See "Removing the Hard Disk Drive Module" on page 65. 6. See "Removing the DIMM Module" on page 68. 8. Removing the Finger Print Reader 1. See "Removing the Keyboard" on page 60...
Aspire 4930 / 4930G Service Guide
Page 103
... Drive Module" on page 76. 10. See "Removing the DIMM Module" on page 60. 2. See "Removing the Battery Pack" on page 65. 6. See "Removing the Hard Disk Drive Module" on page 84. 12. See "Removing the Upper Cover" on page 68. 8. Removing the Launch Board 1. See "Removing the LCD Module" on page...
Aspire 4930 / 4930G Service Guide
Page 105
... Drive Module" on page 62. 4. Chapter 3 95 See "Removing the Keyboard" on page 68. 8. Remove the adhesive tape from the speaker cable. See "Removing the Hard Disk Drive Module" on page 76. 10. See "Removing the LCD Module" on page 61. 3. See "Removing the SD dummy card" on page 82. 11. See...
Aspire 4930 / 4930G Service Guide
Page 107
... the Upper Cover. See "Removing the ExpressCard dummy card" on page 76. 10. See "Removing the WLAN Board Module" on page 68. 8. See "Removing the Hard Disk Drive Module" on page 66. 7. Remove the Switch Board as shown. See "Removing the Lower Covers" on page 82. 11. Ensure the Switch Board cable...
Aspire 4930 / 4930G Service Guide
Page 108
See "Removing the Battery Pack" on page 62. 4. See "Removing the ExpressCard dummy card" on page 60. 2. See "Removing the Hard Disk Drive Module" on page 93. 15. See "Removing the Launch Board" on page 68. 8. See "Removing the DIMM Module" on page 76. 10. See "Removing ...