
User Guide
Page 7
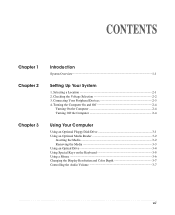
... an Optional Floppy Disk Drive 3-1 Using an Optional Media Reader 3-2 Inserting the Media 3-2 Removing the Media 3-3 Using an Optical Drive 3-4 Using Special Keys on the Keyboard 3-5 Using a Mouse ...3-6 Changing the Display Resolution and Color Depth 3-7 Controlling the Audio Volume 3-7 vii Connecting Your Peripheral Devices 2-3 4. CONTENTS Chapter 1 Chapter 2 Chapter 3 Introduction System Overview...
... an Optional Floppy Disk Drive 3-1 Using an Optional Media Reader 3-2 Inserting the Media 3-2 Removing the Media 3-3 Using an Optical Drive 3-4 Using Special Keys on the Keyboard 3-5 Using a Mouse ...3-6 Changing the Display Resolution and Color Depth 3-7 Controlling the Audio Volume 3-7 vii Connecting Your Peripheral Devices 2-3 4. CONTENTS Chapter 1 Chapter 2 Chapter 3 Introduction System Overview...

User Guide
Page 8
Solving Common Problems Power ...A-1 Hard Disk Drive ...A-1 Optical Drive ...A-2 Audio ...A-2 Floppy Disk Drive A-3 Display & Monitor A-3 Keyboard ...A-4 Mouse ...A-4 Appendix B. Approval Statements Battery Warning Instruction B-1 Fuse Warning Instruction B-1 Laser Product ...B-2 viii Chapter 4 Installing and Removing Drives Removing the Cover 4-1 Replacing the Cover 4-3 Installing ...
Solving Common Problems Power ...A-1 Hard Disk Drive ...A-1 Optical Drive ...A-2 Audio ...A-2 Floppy Disk Drive A-3 Display & Monitor A-3 Keyboard ...A-4 Mouse ...A-4 Appendix B. Approval Statements Battery Warning Instruction B-1 Fuse Warning Instruction B-1 Laser Product ...B-2 viii Chapter 4 Installing and Removing Drives Removing the Cover 4-1 Replacing the Cover 4-3 Installing ...
User Guide
Page 19
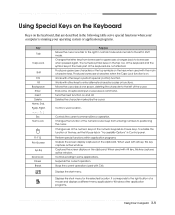
...application programs. Using Your Computer 3-5 Ends a line of the numeric keys on . Controls the current command line or operation. Changes use of keyboard input or executes a command. Controls scrolling in the main part of a mouse and displays a different menu applicable to perform special (control) function... with alt key, this key captures active window. Changes the letter keys from entering numbers to the right button of the keyboard are described in the following table serve special functions when your operating system or application programs. Key Tab Caps Lock Shift Ctrl...
...application programs. Using Your Computer 3-5 Ends a line of the numeric keys on . Controls the current command line or operation. Changes use of keyboard input or executes a command. Controls scrolling in the main part of a mouse and displays a different menu applicable to perform special (control) function... with alt key, this key captures active window. Changes the letter keys from entering numbers to the right button of the keyboard are described in the following table serve special functions when your operating system or application programs. Key Tab Caps Lock Shift Ctrl...
User Guide
Page 20
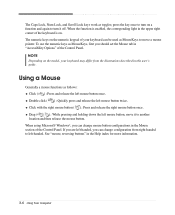
... and then release the mouse button. Drag ( ) : While pressing and holding down the left -handed. The numeric keys on the model, your keyboard can change mouse button configurations in the Mouse section of the Control Panel. NOTE Depending on the numeric keypad of your... button once. Using a Mouse Generally a mouse functions as MouseKeys, first you should set the Mouse tab in the upper right corner of the keyboard is enabled, the corresponding light in "Accessibility Options" of the Control Panel. When using Microsoft® Windows®, you can be used as toggles...
... and then release the mouse button. Drag ( ) : While pressing and holding down the left -handed. The numeric keys on the model, your keyboard can change mouse button configurations in the Mouse section of the Control Panel. NOTE Depending on the numeric keypad of your... button once. Using a Mouse Generally a mouse functions as MouseKeys, first you should set the Mouse tab in the upper right corner of the keyboard is enabled, the corresponding light in "Accessibility Options" of the Control Panel. When using Microsoft® Windows®, you can be used as toggles...
User Guide
Page 25
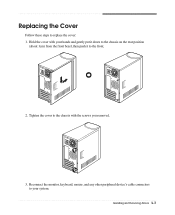
Replacing the Cover Follow these steps to your hands and gently put it down to the chassis on the rear position (about 1cm) from the front bezel, then push it to the front. 2. Reconnect the monitor, keyboard, mouse, and any other peripheral device's cable connectors to replace the cover: 1. Tighten the cover to the chassis with your system. Hold the cover with the screws you removed. 3. Installing and Removing Drives 4-3
Replacing the Cover Follow these steps to your hands and gently put it down to the chassis on the rear position (about 1cm) from the front bezel, then push it to the front. 2. Reconnect the monitor, keyboard, mouse, and any other peripheral device's cable connectors to replace the cover: 1. Tighten the cover to the chassis with your system. Hold the cover with the screws you removed. 3. Installing and Removing Drives 4-3
User Guide
Page 46
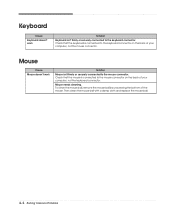
... Mouse isn't firmly or securely connected to the keyboard connector. A-4 Solving Common Problems Mouse Cause Mouse doesn't work Solution Keyboard isn't firmly or securely connected to the mouse connector. Check that the keyboard is connected to the keyboard connector on the back of your computer, not the keyboard connector. Mouse needs cleaning. Check that the...
... Mouse isn't firmly or securely connected to the keyboard connector. A-4 Solving Common Problems Mouse Cause Mouse doesn't work Solution Keyboard isn't firmly or securely connected to the mouse connector. Check that the keyboard is connected to the keyboard connector on the back of your computer, not the keyboard connector. Mouse needs cleaning. Check that the...


