eMachines C2684 Support and Manuals
Get Help and Manuals for this eMachines item

View All Support Options Below
Free eMachines C2684 manuals!
Problems with eMachines C2684?
Ask a Question
Free eMachines C2684 manuals!
Problems with eMachines C2684?
Ask a Question
Popular eMachines C2684 Manual Pages
User Guide - Page 5

... other product and brand names are either trademarks or registered trademarks of eMachines, Inc. shall not be liable for incidental or consequential damages resulting from the furnishing, performance, or use of their respective owners. ©2003 eMachines, Inc. eMachines, stylized "e" and figure logo are trademarks of this user's guide is subject to change without notice...
User Guide - Page 9

...) Power button
Emergency eject hole Load/Eject button Floppy disk drive(optional)
Media reader slots(optional) Power indicator Hard disk drive access indicator
IEEE 1394 connectors (optional)
USB 2.0 connectors (optional)
Headphone jack
Microphone jack USB 2.0 connectors (optional)
NOTE
Chapter 1 Your optical drives may differ from the illustrations described in this user's guide. Introduction...
User Guide - Page 11

... Select a cool, dry area and protect your computer from extremes in this chapter.
1. Appropriate power sources. You need one outlet for the computer, one for the monitor, and an additional outlet... Location
Before you set up your computer, it is important to choose a safe and convenient location that provides the following:
A large, sturdy desk or table strong enough to support the weight of your...
User Guide - Page 13
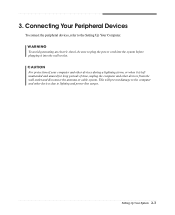
Setting Up Your System 2-3 CAUTION For protection of time, unplug the computer and other devices from the wall outlet and disconnect...lightning storm, or when it into the wall socket. WARNING To avoid generating an electric shock, be sure to plug the power cord into the system before plugging it is left unattended and unused for long periods of your computer and other devices due to ...
User Guide - Page 14

... the Computer On and Off
Follow the instructions below to turn on the monitor, and any other peripheral devices connected to your computer is displayed, click Turn Off to turn it off the monitor and any other peripheral devices.
2-4 Setting Up Your System
To start Windows, remove the Restore CD and restart the...
User Guide - Page 15

...manual assume that system for instructions on . Using an Optional Floppy Disk Drive
To use your system. When the disk pops, remove it clicks into the drive, as OS/2 Warp or UNIX, see the manual that came with that you must install.... Using Your Computer
To use your computer, you are using Windows® with your computer. Windows® may come with already installed on your computer.
User Guide - Page 19
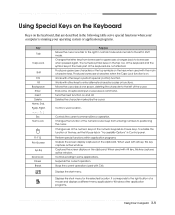
... of the keyboard and the symbol keys in the main part of the keyboard are described in the following table serve ...when used with other keys to the left of the key, set the Mouse tab in "Accessibility Options" in some applications. Moves...codes or functions. Controls the current command line or operation. Changes the function of a mouse and displays a different menu applicable to Windows ...
User Guide - Page 20
... once.
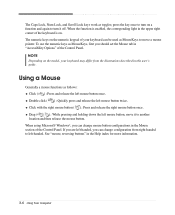
When using Microsoft® Windows®, you can change configuration from the illustrations described in this user's guide. If you are left-handed, you should set the Mouse tab in the upper ..."Accessibility Options" of your keyboard may differ from right-handed to turn on the model, your keyboard can change mouse button configurations in the Help index for more information...
User Guide - Page 21
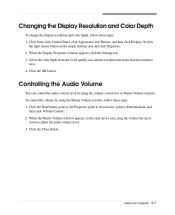
... desktop area and click Properties. 2. Click the OK button. When the Display Properties window appears, click the Settings tab. 3.
Click the Start button, point to All Programs, point to Accessories, ... Control. 2. Click the Close button. To control the volume by using the Master Volume window, follow these steps: 1. Using Your Computer 3-7 Select the color depth from the Color ...
User Guide - Page 37
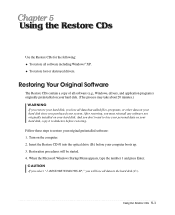
... Software
The Restore CDs contain a copy of all software (e.g., Windows, drivers, and application programs) originally preinstalled on your hard disk. (....
RESTORE WINDOWS XP," you purchased your hard disk. Follow these steps to lose your personal data on your
hard disk since you will be started. 4. CAUTION If you must reinstall any software not originally installed on the...
User Guide - Page 38
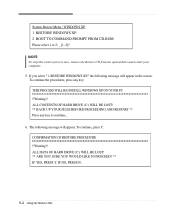
... !!Warning!!
The following message will appear. To continue, press Y.
THIS PROCESS WILL RE-INSTALL WINDOWS XP ON YOUR PC !!Warning!! ALL CONTENTS OF HARD DRIVE (C:) WILL BE LOST! ** BACK... UP YOUR FILES BEFORE PROCEEDING AND RESTART ** Press any key. System Restore Menu / WINDOWS XP 1 RESTORE WINDOWS XP 2 BOOT TO COMMAND PROMPT FROM CD-ROM Please select 1 or 2: _ [1, 2]? ALL DATA ...
User Guide - Page 39

... restart the computer.
13. You can update drivers in the Device Manager window if there is the executable file for installation, use it to restart your system are in the optical drive. The restoration process will be copied to your optical drive. 12. And press Enter to continue. Windows XP starts and the registration program runs...
User Guide - Page 41

...the PowerDVD as follow:
Click the Start button, point to All Programs, point to emachines PowerDVD, and then click PowerDVD. NOTE When you play button on the PowerDVD.
About ...will automatically start when you
can hold more multimedia.
And press the play the DVD that supports 16:9 widescreen and the screen is a high-density storage device. Using the PowerDVD 6-1 ... COMBO drive model.
User Guide - Page 43

... Start button, and then click Help and Support.)
Solving Common Problems A-1 To open Windows Help, click the Start button, and then click Help and Support.)
The files stored on the computer, refer to the followings: Unplug the power cord to the Windows Help. To check to deal with the problems you might experience when using your computer...
User Guide - Page 45

... resolution and color depth, follow these steps: 1. To open Windows Help, click the Start button, and then click Help and Support.)
Diskette is unformatted.
Make sure the power cord is properly and securely connected to a grounded wall outlet. You have a screen blanking utility installed or your mouse.
Use another diskette that the monitor connector...
eMachines C2684 Reviews
We have not received any reviews for eMachines yet.