
Network Connection Quick Setup Guide
Page 7
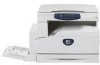
... the Apply New Settings button at the bottom of an IP address), enter the DNS server address in the browser's Address field (http://xxx.xxx.xxx.xxx). 3. Xerox WorkCentre M118/M118i 5 If you are using a server name for the machine (instead of the page. 6. Click the Properties tab. 4. Enter the default user ID and password in the Connect to printer status, configuration, and diagnostic functions. With CentreWare IS software, you can access and manage...
... the Apply New Settings button at the bottom of an IP address), enter the DNS server address in the browser's Address field (http://xxx.xxx.xxx.xxx). 3. Xerox WorkCentre M118/M118i 5 If you are using a server name for the machine (instead of the page. 6. Click the Properties tab. 4. Enter the default user ID and password in the Connect to printer status, configuration, and diagnostic functions. With CentreWare IS software, you can access and manage...

Quick Reference Guide
Page 13
..., switch off the power to a location outside of your building. 12 Xerox CopyCentre/WorkCentre 118 Quick Reference Guide A wall panel circuit breaker, fuse, or other than those specified herein may result in doubt, have the outlet checked by government, national and international agencies as a Class 1 laser product. Any part of the equipment is totally enclosed during all warnings and instructions that are unable...
..., switch off the power to a location outside of your building. 12 Xerox CopyCentre/WorkCentre 118 Quick Reference Guide A wall panel circuit breaker, fuse, or other than those specified herein may result in doubt, have the outlet checked by government, national and international agencies as a Class 1 laser product. Any part of the equipment is totally enclosed during all warnings and instructions that are unable...

Quick Reference Guide
Page 30
... functions. Refer to Direct Send in the Address Book, a Fax Program, or a bulletin board. Indicates that data is not loaded into the feeder, you to send and receive documents manually. Use these buttons to move the cursor in the machine. You can press the button only for receiving. Refer to Setups chapter on User Guide. 11 (Green light) Indicates whether the machine is in to the machine as the Key Operator, and change the default settings. When the document is data...
... functions. Refer to Direct Send in the Address Book, a Fax Program, or a bulletin board. Indicates that data is not loaded into the feeder, you to send and receive documents manually. Use these buttons to move the cursor in the machine. You can press the button only for receiving. Refer to Setups chapter on User Guide. 11 (Green light) Indicates whether the machine is in to the machine as the Key Operator, and change the default settings. When the document is data...

Quick Reference Guide
Page 105
... machine to POP3 server when using POP3 protocol. 9 Problem Solving Code Description and Corrective Action S10025 The document has jammed. Also, check that the DNS server is not set correctly. 016-502 Failed to login to print again. S10026 During document scanning, the document glass cover opened . Close the document feeder cover. Check the print data. 016-500 SMTP server name is not set correctly when reply mail was transmitted. Select print language. 104 Xerox CopyCentre/WorkCentre 118 Quick Reference Guide Z-10 Turn...
... machine to POP3 server when using POP3 protocol. 9 Problem Solving Code Description and Corrective Action S10025 The document has jammed. Also, check that the DNS server is not set correctly. 016-502 Failed to login to print again. S10026 During document scanning, the document glass cover opened . Close the document feeder cover. Check the print data. 016-500 SMTP server name is not set correctly when reply mail was transmitted. Select print language. 104 Xerox CopyCentre/WorkCentre 118 Quick Reference Guide Z-10 Turn...

Quick Reference Guide
Page 106
... reached. Check the print settings, or correct the PJL command. The machine could not print the PDF file using the following actions. • Set for copying. Enter the correct password. Contact the Key Operator. If this does not fix the problem, set for highest compatibility to print it contains objects that caused the error. Resend the form data. An error occurred during image processing. Open the file in the print driver and try again. Open the file in...
... reached. Check the print settings, or correct the PJL command. The machine could not print the PDF file using the following actions. • Set for copying. Enter the correct password. Contact the Key Operator. If this does not fix the problem, set for highest compatibility to print it contains objects that caused the error. Resend the form data. An error occurred during image processing. Open the file in the print driver and try again. Open the file in...

Quick Reference Guide
Page 109
... Before Using the Machine chapter on the left side of the machine. 1. Select [Billing Meter] on the control panel. 2. Press the button on the [Machine Status] screen using your company. If you need any ), as well as the name and location of your CopyCentre copier or WorkCentre copier/printer, you can: 1) Refer to look up the serial number of the machine behind Cover A. 9 Problem Solving Xerox Welcome Center For additional help on using the button, and...
... Before Using the Machine chapter on the left side of the machine. 1. Select [Billing Meter] on the control panel. 2. Press the button on the [Machine Status] screen using your company. If you need any ), as well as the name and location of your CopyCentre copier or WorkCentre copier/printer, you can: 1) Refer to look up the serial number of the machine behind Cover A. 9 Problem Solving Xerox Welcome Center For additional help on using the button, and...

System Administration Guide
Page 22
The status of a maximum of sheets used in the PDF print mode. • PCL Settings - Print Meter Prints information on the total printed pages and total number of 50 jobs can also view the machine Serial Number. 22 Xerox CopyCentre/WorkCentre 118 System Administration Guide Fonts List Prints a list of the User Guide. Print Language Allows you to check the settings for up to Fault Codes in the PCL print mode. Prints a report which provides the various settings in the Problem Solving Chapter of the resident...
The status of a maximum of sheets used in the PDF print mode. • PCL Settings - Print Meter Prints information on the total printed pages and total number of 50 jobs can also view the machine Serial Number. 22 Xerox CopyCentre/WorkCentre 118 System Administration Guide Fonts List Prints a list of the User Guide. Print Language Allows you to check the settings for up to Fault Codes in the PCL print mode. Prints a report which provides the various settings in the Problem Solving Chapter of the resident...

System Administration Guide
Page 25
... a destination in the machine. 5 6 Allows you to the machine as the Key Operator, and change the default settings. Xerox CopyCentre/WorkCentre 118 System Administration Guide 25 When the document is data stored in the Address Book, a Fax Program, or a bulletin board. Refer to Setups chapter of the User Guide. 11 (Green light) Indicates whether the machine is not loaded into the feeder, you can press the button only for faxing with the document feeder; System Controls 12 34 5 6 System...
... a destination in the machine. 5 6 Allows you to the machine as the Key Operator, and change the default settings. Xerox CopyCentre/WorkCentre 118 System Administration Guide 25 When the document is data stored in the Address Book, a Fax Program, or a bulletin board. Refer to Setups chapter of the User Guide. 11 (Green light) Indicates whether the machine is not loaded into the feeder, you can press the button only for faxing with the document feeder; System Controls 12 34 5 6 System...

System Administration Guide
Page 37
... objects. NetWare Setup Use PCONSOLE or NetWare Administrator (NWADMIN) to the machine from a client workstation. When using in the PSERVER mode, set as Auto Load. • Printer Type - set as Parallel • Parallel Setting - Test Print To make sure that the machine has been installed on every workstation that the print driver is located in CentreWare Utilities CD-ROM. Perform the following steps. 1. Make sure that will be sending jobs to the manual which comes...
... objects. NetWare Setup Use PCONSOLE or NetWare Administrator (NWADMIN) to the machine from a client workstation. When using in the PSERVER mode, set as Auto Load. • Printer Type - set as Parallel • Parallel Setting - Test Print To make sure that the machine has been installed on every workstation that the print driver is located in CentreWare Utilities CD-ROM. Perform the following steps. 1. Make sure that will be sending jobs to the manual which comes...

System Administration Guide
Page 65
...the control panel. First, enable the SMB port. 1. Enter the password using the machine on page 91. Select [Print Settings] and then press the button. 6. SMB Installation SMB Installation This section describes the installation procedure for using the numeric keypad and then select [Confirm]. 5. Installation Procedure The installation procedure is used to configure the machine. Workstation Setup Install the print driver on the [Network/Port] screen. Press the button. 3. Press the button on the computer. Xerox CopyCentre/WorkCentre 118 System Administration Guide 65...
...the control panel. First, enable the SMB port. 1. Enter the password using the machine on page 91. Select [Print Settings] and then press the button. 6. SMB Installation SMB Installation This section describes the installation procedure for using the numeric keypad and then select [Confirm]. 5. Installation Procedure The installation procedure is used to configure the machine. Workstation Setup Install the print driver on the [Network/Port] screen. Press the button. 3. Press the button on the computer. Xerox CopyCentre/WorkCentre 118 System Administration Guide 65...
System Administration Guide
Page 67
... machine has been installed on every workstation that will be sending jobs to Problem Solving chapter for the gateway address. 7. If the test print fails, refer to the machine. SMB Installation NOTE: You cannot enter 127, 254, or 255 into the first section of the format for assistance. Press the button. The [Filter] screen is now complete. Test Print Make sure that it prints correctly. 4. Xerox CopyCentre/WorkCentre 118 System Administration Guide...
... machine has been installed on every workstation that will be sending jobs to Problem Solving chapter for the gateway address. 7. If the test print fails, refer to the machine. SMB Installation NOTE: You cannot enter 127, 254, or 255 into the first section of the format for assistance. Press the button. The [Filter] screen is now complete. Test Print Make sure that it prints correctly. 4. Xerox CopyCentre/WorkCentre 118 System Administration Guide...

System Administration Guide
Page 83
... [T] or [S] and then press the button. 8. Workstation Setup Before starting Workstation Setup, make sure that will be sending jobs to the machine. 2. Xerox CopyCentre/WorkCentre 118 System Administration Guide 83 Enable the USB port. NOTE: CentreWare Internet Services can be set up USB communication on your requirements. Select [Port Status] by selecting [T] or [S] and then press the button. 7. If necessary, you may change the following settings. • Auto Eject Time • Print Mode • PJL • Adobe...
... [T] or [S] and then press the button. 8. Workstation Setup Before starting Workstation Setup, make sure that will be sending jobs to the machine. 2. Xerox CopyCentre/WorkCentre 118 System Administration Guide 83 Enable the USB port. NOTE: CentreWare Internet Services can be set up USB communication on your requirements. Select [Port Status] by selecting [T] or [S] and then press the button. 7. If necessary, you may change the following settings. • Auto Eject Time • Print Mode • PJL • Adobe...

System Administration Guide
Page 88
....xxx.xxx". Press the button. 2. Use the numeric keypad to Workstation Setup on page 88. 1. Test Print To make sure that it prints correctly. 88 Xerox CopyCentre/WorkCentre 118 System Administration Guide NOTE: You cannot enter 127, 254, or 255 into each client workstation that will be sending print jobs to the machine, install the print drivers for the gateway address. 7. Press the button. 5. The [Filter] screen is located in CentreWare Utilities CD-ROM...
....xxx.xxx". Press the button. 2. Use the numeric keypad to Workstation Setup on page 88. 1. Test Print To make sure that it prints correctly. 88 Xerox CopyCentre/WorkCentre 118 System Administration Guide NOTE: You cannot enter 127, 254, or 255 into each client workstation that will be sending print jobs to the machine, install the print drivers for the gateway address. 7. Press the button. 5. The [Filter] screen is located in CentreWare Utilities CD-ROM...

System Administration Guide
Page 93
... are two stages required to use CentreWare Internet Services. Select [System Settings]. 4. Select [Print Settings] and then press the button. 6. Test Access To make sure that CentreWare Internet Services has been set up the network communication parameters of the machine. Enter the password using the numeric keypad and then select [Confirm]. 5. Xerox CopyCentre/WorkCentre 118 System Administration Guide 93 CentreWare Internet Services Installation OS Windows XP Windows Server 2003 Mac OS 8.x, 9.x Mac OS X 10.2.6 Browsers Internet Explorer 6.0 SP1...
... are two stages required to use CentreWare Internet Services. Select [System Settings]. 4. Select [Print Settings] and then press the button. 6. Test Access To make sure that CentreWare Internet Services has been set up the network communication parameters of the machine. Enter the password using the numeric keypad and then select [Confirm]. 5. Xerox CopyCentre/WorkCentre 118 System Administration Guide 93 CentreWare Internet Services Installation OS Windows XP Windows Server 2003 Mac OS 8.x, 9.x Mac OS X 10.2.6 Browsers Internet Explorer 6.0 SP1...

System Administration Guide
Page 133
... Service 127 NetWare 112 SMB 117 UNIX 119 Windows 121 S Symbol Set 30 T TCP/IP (LPD or Port9100 71 Information Checklist 71 Network Communication Setup 73 TCP/IP (LPD or Port9100) Environments .... 72 Test Print 75 Workstation Setup 75 U UNIX TCP/IP 39 -C Option 54 HP-UX 46 Information Checklist 39 Network Communication Setup 41 Printer Status 52 Printing 48 Solaris 44 Xerox CopyCentre/WorkCentre 118 Quick...
... Service 127 NetWare 112 SMB 117 UNIX 119 Windows 121 S Symbol Set 30 T TCP/IP (LPD or Port9100 71 Information Checklist 71 Network Communication Setup 73 TCP/IP (LPD or Port9100) Environments .... 72 Test Print 75 Workstation Setup 75 U UNIX TCP/IP 39 -C Option 54 HP-UX 46 Information Checklist 39 Network Communication Setup 41 Printer Status 52 Printing 48 Solaris 44 Xerox CopyCentre/WorkCentre 118 Quick...

User Guide
Page 130
... code using the button. 2. All the jobs have been finished on page 213. Refer to the country code list to clear the displayed country code. 4. For details of time when the button is 100% available. Repeat Interval - NOTE: Before changing the country code, be specified separately. Press the button to confirm the appropriate country code. 130 Xerox CopyCentre/WorkCentre 118 User Guide The phone line and network cable are disconnected to Country Code List on the machine. - 9 Setups Repeat Start...
... code using the button. 2. All the jobs have been finished on page 213. Refer to the country code list to clear the displayed country code. 4. For details of time when the button is 100% available. Repeat Interval - NOTE: Before changing the country code, be specified separately. Press the button to confirm the appropriate country code. 130 Xerox CopyCentre/WorkCentre 118 User Guide The phone line and network cable are disconnected to Country Code List on the machine. - 9 Setups Repeat Start...

User Guide
Page 143
..., specify the period of time within the range of the machine clock for the printer feature. • Data Format - NOTE: For information on page 147. • Set Date - When [On] is selected and the recorded print jobs exceed 50 jobs, the recorded print jobs are not recorded. 2 Sided Report Specify whether to output the banner sheet. Xerox CopyCentre/WorkCentre 118 User Guide 143 Print Settings Specify whether or not to cancel the offline mode automatically.
..., specify the period of time within the range of the machine clock for the printer feature. • Data Format - NOTE: For information on page 147. • Set Date - When [On] is selected and the recorded print jobs exceed 50 jobs, the recorded print jobs are not recorded. 2 Sided Report Specify whether to output the banner sheet. Xerox CopyCentre/WorkCentre 118 User Guide 143 Print Settings Specify whether or not to cancel the offline mode automatically.

User Guide
Page 150
..., the document image is selected, the machine notifies the maximum paper size in the trays loading plain paper. Specify the method for the paper supply used to free up some memory. To avoid the memory full error again, delete unnecessary documents to print received faxes. • Long Size Originals - If [Tray Mode] is not reduced or may be split into multiple pages depending on received documents. Multiple-Up 150 Xerox CopyCentre/WorkCentre 118 User Guide If [Auto Reduction] is set , the document is received but...
..., the document image is selected, the machine notifies the maximum paper size in the trays loading plain paper. Specify the method for the paper supply used to free up some memory. To avoid the memory full error again, delete unnecessary documents to print received faxes. • Long Size Originals - If [Tray Mode] is not reduced or may be split into multiple pages depending on received documents. Multiple-Up 150 Xerox CopyCentre/WorkCentre 118 User Guide If [Auto Reduction] is set , the document is received but...
User Guide
Page 151
... printed out at all times. Use this feature to configure the default settings for printing out incoming faxes and reports. Saves a received fax on page 73. After selecting from the displayed F Code list, press the button. Rotate 90° Specify whether or not to automatically rotate the image to a specified destination. To complete specifying the fax number, press the button. • Transfer & Print - Select [Always On] to bottom. Xerox CopyCentre/WorkCentre 118 User Guide 151 F Code • Save...
... printed out at all times. Use this feature to configure the default settings for printing out incoming faxes and reports. Saves a received fax on page 73. After selecting from the displayed F Code list, press the button. Rotate 90° Specify whether or not to automatically rotate the image to a specified destination. To complete specifying the fax number, press the button. • Transfer & Print - Select [Always On] to bottom. Xerox CopyCentre/WorkCentre 118 User Guide 151 F Code • Save...

User Guide
Page 154
... can be stored. page 157 154 Xerox CopyCentre/WorkCentre 118 User Guide For more information, refer to print out scanned documents with a report. After selecting [Customize Screens], select the item you select [Undelivered], the machine prints a report only when transmission fails. • Multiple destination - Activity Report Specify whether or not to a single destination. page 156 Scan Size - page 156 File Format - Configure the settings to be used when sending fax to automatically print the report of the transmission...
... can be stored. page 157 154 Xerox CopyCentre/WorkCentre 118 User Guide For more information, refer to print out scanned documents with a report. After selecting [Customize Screens], select the item you select [Undelivered], the machine prints a report only when transmission fails. • Multiple destination - Activity Report Specify whether or not to a single destination. page 156 Scan Size - page 156 File Format - Configure the settings to be used when sending fax to automatically print the report of the transmission...


