Features Setup Guide
Page 3
... Asked Questions on your Phaser 6180MFP Multifunction Printer. Use the Phaser 6180MFP Installation Guide to connect the printer to your connection method. This guide will help deciding whether to connect over an Ethernet (Network) or USB connection. ...scanning to an FTP server Enable Fax Features: ■ Entering fax number and country code ■ Creating individual fax addresses ■ Creating and editing a fax group For detailed user information for this printer, go to www.xerox.com/ office/6180MFPsupport. Scanner features vary according to your computer. Phaser® 6180MFP...
... Asked Questions on your Phaser 6180MFP Multifunction Printer. Use the Phaser 6180MFP Installation Guide to connect the printer to your connection method. This guide will help deciding whether to connect over an Ethernet (Network) or USB connection. ...scanning to an FTP server Enable Fax Features: ■ Entering fax number and country code ■ Creating individual fax addresses ■ Creating and editing a fax group For detailed user information for this printer, go to www.xerox.com/ office/6180MFPsupport. Scanner features vary according to your computer. Phaser® 6180MFP...

Features Setup Guide
Page 6
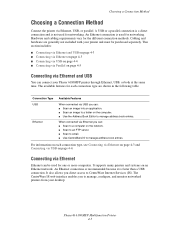
...button. 3. When asked to completion. To add your language, and then click Next. 4. Select the Bonjour connected printer. 5. Phaser® 6180MFP Multifunction Printer EN - 4 Select your new printer, click Add. 3. Select I Accept if you have not already installed PrintingScout ...Printer Features Connecting over USB on page 2. Click Install Utilities. 2. Macintosh Network Installation Installing the Address Book Editor and Express Scan Manager (USB Only) 1. Note: If you accept the Xerox License Agreement, and then click Next. 6. Select Rendezvous from the list of...
...button. 3. When asked to completion. To add your language, and then click Next. 4. Select the Bonjour connected printer. 5. Phaser® 6180MFP Multifunction Printer EN - 4 Select your new printer, click Add. 3. Select I Accept if you have not already installed PrintingScout ...Printer Features Connecting over USB on page 2. Click Install Utilities. 2. Macintosh Network Installation Installing the Address Book Editor and Express Scan Manager (USB Only) 1. Note: If you accept the Xerox License Agreement, and then click Next. 6. Select Rendezvous from the list of...

Features Setup Guide
Page 7
...email Address. ■ Set up scanning to an FTP Server. ■ Set up the fax. ■ Add individual and group addresses to share, and then select Properties. 3. Phaser® 6180MFP Multifunction Printer EN - 5 Open... printers. 7. Click the Add button. 3. Setting Up the Printer Features Connecting over Ethernet (Network) The following section will help you want to your Fax Address Book. Macintosh USB Installation Macintosh...components you wish to completion. Click the Add button. 3. Select Xerox from the drop-down menu. 6. Open the Printer Setup Utility. 2. Click the Sharing tab...
...email Address. ■ Set up scanning to an FTP Server. ■ Set up the fax. ■ Add individual and group addresses to share, and then select Properties. 3. Phaser® 6180MFP Multifunction Printer EN - 5 Open... printers. 7. Click the Add button. 3. Setting Up the Printer Features Connecting over Ethernet (Network) The following section will help you want to your Fax Address Book. Macintosh USB Installation Macintosh...components you wish to completion. Click the Add button. 3. Select Xerox from the drop-down menu. 6. Open the Printer Setup Utility. 2. Click the Sharing tab...
Features Setup Guide
Page 9
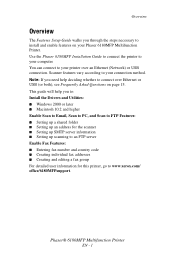
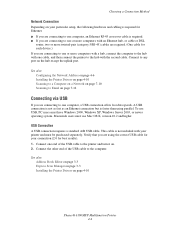
...IP address, see the printer's home page. Select Email Server from the Protocols list. 4. Phaser® 6180MFP Multifunction Printer EN - 7 In the Name field, enter the name that you shared previously....shared folder. Fill in the browser's Address field. e. For example, if you have a shared Scans folder that you created earlier. 7. Select the Enable SNMP check box, and then click Save Changes... the Server Type drop-down list. Setting Up the Printer Features Connecting over Ethernet (Network) 5. Enter your computer, open System Preferences and click on page 15. 3. Enter \...
...IP address, see the printer's home page. Select Email Server from the Protocols list. 4. Phaser® 6180MFP Multifunction Printer EN - 7 In the Name field, enter the name that you shared previously....shared folder. Fill in the browser's Address field. e. For example, if you have a shared Scans folder that you created earlier. 7. Select the Enable SNMP check box, and then click Save Changes... the Server Type drop-down list. Setting Up the Printer Features Connecting over Ethernet (Network) 5. Enter your computer, open System Preferences and click on page 15. 3. Enter \...

Features Setup Guide
Page 10
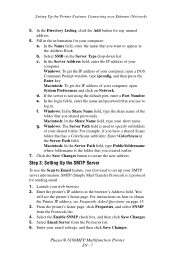
... address is not using CentreWare IS: 1. Leave the Share Name and Server Path fields blank. 6. Phaser® 6180MFP Multifunction Printer EN - 8 Step 5: Using CentreWare IS to Set Up for Scanning to appear in the browser's Address field. Under Server Address Book, click Individual Directory. 5. If ...the FTP server is added to 100 for the scanner using the default port, enter a Port Number. Setting Up the Printer Features Connecting over Ethernet (Network) Note...
... address is not using CentreWare IS: 1. Leave the Share Name and Server Path fields blank. 6. Phaser® 6180MFP Multifunction Printer EN - 8 Step 5: Using CentreWare IS to Set Up for Scanning to appear in the browser's Address field. Under Server Address Book, click Individual Directory. 5. If ...the FTP server is added to 100 for the scanner using the default port, enter a Port Number. Setting Up the Printer Features Connecting over Ethernet (Network) Note...
Features Setup Guide
Page 13
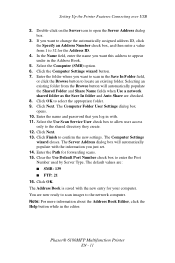
... computer. You are : ■ SMB: 139 ■ FTP: 21 16. Phaser® 6180MFP Multifunction Printer EN - 11 Enter the folder where you want to confirm the new settings. Select the Use Scan Service User check box to allow user access only to open the Server Address dialog box... wizard closes. Clear the Use Default Port Number check box to select the appropriate folder. 9. If you want to the network computer. Click Finish to scan in the editor. The Computer Folder User Settings dialog box opens. 10. Click OK. Setting Up the Printer Features Connecting over...
... computer. You are : ■ SMB: 139 ■ FTP: 21 16. Phaser® 6180MFP Multifunction Printer EN - 11 Enter the folder where you want to confirm the new settings. Select the Use Scan Service User check box to allow user access only to open the Server Address dialog box... wizard closes. Clear the Use Default Port Number check box to select the appropriate folder. 9. If you want to the network computer. Click Finish to scan in the editor. The Computer Folder User Settings dialog box opens. 10. Click OK. Setting Up the Printer Features Connecting over...

Features Setup Guide
Page 14
...To create an address to the network computer. The Server Address dialog box opens. 3. Confirm the settings, and then click OK. 11. The address book is connected to the printer through USB only, you do the steps in this section. Then click OK. Phaser® 6180MFP Multifunction Printer EN - 12 ...in the Address Book. 4. In the Name field of the Address Book Editor, double- Windows: On the Start menu, select All Programs/Xerox/ Phaser 6180MFP/Express Scan Manager. Click OK. In the left navigation panel of the Server Address dialog box, enter the name that you log in with the new...
...To create an address to the network computer. The Server Address dialog box opens. 3. Confirm the settings, and then click OK. 11. The address book is connected to the printer through USB only, you do the steps in this section. Then click OK. Phaser® 6180MFP Multifunction Printer EN - 12 ...in the Address Book. 4. In the Name field of the Address Book Editor, double- Windows: On the Start menu, select All Programs/Xerox/ Phaser 6180MFP/Express Scan Manager. Click OK. In the left navigation panel of the Server Address dialog box, enter the name that you log in with the new...

Features Setup Guide
Page 17
... Down Arrow to scroll down to a computer on Windows, enter the following: ipconfig You will automatically print. Click the Network icon. Phaser® 6180MFP Multifunction Printer EN - 15 How do you find your computer. From your printer to the computer over the Universal Serial ...Frequently Asked Questions Frequently Asked Questions Why would you use a network connection? Scroll down to the computer over the Ethernet (Network) you use a USB connection? For Windows: From a DOS prompt on the network using Express Scan manager. ■ Use the Address Book Editor to create ...
... Down Arrow to scroll down to a computer on Windows, enter the following: ipconfig You will automatically print. Click the Network icon. Phaser® 6180MFP Multifunction Printer EN - 15 How do you find your computer. From your printer to the computer over the Universal Serial ...Frequently Asked Questions Frequently Asked Questions Why would you use a network connection? Scroll down to the computer over the Ethernet (Network) you use a USB connection? For Windows: From a DOS prompt on the network using Express Scan manager. ■ Use the Address Book Editor to create ...

Quick Use Guide
Page 9
... Status System OK Manual Dial 3 Service Computer (Network)... www.xerox.com/office/6180MFPsupport 2 Copy Fax E-mail Scan Color Mode B&W Color Job in the User Guide for more information. 063-0000-00a Phaser® 6180MFP Software and Documentation CD-ROM Printer Drivers and Utilities Installation Video W i n d o w s ®, Mac OS® 9 Scanning Scanning Scanning to a computer USB PC 1 Mac Select settings in...
... Status System OK Manual Dial 3 Service Computer (Network)... www.xerox.com/office/6180MFPsupport 2 Copy Fax E-mail Scan Color Mode B&W Color Job in the User Guide for more information. 063-0000-00a Phaser® 6180MFP Software and Documentation CD-ROM Printer Drivers and Utilities Installation Video W i n d o w s ®, Mac OS® 9 Scanning Scanning Scanning to a computer USB PC 1 Mac Select settings in...

Quick Use Guide
Page 10
... x 150 OK Scroll to display the address menu. Service Computer (Network)... Computer (USB)... 2 Service Computer (Network)... or Server (FTP)... www.xerox.com/office/6180MFPsupport [ ] Detail, [Enter]: Save 01 MyComputer 02...Scanning Scanning 1 Scan Press the Scan button. OK Scroll to : MyComput... Ready to Scan: 01 MyComputer Scan to select Computer (Network)... File Format... MultipageTIFF Resolution... 150 x 150 OK Scroll to select other settings. 6 Start Press the Start button. See Scanning in the User Guide for more information. 063-0000-00a Phaser® 6180MFP...
... x 150 OK Scroll to display the address menu. Service Computer (Network)... Computer (USB)... 2 Service Computer (Network)... or Server (FTP)... www.xerox.com/office/6180MFPsupport [ ] Detail, [Enter]: Save 01 MyComputer 02...Scanning Scanning 1 Scan Press the Scan button. OK Scroll to : MyComput... Ready to Scan: 01 MyComputer Scan to select Computer (Network)... File Format... MultipageTIFF Resolution... 150 x 150 OK Scroll to select other settings. 6 Start Press the Start button. See Scanning in the User Guide for more information. 063-0000-00a Phaser® 6180MFP...
User Guide
Page 4
...13 3 Printer Management Software Print and Scan Drivers 3-2 CentreWare Internet Services 3-2 Creating an Administrative Password 3-2 Address Book Editor 3-3 Express Scan Manager 3-3 Launcher (Windows 3-3 PrintingScout Software 3-4 4 Network Basics Overview of Network Setup and Configuration 4-2 Choosing a Connection... 4-5 Configuring the Network Address 4-6 TCP/IP and IP Addresses 4-6 Automatically Setting the Printer's IP Address 4-6 Dynamic Methods of Setting the Printer's IP Address 4-7 Manually Setting the Printer's IP Address 4-8 Phaser® 6180MFP Multifunction Printer ii
...13 3 Printer Management Software Print and Scan Drivers 3-2 CentreWare Internet Services 3-2 Creating an Administrative Password 3-2 Address Book Editor 3-3 Express Scan Manager 3-3 Launcher (Windows 3-3 PrintingScout Software 3-4 4 Network Basics Overview of Network Setup and Configuration 4-2 Choosing a Connection... 4-5 Configuring the Network Address 4-6 TCP/IP and IP Addresses 4-6 Automatically Setting the Printer's IP Address 4-6 Dynamic Methods of Setting the Printer's IP Address 4-7 Manually Setting the Printer's IP Address 4-8 Phaser® 6180MFP Multifunction Printer ii

User Guide
Page 6
... Computer 7-5 Scanning to a Computer on a Network 7-6 Setting Up Scanning to a Computer 7-6 Scanning to a Computer on a Network 7-10 Scanning to Email 7-11 Setting Up the SMTP Server 7-11 Using CentreWare IS to Create an Address 7-11 Scanning to Email 7-12 Scanning to a FTP Server 7-13 Creating an Address for the Scanner 7-13 Scanning to a FTP Server 7-14 Phaser® 6180MFP Multifunction Printer...
... Computer 7-5 Scanning to a Computer on a Network 7-6 Setting Up Scanning to a Computer 7-6 Scanning to a Computer on a Network 7-10 Scanning to Email 7-11 Setting Up the SMTP Server 7-11 Using CentreWare IS to Create an Address 7-11 Scanning to Email 7-12 Scanning to a FTP Server 7-13 Creating an Address for the Scanner 7-13 Scanning to a FTP Server 7-14 Phaser® 6180MFP Multifunction Printer...

User Guide
Page 47
...the print and scan drivers from the Software and Documentation CD-ROM or from the Xerox Drivers and Downloads website: www.xerox.com/office/...your computer. See also: Installing the Scan Driver on page 7-3 CentreWare Internet Services This section provides information on your network can log in the browser's Address field...Scan Drivers Print and Scan Drivers To access all of the printer, set and anyone with your printer driver and is not open, click the plus sign (+) to printer status, and printer configuration options. Click the Properties button. 4. Phaser® 6180MFP...
...the print and scan drivers from the Software and Documentation CD-ROM or from the Xerox Drivers and Downloads website: www.xerox.com/office/...your computer. See also: Installing the Scan Driver on page 7-3 CentreWare Internet Services This section provides information on your network can log in the browser's Address field...Scan Drivers Print and Scan Drivers To access all of the printer, set and anyone with your printer driver and is not open, click the plus sign (+) to printer status, and printer configuration options. Click the Properties button. 4. Phaser® 6180MFP...
User Guide
Page 52
... type, see Connecting via Ethernet on the computer. ■ Use the Address Book Editor to a computer on an Ethernet network. It also allows you can : ■ Scan to manage address book entries. Phaser® 6180MFP Multifunction Printer 4-3 This section includes: ■ Connecting via Ethernet and USB on page 4-3 ■ Connecting via Ethernet on page...
... type, see Connecting via Ethernet on the computer. ■ Use the Address Book Editor to a computer on an Ethernet network. It also allows you can : ■ Scan to manage address book entries. Phaser® 6180MFP Multifunction Printer 4-3 This section includes: ■ Connecting via Ethernet and USB on page 4-3 ■ Connecting via Ethernet on page...
User Guide
Page 53
...the uplink port. See also: Configuring the Network Address on page 4-6 Installing the Printer Drivers on page 4-10 Scanning to a Computer on a Network on page 7-10 Scanning to Email on page 7-12 Connecting via USB...cable for best results). 1. To use Mac OS X, version 10.2 and higher. Choosing a Connection Method Network Connection Depending on your particular setup, the following hardware and cabling is required for Ethernet. ■ If ... and turn it on page 4-10 Phaser® 6180MFP Multifunction Printer 4-4 Macintosh users must use USB, PC users must be purchased separately.
...the uplink port. See also: Configuring the Network Address on page 4-6 Installing the Printer Drivers on page 4-10 Scanning to a Computer on a Network on page 7-10 Scanning to Email on page 7-12 Connecting via USB...cable for best results). 1. To use Mac OS X, version 10.2 and higher. Choosing a Connection Method Network Connection Depending on your particular setup, the following hardware and cabling is required for Ethernet. ■ If ... and turn it on page 4-10 Phaser® 6180MFP Multifunction Printer 4-4 Macintosh users must use USB, PC users must be purchased separately.
User Guide
Page 123
... 7-5 ■ Scanning to a Computer on a Network on page 7-6 ■ Scanning to Email on page 7-11 ■ Scanning to a FTP Server on page 7-13 ■ Scanning Images into an Application on page 7-15 ■ Adjusting Scanning Options on page 7-18 See also: Printer Management Software on page 3-1 Scanning tutorials (English Only) www.xerox.com/office/6180MFPsupport Phaser® 6180MFP Multifunction Printer 7-1
... 7-5 ■ Scanning to a Computer on a Network on page 7-6 ■ Scanning to Email on page 7-11 ■ Scanning to a FTP Server on page 7-13 ■ Scanning Images into an Application on page 7-15 ■ Adjusting Scanning Options on page 7-18 See also: Printer Management Software on page 3-1 Scanning tutorials (English Only) www.xerox.com/office/6180MFPsupport Phaser® 6180MFP Multifunction Printer 7-1
User Guide
Page 124
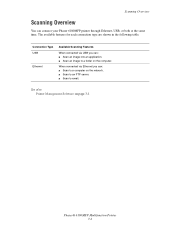
... the computer. When connected via USB you can: ■ Scan to a computer on the network. ■ Scan to an FTP server. ■ Scan to a folder on page 3-1 Phaser® 6180MFP Multifunction Printer 7-2 Connection Type USB Ethernet Available Scanning Features When connected via Ethernet you can connect your Phaser 6180MFP printer through Ethernet, USB, or both at the same time...
... the computer. When connected via USB you can: ■ Scan to a computer on the network. ■ Scan to an FTP server. ■ Scan to a folder on page 3-1 Phaser® 6180MFP Multifunction Printer 7-2 Connection Type USB Ethernet Available Scanning Features When connected via Ethernet you can connect your Phaser 6180MFP printer through Ethernet, USB, or both at the same time...
User Guide
Page 128
...type ipconfig, and then press the Enter key. Now you want the scan to go to. Creating a Shared Folder on a network drive. Close the DOS Command Prompt window. The folder is ready. Phaser® 6180MFP Multifunction Printer 7-6 Right-click the folder you need to create a ...shared folder on the computer for the printer to send scanned images to. Select the Everyone group...
...type ipconfig, and then press the Enter key. Now you want the scan to go to. Creating a Shared Folder on a network drive. Close the DOS Command Prompt window. The folder is ready. Phaser® 6180MFP Multifunction Printer 7-6 Right-click the folder you need to create a ...shared folder on the computer for the printer to send scanned images to. Select the Everyone group...

User Guide
Page 129
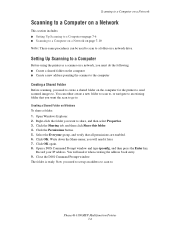
...a Computer on a Network Creating a Shared Folder on a Macintosh To share a folder: 1. b. Phaser® 6180MFP Multifunction Printer 7-7 Click Show All, and then click the Network icon. 8. You will place scanned images in the Address Book. Launch your printer to scan to appear under Server ...Address Book, click Individual Directory. 5. Click Done. 7. In the Address Book, under in this address to . Scanning to create the address: ■ Create the address with CentreWare IS (requires Ethernet connection). ■ Create the address with Xerox...
...a Computer on a Network Creating a Shared Folder on a Macintosh To share a folder: 1. b. Phaser® 6180MFP Multifunction Printer 7-7 Click Show All, and then click the Network icon. 8. You will place scanned images in the Address Book. Launch your printer to scan to appear under Server ...Address Book, click Individual Directory. 5. Click Done. 7. In the Address Book, under in this address to . Scanning to create the address: ■ Create the address with CentreWare IS (requires Ethernet connection). ■ Create the address with Xerox...

User Guide
Page 130
... scans in the Address Book. 10. Using the Address Book Editor to Create an Address Note: To use the Address Book Editor, your computer must be specified if the server is used to the printer with the new entry for sharing. On the Start menu, select Programs > Xerox > Phaser 6180MFP ... you want this address to be connected to specify subfolders of the folder that you have a shared Scans folder that you previously configured for your short name. See Creating a Shared Folder on a Network d. Click OK, and then Next. 7. The Computer Settings Wizard closes. 9. In the Name field...
... scans in the Address Book. 10. Using the Address Book Editor to Create an Address Note: To use the Address Book Editor, your computer must be specified if the server is used to the printer with the new entry for sharing. On the Start menu, select Programs > Xerox > Phaser 6180MFP ... you want this address to be connected to specify subfolders of the folder that you have a shared Scans folder that you previously configured for your short name. See Creating a Shared Folder on a Network d. Click OK, and then Next. 7. The Computer Settings Wizard closes. 9. In the Name field...


