Features Setup Guide
Page 15
Verify that your country. b. Select the Fax Settings. Windows: On the Start menu, select All Programs/Xerox/ Phaser 6180MFP/Address Book Editor, and then click OK. The Speed Dial dialog box opens. Type in the Address Book correspond to an existing group:...Editor to Add an Individual to the first empty entry. 3. Macintosh: From the Application folder, click Xerox/ Phaser 6180MFP, and then double-click Address Book Editor. 2. In the left navigation panel of the faxes). To manually specify the speed dial number, click Specify an Address Number, and then enter a value from 1 to...
Verify that your country. b. Select the Fax Settings. Windows: On the Start menu, select All Programs/Xerox/ Phaser 6180MFP/Address Book Editor, and then click OK. The Speed Dial dialog box opens. Type in the Address Book correspond to an existing group:...Editor to Add an Individual to the first empty entry. 3. Macintosh: From the Application folder, click Xerox/ Phaser 6180MFP, and then double-click Address Book Editor. 2. In the left navigation panel of the faxes). To manually specify the speed dial number, click Specify an Address Number, and then enter a value from 1 to...

Features Setup Guide
Page 16
Windows: On the Start menu, select All Programs/Xerox/ Phaser 6180MFP/Address Book Editor, and then click OK. ... a Fax Group To create a group using the Address Book Editor: 1. Click the Group Membership button. 5. Phaser® 6180MFP Multifunction Printer EN - 14 The Group Dial dialog box opens. To select multiple group members, press and hold ...On the File menu, select Save all . Macintosh: From the Application folder, click Xerox/ Phaser 6180MFP, and then double-click Address Book Editor. 2. To manually specify the Group ID, click Specify an Address Number, and then type a value...
Windows: On the Start menu, select All Programs/Xerox/ Phaser 6180MFP/Address Book Editor, and then click OK. ... a Fax Group To create a group using the Address Book Editor: 1. Click the Group Membership button. 5. Phaser® 6180MFP Multifunction Printer EN - 14 The Group Dial dialog box opens. To select multiple group members, press and hold ...On the File menu, select Save all . Macintosh: From the Application folder, click Xerox/ Phaser 6180MFP, and then double-click Address Book Editor. 2. To manually specify the Group ID, click Specify an Address Number, and then type a value...
Quick Use Guide
Page 1
www.xerox.com/office/6180MFPsupport Phaser® 6180MFP multifunction printer Printer Tour Printing Copying Scanning Faxing Troubleshooting More Information www.xerox.com/office/6180MFPsupport • Printer drivers and utilities • Quick Start Tutorials • User manuals and instructions • Online Support Assistant • Safety specifications (in User Guide) www.xerox.com/msds (U.S./Canada) www.xerox.com/environment_europe Material...
www.xerox.com/office/6180MFPsupport Phaser® 6180MFP multifunction printer Printer Tour Printing Copying Scanning Faxing Troubleshooting More Information www.xerox.com/office/6180MFPsupport • Printer drivers and utilities • Quick Start Tutorials • User manuals and instructions • Online Support Assistant • Safety specifications (in User Guide) www.xerox.com/msds (U.S./Canada) www.xerox.com/environment_europe Material...
Quick Use Guide
Page 3
... 002 003 004 005 006 007 008 009 010 Selects the color mode. Goes down . www.xerox.com/office/6180MFPsupport 3 Copy Fax E-mail Scan Color Mode B&W Color Job Status Ready CMYK System @:./ ABC DEF 12 3 GHI JKL MNO 456 PQRS TUV WXYZ 7 89 -_~ OK 0# Manual Dial Redial/ Pause Speed Dial C Job in Memory Wake Up...
... 002 003 004 005 006 007 008 009 010 Selects the color mode. Goes down . www.xerox.com/office/6180MFPsupport 3 Copy Fax E-mail Scan Color Mode B&W Color Job Status Ready CMYK System @:./ ABC DEF 12 3 GHI JKL MNO 456 PQRS TUV WXYZ 7 89 -_~ OK 0# Manual Dial Redial/ Pause Speed Dial C Job in Memory Wake Up...
Quick Use Guide
Page 4
...in Memory Job Status System @:./ ABC DEF 12 3 GHI JKL MNO 456 PQRS TUV WXYZ 7 89 -_~ Manual Dial Redial/ Pause 0# Speed Dial C 65-120 g/m2 (17-32 lb. Plain Paper Auto Scan OK Color Mode B&W Color Job in . Cover) Thick Card Stock 100-160 g/m2 Glossy Paper (28 lb. Monarch 3.8 x ... in.) LE: 127 - 355.6 mm (5.0 - 14.0 in . Bond - 60 lb. Bond - 60 lb. Legal 8.5 x 14.0 in .) Custom (SE) x (LE) SE LE www.xerox.com/office/6180MFPsupport When loading paper: Select appropriate settings on the control panel. Executive 7.25 x 10.5 in . A4 210 x 297 mm A5 148 x 210 mm...
...in Memory Job Status System @:./ ABC DEF 12 3 GHI JKL MNO 456 PQRS TUV WXYZ 7 89 -_~ Manual Dial Redial/ Pause 0# Speed Dial C 65-120 g/m2 (17-32 lb. Plain Paper Auto Scan OK Color Mode B&W Color Job in . Cover) Thick Card Stock 100-160 g/m2 Glossy Paper (28 lb. Monarch 3.8 x ... in.) LE: 127 - 355.6 mm (5.0 - 14.0 in . Bond - 60 lb. Bond - 60 lb. Legal 8.5 x 14.0 in .) Custom (SE) x (LE) SE LE www.xerox.com/office/6180MFPsupport When loading paper: Select appropriate settings on the control panel. Executive 7.25 x 10.5 in . A4 210 x 297 mm A5 148 x 210 mm...

Quick Use Guide
Page 9
Server (FTP)... Computer (USB)... See Scanning in Memory Scan Job Status System OK Manual Dial 3 Service Computer (Network)... OK Press the Scan button. Scroll to select the file format. Scanning Scanning to a computer USB ...OK Scroll to select Computer (USB)... 6 6.1 OK 6.2 Start Press OK, and then Start. www.xerox.com/office/6180MFPsupport 2 Copy Fax E-mail Scan Color Mode B&W Color Job in the User Guide for more information. 063-0000-00a Phaser® 6180MFP Software and Documentation CD-ROM Printer Drivers and Utilities Installation Video W i n d o w s ...
Server (FTP)... Computer (USB)... See Scanning in Memory Scan Job Status System OK Manual Dial 3 Service Computer (Network)... OK Press the Scan button. Scroll to select the file format. Scanning Scanning to a computer USB ...OK Scroll to select Computer (USB)... 6 6.1 OK 6.2 Start Press OK, and then Start. www.xerox.com/office/6180MFPsupport 2 Copy Fax E-mail Scan Color Mode B&W Color Job in the User Guide for more information. 063-0000-00a Phaser® 6180MFP Software and Documentation CD-ROM Printer Drivers and Utilities Installation Video W i n d o w s ...
Quick Use Guide
Page 12
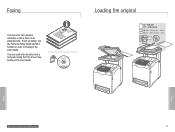
See Faxing in .) Faxing Faxing www.xerox.com/office/6180MFPsupport 12 Bond) W: 148 - 216 mm (4.1 - 8.5 in.) W H H: 210 - 355.6 mm (8.3 - 14 in the User Guide. 063-0000-00a Phaser® 6180MFP Software and Documentation CD-ROM Printer Drivers and Utilities Installation Video W i n d o w s ®, Mac OS® Loading the original 65 - 120 g/m2 (17 - 32 lb... driver. To set up faxing, see the Features Setup Guide (printed booklet or web) or Faxing in an address book. You can enter fax numbers manually or store them in the User Guide.
See Faxing in .) Faxing Faxing www.xerox.com/office/6180MFPsupport 12 Bond) W: 148 - 216 mm (4.1 - 8.5 in.) W H H: 210 - 355.6 mm (8.3 - 14 in the User Guide. 063-0000-00a Phaser® 6180MFP Software and Documentation CD-ROM Printer Drivers and Utilities Installation Video W i n d o w s ®, Mac OS® Loading the original 65 - 120 g/m2 (17 - 32 lb... driver. To set up faxing, see the Features Setup Guide (printed booklet or web) or Faxing in an address book. You can enter fax numbers manually or store them in the User Guide.
User Guide
Page 4
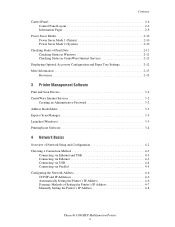
... via Parallel 4-5 Configuring the Network Address 4-6 TCP/IP and IP Addresses 4-6 Automatically Setting the Printer's IP Address 4-6 Dynamic Methods of Setting the Printer's IP Address 4-7 Manually Setting the Printer's IP Address 4-8 Phaser® 6180MFP Multifunction Printer ii
... via Parallel 4-5 Configuring the Network Address 4-6 TCP/IP and IP Addresses 4-6 Automatically Setting the Printer's IP Address 4-6 Dynamic Methods of Setting the Printer's IP Address 4-7 Manually Setting the Printer's IP Address 4-8 Phaser® 6180MFP Multifunction Printer ii

User Guide
Page 17
Use caution to light. Do not expose the item to avoid personal injury. Recycle the item. Hot surface on Printer User Safety Use caution (or draws attention to cool down. Do not touch the item. Safety Symbols Marked on or in the printer. It may take 30 minutes for information. Do not expose the item to sunlight. Phaser® 6180MFP Multifunction Printer 1-8 Do not burn the item. See the manual(s) for the fuser to a particular component).
Use caution to light. Do not expose the item to avoid personal injury. Recycle the item. Hot surface on Printer User Safety Use caution (or draws attention to cool down. Do not touch the item. Safety Symbols Marked on or in the printer. It may take 30 minutes for information. Do not expose the item to sunlight. Phaser® 6180MFP Multifunction Printer 1-8 Do not burn the item. See the manual(s) for the fuser to a particular component).
User Guide
Page 38
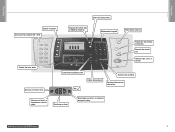
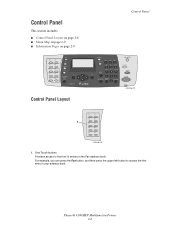
Phaser® 6180MFP Multifunction Printer 2-6 For example, you can press... on page 2-9 001 002 003 004 005 006 007 008 009 010 Copy Fax E-mail Scan Color Mode B&W Color Job in your address book. One Touch buttons Provides access to access the first entry in Memory ...Control Panel Layout Control Panel Job Status System @:./ ABC DEF 12 3 GHI JKL MNO 456 PQRS TUV WXYZ 7 89 -_~ OK 0# Manual Dial Redial/ Pause Speed Dial C Wake Up Clear All Stop Start Error 6180mfp...
Phaser® 6180MFP Multifunction Printer 2-6 For example, you can press... on page 2-9 001 002 003 004 005 006 007 008 009 010 Copy Fax E-mail Scan Color Mode B&W Color Job in your address book. One Touch buttons Provides access to access the first entry in Memory ...Control Panel Layout Control Panel Job Status System @:./ ABC DEF 12 3 GHI JKL MNO 456 PQRS TUV WXYZ 7 89 -_~ OK 0# Manual Dial Redial/ Pause Speed Dial C Wake Up Clear All Stop Start Error 6180mfp...
User Guide
Page 39
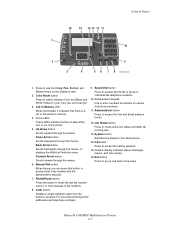
...fax number with the alphanumeric key pad. 7. Phaser® 6180MFP Multifunction Printer 2-7 Job in Memory Job Status System @:./ ABC DEF 12 3 GHI JKL MNO 456 PQRS TUV WXYZ 7 89 -_~ OK 0# Manual Dial Redial/ Pause Speed Dial C 10 9 3 4 56 7 8 6180mfp-046 1. These LEDs indicate the flow of data..., you can press this button to insert pauses in the printer's memory. 4. Color Mode button Press to the Setup menu. 14. System button Switches the display to switch between Color and Black and White modes for names and phone numbers. Graphic display indicates status messages...
...fax number with the alphanumeric key pad. 7. Phaser® 6180MFP Multifunction Printer 2-7 Job in Memory Job Status System @:./ ABC DEF 12 3 GHI JKL MNO 456 PQRS TUV WXYZ 7 89 -_~ OK 0# Manual Dial Redial/ Pause Speed Dial C 10 9 3 4 56 7 8 6180mfp-046 1. These LEDs indicate the flow of data..., you can press this button to insert pauses in the printer's memory. 4. Color Mode button Press to the Setup menu. 14. System button Switches the display to switch between Color and Black and White modes for names and phone numbers. Graphic display indicates status messages...

User Guide
Page 42
... for the printer to enter Power Saver Mode 2 is 5 to 60 minutes. See also: Changing the Power Saver Time on page 9-3 Phaser® 6180MFP Multifunction Printer 2-10 The time range that can be specified for Power Saver Mode 2. The default setting for Power Saver Mode 2 is 30... minutes after the time specified for the printer to enter Power Saver Mode 1 is 5 to 120 minutes. To cancel the Power Saver Mode 2 manually...
... for the printer to enter Power Saver Mode 2 is 5 to 60 minutes. See also: Changing the Power Saver Time on page 9-3 Phaser® 6180MFP Multifunction Printer 2-10 The time range that can be specified for Power Saver Mode 2. The default setting for Power Saver Mode 2 is 30... minutes after the time specified for the printer to enter Power Saver Mode 1 is 5 to 120 minutes. To cancel the Power Saver Mode 2 manually...
User Guide
Page 51
...TCP/IP address on page 2-12. 4. Print a Configuration page to an established TCP/IP network. Turn on the computer from www.xerox.com/office/6180MFPdrivers. Configure the printer's TCP/IP address, which is required to identify the printer on the network. ■ Windows... Configuration page and keep it for the specific operating system you can also manually set the printer's IP address on the control panel. ■ Macintosh systems: Manually set up and configure the network: 1. Phaser® 6180MFP Multifunction Printer 4-2 Connect the printer to the network using . 5.
...TCP/IP address on page 2-12. 4. Print a Configuration page to an established TCP/IP network. Turn on the computer from www.xerox.com/office/6180MFPdrivers. Configure the printer's TCP/IP address, which is required to identify the printer on the network. ■ Windows... Configuration page and keep it for the specific operating system you can also manually set the printer's IP address on the control panel. ■ Macintosh systems: Manually set up and configure the network: 1. Phaser® 6180MFP Multifunction Printer 4-2 Connect the printer to the network using . 5.
User Guide
Page 55
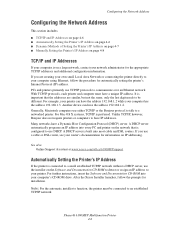
... while your printer. If you are similar, but not the same; After the Xerox Installer launches, follow the procedure for the appropriate TCP/IP addresses and additional configuration information. Phaser® 6180MFP Multifunction Printer 4-6 With TCP/IP protocols, each printer and computer must be connected... Automatically Setting the Printer's IP Address on page 4-6 ■ Dynamic Methods of Setting the Printer's IP Address on page 4-7 ■ Manually Setting the Printer's IP Address on page 4-8 TCP/IP and IP Addresses If your computer is on a large network, contact your network ...
... while your printer. If you are similar, but not the same; After the Xerox Installer launches, follow the procedure for the appropriate TCP/IP addresses and additional configuration information. Phaser® 6180MFP Multifunction Printer 4-6 With TCP/IP protocols, each printer and computer must be connected... Automatically Setting the Printer's IP Address on page 4-6 ■ Dynamic Methods of Setting the Printer's IP Address on page 4-7 ■ Manually Setting the Printer's IP Address on page 4-8 TCP/IP and IP Addresses If your computer is on a large network, contact your network ...
User Guide
Page 57
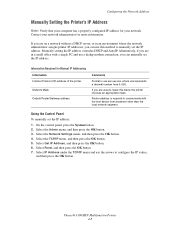
... IP address for more information. the printer chooses an appropriate mask. Phaser® 6180MFP Multifunction Printer 4-8 Alternatively, if you are unsure, leave this method to manually set the IP address. Using the Control Panel To manually set the IP address. Select Panel, and then press the OK button... single PC and use a dialup modem connection, you are in an environment where the network administrator assigns printer IP addresses, you can manually set the IP address: 1. Router address is xxx.xxx.xxx.xxx, where xxx represents a decimal number from anywhere other than the ...
... IP address for more information. the printer chooses an appropriate mask. Phaser® 6180MFP Multifunction Printer 4-8 Alternatively, if you are unsure, leave this method to manually set the IP address. Using the Control Panel To manually set the IP address. Select Panel, and then press the OK button... single PC and use a dialup modem connection, you are in an environment where the network administrator assigns printer IP addresses, you can manually set the IP address: 1. Router address is xxx.xxx.xxx.xxx, where xxx represents a decimal number from anywhere other than the ...
User Guide
Page 86
... 2-sided printing: ■ Transparencies ■ Envelopes ■ Labels ■ Any die-cut specialty media, such as an option for the Phaser 6180MFP-N configuration. For a list of the Paper This section includes: ■ Automatic 2-Sided Printing Guidelines on page 5-23 ■ Binding Edge ...on page 5-24 Note: For information about manual two-sided printing, go to the Online Support Assistant at www.xerox.com/office/6180MFPsupport. Automatic 2-Sided Printing Guidelines Automatic 2-sided printing is available from the Phaser 6180MFP-DN configuration. The following paper and media ...
... 2-sided printing: ■ Transparencies ■ Envelopes ■ Labels ■ Any die-cut specialty media, such as an option for the Phaser 6180MFP-N configuration. For a list of the Paper This section includes: ■ Automatic 2-Sided Printing Guidelines on page 5-23 ■ Binding Edge ...on page 5-24 Note: For information about manual two-sided printing, go to the Online Support Assistant at www.xerox.com/office/6180MFPsupport. Automatic 2-Sided Printing Guidelines Automatic 2-sided printing is available from the Phaser 6180MFP-DN configuration. The following paper and media ...
User Guide
Page 89
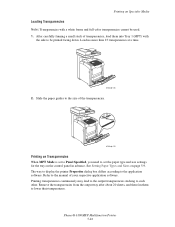
... Mode is set to Panel Specified, you need to the manual of transparencies, load them to lower their temperatures. Refer to set the paper type and size settings for the tray on page 5-9. Phaser® 6180MFP Multifunction Printer 5-26 See Setting Paper Types and Sizes on ... at a time. 6180mfp-018 2. Printing transparencies continuously may lead to the output transparencies sticking to the application software. Remove the transparencies from the output tray after about 20 sheets, and then fan them into Tray 1 (MPT) with a white frame and full-color transparencies cannot be printed...
... Mode is set to Panel Specified, you need to the manual of transparencies, load them to lower their temperatures. Refer to set the paper type and size settings for the tray on page 5-9. Phaser® 6180MFP Multifunction Printer 5-26 See Setting Paper Types and Sizes on ... at a time. 6180mfp-018 2. Printing transparencies continuously may lead to the output transparencies sticking to the application software. Remove the transparencies from the output tray after about 20 sheets, and then fan them into Tray 1 (MPT) with a white frame and full-color transparencies cannot be printed...

User Guide
Page 93
... to display the Properties dialog box. 3. From Paper Type, select Envelope. 6. Select this printer as the printer to be used and click Preferences to the manual of the original document. 7. Select the appropriate paper type from Tray 1 (MPT) Paper Type. 6. Phaser® 6180MFP Multifunction Printer 5-30
... to display the Properties dialog box. 3. From Paper Type, select Envelope. 6. Select this printer as the printer to be used and click Preferences to the manual of the original document. 7. Select the appropriate paper type from Tray 1 (MPT) Paper Type. 6. Phaser® 6180MFP Multifunction Printer 5-30

User Guide
Page 105
...length of the short edge cannot be longer than the long edge, even if it is within the specified range. 7. Click the Layout tab. Phaser® 6180MFP Multifunction Printer 5-42 You can be longer than the long edge, even if it is within the specified range. If necessary, repeat steps 4 ...length of your respective application software. 1. Click OK. Using the PCL Driver To print on Custom Size Paper Use the following procedures to the manual of the short edge and long edge under Settings for the paper name. 8. Select the appropriate paper type from Paper Tray. 5. Printing ...
...length of the short edge cannot be longer than the long edge, even if it is within the specified range. 7. Click the Layout tab. Phaser® 6180MFP Multifunction Printer 5-42 You can be longer than the long edge, even if it is within the specified range. If necessary, repeat steps 4 ...length of your respective application software. 1. Click OK. Using the PCL Driver To print on Custom Size Paper Use the following procedures to the manual of the short edge and long edge under Settings for the paper name. 8. Select the appropriate paper type from Paper Tray. 5. Printing ...
User Guide
Page 107
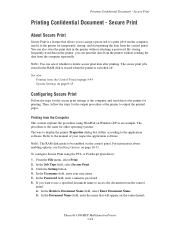
...using WordPad on the control panel. In the Username field, enter your respective application software. In the Password field, enter a numeric password. 6. Phaser® 6180MFP Multifunction Printer 5-44 Click the Setting button. 4. In the Document Name field, enter the name that allows you to assign a password to ... Options on page 9-15 Configuring Secure Print Follow the steps for the output procedure at the computer and send data to the manual of your user name. 5. In the Retrieve Document Name field, select Enter Document Name. If you can select whether to the ...
...using WordPad on the control panel. In the Username field, enter your respective application software. In the Password field, enter a numeric password. 6. Phaser® 6180MFP Multifunction Printer 5-44 Click the Setting button. 4. In the Document Name field, enter the name that allows you to assign a password to ... Options on page 9-15 Configuring Secure Print Follow the steps for the output procedure at the computer and send data to the manual of your user name. 5. In the Retrieve Document Name field, select Enter Document Name. If you can select whether to the ...


