Quick Use Guide
Page 31
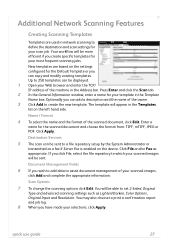
... document management of the scanned document, click Edit. quick use guide 27 Up to which your scanned images will be more efficient if you create specific templates for your most frequent scanning jobs. Optionally you can be sent. Destination Services 5 The scan can copy and modify existing templates. New templates are...
... document management of the scanned document, click Edit. quick use guide 27 Up to which your scanned images will be more efficient if you create specific templates for your most frequent scanning jobs. Optionally you can be sent. Destination Services 5 The scan can copy and modify existing templates. New templates are...

System Administration Guide
Page 35
...14 until step 38, then return to the network. 3. Unix Unix HP-UX Client (Version 10.x) HP-UX workstations require specific installation steps to access Super User mode. 3. The machine is a BSD-style UNIX printer, whereas HP-UX is connected ...are written. Subnet Mask Address for the machine. 6. Ensure that the following information into the [Add Remote Printer/Plotter] form: Xerox WorkCentre 4250/4260 Series System Administration Guide 23 Procedure 1. Click on [Actions: Add Remote Printer/Plotter...]. 8. Information Checklist Before starting the installation procedure...
...14 until step 38, then return to the network. 3. Unix Unix HP-UX Client (Version 10.x) HP-UX workstations require specific installation steps to access Super User mode. 3. The machine is a BSD-style UNIX printer, whereas HP-UX is connected ...are written. Subnet Mask Address for the machine. 6. Ensure that the following information into the [Add Remote Printer/Plotter] form: Xerox WorkCentre 4250/4260 Series System Administration Guide 23 Procedure 1. Click on [Actions: Add Remote Printer/Plotter...]. 8. Information Checklist Before starting the installation procedure...
System Administration Guide
Page 38
... file. 4. Procedure 1. Follow the steps in Chapter 3, Configure Static IPv4 Addressing using either the GUI or the TTY method. 26 Xerox WorkCentre 4250/4260 Series System Administration Guide SCO SCO UNIX workstations require specific installation steps to exit Super User mode. 7. Subnet Mask Address for the machine. 4. Ensure that the job prints at the...
... file. 4. Procedure 1. Follow the steps in Chapter 3, Configure Static IPv4 Addressing using either the GUI or the TTY method. 26 Xerox WorkCentre 4250/4260 Series System Administration Guide SCO SCO UNIX workstations require specific installation steps to exit Super User mode. 7. Subnet Mask Address for the machine. 4. Ensure that the job prints at the...

System Administration Guide
Page 45
...PC. 8. Ensure that you to clone other machines. The [.dlm] file can save the Clone file onto a laptop or PC. 6. Xerox WorkCentre 4250/4260 Series System Administration Guide 33 Click on [Install] to submit the file to clone. 3. It will cause the machine to another Device NOTE... on [Save]. Install Clone File to reboot. In the [Install Clone File] area, click on [Clone]. Click on the [Browse] button. Cloning b) Specific features - Click on the [Cloning] link. 6. Click on the [General Setup] link. 5. NOTE: You can now be unavailable over the network for ...
...PC. 8. Ensure that you to clone other machines. The [.dlm] file can save the Clone file onto a laptop or PC. 6. Xerox WorkCentre 4250/4260 Series System Administration Guide 33 Click on [Install] to submit the file to clone. 3. It will cause the machine to another Device NOTE... on [Save]. Install Clone File to reboot. In the [Install Clone File] area, click on [Clone]. Click on the [Browse] button. Cloning b) Specific features - Click on the [Cloning] link. 6. Click on the [General Setup] link. 5. NOTE: You can now be unavailable over the network for ...

System Administration Guide
Page 47
Double-click on [Start]. 4. Click on [Add or Remove Programs]. 6. Click on [Exit]. 2. Xerox WorkCentre 4250/4260 Series System Administration Guide 35 If the CD autoruns, click on [Add/Remove Windows Components] in the left hand column. Verify that Print ... Banner Sheet on page 54 Windows Printing LPR Printing Ensure Print Services for Unix is loaded 3. Click on [Control Panel]. 5. The following areas are specific to install the print drivers on your operating system: Windows XP 1. 4 Print Drivers This chapter explains how to your computer. From your Workstation, load...
Double-click on [Start]. 4. Click on [Add or Remove Programs]. 6. Click on [Exit]. 2. Xerox WorkCentre 4250/4260 Series System Administration Guide 35 If the CD autoruns, click on [Add/Remove Windows Components] in the left hand column. Verify that Print ... Banner Sheet on page 54 Windows Printing LPR Printing Ensure Print Services for Unix is loaded 3. Click on [Control Panel]. 5. The following areas are specific to install the print drivers on your operating system: Windows XP 1. 4 Print Drivers This chapter explains how to your computer. From your Workstation, load...
System Administration Guide
Page 51
... loaded. 5. b) Click on [Start]. Windows 2000/2003 From your Workstation: a) Click on [Network Connections]. Right-click on the [My Network Places] icon. Ensure that are specific to Keep Jobs in the URL field. Click on the [Next] button. The [Add Printer Wizard] window will appear: • Locate Your Printer for Windows... of the printer. 9. The following screen will appear. Click on : • For Windows 2000/2003 - [Settings] then [Printers]. • For Windows XP - [Printers and Faxes]. Xerox WorkCentre 4250/4260 Series System Administration Guide 39
... loaded. 5. b) Click on [Start]. Windows 2000/2003 From your Workstation: a) Click on [Network Connections]. Right-click on the [My Network Places] icon. Ensure that are specific to Keep Jobs in the URL field. Click on the [Next] button. The [Add Printer Wizard] window will appear: • Locate Your Printer for Windows... of the printer. 9. The following screen will appear. Click on : • For Windows 2000/2003 - [Settings] then [Printers]. • For Windows XP - [Printers and Faxes]. Xerox WorkCentre 4250/4260 Series System Administration Guide 39
System Administration Guide
Page 55
... then return to your operating system: Windows XP a) Click on the [My Network Places] icon. Follow the steps below that are specific to configure AppleTalk on, and then click on [Login]. 11. Press [Enter]. 3. Select [AppleTalk] in [Printer Name]. 9.... [Connectivity] link. 5. Click the [Reboot Machine] button and click [OK] to enable the Protocol. 8. b) Click on [Network Connections] Xerox WorkCentre 4250/4260 Series System Administration Guide 43 b) Click on [Network Connections]. Click on the [Properties] tab. 4. Install the Printer Driver 1. The [Connection ...
... then return to your operating system: Windows XP a) Click on the [My Network Places] icon. Follow the steps below that are specific to configure AppleTalk on, and then click on [Login]. 11. Press [Enter]. 3. Select [AppleTalk] in [Printer Name]. 9.... [Connectivity] link. 5. Click the [Reboot Machine] button and click [OK] to enable the Protocol. 8. b) Click on [Network Connections] Xerox WorkCentre 4250/4260 Series System Administration Guide 43 b) Click on [Network Connections]. Click on the [Properties] tab. 4. Install the Printer Driver 1. The [Connection ...
System Administration Guide
Page 59
... menu allows you to select the specific paper that it fits the selected paper size. b) In [Paper size] select [...]. c) Configure the paper size settings as required, then click the [OK] button. 5. d) Configure any other settings in the driver to view information about each feature. Xerox WorkCentre 4250/4260 Series System Administration Guide 47 Click...
... menu allows you to select the specific paper that it fits the selected paper size. b) In [Paper size] select [...]. c) Configure the paper size settings as required, then click the [OK] button. 5. d) Configure any other settings in the driver to view information about each feature. Xerox WorkCentre 4250/4260 Series System Administration Guide 47 Click...
System Administration Guide
Page 60
NOTE: Any options selected in the Printers list and select [Properties]. Advanced The Advanced tab contains settings specific to your operating system: Windows Vista a) Right-click on a page or as a booklet. Configure the Windows Printer Driver Bi-Directional ... also select to describe the settings. 4. Layout/Watermark The Layout/Watermark tab allows you are specific to the driver, such as [2-Sided Printing], then click [OK]. Windows XP 48 Xerox WorkCentre 4250/4260 Series System Administration Guide You can be selected from the [Saved Settings] menu. Follow the ...
NOTE: Any options selected in the Printers list and select [Properties]. Advanced The Advanced tab contains settings specific to your operating system: Windows Vista a) Right-click on a page or as a booklet. Configure the Windows Printer Driver Bi-Directional ... also select to describe the settings. 4. Layout/Watermark The Layout/Watermark tab allows you are specific to the driver, such as [2-Sided Printing], then click [OK]. Windows XP 48 Xerox WorkCentre 4250/4260 Series System Administration Guide You can be selected from the [Saved Settings] menu. Follow the ...

System Administration Guide
Page 61
... status. 5. g) Click on the [OK] button. g) Verify that the [Paper/Output] tab is printed at the bottom of the window. Xerox WorkCentre 4250/4260 Series System Administration Guide 49 Click on [Printing Preferences]. Follow the steps below that are installed on the [OK] button to close the [Test ... page is selected and click on [Close] to close the window. Click on [Automatic] to your operating system: 4. h) Verify that are specific to have the driver automatically configure the IP Address of the machine. b) Right-click on [Manual] and enter the IP Address or Host Name...
... status. 5. g) Click on the [OK] button. g) Verify that the [Paper/Output] tab is printed at the bottom of the window. Xerox WorkCentre 4250/4260 Series System Administration Guide 49 Click on [Printing Preferences]. Follow the steps below that are installed on the [OK] button to close the [Test ... page is selected and click on [Close] to close the window. Click on [Automatic] to your operating system: 4. h) Verify that are specific to have the driver automatically configure the IP Address of the machine. b) Right-click on [Manual] and enter the IP Address or Host Name...

System Administration Guide
Page 62
...machine. 2. Change any default printer settings, as required. 11. Open the CD and select the required language, if necessary. 50 Xerox WorkCentre 4250/4260 Series System Administration Guide 4 Print Drivers Manual Print Driver Configuration To configure the printer driver without using Bi-Directional communication: 1. Apple ...[Print Test Page]. 8. Windows XP a) From the [Start] menu, click on [Start], followed by [Control Panel]. Verify that are specific to close the [Test Page] window. 9. Load the CentreWare Print and Fax Drivers CD into your machine. Click on the [OK] ...
...machine. 2. Change any default printer settings, as required. 11. Open the CD and select the required language, if necessary. 50 Xerox WorkCentre 4250/4260 Series System Administration Guide 4 Print Drivers Manual Print Driver Configuration To configure the printer driver without using Bi-Directional communication: 1. Apple ...[Print Test Page]. 8. Windows XP a) From the [Start] menu, click on [Start], followed by [Control Panel]. Verify that are specific to close the [Test Page] window. 9. Load the CentreWare Print and Fax Drivers CD into your machine. Click on the [OK] ...
System Administration Guide
Page 71
... that the following items are running on [Login]. 18. Enter the name of the Server. 2. Enter the path from the Share to input from your specific folder in the [Login Name] and [Password] boxes. Enter the Login Name and Password in the [Document Path] entry box. Select the [Select to Optional... on the [File Repository Setup] link. f) Click on the server: a) The machine will send POST requests and scanned data to your HTTP server from a browser. Xerox WorkCentre 4250/4260 Series System Administration Guide 59
... that the following items are running on [Login]. 18. Enter the name of the Server. 2. Enter the path from the Share to input from your specific folder in the [Login Name] and [Password] boxes. Enter the Login Name and Password in the [Document Path] entry box. Select the [Select to Optional... on the [File Repository Setup] link. f) Click on the server: a) The machine will send POST requests and scanned data to your HTTP server from a browser. Xerox WorkCentre 4250/4260 Series System Administration Guide 59

System Administration Guide
Page 73
...save new password] checkbox. 16. Click on [Login]. 17. NOTE: The supplied Username must have only setup 1 filing destination, go to your specific folder in the [Friendly Name] entry box. If prompted, enter the Administrator's User ID [admin] and Password [1111], and click on [IP...from the machine's web pages. • If you have permission to describe the File Destination in the [Friendly Name] entry box. 9. Xerox WorkCentre 4250/4260 Series System Administration Guide 61 Enter the Password again in the [Default File Destination] area. Click on the [Add] button in the [...
...save new password] checkbox. 16. Click on [Login]. 17. NOTE: The supplied Username must have only setup 1 filing destination, go to your specific folder in the [Friendly Name] entry box. If prompted, enter the Administrator's User ID [admin] and Password [1111], and click on [IP...from the machine's web pages. • If you have permission to describe the File Destination in the [Friendly Name] entry box. 9. Xerox WorkCentre 4250/4260 Series System Administration Guide 61 Enter the Password again in the [Default File Destination] area. Click on the [Add] button in the [...
System Administration Guide
Page 74
.... 6. This data becomes the default document name for network scanning jobs. Click on the [Custom Filenaming] link. 7. Auto Using this option, you can enter more specific data formats and types, such as the default document name. If the [Name] field is empty, then the value set in the Default Template will... the option to your Workstation, open the web browser, enter the TCP/IP Address of Month • Month • Year • Time (24 hour) 62 Xerox WorkCentre 4250/4260 Series System Administration Guide Press [Enter]. 3. Click on the [Services] link. 5.
.... 6. This data becomes the default document name for network scanning jobs. Click on the [Custom Filenaming] link. 7. Auto Using this option, you can enter more specific data formats and types, such as the default document name. If the [Name] field is empty, then the value set in the Default Template will... the option to your Workstation, open the web browser, enter the TCP/IP Address of Month • Month • Year • Time (24 hour) 62 Xerox WorkCentre 4250/4260 Series System Administration Guide Press [Enter]. 3. Click on the [Services] link. 5.
System Administration Guide
Page 76
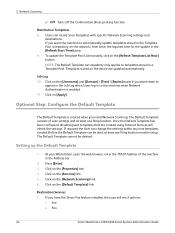
...), then enter the required time for the update in a Template Pool. Click on the [Properties] tab. 4. If required the User can create Scan Templates with specific Network Scanning settings and destinations. Before the Default Template can be used, at least one filing location must be deleted. Setting up the Default Template... Default Template The Default Template is enabled. 11. Click on the device are created using Internet Services will see 2 options: • File • Fax 64 Xerox WorkCentre 4250/4260 Series System Administration Guide
...), then enter the required time for the update in a Template Pool. Click on the [Properties] tab. 4. If required the User can create Scan Templates with specific Network Scanning settings and destinations. Before the Default Template can be used, at least one filing location must be deleted. Setting up the Default Template... Default Template The Default Template is enabled. 11. Click on the device are created using Internet Services will see 2 options: • File • Fax 64 Xerox WorkCentre 4250/4260 Series System Administration Guide
System Administration Guide
Page 77
.... NOTE: A Server Fax Repository must enter a name for the field at a specific time. 6. Optional Step: Configure the Default Template 8. Enter the required fax number in the Fax Destinations area to the Default Template. Click on their Job Log information. 1. Xerox WorkCentre 4250/4260 Series System Administration Guide 65 You will be used instead. Click...
.... NOTE: A Server Fax Repository must enter a name for the field at a specific time. 6. Optional Step: Configure the Default Template 8. Enter the required fax number in the Fax Destinations area to the Default Template. Click on their Job Log information. 1. Xerox WorkCentre 4250/4260 Series System Administration Guide 65 You will be used instead. Click...

System Administration Guide
Page 105
... password] entry box. 13. This is 139). This is sharename/wc/scans, enter /wc/scans. 11. Download a sample script: a) At your specific folder in the Address bar. e) Click on the [Apply] button to a Web Server. Enter the Document Path from the Protocol drop-down the IP... and Password [1111], and click on [IP Address] or [Host Name], enter either the IP Address or Host Name of the Server. 2. Xerox WorkCentre 4250/4260 Series System Administration Guide 93 page 95. Enter the Password again in the [Login Name] and [Password] boxes. Click on [Login]. 15. ...
... password] entry box. 13. This is 139). This is sharename/wc/scans, enter /wc/scans. 11. Download a sample script: a) At your specific folder in the Address bar. e) Click on the [Apply] button to a Web Server. Enter the Document Path from the Protocol drop-down the IP... and Password [1111], and click on [IP Address] or [Host Name], enter either the IP Address or Host Name of the Server. 2. Xerox WorkCentre 4250/4260 Series System Administration Guide 93 page 95. Enter the Password again in the [Login Name] and [Password] boxes. Click on [Login]. 15. ...

System Administration Guide
Page 107
...The Confirmation Sheet specifies the success or failure of the arrival of the fax job on [Login]. Click on the [Apply] button to your specific folder in the Fax menu. If prompted, enter the Administrator's User ID [admin] and Password [1111], and click on [General] in the... [Script path and filename (from the [Confirmation Sheet] drop-down menu: a) On - Click on their Job Log information. 2. c) Off - Xerox WorkCentre 4250/4260 Series System Administration Guide 95 Select the [Select to search, file and distribute documents based on the [Apply] button to the script, starting at the...
...The Confirmation Sheet specifies the success or failure of the arrival of the fax job on [Login]. Click on the [Apply] button to your specific folder in the Fax menu. If prompted, enter the Administrator's User ID [admin] and Password [1111], and click on [General] in the... [Script path and filename (from the [Confirmation Sheet] drop-down menu: a) On - Click on their Job Log information. 2. c) Off - Xerox WorkCentre 4250/4260 Series System Administration Guide 95 Select the [Select to search, file and distribute documents based on the [Apply] button to the script, starting at the...
System Administration Guide
Page 117
Use the Feature 33. Personal Phonebook The Personal Phonebook is automatically saved to your fax at a specific time, click on [OK] to close the [Fax] window. c) Click on [Open] next to Personal Phonebook on [Open] next to Shared Phonebook to the phonebook: ... and recipient details that you have more than one person to a network drive for billing purposes, click on your fax. 35. If your selections. 44. Xerox WorkCentre 4250/4260 Series System Administration Guide 105
Use the Feature 33. Personal Phonebook The Personal Phonebook is automatically saved to your fax at a specific time, click on [OK] to close the [Fax] window. c) Click on [Open] next to Personal Phonebook on [Open] next to Shared Phonebook to the phonebook: ... and recipient details that you have more than one person to a network drive for billing purposes, click on your fax. 35. If your selections. 44. Xerox WorkCentre 4250/4260 Series System Administration Guide 105

System Administration Guide
Page 129
... created user(s) account, you want to add to the default Group Account or a specific Group Account. Enter a [User ID] for example: Jane Smith. Usage limits can be specified as follows: Xerox WorkCentre 4250/4260 Series System Administration Guide 117 If you want this account in the [Group Accounts]... is to a maximum of 32 characters. Click on the [Group Accounts] link. 4. Click on the [Add New User] link. 6. Click on the [Xerox Standard Accounting] link. 4. The next step is 16,000,000. Click on the [Properties] tab. 2. User names must be unique. 8. Click on [Add...
... created user(s) account, you want to add to the default Group Account or a specific Group Account. Enter a [User ID] for example: Jane Smith. Usage limits can be specified as follows: Xerox WorkCentre 4250/4260 Series System Administration Guide 117 If you want this account in the [Group Accounts]... is to a maximum of 32 characters. Click on the [Group Accounts] link. 4. Click on the [Add New User] link. 6. Click on the [Xerox Standard Accounting] link. 4. The next step is 16,000,000. Click on the [Properties] tab. 2. User names must be unique. 8. Click on [Add...
