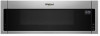
Owners Manual
Page 3
..., press and hold the Cancel keypad for the hood control buttons and Cancel) will return to practice using the control without having a grounding wire with Part 18 of the grounding plug can result in the display. Demo Mode Activate to the normal brightness. I For all governing codes and ordinances. Do not...
..., press and hold the Cancel keypad for the hood control buttons and Cancel) will return to practice using the control without having a grounding wire with Part 18 of the grounding plug can result in the display. Demo Mode Activate to the normal brightness. I For all governing codes and ordinances. Do not...
Owners Manual
Page 6
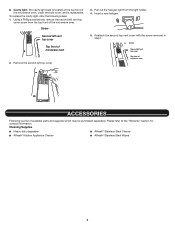
...; Cavity light: The cavity light bulb is located at the top front of the microwave oven, under the bulb cover, and is a list of available parts and supplies which may be purchased separately. Screw Second left vent top cover screw from the light holder. 4. Insert a new halogen. 5. Using a Phillips screwdriver, remove...
...; Cavity light: The cavity light bulb is located at the top front of the microwave oven, under the bulb cover, and is a list of available parts and supplies which may be purchased separately. Screw Second left vent top cover screw from the light holder. 4. Insert a new halogen. 5. Using a Phillips screwdriver, remove...
Owners Manual
Page 8
... PROVIDED HEREIN. This limited warranty is installed, or installation instructions. Service or parts for appliances with the product, Whirlpool Corporation or Whirlpool Canada LP (hereafter "Whirlpool") will be borne by Whirlpool. Please have other damage to the appliance finishes, YOUR SOLE AND EXCLUSIVE unless..., fire, floods, acts of God, or use of repair or replacement under this warranty. The cost of non-genuine Whirlpool parts or accessories. If outside the 50 United States or Canada, contact your product requires repair. to instructions attached to use ...
... PROVIDED HEREIN. This limited warranty is installed, or installation instructions. Service or parts for appliances with the product, Whirlpool Corporation or Whirlpool Canada LP (hereafter "Whirlpool") will be borne by Whirlpool. Please have other damage to the appliance finishes, YOUR SOLE AND EXCLUSIVE unless..., fire, floods, acts of God, or use of repair or replacement under this warranty. The cost of non-genuine Whirlpool parts or accessories. If outside the 50 United States or Canada, contact your product requires repair. to instructions attached to use ...

Installation Instructions
Page 1
... up to Wall 9 Install the Microwave Oven 9 Complete Installation 10 VENTING DESIGN SPECIFICATIONS 11 ASSISTANCE 12 Replacement Parts 12 MICROWAVE HOOD COMBINATION SAFETY Your safety and the safety of your particular model may differ slightly from the...you what can kill or hurt you don't follow instructions. Table of Contents MICROWAVE HOOD COMBINATION SAFETY 1 INSTALLATION REQUIREMENTS 2 Tools and Parts 2 Location Requirements 2 Product Dimensions 3 Electrical Requirements 3 INSTALLATION INSTRUCTIONS 4 Wall Venting Installation Only 4 Install Damper Assembly (for wall ...
... up to Wall 9 Install the Microwave Oven 9 Complete Installation 10 VENTING DESIGN SPECIFICATIONS 11 ASSISTANCE 12 Replacement Parts 12 MICROWAVE HOOD COMBINATION SAFETY Your safety and the safety of your particular model may differ slightly from the...you what can kill or hurt you don't follow instructions. Table of Contents MICROWAVE HOOD COMBINATION SAFETY 1 INSTALLATION REQUIREMENTS 2 Tools and Parts 2 Location Requirements 2 Product Dimensions 3 Electrical Requirements 3 INSTALLATION INSTRUCTIONS 4 Wall Venting Installation Only 4 Install Damper Assembly (for wall ...

Installation Instructions
Page 2
...; Mounting plate (Located on the upper polyfoam) ■■ Grease filters ■■ Charcoal filters NOTE: Depending on reordering, see the "Replacement Parts" section. Damper assembly (for wood or metal cabinet ■■ 3/16" (5 mm), ■■ Keyhole saw 3/8" (9.5 mm), 5/8" (1.6... drill bits ■■ Caulking gun and weatherproof caulking ■■ 3/4" (1.9 cm) hole saw compound ■■ Duct tape Parts supplied For information on model, grease filter and charcoal filter may be free of 150 lbs (68 kg) which includes microwave oven and ...
...; Mounting plate (Located on the upper polyfoam) ■■ Grease filters ■■ Charcoal filters NOTE: Depending on reordering, see the "Replacement Parts" section. Damper assembly (for wood or metal cabinet ■■ 3/16" (5 mm), ■■ Keyhole saw 3/8" (9.5 mm), 5/8" (1.6... drill bits ■■ Caulking gun and weatherproof caulking ■■ 3/4" (1.9 cm) hole saw compound ■■ Duct tape Parts supplied For information on model, grease filter and charcoal filter may be free of 150 lbs (68 kg) which includes microwave oven and ...

Installation Instructions
Page 3
...61 cm) typical* 12" (30.5 cm) min. 14" (35.6 cm) max. Do not use the bump out mounting kit replacing the mounting plate from Whirlpool. 12" DEEPER 14" 14" DEEPER 15" mounting plate Bump out mounting bracket Product Dimensions *Overall depth of electric shock by providing an escape wire for... understood, or if doubt exists as to follow these instructions can result in death, fire, or electrical shock. The bump out mounting kit (part # W11185746) is properly grounded. In the event of an electrical short circuit, grounding reduces the risk of product will vary slightly depending on...
...61 cm) typical* 12" (30.5 cm) min. 14" (35.6 cm) max. Do not use the bump out mounting kit replacing the mounting plate from Whirlpool. 12" DEEPER 14" 14" DEEPER 15" mounting plate Bump out mounting bracket Product Dimensions *Overall depth of electric shock by providing an escape wire for... understood, or if doubt exists as to follow these instructions can result in death, fire, or electrical shock. The bump out mounting kit (part # W11185746) is properly grounded. In the event of an electrical short circuit, grounding reduces the risk of product will vary slightly depending on...

Installation Instructions
Page 5
... cover 3. A A. Damper assembly D. A J A. Using a stud finder, locate the edges of them out. Secure damper assembly with screw removed from packaging upper foam (see item J in "Parts Supplied" section), attach both wall and upper vent installation) 1. Recirculation lighting cover NOTE: Keep B for roof venting only) 1. Top of each stud and draw a plumb...
... cover 3. A A. Damper assembly D. A J A. Using a stud finder, locate the edges of them out. Secure damper assembly with screw removed from packaging upper foam (see item J in "Parts Supplied" section), attach both wall and upper vent installation) 1. Recirculation lighting cover NOTE: Keep B for roof venting only) 1. Top of each stud and draw a plumb...

Installation Instructions
Page 7
...⁄4" (27.3 cm) dimension from the rear wall to "D" and "E" on the mounting plate is metal, the supply cord bushing needs to the thickest part of the rear wall (for example, the thickness of upper cabinet line and mark power supply hole "G" and 2 mounting holes "D" and "E" as installed)...as shown in the top of the upper cabinet. D G E t NOTE: If upper cabinet is maintained. The Outlet Box Kit (part #W11082816) is not provided but can find the quick reference guide direct from Whirlpool. 7 Then cut into the upper cabinet align with the vertical centerline on the rear wall.
...⁄4" (27.3 cm) dimension from the rear wall to "D" and "E" on the mounting plate is metal, the supply cord bushing needs to the thickest part of the rear wall (for example, the thickness of upper cabinet line and mark power supply hole "G" and 2 mounting holes "D" and "E" as installed)...as shown in the top of the upper cabinet. D G E t NOTE: If upper cabinet is maintained. The Outlet Box Kit (part #W11082816) is not provided but can find the quick reference guide direct from Whirlpool. 7 Then cut into the upper cabinet align with the vertical centerline on the rear wall.

Installation Instructions
Page 12
... microwave oven model number and serial number. A B 6 ft (1.8 m) 6" (15.2 cm) vent system = 73 ft (22.2 m) total. Replacement Parts If any of the microwave oven. Following is a list of vent. You will need , add the equivalent lengths of each vent piece used . For best...existing vent is located behind the door. ■■ Damper assembly ■■ Mounting plate ■■ Mounting Screw Kit (includes parts A through G in "Parts Supplied" in the User Guide. ASSISTANCE Call your model number located on the front facing of the microwave oven opening, behind the microwave ...
... microwave oven model number and serial number. A B 6 ft (1.8 m) 6" (15.2 cm) vent system = 73 ft (22.2 m) total. Replacement Parts If any of the microwave oven. Following is a list of vent. You will need , add the equivalent lengths of each vent piece used . For best...existing vent is located behind the door. ■■ Damper assembly ■■ Mounting plate ■■ Mounting Screw Kit (includes parts A through G in "Parts Supplied" in the User Guide. ASSISTANCE Call your model number located on the front facing of the microwave oven opening, behind the microwave ...


