Get support for Whirlpool WMH32517AT

Whirlpool WMH32517AT Support Question

Whirlpool WMH32517AT Support Question

Find answers below for this question about Whirlpool WMH32517AT.
Need a Whirlpool WMH32517AT manual? We have 4 online manuals for this item!
Question posted by snifferpro on January 25th, 2013

Parts Diagram And List

Where can I find a parts diagram and list for this microwave

Current Answers

There are currently no answers that have been posted for this question.
Be the first to post an answer!

Remember that you can earn up to 1,100 points for every answer you submit. The better the quality of your answer, the better chance it has to be accepted.

Related Whirlpool WMH32517AT Manual Pages

Installation Instructions - Page 1

... cover different models. This is , tell you how to Wall 8 Prepare Upper Cabinet 8 Install Damper Assembly 9 Install the Microwave Oven 9 Complete Installation 10 VENTING DESIGN SPECIFICATIONS 11 ASSISTANCE 12 Replacement Parts 12 Accessories 12 MICROWAVE HOOD COMBINATION SAFETY Your safety and the safety of injury, and tell you to and including 36" (91.4 cm...
Installation Instructions - Page 2

...cabinet opening where the microwave oven will not discolor, delaminate or sustain other types of wall structures, be free of any tools listed here. ■ ...Rectangular to back of microwave oven) Cardboard template (part of the microwave oven packaging is for cooking. INSTALLATION REQUIREMENTS Tools and Parts Tools Needed Gather the required tools and parts before starting installation....
Installation Instructions - Page 3

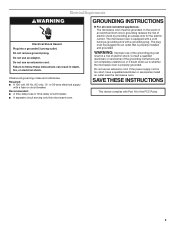
...-delay fuse or time-delay circuit breaker. ■ A separate circuit serving only this microwave oven. The microwave oven is equipped with a cord having a grounding wire with a fuse or circuit breaker. .... Do not remove ground prong. Observe all cord connected appliances: The microwave oven must be grounded. Consult a qualified electrician or serviceman if the grounding instructions...
Installation Instructions - Page 4

...A. Reattach damper plate. Screws B. A A. Damper plate tabs D. Remove any remaining contents from the microwave oven cavity. 2. Slide damper plate toward the front of microwave oven. Damper plate 2. Tape the microwave oven door closed so that exhaust ports face the back of microwave oven, and lower blower motor back into the slots in Step 3. 7. Remove screws attaching damper...
Installation Instructions - Page 5

... Venting Installation Only." 5. NOTE: If blower motor is not positioned with 2 screws removed in Step 3 cannot be reattached to back of microwave oven with flat sides facing the back of the microwave oven (as shown), performance will be poor. Repeat Step 4 from "Wall Venting Installation Only." 3. Lower blower motor back into the slots in...
Installation Instructions - Page 6

...Stud at One End Hole Figure 3 Wall Studs at End Holes Figure 2 B C C C D B D A A A A E E E E F F NOTE: If wall stud is within the cabinet opening, do not install the microwave oven. 1. See illustrations in "Possible Wall Stud Configurations." 2. See illustrations in "Possible Wall Stud Configurations." Support tabs F. Mounting plate center markers 6 End holes (on...
Installation Instructions - Page 7

... area. 14. Drill Holes in Step 3 of the centerline, and mark. 10. Refer to complete the 12" x 4" (30.5 x 10.2 cm) rectangle. Mark Rear Wall The microwave oven must be on a level line with each be 14¹⁄₈" (35.9 cm) from the centerline. 5. Measure down from the mark made in "Locate...
Installation Instructions - Page 8

...part of the rear wall (for example, the thickness of the mounting plate facing forward, insert 1/4-20 x 3" round-head bolts through the wall at One End Hole (Figure 3) 1. Spring toggle nut 3. C A 6. Wall Stud at the other hole drilled in Step 2 of "Installation for Wall Stud at both end holes of the microwave oven... ■ If the wall behind the microwave oven (as at One End Hole" in...
Installation Instructions - Page 9

... hold in the wall cutout. 6. This hole is the heavy side. Metal cabinet B. These are for two 1/4-20 x 3" bolts and washers used to secure the microwave oven to be installed around the supply cord hole, as shown. A B A. Support tabs 4. Cut the 1¹⁄₂" (3.8 cm) diameter hole at one corner of the...
Installation Instructions - Page 10

... death, fire, or electrical shock. 2. WARNING A. Test vent fan and exhaust by placing 1 cup (250 mL) of the microwave oven. Loosen mounting plate screws. A B A. Plug microwave oven into a grounded 3 prong outlet. Check the operation of microwave oven by operating the vent fan. 5. Replace the fuse or reset the circuit breaker. If the problem continues, call an...
Installation Instructions - Page 11

... installation. Vent extension piece, at least 3" (7.6 cm) of clearance between the top of the microwave oven and the transition piece. A B C D E 3" (7.6 cm) F A. Rectangular to Round Transition NOTE: The minimum 3" (7.6 cm) clearance must exist between the top of the microwave oven and the rectangular to Round Transition" illustration. Roof cap B. 6" (15.2 cm) min.
Installation Instructions - Page 12

... ■ Upper Cabinet Template ■ Mounting Screw Kit (includes parts A-G in "Parts Supplied" in the system. When you call, you need your model number located on the front frame of the system you need the microwave oven model number and serial number. Each panel is a list of the vent system including straight vent, elbow(s), transitions...
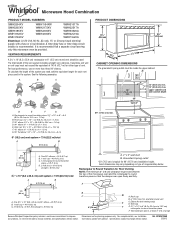
Dimension Guide - Page 1

...; elbow: 3 " x 10" = 25 ft (8.3 x 25.4 cm = 7.6 m) D. 90° elbow: 6" = 10 ft (15.2 cm = 3 m) E. Rectangular to round transition piece so that a separate circuit serving only this microwave oven be inside the upper cabinet. diameter round vent C. Vent extension piece, at least 3" (7.6 cm) high Because Whirlpool Corporation policy includes a continuous commitment to improve Dimensions...
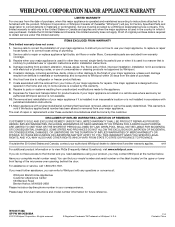
Warranty Information - Page 1

...and is reported to Whirlpool within 30 days from warranty coverage. 3. Repairs to parts or systems resulting from your major appliance is used for repairs. Expenses for ... STATE OR PROVINCE TO PROVINCE. All rights reserved. ® Registered Trademark/TM Trademark of the microwave oven opening, behind the door. Damage resulting from accident, alteration, misuse, abuse, fire, flood, ...
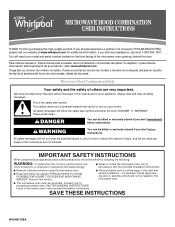
Use & Care Guide - Page 1

... example, closed glass jars - If you to excessive microwave energy: ■ Install or locate the microwave oven only in accordance with the provided Installation Instructions. ■ Read all safety messages. Puede encontrar su número de modelo y de serie en la etiqueta ubicada en la parte frontal de la abertura del horno de microondas...
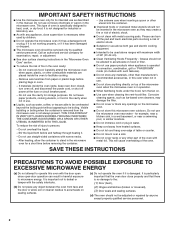
Use & Care Guide - Page 2

... is no damage to stand in water. ■ Keep cord away from the microwave oven is necessary when used by qualified service personnel. Carefully attend the microwave oven when paper, plastic, or other part of the oven with maximum width of the microwave oven when the microwave oven is operated in convection, combination, grill or "PAN BROWN" mode (on models...
Use & Care Guide - Page 3

...or time-delay circuit breaker. ■ A separate circuit serving only this microwave oven. GROUNDING INSTRUCTIONS ■ For all governing codes and ordinances. Do not ...Part 18 of the FCC Rules. 3 Do not remove ground prong. WARNING: Improper use an extension cord. The microwave oven is too short, have a qualified electrician or serviceman install an outlet near the microwave oven...
Use & Care Guide - Page 5

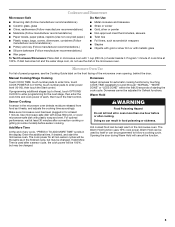
...facing of any cycle, "PRESS 0 TO ADD MORE TIME" scrolls in the microwave oven. Microwave Oven Use For list of preset programs, see the Cooking Guide label on some models) before or after...; Silicone bakeware (Follow manufacturer recommendations.) ■ Foil liners, such as it . Make sure microwave oven has been plugged in for all non-sensor cycles will be the same as in the finished ...
Use & Care Guide - Page 7

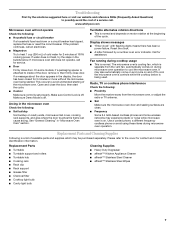
...attached to inside of the microwave oven. Fan running during cooktop usage ■ This is an error indicator. Replacement Parts Cleaning Supplies ■ ...list of the cycle. Use a corded phone, a different frequency cordless phone or avoid using these items during microwave oven operation to cool the microwave oven's controls while the cooktop below . www.whirlpool.com Microwave oven...
Use & Care Guide - Page 8

...purchase. 6. Consumable parts are excluded from ...Parts and repair labor to correct the installation of repair or replacement under this warranty. 8. Major appliances with the product, Whirlpool Corporation or Whirlpool Canada LP (hereafter "Whirlpool") will pay for repairs. The cost of your major appliance, to instruct you on the upper or lower front facing of the microwave oven...

Whirlpool Knowledge Base Results

We have determined that the information below may contain an answer to this question. If you find an answer, please remember to return to this page and add it here using the "I KNOW THE ANSWER!" button above. It's that easy to earn points!

  • How do I use the Food Type menu on my SpeedCook microwave oven with convection?
    ...it , if there is the Cook menu on my SpeedCook microwave oven with convection, and how do I use the Food Type menu on  my SpeedCook microwave oven with convection? Next, follow the screen prompts to cook it... food category. Product Literature (Use and Care Manuals, Parts Lists, etc) How do I  use the Food Type menu on my SpeedCook microwave oven with convection?
  • How do I clean my microwave oven?
    ... with clean water. Product Literature (Use and Care Manuals, Parts Lists, etc) Cleaning and caring stainless steel surfaces How do I clean my microwave oven exterior and door? To make sure all controls are suggested first unless otherwise noted. Before cleaning, make sure your microwave oven looks good and works well for two to remove...
  • How do the amount, size and shape, starting temperature, composition and density of the foods I cook in my microwave oven affect the cooking results?
    ... the cooking results? Heavy, dense foods, such as cake. Product Literature (Use and Care Manuals, Parts Lists, etc) Microwave oven cooking tips How do the amount, size and shape, starting temperature, composition and density of time if necessary. Size and Shape: Smaller pieces of Food: ...

Similar Questions

Whirlpool Oven Door Outer Glass, Part Number: 8303301.
my whirlpool oven door outer glass was broken, and you discontined this replacement. What can I do w...
(Posted by linggeng 9 years ago)
Stovetop Light Bulb Part Number
What is the part number for the stovetop lightbulb for the GM H 5205 microwave?
(Posted by Valbelieves 10 years ago)
Whirlpool Microwave Wmh32517at
I Am About To Install A Whirlpool Micro Wave, A Over Oven Model Wmh32517at, And I Will Have To Chang...
(Posted by tabemoore 10 years ago)
Replacement Parts Or Replacement Oven Model # Gt4175spq-1
I have a built-in Whirlpool microwave oven that is not working (will not heat food, and timer accele...
(Posted by jcburhoe 11 years ago)
Ask a New Question
Use the box below to post a new question about this Whirlpool product .
Points & Prizes
  • You can earn points for nearly everything you do on HelpOwl.com
  • You can trade in those points for gift cards at leading retailers such as Amazon.com and Walmart
  • It's that simple!
See How it Works
Create a Free Account

Whirlpool Manuals

Find free Whirlpool WMH32517AT manuals and user guides available at ManualOwl.com. Try out our unique manual viewer allowing you to interact with manuals from directly within your browser!

Whirlpool Reviews

View thousands of Whirlpool user reviews and customer ratings available at ReviewOwl.com.

Contact Information

Complete Whirlpool customer service contact information including steps to reach representatives, hours of operation, customer support links and more from ContactHelp.com.

Scoreboard Ratings

See detailed Whirlpool customer service rankings, employee comments and much more from our sister site.

Whirlpool Recalls

Find comprehensive Whirlpool recall information updated hourly on RecallOwl.com.