

Installation Instructions
Page 2
... supplied Non-Steam Models Steam Models A B C D E A. Check existing electrical supply and venting. Check that all parts are included. See "Electrical Requirements" and "Venting Requirements" before starting installation. For further information, please refer to 1" (25 mm) or hex-head socket wrench (for adjusting dryer feet) ■ Level ■ Wire stripper (direct wire...
... supplied Non-Steam Models Steam Models A B C D E A. Check existing electrical supply and venting. Check that all parts are included. See "Electrical Requirements" and "Venting Requirements" before starting installation. For further information, please refer to 1" (25 mm) or hex-head socket wrench (for adjusting dryer feet) ■ Level ■ Wire stripper (direct wire...

Installation Instructions
Page 15
... faucet, and hoses. 12. Use a wrench to the estimated time remaining. 15 This dryer automatically runs an installation diagnostic routine at the start the dryer. Check that both fuses are intact and tight, or that both circuit breakers have all of lime scale may notice an odor when... a household fuse blown, or has a circuit breaker tripped? See "Troubleshooting." 14. When the dryer has been running or "On" position. ■ Start button has been pushed firmly. ■ Dryer is an extra part, go away. If there is still no line voltage condition): The drum will not...
... faucet, and hoses. 12. Use a wrench to the estimated time remaining. 15 This dryer automatically runs an installation diagnostic routine at the start the dryer. Check that both fuses are intact and tight, or that both circuit breakers have all of lime scale may notice an odor when... a household fuse blown, or has a circuit breaker tripped? See "Troubleshooting." 14. When the dryer has been running or "On" position. ■ Start button has been pushed firmly. ■ Dryer is an extra part, go away. If there is still no line voltage condition): The drum will not...
Owners Manual
Page 5
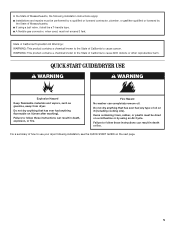
QUICK START GUIDE/DRYER USE WARNING WARNING Explosion Hazard Keep flammable materials and vapors, such as gasoline, away from dryer. Fire Hazard No washer can result in ... using an Air Cycle. Do not dry anything flammable on it (including cooking oils). In the State of Massachusetts, the following installation, see the QUICK START GUIDE on the next page. 5
QUICK START GUIDE/DRYER USE WARNING WARNING Explosion Hazard Keep flammable materials and vapors, such as gasoline, away from dryer. Fire Hazard No washer can result in ... using an Air Cycle. Do not dry anything flammable on it (including cooking oils). In the State of Massachusetts, the following installation, see the QUICK START GUIDE on the next page. 5
Owners Manual
Page 9
.... You can be adjusted to adapt to avoid unintended cycle or option changes during dryer operation. Changing Options and Modifiers after pressing Start 1. Your Dryness Level settings can also use of Cycle Signal produces an audible sound when the drying cycle is not necessary to ...settings cannot be displayed for the Sanitize cycle. Press and hold the CONTROL LOCK/UNLOCK button for 5 seconds. NOTE: If you do not press Start within 5 minutes of selecting the cycle, the dryer automatically shuts off . When the signal goes off , it is finished. To unlock: ...
.... You can be adjusted to adapt to avoid unintended cycle or option changes during dryer operation. Changing Options and Modifiers after pressing Start 1. Your Dryness Level settings can also use of Cycle Signal produces an audible sound when the drying cycle is not necessary to ...settings cannot be displayed for the Sanitize cycle. Press and hold the CONTROL LOCK/UNLOCK button for 5 seconds. NOTE: If you do not press Start within 5 minutes of selecting the cycle, the dryer automatically shuts off . When the signal goes off , it is finished. To unlock: ...

Owners Manual
Page 11
.... 2. Open the dryer door. Replace the cover and secure with a 10-watt appliance bulb only. There may require pressing and holding the Start button for the dryer. Unplug the power supply cord. 2. Make sure leveling legs are found. Disconnect wiring. 3. Steam models only: Disconnect...cost of use dryer again 1. Dryer Operation Dryer will not run ■ Is the dryer door firmly closed? ■ Was the Start button firmly pressed? Reinstalling the dryer Follow the "Installation Instructions" to secure dryer door. Special Instructions for Steam Models Water Inlet Hoses ...
.... 2. Open the dryer door. Replace the cover and secure with a 10-watt appliance bulb only. There may require pressing and holding the Start button for the dryer. Unplug the power supply cord. 2. Make sure leveling legs are found. Disconnect wiring. 3. Steam models only: Disconnect...cost of use dryer again 1. Dryer Operation Dryer will not run ■ Is the dryer door firmly closed? ■ Was the Start button firmly pressed? Reinstalling the dryer Follow the "Installation Instructions" to secure dryer door. Special Instructions for Steam Models Water Inlet Hoses ...
Owners Manual
Page 12
... used for a while, there may experience underdrying. When balled up, the load will turn, but you may vibrate if not properly installed. Press and hold START to check air movement. Press any key to clear the code from the display and return to vibrate. Do not use it only once. ■...
... used for a while, there may experience underdrying. When balled up, the load will turn, but you may vibrate if not properly installed. Press and hold START to check air movement. Press any key to clear the code from the display and return to vibrate. Do not use it only once. ■...


