Owners Manual
Page 2
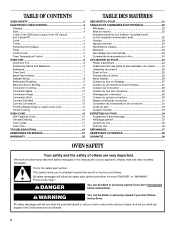
...safety messages. TABLE OF CONTENTS OVEN SAFETY 2 ELECTRONIC OVEN CONTROL 4 Displays 4 Start 4 Lower Oven Off/Cancel, Upper Oven Off Cancel and Cancel Off 4 Clock 4 Tones 5 Fahrenheit and Celsius 5 Timer 5 Control Lock 5 Oven Temperature Control 5 OVEN USE 6 Aluminum Foil 6 Positioning Racks and Bakeware 6 Bakeware ...Convection Cooking 10 Convection Bake 10 Convection Roast 11 Convection Broil 12 Convect Full Meal 12 Convect Conversion 13 Proofing Bread (single or upper ovens only 14 Timed Cooking 14 OVEN CARE 15 Self-Cleaning Cycle 15 General Cleaning 16 Oven Lights 17...
...safety messages. TABLE OF CONTENTS OVEN SAFETY 2 ELECTRONIC OVEN CONTROL 4 Displays 4 Start 4 Lower Oven Off/Cancel, Upper Oven Off Cancel and Cancel Off 4 Clock 4 Tones 5 Fahrenheit and Celsius 5 Timer 5 Control Lock 5 Oven Temperature Control 5 OVEN USE 6 Aluminum Foil 6 Positioning Racks and Bakeware 6 Bakeware ...Convection Cooking 10 Convection Bake 10 Convection Roast 11 Convection Broil 12 Convect Full Meal 12 Convect Conversion 13 Proofing Bread (single or upper ovens only 14 Timed Cooking 14 OVEN CARE 15 Self-Cleaning Cycle 15 General Cleaning 16 Oven Lights 17...
Owners Manual
Page 4
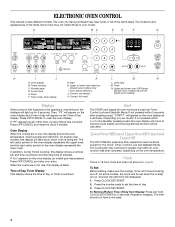
...retry your model. Press CLOCK SET/START. 2. The time should not have some models, the clock can be reset. 4 ...pressing a pad, "START?" Press CLOCK SET/START. Clock F. Start H. Oven option selectors J. Oven light M. Then,...appear on the Time of the items listed. will disappear. 1. Clock This is being set. The oven you have purchased may have... from Display: Press and hold CLOCK SET/START for the Clock, Timer, Control Lock and Sabbath... reset the clock if needed. If "Err" appears on the displays will also show which oven is a 12-hour clock and does not...
...retry your model. Press CLOCK SET/START. 2. The time should not have some models, the clock can be reset. 4 ...pressing a pad, "START?" Press CLOCK SET/START. Clock F. Start H. Oven option selectors J. Oven light M. Then,...appear on the Time of the items listed. will disappear. 1. Clock This is being set. The oven you have purchased may have... from Display: Press and hold CLOCK SET/START for the Clock, Timer, Control Lock and Sabbath... reset the clock if needed. If "Err" appears on the displays will also show which oven is a 12-hour clock and does not...
Owners Manual
Page 5
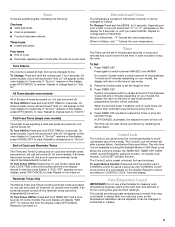
...taken within a certain amount of time (between MIN/SEC and HR/MIN. Repeat to low. If "Snd Lo" remains on . Pad Press Tones (single oven models) The single tones signaling a valid pad press are preset on , but can be reset during the Sabbath Mode or Self-Clean cycle. If "Snd off . ... Only The Minute Timer and Timed Cooking reminder tones are preset on ." To remove this from the display. Press TIMER SET. On double oven models, CLOCK SET will appear on the oven display for 5 seconds. The Control Lock is preset in Fahrenheit or Celsius. 5 To Lock/Unlock Control: Press and...
...taken within a certain amount of time (between MIN/SEC and HR/MIN. Repeat to low. If "Snd Lo" remains on . Pad Press Tones (single oven models) The single tones signaling a valid pad press are preset on , but can be reset during the Sabbath Mode or Self-Clean cycle. If "Snd off . ... Only The Minute Timer and Timed Cooking reminder tones are preset on ." To remove this from the display. Press TIMER SET. On double oven models, CLOCK SET will appear on the oven display for 5 seconds. The Control Lock is preset in Fahrenheit or Celsius. 5 To Lock/Unlock Control: Press and...
Owners Manual
Page 14
... is automatically calculated and displayed. Press number pads to enter a temperature other than the one displayed. 3. The start , make sure the clock is the lower oven. 2. The vertical bar countdown and minute time countdown will appear on the oven display. On double ovens only, touch...result in food poisoning or sickness. Press BAKE, CONVECT BAKE or CONVECT ROAST. Press START. Press STOP TIME. 6. Press START. Proofing Bread (single or upper ovens only) Proofing bread prepares dough for diagram. Close door. 1. Let dough rise until nearly doubled in size, check at the same...
... is automatically calculated and displayed. Press number pads to enter a temperature other than the one displayed. 3. The start , make sure the clock is the lower oven. 2. The vertical bar countdown and minute time countdown will appear on the oven display. On double ovens only, touch...result in food poisoning or sickness. Press BAKE, CONVECT BAKE or CONVECT ROAST. Press START. Press STOP TIME. 6. Press START. Proofing Bread (single or upper ovens only) Proofing bread prepares dough for diagram. Close door. 1. Let dough rise until nearly doubled in size, check at the same...
Owners Manual
Page 15
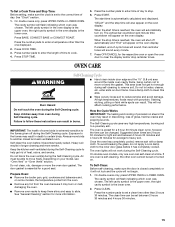
... oven display is extremely sensitive to the correct time of porcelain on the oven display. To Self-Clean: Before self-cleaning, make sure the clock is closed and well-ventilated room. Press the number pads to set to the fumes given off automatically and "End" will flash indicating which ...oven was chosen. See "Clock" section. 1. The cavity symbol will not begin. 1. Press the number pads to enter time of time to slide. To avoid breaking the glass,...
... oven display is extremely sensitive to the correct time of porcelain on the oven display. To Self-Clean: Before self-cleaning, make sure the clock is closed and well-ventilated room. Press the number pads to set to the fumes given off automatically and "End" will flash indicating which ...oven was chosen. See "Clock" section. 1. The cavity symbol will not begin. 1. Press the number pads to enter time of time to slide. To avoid breaking the glass,...
Owners Manual
Page 16
The door will disappear. 6. See "Clock" section. The left cavity symbol is the upper oven, the right cavity symbol is reached, the oven will automatically turn on panel. Press STOP TIME. 4. ... soft cloth or sponge, not directly on cleaning products. Press START. If the oven temperature is cool. General Cleaning IMPORTANT: Before cleaning, make sure the clock is cool, "End" will appear on the oven display and "DOOR LOCKED" will not unlock until the oven cools. Always follow label instructions on panel...
The door will disappear. 6. See "Clock" section. The left cavity symbol is the upper oven, the right cavity symbol is reached, the oven will automatically turn on panel. Press STOP TIME. 4. ... soft cloth or sponge, not directly on cleaning products. Press START. If the oven temperature is cool. General Cleaning IMPORTANT: Before cleaning, make sure the clock is cool, "End" will appear on the oven display and "DOOR LOCKED" will not unlock until the oven cools. Always follow label instructions on panel...

Owners Manual
Page 18
... When one oven is one oven self-cleaning? Display shows messages ■ Is the display showing "PF", "PF id=27" or "PF id=30"? See "Clock" section. ■ Is the display showing a letter followed by a number? Adjust cooking time. ■ Has the oven door been opened while cooking? See "... the oven door all the way. ■ Has the function been entered? See "Self-Cleaning Cycle" section. ■ On some models, reset the clock, if needed. Use aluminum foil to cover the edge of the crust and/or reduce baking temperature. 18 Clear the display. See "Positioning Racks and...
... When one oven is one oven self-cleaning? Display shows messages ■ Is the display showing "PF", "PF id=27" or "PF id=30"? See "Clock" section. ■ Is the display showing a letter followed by a number? Adjust cooking time. ■ Has the oven door been opened while cooking? See "... the oven door all the way. ■ Has the function been entered? See "Self-Cleaning Cycle" section. ■ On some models, reset the clock, if needed. Use aluminum foil to cover the edge of the crust and/or reduce baking temperature. 18 Clear the display. See "Positioning Racks and...

Installation Instructions
Page 8
... connected. ■ See "Troubleshooting" section in the Use and Care Guide. 4. See "Prepare Built-In Oven" section. 15. Check Operation of Single Oven" steps 2-5. If you need Assistance or Service: Please reference the "Assistance or Service" section of the Use and Care Guide or contact the ... into place. 13. Dispose of trim. Make sure the oven door is closed and the "ON" light is intact and tight; To set the clock and other oven functions, refer to the locked position. 14. Complete Installation 1. Press OFF/CANCEL. Check Operation of your tools. 3. A A. For...
... connected. ■ See "Troubleshooting" section in the Use and Care Guide. 4. See "Prepare Built-In Oven" section. 15. Check Operation of Single Oven" steps 2-5. If you need Assistance or Service: Please reference the "Assistance or Service" section of the Use and Care Guide or contact the ... into place. 13. Dispose of trim. Make sure the oven door is closed and the "ON" light is intact and tight; To set the clock and other oven functions, refer to the locked position. 14. Complete Installation 1. Press OFF/CANCEL. Check Operation of your tools. 3. A A. For...


