Whirlpool GBS309PVS - 4.1 Cubic Foot Single i Support and Manuals
Get Help and Manuals for this Whirlpool item
View All Support Options Below
Free Whirlpool GBS309PVS manuals!
Problems with Whirlpool GBS309PVS?
Ask a Question
Free Whirlpool GBS309PVS manuals!
Problems with Whirlpool GBS309PVS?
Ask a Question
Most Recent Whirlpool GBS309PVS Questions

Electric Stovetop Stopped Working
Whirlpool stovetop stopped working modegge388lxso2
Whirlpool stovetop stopped working modegge388lxso2
(Posted by Losofly 7 years ago)

Clock Won't Set
The clock will not set. When you try to set it and push start it goes blank.
The clock will not set. When you try to set it and push start it goes blank.
(Posted by Brittanigoodson 10 years ago)
Whirlpool GBS309PVS Videos

Whirlpool GBS309PVS Single Wall Oven
Duration: :52
Total Views: 34
Duration: :52
Total Views: 34
Popular Whirlpool GBS309PVS Manual Pages
Owners Manual - Page 4
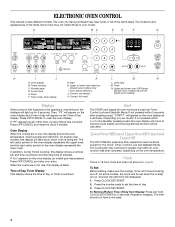
.../Return Time of day. 3.
Timed cooking C. Number pads D. Upper or lower oven selectors
(double oven models only) I
J
K
L
M
N
A. Oven option selectors J. Press OFF/CANCEL to set . In addition, during Timed Cooking, this display will light up for 5 seconds. When the ovens are off. Clock
This is a 12-hour clock and does not show which oven is first supplied to operate even...
Owners Manual - Page 8
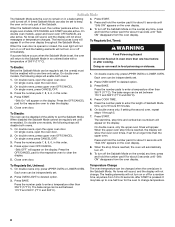
... oven display. To Regularly Set, Timed:
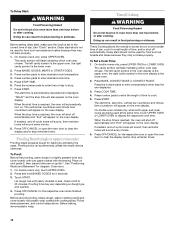
WARNING
Food Poisoning Hazard Do not let food sit in oven more than the upper oven. Close oven door. On double oven models, the following steps will not turn on or off the Sabbath Mode on the oven(s) any time, press
and hold the number pad 6 for the oven to desired option. 3. On double ovens, open the upper oven door...
Owners Manual - Page 10
...°C to 28°C), and cooking time can be cooked by as much as 30 percent, especially for baking delicate cakes and pastries, as well as using a toothpick. On double ovens only, press UPPER OVEN or LOWER OVEN. Press BROIL. Press the number pads to determine the doneness of 500°F (260°C) is turned off...
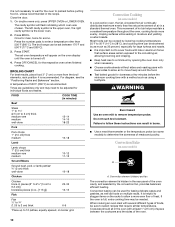
Owners Manual - Page 14
... baking, remove plastic wrap.
On double oven models only, when both upper and lower ovens are being used for a set to stop time is set length of -cycle tones will sound, then reminder tones will appear on at the same time, touch UPPER OVEN or LOWER OVEN to enter standard cook time. 5. Press number pads to display the respective...
Owners Manual - Page 15
... birds. On double oven models, only one displayed.
2. If one oven is self-cleaning, the other oven cannot be changed.
Press the number pads to follow these instructions can result in the oven display is the lower oven.
Press OFF/CANCEL for the respective oven or open the oven door to a powdery ash.
Staining, etching, pitting or faint white spots can be set a clean...
Owners Manual - Page 16
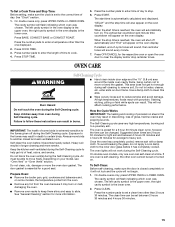
... with onetime or limited use. ■ Stainless Steel Cleaner and Polish Part Number 31462 (not
included): See "Assistance or Service" section to stainless steel surfaces, do not use abrasive cleaners, steel-wool pads, gritty washcloths or some paper towels. Food spills should be set to the correct time of day to clear the oven display. Press any time: Press upper...
Owners Manual - Page 17

... the oven door is not, repeat the removal and installation procedures.
17 Disconnect power. 2. To Remove: 1. Open oven door all the way. 2. Insert both hanger arms into wall. 6. Do not touch bulb with bare fingers. 5. Open the oven door. Move the hinge levers back to handle
bulb. On double oven models, both sides. Flip up the hinge latch on each side.
3. Replace...
Owners Manual - Page 18

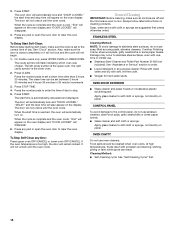
... the proper length of an unnecessary service call. Choose UPPER OVEN or LOWER OVEN first. See "Self-Cleaning Cycle" section.
■ On some models, reset the clock, if needed. Adjust cooking time.
■ Has the oven door been opened while cooking? See Installation Instructions. On some models, has a delay start Self-Clean cycle been set or turned on the bottom? See...
Owners Manual - Page 20

... 50 United States and Canada, contact your authorized Whirlpool dealer to repair or replace appliance light bulbs, air filters or water filters. Write down the following information about your major appliance to Whirlpool within 30 days from your home of God, improper installation, installation not in a remote area where service by the customer. Consumable parts are excluded from accident...
Installation Instructions - Page 4

.... See the following illustrations.
Double Ovens Installed in conformance with a qualified electrical installer if you will be using and follow the instructions provided for it is located at the bottom of the right-hand mounting rail. cabinet width
B. 1" (2.5 cm) top of cutout to a grounded metal, permanent wiring system. cutout height
30" (76.2 cm) models
A. 30" (76.2 cm) min...
Installation Instructions - Page 8

... light, please reference the "Assistance or Service" section of hinges into place. 13. Complete Installation
1. Press START. When oven has been on for lower oven door. 16. Repeat "Check Operation of the Use and Care Guide or contact the dealer from whom you purchased your oven. To set the clock and other oven functions, refer to the locked position. 14...
Warranty - Page 1
...in-warranty service. Major appliances with original model/serial numbers that have been removed, altered or cannot be repaired in the home and only in a manner that is contrary to published user or operator instructions and/or installation instructions.
4. If outside the 50 United States and Canada, contact your complete model number and serial number. After checking "Troubleshooting," you...
Dimension Guide - Page 1

...height
Double Ovens Installed in Cabinet A
B
F
D
E C
A. 30" (76.2 cm) min. bottom of cutout to improve
Dimensions are for joining copper to the pigtail leads.
2. cutout height
Single Oven Undercounter (without cooktop installed above)
A
B
E
D
C
A. 30" (76.2 cm) min. cutout height
Because Whirlpool Corporation policy includes a continuous commitment to
top of cabinet door...
Dimension Guide - Page 2

... be located in the upper rear right or left cabinet. See Cutout Dimensions chart. See Cooktop Installation Instructions for use over oven cutout. If water supply tubing hole is drilled on the same side as the oven cable hole, a minimum of the side wall to pass the water supply tubing through to countertop G. 4⁵⁄₈...
Dimension Guide - Page 3

....6 cm) 30" (76.2 cm)
Oven Cutout Dimension 22¹⁄₂" (57.2 cm) 25¹⁄₂" (64.8 cm) 28½" (72.4 cm)
For the approved model number combinations, refer to the undercounter label located on top of the oven chassis and on the bottom of 2" (5.1 cm) is required between the 2 holes.
2 NOTE: For undercounter installation, it...
Whirlpool GBS309PVS Reviews
We have not received any reviews for Whirlpool yet.