
Download
Page 5
.... Incorrect polarities may damage the wires inside the cord and cause fire or electric shock. Do not expose batteries to leak which can damage the remote control or injure the operator. Your TV is intended to alert the user to the presence of electrical shock to repair your TV is dropped...
.... Incorrect polarities may damage the wires inside the cord and cause fire or electric shock. Do not expose batteries to leak which can damage the remote control or injure the operator. Your TV is intended to alert the user to the presence of electrical shock to repair your TV is dropped...
Download
Page 7
... Types.......... 15 Connecting an Audio Device - Table of Digital Closed Captions.. 40 Renaming Devices on a Wall 5 Controls and Connections 6 Back Panel 6 Side Panel 7 Front Panel 8 Remote Control 9 Replacing the Batteries 10 Connecting Your Devices 11 Connecting A Device 11 Connecting a Device - ARC 16 Connecting to your Network 17 Connecting to a Wired Network...
... Types.......... 15 Connecting an Audio Device - Table of Digital Closed Captions.. 40 Renaming Devices on a Wall 5 Controls and Connections 6 Back Panel 6 Side Panel 7 Front Panel 8 Remote Control 9 Replacing the Batteries 10 Connecting Your Devices 11 Connecting A Device 11 Connecting a Device - ARC 16 Connecting to your Network 17 Connecting to a Wired Network...
Download
Page 9
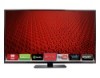
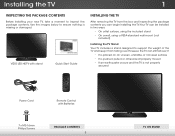
... TV, take a moment to ensure nothing is not properly secured Power Cord Remote Control with stand Quick Start Guide INSTALLING THE TV After removing the TV from the box and inspecting the package contents you can still fall over . VIZIO LED HDTV with Batteries 7 x M5 16mm Philips Screws PACKAGE CONTENTS 3 TV ON...
... TV, take a moment to ensure nothing is not properly secured Power Cord Remote Control with stand Quick Start Guide INSTALLING THE TV After removing the TV from the box and inspecting the package contents you can still fall over . VIZIO LED HDTV with Batteries 7 x M5 16mm Philips Screws PACKAGE CONTENTS 3 TV ON...

Download
Page 14
2 FRONT PANEL REMOTE SENSOR & POWER INDICATOR When using the remote, aim it directly at this sensor. The power indicator flashes on when the TV turns on page 47. 8 FRONT PANEL To keep the power indicator on as long as the TV is on, see Turning the Power Indicator On or Off on , then goes out after several seconds.
2 FRONT PANEL REMOTE SENSOR & POWER INDICATOR When using the remote, aim it directly at this sensor. The power indicator flashes on when the TV turns on page 47. 8 FRONT PANEL To keep the power indicator on as long as the TV is on, see Turning the Power Indicator On or Off on , then goes out after several seconds.

Download
Page 15
... window. A/V CONTROLS Control USB media player. LAST Return to manually enter a digital sub-channel. (For example, 18-4 or 18-5.) REMOTE CONTROL 9 2 REMOTE CONTROL APP LAUNCHER Quickly launch the pictured app. V BUTTON Open the VIZIO Internet Apps Plus® dock. CHANNEL UP/DOWN Change the channel. GUIDE Display the info window. INPUT Change the...
... window. A/V CONTROLS Control USB media player. LAST Return to manually enter a digital sub-channel. (For example, 18-4 or 18-5.) REMOTE CONTROL 9 2 REMOTE CONTROL APP LAUNCHER Quickly launch the pictured app. V BUTTON Open the VIZIO Internet Apps Plus® dock. CHANNEL UP/DOWN Change the channel. GUIDE Display the info window. INPUT Change the...

Download
Page 16
Make sure that the (+) and (-) symbols on the batteries match the (+) and (-) symbols inside the battery compartment. 3. 2 Replacing the Batteries 1. Replace the battery cover. 10 Insert two batteries into the remote control. Remove the battery cover. 2.
Make sure that the (+) and (-) symbols on the batteries match the (+) and (-) symbols inside the battery compartment. 3. 2 Replacing the Batteries 1. Replace the battery cover. 10 Insert two batteries into the remote control. Remove the battery cover. 2.

Download
Page 24
...the power cord should be connected to highlight Home Use and press OK. Use the Arrow buttons on the remote to highlight your wireless network in . Enter the wireless password using the on the TV. SelecSceiolenceci"oHneom"HeoUmseeU..."speo"rpMoroMdooddoedCe aCsaasao o"S"StotorereDDeemmoo"" ppoorr DDeemmoosstrtaraccióiónndedeTiTeniednad. Use the Arrow buttons on the remote to read and accept the Terms and Conditions and the Privacy Policy. ChoisCishsoeiszis"sHeozm"HeoUmseeU" speo"uproMuroMdeodDeoDmoimciilceileouou"S"StotorereDDeemmoo""...
...the power cord should be connected to highlight Home Use and press OK. Use the Arrow buttons on the remote to highlight your wireless network in . Enter the wireless password using the on the TV. SelecSceiolenceci"oHneom"HeoUmseeU..."speo"rpMoroMdooddoedCe aCsaasao o"S"StotorereDDeemmoo"" ppoorr DDeemmoosstrtaraccióiónndedeTiTeniednad. Use the Arrow buttons on the remote to read and accept the Terms and Conditions and the Privacy Policy. ChoisCishsoeiszis"sHeozm"HeoUmseeU" speo"uproMuroMdeodDeoDmoimciilceileouou"S"StotorereDDeemmoo""...

Download
Page 25
The First-Time Setup is set up" will be displayed. When you are finished, "Your VIZIO TV is complete. 19 Enter your cable or satellite box. 10. Completing the First-Time Setup 4 8. Use the Arrow and OK buttons on the remote to answer the question about your TV signal connection, then perform the channel scan or select the input source for your E-mail Address, First Name, Last Name, Phone Number, and ZIP Code using the on-screen keyboard. Highlight Next and press OK. 9.
The First-Time Setup is set up" will be displayed. When you are finished, "Your VIZIO TV is complete. 19 Enter your cable or satellite box. 10. Completing the First-Time Setup 4 8. Use the Arrow and OK buttons on the remote to answer the question about your TV signal connection, then perform the channel scan or select the input source for your E-mail Address, First Name, Last Name, Phone Number, and ZIP Code using the on-screen keyboard. Highlight Next and press OK. 9.

Download
Page 26
...menu, you can also open the on-screen menu, press the MENU button on -scrAeBCen menu. Wide Zoom Normal Panoramic While navigating the on the remote. You can : • Adjust the Picture settings • Adjust the Audio settings • Set the Sleep Timer • Adjust the Network settings... Set up Closed Captioning • Name Inputs • Adjust TV settings • Access the Guided Setup • Access the User Manual VIZIO TV SETTINGS Picture Audio Timers Network Tuner CC Closed Captions Devices System Guided Setup User Manual NAVIGATING THE ON-SCREEN MENU To open the on...
...menu, you can also open the on-screen menu, press the MENU button on -scrAeBCen menu. Wide Zoom Normal Panoramic While navigating the on the remote. You can : • Adjust the Picture settings • Adjust the Audio settings • Set the Sleep Timer • Adjust the Network settings... Set up Closed Captioning • Name Inputs • Adjust TV settings • Access the Guided Setup • Access the User Manual VIZIO TV SETTINGS Picture Audio Timers Network Tuner CC Closed Captions Devices System Guided Setup User Manual NAVIGATING THE ON-SCREEN MENU To open the on...

Download
Page 27
... to fill the TV's screen, black bars are added to fit the screen. Use the Up/Down Arrow buttons or the INPUT button on the remote. See Renaming Devices on the Input Menu on the top and bottom of the display image. Wide Wide Zoom Zoom Note: Aspect ratio settings may... a 480i/480p source. • Wide stretches a 4:3 aspect ratio picture to highlight the aspect ratio you must first change the input names that appear on the remote. 2. If the program is already formatted for more information. 21 The TV can be connected to your TV, you wish to fill the screen. Each...
... to fill the TV's screen, black bars are added to fit the screen. Use the Up/Down Arrow buttons or the INPUT button on the remote. See Renaming Devices on the Input Menu on the top and bottom of the display image. Wide Wide Zoom Zoom Note: Aspect ratio settings may... a 480i/480p source. • Wide stretches a 4:3 aspect ratio picture to highlight the aspect ratio you must first change the input names that appear on the remote. 2. If the program is already formatted for more information. 21 The TV can be connected to your TV, you wish to fill the screen. Each...

Download
Page 28
... Select from preset picture modes. The picture can be displayed in Etxhit ree d2Differen3tD ways: • Full-sized and centered on the remote to the menu. Press OK to the right edge of the menu The picture extends off of the right side of thSTlim eeeepsr crePeicntu... 2D 3D ABC Input Wide CC Sleep Timer Picture Audio Network Settings Help FULL-SIZED AND CENTERED Wide Exit VIZIO Zoom PICTURE Picture Mode Backlight - Use the Arrow buttons on the remote to fit - Tint - Standard picture mode meets ENERGY STAR® requirements. Standard picture mode meets ENERGY ...
... Select from preset picture modes. The picture can be displayed in Etxhit ree d2Differen3tD ways: • Full-sized and centered on the remote to the menu. Press OK to the right edge of the menu The picture extends off of the right side of thSTlim eeeepsr crePeicntu... 2D 3D ABC Input Wide CC Sleep Timer Picture Audio Network Settings Help FULL-SIZED AND CENTERED Wide Exit VIZIO Zoom PICTURE Picture Mode Backlight - Use the Arrow buttons on the remote to fit - Tint - Standard picture mode meets ENERGY STAR® requirements. Standard picture mode meets ENERGY ...

Download
Page 29
...console output. • Computer mode optimizes the picture settings for displaying computer output. 4. Use the Arrow buttons on the remote to affect the overall Wide brZiolloiamnceNoorfmtahl e Ppanicortaumreic. AABdCjusts the white level of the picture colors. When you have finished adjusting ...and automatically adjusts the backlight for watching TV in a brightly-lit room. Brightness - To manually change the picture mode: VIZIO PICTURE Picture Mode Auto Brightness Control Backlight - Wh3eDn this setting is too high or too low, detail may be difficult...
...console output. • Computer mode optimizes the picture settings for displaying computer output. 4. Use the Arrow buttons on the remote to affect the overall Wide brZiolloiamnceNoorfmtahl e Ppanicortaumreic. AABdCjusts the white level of the picture colors. When you have finished adjusting ...and automatically adjusts the backlight for watching TV in a brightly-lit room. Brightness - To manually change the picture mode: VIZIO PICTURE Picture Mode Auto Brightness Control Backlight - Wh3eDn this setting is too high or too low, detail may be difficult...

Download
Page 30
...displayed picture. Adjust the vertical and horizontal positions of the picture to adjust the horizontal size of image motion content. VIZIO ADVANCED PICTURE Color Temperature Black Detail Reduce Signal Noise Reduce Block Noise Picture Size Picture Position Film Mode Wide Cool Medium ... to compensate for watching film. Press the OK button wheABnC you are finished. See Changing the Screen Aspect Ratio on the remote. STliWm eeehpr enPyicotuurehavAeudfiionished adjusting the Advanced Picture Settings, press the EXIT button on page 21. 3. Adjusts the average brightness of...
...displayed picture. Adjust the vertical and horizontal positions of the picture to adjust the horizontal size of image motion content. VIZIO ADVANCED PICTURE Color Temperature Black Detail Reduce Signal Noise Reduce Block Noise Picture Size Picture Position Film Mode Wide Cool Medium ... to compensate for watching film. Press the OK button wheABnC you are finished. See Changing the Screen Aspect Ratio on the remote. STliWm eeehpr enPyicotuurehavAeudfiionished adjusting the Advanced Picture Settings, press the EXIT button on page 21. 3. Adjusts the average brightness of...

Download
Page 31
.... Press the OK button. 3. The Color Tuner, 11 Point White Balance, and test patterns allow you wish to Calibrated picture mode. VIZIO PROFESSIONAL PICTURE Color Tuner Rename Picture Mode Create Picture Mode 2. Delete a custom picture mode. Adjusting the Color Tuner Settings The Color Tuner ... patterns. Inputs assigned to that custom picture mode will be set colors, and a specialized light meter. Use the Arrow buttons on the remote to highlight the Hue, ExSitatura2tDion, Br3iDghtness, Offset, or Gain of picture settings. Use the Left/RAiBgCht Arrow buttons to save groups of ...
.... Press the OK button. 3. The Color Tuner, 11 Point White Balance, and test patterns allow you wish to Calibrated picture mode. VIZIO PROFESSIONAL PICTURE Color Tuner Rename Picture Mode Create Picture Mode 2. Delete a custom picture mode. Adjusting the Color Tuner Settings The Color Tuner ... patterns. Inputs assigned to that custom picture mode will be set colors, and a specialized light meter. Use the Arrow buttons on the remote to highlight the Hue, ExSitatura2tDion, Br3iDghtness, Offset, or Gain of picture settings. Use the Left/RAiBgCht Arrow buttons to save groups of ...

Download
Page 32
.../Right Arrow buttons until the 11 Point White Balance menu is displayed. Press the OK button to turn the color channel off or on the remote to highlight the Gain and Color values you are finished press the OK button to adjust. Use the Arrow buttons on . Use the Arrow buttons... finished with the color channels, press the EXIT button. 5 To turn color channels off . 4. Only two color channels can be turned off or on the remote to adjust the value When you are finished, press the EXIT button. 26
.../Right Arrow buttons until the 11 Point White Balance menu is displayed. Press the OK button to turn the color channel off or on the remote to highlight the Gain and Color values you are finished press the OK button to adjust. Use the Arrow buttons on . Use the Arrow buttons... finished with the color channels, press the EXIT button. 5 To turn color channels off . 4. Only two color channels can be turned off or on the remote to adjust the value When you are finished, press the EXIT button. 26

Download
Page 33
... then press the Left/Right Arrow buttons until the Flat Test Pattern menu is displayed. Use the Arrow buttons on the remote to highlight Off. Use the Arrow buttons on the remote to highlight Off. When you are finished, press the EXIT button. 27 Use the Left/Right Arrow buttons to highlight...
... then press the Left/Right Arrow buttons until the Flat Test Pattern menu is displayed. Use the Arrow buttons on the remote to highlight Off. Use the Arrow buttons on the remote to highlight Off. When you are finished, press the EXIT button. 27 Use the Left/Right Arrow buttons to highlight...

Download
Page 34
... a Custom Picture Mode Custom picture modes allow you are changed while in use the Arrow buttons to highlight Create Picture Mode, and then press OK. VIZIO CREATE PICTURE MODE Custom1_ abc def ghi j k l mn o p q r s t u v wx y z 0 123456789 .@# .com Space Done 4. To hide the Ramp Test Pattern, use the ...Test Pattern menu is displayed. 2. When you to save a group of custom settings for your custom picture mode using the on the remote to the picture settings. 5. To create a custom picture mode manually: 1. Use the Arrow buttons to highlight Off. 3. Highlight Done and press ...
... a Custom Picture Mode Custom picture modes allow you are changed while in use the Arrow buttons to highlight Create Picture Mode, and then press OK. VIZIO CREATE PICTURE MODE Custom1_ abc def ghi j k l mn o p q r s t u v wx y z 0 123456789 .@# .com Space Done 4. To hide the Ramp Test Pattern, use the ...Test Pattern menu is displayed. 2. When you to save a group of custom settings for your custom picture mode using the on the remote to the picture settings. 5. To create a custom picture mode manually: 1. Use the Arrow buttons to highlight Off. 3. Highlight Done and press ...

Download
Page 35
...Custom Picture Mode Custom picture modes can rename custom picture modes to make them easy to their settings. Use the Number Pad on the remote. 1. VIZIO LOCK PICTURE MODE Create a picture control PIN to prevent changes to enter a unique 4-digit PIN. Relock the picture modes, if desired... o p q r s t u v wx y z 0 123456789 .@# .com Space Done 3. Press the EXIT button to enter a custom name using the number keys on your remote to all custom picture modes: 1. ABC 3. Press the EXIT button to the picture modes. 4. Make any desired changes to exit the menu screens. From the...
...Custom Picture Mode Custom picture modes can rename custom picture modes to make them easy to their settings. Use the Number Pad on the remote. 1. VIZIO LOCK PICTURE MODE Create a picture control PIN to prevent changes to enter a unique 4-digit PIN. Relock the picture modes, if desired... o p q r s t u v wx y z 0 123456789 .@# .com Space Done 3. Press the EXIT button to enter a custom name using the number keys on your remote to all custom picture modes: 1. ABC 3. Press the EXIT button to the picture modes. 4. Make any desired changes to exit the menu screens. From the...

Download
Page 37
VIZIO AUDIO TV Speakers Surround Sound Volume Leveling Balance - Select PCM or Bitstream. Select Variable to Input conWtidroe l theCeC xternal device's volume from the TV's volume ... Left/Right Arrow buttons to a home theater audio system. Use the Arrow buttons on or off . • Balance - Turns the built-in speakers on the remote to a home theater audio system. Surround sound uses DTS TruSurround™ to hear dialog or flattening sudden noises. Adjusts the synchronization between program content, AV...
VIZIO AUDIO TV Speakers Surround Sound Volume Leveling Balance - Select PCM or Bitstream. Select Variable to Input conWtidroe l theCeC xternal device's volume from the TV's volume ... Left/Right Arrow buttons to a home theater audio system. Use the Arrow buttons on or off . • Balance - Turns the built-in speakers on the remote to a home theater audio system. Surround sound uses DTS TruSurround™ to hear dialog or flattening sudden noises. Adjusts the synchronization between program content, AV...

Download
Page 38
... press OK. The AUDIO menu is displayed. 3. Press the EXIT button on the remote to highlight Audio and press OK. Use the Arrow buttons on the remote. Highlight Delete and press OK. 5. The on the remote to highlight Audio and press OK. Use the Arrow buttons to highlight Delete Audio Mode... and press OK. Use the Arrow buttons on -screen menu is displayed. 2. Press the MENU button on the remote. Use the Arrow buttons to highlight Equalizer and press OK. The TV displays, "To delete the user created custom audio mode, select the Delete ...
... press OK. The AUDIO menu is displayed. 3. Press the EXIT button on the remote to highlight Audio and press OK. Use the Arrow buttons on the remote. Highlight Delete and press OK. 5. The on the remote to highlight Audio and press OK. Use the Arrow buttons to highlight Delete Audio Mode... and press OK. Use the Arrow buttons on -screen menu is displayed. 2. Press the MENU button on the remote. Use the Arrow buttons to highlight Equalizer and press OK. The TV displays, "To delete the user created custom audio mode, select the Delete ...


