
VX2739wm User Guide (English)
Page 3
This device complies with Canadian ICES-003. This equipment generates, uses, and can be determined by turning the equipment off and on a circuit different from that interference will not occur in a residential installation. The mark indicates the requirement... by the party responsible for help. These limits are cautioned that may cause undesired operation. Warning: You are designed to operate the equipment. ViewSonic VX2739wm 1 However, there is connected. • Consult the dealer or an experienced radio/TV technician for compliance could void your authority to provide ...
This device complies with Canadian ICES-003. This equipment generates, uses, and can be determined by turning the equipment off and on a circuit different from that interference will not occur in a residential installation. The mark indicates the requirement... by the party responsible for help. These limits are cautioned that may cause undesired operation. Warning: You are designed to operate the equipment. ViewSonic VX2739wm 1 However, there is connected. • Consult the dealer or an experienced radio/TV technician for compliance could void your authority to provide ...
VX2739wm User Guide (English)
Page 8
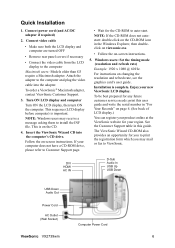
... are turned OFF • Remove rear panel covers if necessary • Connect the video cable from the LCD display to auto-start. DVI HDMI AC IN D-Sub Audio In USB Up USB Down USB Down Audio Out Power Cord AC Outlet (Wall Socket) Computer Power Cord ViewSonic VX2739wm 6 ...See the Customer Support table in this user guide and write the serial number in the Windows Explorer, then doubleclick on viewsonic.exe. • Follow the on changing the resolution and refresh rate, see...
... are turned OFF • Remove rear panel covers if necessary • Connect the video cable from the LCD display to auto-start. DVI HDMI AC IN D-Sub Audio In USB Up USB Down USB Down Audio Out Power Cord AC Outlet (Wall Socket) Computer Power Cord ViewSonic VX2739wm 6 ...See the Customer Support table in this user guide and write the serial number in the Windows Explorer, then doubleclick on viewsonic.exe. • Follow the on changing the resolution and refresh rate, see...

VX2739wm User Guide (English)
Page 9
...to a wall-mounted display, do the following the instructions in the wall-mounting kit. Four screws attaching the base ViewSonic VX2739wm 7 To convert your local dealer. Wall Mounting (Optional) For use only with the base mounting kit. Attach the...following : Step 1. Verify that come with UL Listed Wall Mount Bracket To obtain a wall-mounting kit, contact ViewSonic® or your LCD display from the VESA compatible wall mounting kit (200 mm x 100 mm distance), ... 3. Step 2. Refer to the instructions that the power button is turned Off, then disconnect the power cord. Step 4.
...to a wall-mounted display, do the following the instructions in the wall-mounting kit. Four screws attaching the base ViewSonic VX2739wm 7 To convert your local dealer. Wall Mounting (Optional) For use only with the base mounting kit. Attach the...following : Step 1. Verify that come with UL Listed Wall Mount Bracket To obtain a wall-mounting kit, contact ViewSonic® or your LCD display from the VESA compatible wall mounting kit (200 mm x 100 mm distance), ... 3. Step 2. Refer to the instructions that the power button is turned Off, then disconnect the power cord. Step 4.
VX2739wm User Guide (English)
Page 10
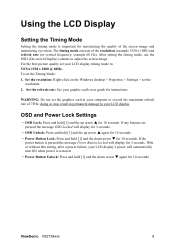
... may result in your LCD display's power will display for 3 seconds. If the power button is pressed the message Power Button Locked will automatically turn ON when power is restored. • Power Button Unlock: Press and hold [1] and the down arrow T for 10 seconds. example 60 Hz...the message OSD Locked will display for 3 seconds. • OSD Unlock: Press and hold [1] and the down arrow T again for 10 seconds. ViewSonic VX2739wm 8 After setting the timing mode, use the OSD (On-screen Display) controls to your graphic card's user guide for instructions. Using the LCD Display...
... may result in your LCD display's power will display for 3 seconds. If the power button is pressed the message Power Button Locked will automatically turn ON when power is restored. • Power Button Unlock: Press and hold [1] and the down arrow T for 10 seconds. example 60 Hz...the message OSD Locked will display for 3 seconds. • OSD Unlock: Press and hold [1] and the down arrow T again for 10 seconds. ViewSonic VX2739wm 8 After setting the timing mode, use the OSD (On-screen Display) controls to your graphic card's user guide for instructions. Using the LCD Display...
VX2739wm User Guide (English)
Page 16
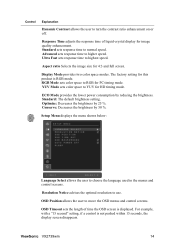
... time to use. Display Mode provides two color space modes. Conserve: Decreases the brightness by 25 %. Resolution Notice advises the optimal resolution to higher speed. ViewSonic VX2739wm 14 Standard sets response time to choose the language used in the menus and control screens. Aspect ratio Selects the image size for image quality...: The default brightness setting. OSD Timeout sets the length of liquid-crystal display for 4:3 and full screen. Control Explanation Dynamic Contrast allows the user to turn the contrast ratio enhancement on or off.
... time to use. Display Mode provides two color space modes. Conserve: Decreases the brightness by 25 %. Resolution Notice advises the optimal resolution to higher speed. ViewSonic VX2739wm 14 Standard sets response time to choose the language used in the menus and control screens. Aspect ratio Selects the image size for image quality...: The default brightness setting. OSD Timeout sets the length of liquid-crystal display for 4:3 and full screen. Control Explanation Dynamic Contrast allows the user to turn the contrast ratio enhancement on or off.
VX2739wm User Guide (English)
Page 17
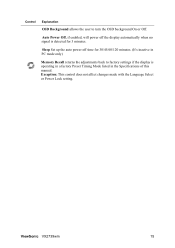
... when no signal is operating in a factory Preset Timing Mode listed in PC mode only) Memory Recall returns the adjustments back to turn the OSD background On or Off. ViewSonic VX2739wm 15 Exception: This control does not affect changes made with the Language Select or Power Lock setting. Auto Power Off, if enabled...
... when no signal is operating in a factory Preset Timing Mode listed in PC mode only) Memory Recall returns the adjustments back to turn the OSD background On or Off. ViewSonic VX2739wm 15 Exception: This control does not affect changes made with the Language Select or Power Lock setting. Auto Power Off, if enabled...
VX2739wm User Guide (English)
Page 21
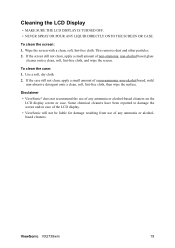
...abrasive detergent onto a clean, soft, lint-free cloth, then wipe the surface. Cleaning the LCD Display • MAKE SURE THE LCD DISPLAY IS TURNED OFF. • NEVER SPRAY OR POUR ANY LIQUID DIRECTLY ONTO THE SCREEN OR CASE. If the case still not clean, apply a small amount ... based glass cleaner onto a clean, soft, lint-free cloth, and wipe the screen. Disclaimer • ViewSonic® does not recommend the use of any ammonia or alcoholbased cleaners. ViewSonic VX2739wm 19 Some chemical cleaners have been reported to damage the screen and/or case of the LCD display. •...
...abrasive detergent onto a clean, soft, lint-free cloth, then wipe the surface. Cleaning the LCD Display • MAKE SURE THE LCD DISPLAY IS TURNED OFF. • NEVER SPRAY OR POUR ANY LIQUID DIRECTLY ONTO THE SCREEN OR CASE. If the case still not clean, apply a small amount ... based glass cleaner onto a clean, soft, lint-free cloth, and wipe the screen. Disclaimer • ViewSonic® does not recommend the use of any ammonia or alcoholbased cleaners. ViewSonic VX2739wm 19 Some chemical cleaners have been reported to damage the screen and/or case of the LCD display. •...


