Q171b PDF Spec Sheet
Page 1
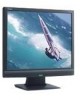
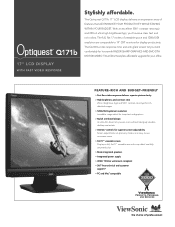
Q171b 17" LCD DISPLAY WITH FAST VIDEO RESPONSE Stylishly affordable. The full, flat 17 inches of features that will ENHANCE YOUR ...are comparable to -use on-screen menu. > Full 17" viewable screen Displays a full, flat 17" viewable area with RAZOR-SHARP GRAPHICS AND SMOOTH MOTION VIDEO. This LCD is the stylish, affordable upgrade for display productivity. The...24/7 free technical and customer support.* > PC and Mac® compatible The Optiquest Q171b 17" LCD display delivers an impressive array of viewable space and 1280x1024 resolution are precisely made via an easy-to 19"...
Q171b 17" LCD DISPLAY WITH FAST VIDEO RESPONSE Stylishly affordable. The full, flat 17 inches of features that will ENHANCE YOUR ...are comparable to -use on-screen menu. > Full 17" viewable screen Displays a full, flat 17" viewable area with RAZOR-SHARP GRAPHICS AND SMOOTH MOTION VIDEO. This LCD is the stylish, affordable upgrade for display productivity. The...24/7 free technical and customer support.* > PC and Mac® compatible The Optiquest Q171b 17" LCD display delivers an impressive array of viewable space and 1280x1024 resolution are precisely made via an easy-to 19"...
Q171b-1 User Guide, English
Page 9
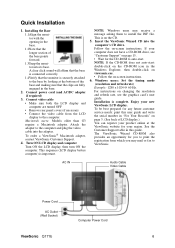
...AC IN Audio Cable Video Cable Power Cord AC Outlet (Wall Socket) Computer Power Cord ViewSonic Q171b 6 Connect power cord (and AC/DC adapter if required) 3. Connect video cable • Make sure both the LCD display and computer are fully engaged in the Windows Explorer, then double-click on.... A clear click sound will affirm that the base is connected correctly. 1.4Verify that the monitor is on -screen instructions. 6. Attach the adapter to ViewSonic. Turn ON LCD display and computer Turn ON the LCD display, then turn ON the computer. NOTE: If the CD-ROM does not auto-start ...
...AC IN Audio Cable Video Cable Power Cord AC Outlet (Wall Socket) Computer Power Cord ViewSonic Q171b 6 Connect power cord (and AC/DC adapter if required) 3. Connect video cable • Make sure both the LCD display and computer are fully engaged in the Windows Explorer, then double-click on.... A clear click sound will affirm that the base is connected correctly. 1.4Verify that the monitor is on -screen instructions. 6. Attach the adapter to ViewSonic. Turn ON LCD display and computer Turn ON the LCD display, then turn ON the computer. NOTE: If the CD-ROM does not auto-start ...


