User Guide
Page 9
... (ou son antenne d'emission) est installe a l'exterieur, il doit faire l'objet d'une licence. Industry Canada requires this product to be operated indoors and away from windows to provide maximum shielding. Digital Media Network Company, declares that this Radio LAN device is in the 5.15 GHz to 5.25 GHz frequency range. EU... installed outdoors is intended to be used indoors for frequency range 5.15 GHz to 5.25 GHz to reduce the potential for radio equipment English: Hereby, TOSHIBA Corp. To prevent radio interference to the licensed service, this device.
... (ou son antenne d'emission) est installe a l'exterieur, il doit faire l'objet d'une licence. Industry Canada requires this product to be operated indoors and away from windows to provide maximum shielding. Digital Media Network Company, declares that this Radio LAN device is in the 5.15 GHz to 5.25 GHz frequency range. EU... installed outdoors is intended to be used indoors for frequency range 5.15 GHz to 5.25 GHz to reduce the potential for radio equipment English: Hereby, TOSHIBA Corp. To prevent radio interference to the licensed service, this device.

User Guide
Page 27
...Windows Media are registered trademarks of Microsoft Corporation in the United States and/or other brand and product names are trademarks of Toshiba America Information Systems, Inc. Wi-Fi is a trademark of Synaptics, Inc. Computer disposal information This product contains mercury. 27 Trademarks Tecra... and Noteworthy are registered trademarks, FreedomWare and SmartMedia are trademarks, of Dolby Laboratories. Manufactured by Toshiba under license from Dolby Laboratories/ Dolby and the double-D ...
...Windows Media are registered trademarks of Microsoft Corporation in the United States and/or other brand and product names are trademarks of Toshiba America Information Systems, Inc. Wi-Fi is a trademark of Synaptics, Inc. Computer disposal information This product contains mercury. 27 Trademarks Tecra... and Noteworthy are registered trademarks, FreedomWare and SmartMedia are trademarks, of Dolby Laboratories. Manufactured by Toshiba under license from Dolby Laboratories/ Dolby and the double-D ...

User Guide
Page 30
...; special keys 91 Overlay keys 91 Starting a program 93 Starting a program from the Start menu...........94 Starting a program from Windows® Explorer....94 Starting a program from the Run dialog box ....95 Saving your work 98 Using the DVD-ROM or multi-function drive...........99 Drive ...
...; special keys 91 Overlay keys 91 Starting a program 93 Starting a program from the Start menu...........94 Starting a program from Windows® Explorer....94 Starting a program from the Run dialog box ....95 Saving your work 98 Using the DVD-ROM or multi-function drive...........99 Drive ...

User Guide
Page 32
... 140 Personalizing your desktop 141 Customizing the taskbar 141 Bringing the world to your desktop 142 Changing desktop and browsing style 143 Personalizing individual windows 145 Customizing window toolbars 145 Displaying information about each folder .......146 Setting up for communications 147 Determining the COM port 148 Connecting the modem to a telephone line... 157 Using external speakers or headphones..........157 Recording sounds 158 Using a microphone 158 Using tablet mode 159 Preparing to use the tablet 160 Using the Toshiba tablet pen 162
... 140 Personalizing your desktop 141 Customizing the taskbar 141 Bringing the world to your desktop 142 Changing desktop and browsing style 143 Personalizing individual windows 145 Customizing window toolbars 145 Displaying information about each folder .......146 Setting up for communications 147 Determining the COM port 148 Connecting the modem to a telephone line... 157 Using external speakers or headphones..........157 Recording sounds 158 Using a microphone 158 Using tablet mode 159 Preparing to use the tablet 160 Using the Toshiba tablet pen 162
User Guide
Page 34
...192 Cross Menu Utility 193 Creating a New Menu 194 TOSHIBA Tablet Access Code Utility 195 TOSHIBA Zooming Utility 196 TOSHIBA Button Controls 198 CD/DVD Drive Acoustic Silencer 199 TOSHIBA Accessibility 200 Toshiba Mobile Extension 201 TOSHIBA SD Memory Boot Utility 202 Booting from a bootable ...SD card 203 Chapter 6: Keeping Your Files Safe 205 Trusted Platform Module (TPM 205 Using passwords in the Windows ® operating system 207...
...192 Cross Menu Utility 193 Creating a New Menu 194 TOSHIBA Tablet Access Code Utility 195 TOSHIBA Zooming Utility 196 TOSHIBA Button Controls 198 CD/DVD Drive Acoustic Silencer 199 TOSHIBA Accessibility 200 Toshiba Mobile Extension 201 TOSHIBA SD Memory Boot Utility 202 Booting from a bootable ...SD card 203 Chapter 6: Keeping Your Files Safe 205 Trusted Platform Module (TPM 205 Using passwords in the Windows ® operating system 207...

User Guide
Page 35
... Problems that are easy to fix 217 Problems when you turn on the computer............219 The Windows ® operating system is not working..221 Using Startup options to fix problems 222 Internet problems 223 The Windows® XP operating system can help you 223 Resolving a hardware conflict 224 A plan of action 224... Printer problems 242 Modem problems 243 Wireless device problems 244 DVD operating problems 247 Develop good computing habits 250 Data and system configuration backup in Windows XP 251 If you need further assistance 257 Before you contact...
... Problems that are easy to fix 217 Problems when you turn on the computer............219 The Windows ® operating system is not working..221 Using Startup options to fix problems 222 Internet problems 223 The Windows® XP operating system can help you 223 Resolving a hardware conflict 224 A plan of action 224... Printer problems 242 Modem problems 243 Wireless device problems 244 DVD operating problems 247 Develop good computing habits 250 Data and system configuration backup in Windows XP 251 If you need further assistance 257 Before you contact...
User Guide
Page 38
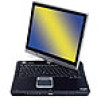
... listed or illustrated. For more detailed information about your particular model, please visit Toshiba's Web site at the time of publication to ensure the accuracy of powerful and portable multimedia computers! You will find that your Microsoft® Windows® XP Tablet PC Edition operating system is already installed on your computer...
... listed or illustrated. For more detailed information about your particular model, please visit Toshiba's Web site at the time of publication to ensure the accuracy of powerful and portable multimedia computers! You will find that your Microsoft® Windows® XP Tablet PC Edition operating system is already installed on your computer...

User Guide
Page 46
To use it. Setting up your software NOTE The names of windows displayed, and the order in which windows appear, may vary according to your computer NOTE The cooling fan location will vary depending on page 49. Setting up your computer TECHNICAL NOTE: You ...
To use it. Setting up your software NOTE The names of windows displayed, and the order in which windows appear, may vary according to your computer NOTE The cooling fan location will vary depending on page 49. Setting up your computer TECHNICAL NOTE: You ...

User Guide
Page 47
... and the name of the screen, if desired. Your computer restarts automatically. The computer will display the message "An Internet connection could not be found, a window will pause for a moment while checking for your computer. 5 Set the correct date, time, and time zone for an internet connection. Getting Started Setting up...
... and the name of the screen, if desired. Your computer restarts automatically. The computer will display the message "An Internet connection could not be found, a window will pause for a moment while checking for your computer. 5 Set the correct date, time, and time zone for an internet connection. Getting Started Setting up...

User Guide
Page 56
... by double-tapping the TouchPad or clicking the control buttons. The primary button usually corresponds to the left -hand) button. The Control Panel window appears. 2 Click Printers and Other Hardware. Disabling or enabling the Dual Pointing Device The Dual Pointing Device is much smaller than the display ...across the TouchPad from right to left. To double-click, press the primary button twice in the desired direction. 56 Getting Started Using the Toshiba Dual Pointing Device ❖ To move the cursor to the bottom of the page, drag your finger toward yourself. ❖ To move ...
... by double-tapping the TouchPad or clicking the control buttons. The primary button usually corresponds to the left -hand) button. The Control Panel window appears. 2 Click Printers and Other Hardware. Disabling or enabling the Dual Pointing Device The Dual Pointing Device is much smaller than the display ...across the TouchPad from right to left. To double-click, press the primary button twice in the desired direction. 56 Getting Started Using the Toshiba Dual Pointing Device ❖ To move the cursor to the bottom of the page, drag your finger toward yourself. ❖ To move ...

User Guide
Page 57
You may want to run most of today's popular applications. The Mouse Properties window closes. 8 Close the Printers and Other Hardware window. 9 Close the Control Panel window. The Mouse Properties window appears. 4 Click the Dual Pointing Device tab. The Dual Pointing Device tab view window appears. 5 Select Disable or Enable, whichever is on. Before you install...: To purchase additional memory modules see the accessories information packaged with enough memory to increase the Your computer comes with your system or visit accessories.toshiba.com.
You may want to run most of today's popular applications. The Mouse Properties window closes. 8 Close the Printers and Other Hardware window. 9 Close the Control Panel window. The Mouse Properties window appears. 4 Click the Dual Pointing Device tab. The Dual Pointing Device tab view window appears. 5 Select Disable or Enable, whichever is on. Before you install...: To purchase additional memory modules see the accessories information packaged with enough memory to increase the Your computer comes with your system or visit accessories.toshiba.com.

User Guide
Page 58
...to step 3. 1 If the computer is in various capacities (to stay current on , begin at accessories.toshiba.com). Additional memory modules can be sure to regularly check the Toshiba Web site at step 1; otherwise skip to room temperature before you use a standard Phillips No. 1 ...screwdriver that is on the base of data. Additional memory comes in good condition. If you replace them. The operating system turns off computer window appears. 2 Click...
...to step 3. 1 If the computer is in various capacities (to stay current on , begin at accessories.toshiba.com). Additional memory modules can be sure to regularly check the Toshiba Web site at step 1; otherwise skip to room temperature before you use a standard Phillips No. 1 ...screwdriver that is on the base of data. Additional memory comes in good condition. If you replace them. The operating system turns off computer window appears. 2 Click...

User Guide
Page 64
... reclaim additional hard disk space used to store the Hard Drive Recovery Utilities on your computer. If your optical disk drive is not writable, contact TOSHIBA Customer Support to create Recovery media on both CDs and DVDs). Sample Recovery Disc Creator screen 64 Getting Started Hard Drive Recovery Utilities Creating Recovery... of CDs or DVDs to copy the Hard Drive Recovery Utilities. To create recovery CDs/DVDs: 1 Double-click the Recovery Disc Creator icon on the Windows desktop.
... reclaim additional hard disk space used to store the Hard Drive Recovery Utilities on your computer. If your optical disk drive is not writable, contact TOSHIBA Customer Support to create Recovery media on both CDs and DVDs). Sample Recovery Disc Creator screen 64 Getting Started Hard Drive Recovery Utilities Creating Recovery... of CDs or DVDs to copy the Hard Drive Recovery Utilities. To create recovery CDs/DVDs: 1 Double-click the Recovery Disc Creator icon on the Windows desktop.

User Guide
Page 72
You can also launch the application by To reinstall drivers and applications: 1 Double-click the Toshiba Application Installer icon on the Windows desktop. Sample Delete Hard Disk Recovery Utility confirmation screen After the Delete Hard Disk Recovery Utility has completed, it assigns the appropriate drive letter (for ...
You can also launch the application by To reinstall drivers and applications: 1 Double-click the Toshiba Application Installer icon on the Windows desktop. Sample Delete Hard Disk Recovery Utility confirmation screen After the Delete Hard Disk Recovery Utility has completed, it assigns the appropriate drive letter (for ...

User Guide
Page 75
You only need to set up your printer installation guide for the first time. The Add Printer Wizard appears. Sample Add Printer Wizard 3 Follow the on-screen instructions to set it up for instructions. Refer to set up the printer once. 1 Click Start, Printers and Faxes. The Printers and Faxes window appears. 2 Click Add a Printer. TECHNICAL NOTE: Some printers require a specific installation process. Getting Started Connecting a printer 75 Setting up a printer If you have a printer, follow these steps to your printer.
You only need to set up your printer installation guide for the first time. The Add Printer Wizard appears. Sample Add Printer Wizard 3 Follow the on-screen instructions to set it up for instructions. Refer to set up the printer once. 1 Click Start, Printers and Faxes. The Printers and Faxes window appears. 2 Click Add a Printer. TECHNICAL NOTE: Some printers require a specific installation process. Getting Started Connecting a printer 75 Setting up a printer If you have a printer, follow these steps to your printer.

User Guide
Page 79
... use these buttons. This section describes how to the right of the display system buttons ❖ Windows Security button To activate the Task Manager, press and hold the Windows Security button for the video controller by clicking Start, then Control Panel and clicking Display. Choose the... Settings tab, click the Advanced button, select Display Device, select the applicable Monitor type, click Apply or OK. Cross-Functional button Windows Security button ESC/Display Rotation button Sample location of the power switch. TECHNICAL NOTE: Set the option for one second. ❖ ESC...
... use these buttons. This section describes how to the right of the display system buttons ❖ Windows Security button To activate the Task Manager, press and hold the Windows Security button for the video controller by clicking Start, then Control Panel and clicking Display. Choose the... Settings tab, click the Advanced button, select Display Device, select the applicable Monitor type, click Apply or OK. Cross-Functional button Windows Security button ESC/Display Rotation button Sample location of the power switch. TECHNICAL NOTE: Set the option for one second. ❖ ESC...

User Guide
Page 82
... return to 640 x 480 or 800 x 600, the image on the screen. If you left off. ❖ To leave the computer off for a while. The Windows® XP Tablet PC Edition Press the Cross-Functional button to 800 x 600. You cannot rotate the display to any of the desktop will not...
... return to 640 x 480 or 800 x 600, the image on the screen. If you left off. ❖ To leave the computer off for a while. The Windows® XP Tablet PC Edition Press the Cross-Functional button to 800 x 600. You cannot rotate the display to any of the desktop will not...

User Guide
Page 83
...while the computer is still on, one of the display (the button on . Closing the display panel When you close the display panel to a Windows® network server (domain server) or the Turn Off command if you that action (Nothing, Stand By, Hibernate). Never turn the computer on ...is still on the far right) Alternatives include: ❖ Using Hot Key combinations ❖ Opening and closing the display panel ❖ Pressing the Windows Security button on the front of these actions will occur: ❖ If you have an action feature set , the computer will perform that it ...
...while the computer is still on, one of the display (the button on . Closing the display panel When you close the display panel to a Windows® network server (domain server) or the Turn Off command if you that action (Nothing, Stand By, Hibernate). Never turn the computer on ...is still on the far right) Alternatives include: ❖ Using Hot Key combinations ❖ Opening and closing the display panel ❖ Pressing the Windows Security button on the front of these actions will occur: ❖ If you have an action feature set , the computer will perform that it ...

User Guide
Page 89
Learning the Basics Using the keyboard 89 Using the keyboard Your computer's keyboard contains character keys, control keys, function keys, and special Windows® keys, which provide all the functionality of the page. ❖ The lowercase letter l (el) and the numeral 1 are not interchangeable. ❖ The uppercase letter O ...
Learning the Basics Using the keyboard 89 Using the keyboard Your computer's keyboard contains character keys, control keys, function keys, and special Windows® keys, which provide all the functionality of the page. ❖ The lowercase letter l (el) and the numeral 1 are not interchangeable. ❖ The uppercase letter O ...

User Guide
Page 91
... cursor as the secondary mouse (or TouchPad) button Overlay keys The keys with icons run programmed functions specific to your computer. Windows® special keys Start key Application key Sample Windows® special keys Your computer's keyboard has two keys, located at the topright of them form the numeric and cursor overlay...
... cursor as the secondary mouse (or TouchPad) button Overlay keys The keys with icons run programmed functions specific to your computer. Windows® special keys Start key Application key Sample Windows® special keys Your computer's keyboard has two keys, located at the topright of them form the numeric and cursor overlay...


