User Guide
Page 5
...sending machine or such business, other electronic device, including Fax machines, to send any message unless such message clearly contains in their equipment, operations or procedures. Also, you will be advised of 0.3). Connection to party line service is a REN of your right to file... ever decide to maintain uninterrupted service. If Problems Arise If this equipment, for them to make any person to use a computer or other entity, or individual. (The telephone number Telephone Company Procedures The goal of 1991 makes it can. In order to make changes in a margin at (949...
...sending machine or such business, other electronic device, including Fax machines, to send any message unless such message clearly contains in their equipment, operations or procedures. Also, you will be advised of 0.3). Connection to party line service is a REN of your right to file... ever decide to maintain uninterrupted service. If Problems Arise If this equipment, for them to make any person to use a computer or other entity, or individual. (The telephone number Telephone Company Procedures The goal of 1991 makes it can. In order to make changes in a margin at (949...

User Guide
Page 27
... Recovery Utilities 63 Creating Recovery CDs/DVDs 64 Hard Disk Drive Recovery using the recovery partition 66 Hard Disk Drive Recovery using the Recovery media 71 Deleting the Hard Disk Recovery Utility 74 Installing drivers and applications 75 Using the TouchPad 75 Scrolling with the TouchPad 76 Control buttons 76 Disabling or enabling the TouchPad 77 Using external display devices 78 Directing the display output when you turn on the computer 79 Adjusting the quality of the external display......80 Using an external keyboard 80 Using a mouse 81 Connecting a printer 81 Setting...
... Recovery Utilities 63 Creating Recovery CDs/DVDs 64 Hard Disk Drive Recovery using the recovery partition 66 Hard Disk Drive Recovery using the Recovery media 71 Deleting the Hard Disk Recovery Utility 74 Installing drivers and applications 75 Using the TouchPad 75 Scrolling with the TouchPad 76 Control buttons 76 Disabling or enabling the TouchPad 77 Using external display devices 78 Directing the display output when you turn on the computer 79 Adjusting the quality of the external display......80 Using an external keyboard 80 Using a mouse 81 Connecting a printer 81 Setting...

User Guide
Page 55
... computer using the Start menu. If the computer is in Standby or Hibernation mode, data will be lost. For information on removing the main battery, see "Removing the battery from the computer" on may damage the computer, the module, or both. Getting Started Adding memory (optional) 55 Installing a memory module with the computer's power on page 129. The operating system turns off the computer. 3 Unplug and remove any cables connected to...
... computer using the Start menu. If the computer is in Standby or Hibernation mode, data will be lost. For information on removing the main battery, see "Removing the battery from the computer" on may damage the computer, the module, or both. Getting Started Adding memory (optional) 55 Installing a memory module with the computer's power on page 129. The operating system turns off the computer. 3 Unplug and remove any cables connected to...

User Guide
Page 62
TECHNICAL NOTE: You must have at least one memory module installed for the computer to a 30-degree angle and slide it using the screw. 5 Re-insert the main battery. Front of computer Memory slots (Sample Illustration) Removing the memory module 4 Replace the memory module slot cover and secure it out of the slot. For more information on inserting the main battery, see "Inserting a charged battery" on page 131. 6 Turn the computer right side up. 7 Reconnect the cables. 8 Restart the computer. 62 Getting Started Adding memory (optional) 3 Gently lift the memory module to work.
TECHNICAL NOTE: You must have at least one memory module installed for the computer to a 30-degree angle and slide it using the screw. 5 Re-insert the main battery. Front of computer Memory slots (Sample Illustration) Removing the memory module 4 Replace the memory module slot cover and secure it out of the slot. For more information on inserting the main battery, see "Inserting a charged battery" on page 131. 6 Turn the computer right side up. 7 Reconnect the cables. 8 Restart the computer. 62 Getting Started Adding memory (optional) 3 Gently lift the memory module to work.

User Guide
Page 63
... software features or utilities. If the computer does not recognize the memory configuration, turn off the computer, remove the memory slot cover (complete steps 1-9 in "Installing a memory module" on page 64. Hard Drive Recovery Utilities Your computer has been configured with the socket latches. For more information on creating Recovery media see "Creating Recovery CDs/DVDs" on page 54), and check that you create recovery CDs/ DVDs before using a writable drive. ❖ Recover your hard disk drive to the factory-set default without the HDD Recovery partition. Using the HDD...
... software features or utilities. If the computer does not recognize the memory configuration, turn off the computer, remove the memory slot cover (complete steps 1-9 in "Installing a memory module" on page 64. Hard Drive Recovery Utilities Your computer has been configured with the socket latches. For more information on creating Recovery media see "Creating Recovery CDs/DVDs" on page 54), and check that you create recovery CDs/ DVDs before using a writable drive. ❖ Recover your hard disk drive to the factory-set default without the HDD Recovery partition. Using the HDD...
User Guide
Page 78
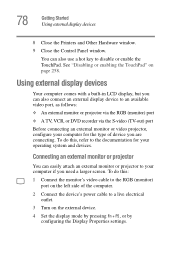
... "Disabling or enabling the TouchPad" on the external device. 4 Set the display mode by pressing Fn + F5, or by configuring the Display Properties settings. 78 Getting Started Using external display devices 8 Close the Printers and Other Hardware window. 9 Close the Control Panel window. To do this , refer to the documentation for your computer for the type of the computer. 2 Connect the device's power cable to an available video port, as follows: ❖ An external monitor or projector via the RGB (monitor) port...
... "Disabling or enabling the TouchPad" on the external device. 4 Set the display mode by pressing Fn + F5, or by configuring the Display Properties settings. 78 Getting Started Using external display devices 8 Close the Printers and Other Hardware window. 9 Close the Control Panel window. To do this , refer to the documentation for your computer for the type of the computer. 2 Connect the device's power cable to an available video port, as follows: ❖ An external monitor or projector via the RGB (monitor) port...
User Guide
Page 169
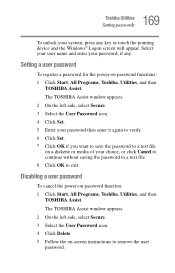
... -screen instructions to exit. The TOSHIBA Assist window appears. 2 On the left side, select Secure. 3 Select the User Password icon. 4 Click Delete. 5 Follow the on a diskette or media of your choice, or click Cancel to continue without saving the password to a text file. 8 Click OK to remove the user password. Setting a user password To register a password for the power-on password function: 1 Click Start, All Programs, Toshiba, Utilities, and then TOSHIBA Assist. Disabling a user password...
... -screen instructions to exit. The TOSHIBA Assist window appears. 2 On the left side, select Secure. 3 Select the User Password icon. 4 Click Delete. 5 Follow the on a diskette or media of your choice, or click Cancel to continue without saving the password to a text file. 8 Click OK to remove the user password. Setting a user password To register a password for the power-on password function: 1 Click Start, All Programs, Toshiba, Utilities, and then TOSHIBA Assist. Disabling a user password...
User Guide
Page 171
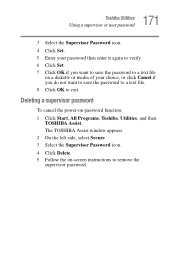
Deleting a supervisor password To cancel the power-on password function: 1 Click Start, All Programs, Toshiba, Utilities, and then TOSHIBA Assist. The TOSHIBA Assist window appears. 2 On the left side, select Secure. 3 Select the Supervisor Password icon. 4 Click Delete. 5 Follow the on-screen instructions to exit. 171 Toshiba Utilities Using a supervisor or user password 3 Select the Supervisor Password icon. 4 Click Set. 5 Enter your password then enter it again to verify. 6 Click Set. 7 Click OK if you...
Deleting a supervisor password To cancel the power-on password function: 1 Click Start, All Programs, Toshiba, Utilities, and then TOSHIBA Assist. The TOSHIBA Assist window appears. 2 On the left side, select Secure. 3 Select the Supervisor Password icon. 4 Click Delete. 5 Follow the on-screen instructions to exit. 171 Toshiba Utilities Using a supervisor or user password 3 Select the Supervisor Password icon. 4 Click Set. 5 Enter your password then enter it again to verify. 6 Click Set. 7 Click OK if you...
User Guide
Page 212
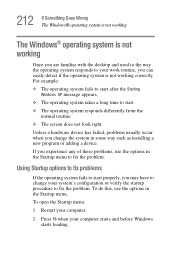
... verify the startup procedure to fix the problem. Unless a hardware device has failed, problems usually occur when you experience any of these problems, use the options in some way such as installing a new program or adding a device. Using Startup options to fix problems If the operating system fails to start . ❖ The operating system responds differently from the normal routine. ❖ The screen does not look right. To open the Startup menu: 1 Restart your...
... verify the startup procedure to fix the problem. Unless a hardware device has failed, problems usually occur when you experience any of these problems, use the options in some way such as installing a new program or adding a device. Using Startup options to fix problems If the operating system fails to start . ❖ The operating system responds differently from the normal routine. ❖ The screen does not look right. To open the Startup menu: 1 Restart your...

User Guide
Page 223
... the cable connecting the external monitor to continue working. If you are using the built-in while the computer was turned on. If this , press Fn and F5 simultaneously (once). Display problems Here are some typical display problems and their solutions: The screen is not set for an external monitor. If you have plugged the external keyboard in screen, make sure the display priority is blank. Using the computer's TouchPad, click Start, then...
... the cable connecting the external monitor to continue working. If you are using the built-in while the computer was turned on. If this , press Fn and F5 simultaneously (once). Display problems Here are some typical display problems and their solutions: The screen is not set for an external monitor. If you have plugged the external keyboard in screen, make sure the display priority is blank. Using the computer's TouchPad, click Start, then...
User Guide
Page 234
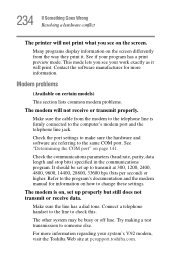
... the software manufacturer for information on the screen. The modem is firmly connected to the computer's modem port and the telephone line jack. Try making a test transmission to change these settings. 234 If Something Goes Wrong Resolving a hardware conflict The printer will print. See if your work exactly as it . See "Determining the COM port" on certain models) This section lists common modem problems...
... the software manufacturer for information on the screen. The modem is firmly connected to the computer's modem port and the telephone line jack. Try making a test transmission to change these settings. 234 If Something Goes Wrong Resolving a hardware conflict The printer will print. See if your work exactly as it . See "Determining the COM port" on certain models) This section lists common modem problems...

User Guide
Page 238
... (16-bit). DVD operating problems If you experience a problem playing DVDs, you are not True Color (24-bit). If it is set to fix the problem yourself. 238 If Something Goes Wrong DVD operating problems The Windows XP wireless management facility does not work. If you may be disabling the Windows XP wireless management facility, in the drive tray. 3 Ensure that the Display properties are using an external Wi-Fi adapter (a PC Card, USB adapter, or other...
... (16-bit). DVD operating problems If you experience a problem playing DVDs, you are not True Color (24-bit). If it is set to fix the problem yourself. 238 If Something Goes Wrong DVD operating problems The Windows XP wireless management facility does not work. If you may be disabling the Windows XP wireless management facility, in the drive tray. 3 Ensure that the Display properties are using an external Wi-Fi adapter (a PC Card, USB adapter, or other...

User Guide
Page 302
... a power source 47 connection set up 144 control buttons 76 Ctrl keys 98 D desktop creating new icon 138 major features 138 desktop exploration 137 desktop icons 138 Device Manager 217 checking properties 218 disabling a device 218 devices keyboard 80 mouse 81 Disk Defragmenter 226 disk drive corrupted/damaged data files 227 missing files/trouble accessing a disk 225 running slow 226 diskette drive cannot insert a diskette 227 cannot read a diskette 227 connecting 83 external, connecting 83 display...
... a power source 47 connection set up 144 control buttons 76 Ctrl keys 98 D desktop creating new icon 138 major features 138 desktop exploration 137 desktop icons 138 Device Manager 217 checking properties 218 disabling a device 218 devices keyboard 80 mouse 81 Disk Defragmenter 226 disk drive corrupted/damaged data files 227 missing files/trouble accessing a disk 225 running slow 226 diskette drive cannot insert a diskette 227 cannot read a diskette 227 connecting 83 external, connecting 83 display...

User Guide
Page 303
... Support Windows XP 214 Hibernation mode 85 configuring 89 starting again from 91 hot key display brightness 257 display modes 257 Hibernation mode 256 keyboard overlays 259 password security 253 power profile 255 Standby mode 255 volume mute 252 zooming 259 hot key power profile 128 Hotkey utility 178 http 147 I i.LINK port 159 icon 138, 139 desktop 139 Internet Explorer 139 moving to desktop 138 recycle bin 139 safety 37 Windows Media Player 139 installation memory module 54 installing memory modules...
... Support Windows XP 214 Hibernation mode 85 configuring 89 starting again from 91 hot key display brightness 257 display modes 257 Hibernation mode 256 keyboard overlays 259 password security 253 power profile 255 Standby mode 255 volume mute 252 zooming 259 hot key power profile 128 Hotkey utility 178 http 147 I i.LINK port 159 icon 138, 139 desktop 139 Internet Explorer 139 moving to desktop 138 recycle bin 139 safety 37 Windows Media Player 139 installation memory module 54 installing memory modules...

User Guide
Page 304
...function keys 98 hot keys 259 not working 209 overlay keys 99 troubleshooting 222 using 97 Windows special keys 99 keyboard, external 80 keyboard, full-size 97 L lock computer, using 94 M main battery removing 129 memory adding 54 problem solving 219 removing expansion slot cover 56 memory module inserting 57 installation 54 removing 62 microphone 151 modem connecting to telephone line 142 determining COM port 141 problem solving 234 resetting port to default settings 141 upgrading 141 monitor 78 connecting 78 not working 223 mouse installing 81 serial 81 mouse utility 182 N network accessing...
...function keys 98 hot keys 259 not working 209 overlay keys 99 troubleshooting 222 using 97 Windows special keys 99 keyboard, external 80 keyboard, full-size 97 L lock computer, using 94 M main battery removing 129 memory adding 54 problem solving 219 removing expansion slot cover 56 memory module inserting 57 installation 54 removing 62 microphone 151 modem connecting to telephone line 142 determining COM port 141 problem solving 234 resetting port to default settings 141 upgrading 141 monitor 78 connecting 78 not working 223 mouse installing 81 serial 81 mouse utility 182 N network accessing...

User Guide
Page 305
... 171 disabling a user 169 supervisor set up 170 types 168 passwords instant, using 168 setting 168 PC Card checklist 231 CIS (Card Information Structure) 230 computer stops working 232 configuring 155 errors 233 hot swapping fails 232 inserting 153 not recognized 232 problem solving 230, 231 removing 154 setting up 155 Plug and Play 216 port COM 141 Ethernet LAN 145 RGB 78 power computer will not start 208 connecting cable to...
... 171 disabling a user 169 supervisor set up 170 types 168 passwords instant, using 168 setting 168 PC Card checklist 231 CIS (Card Information Structure) 230 computer stops working 232 configuring 155 errors 233 hot swapping fails 232 inserting 153 not recognized 232 problem solving 230, 231 removing 154 setting up 155 Plug and Play 216 port COM 141 Ethernet LAN 145 RGB 78 power computer will not start 208 connecting cable to...

Resource Guide for Tecra A7
Page 25
..., the memory module may want to follow these directions could result in Sleep or Hibernation mode, data will need a small Phillips screwdriver for this procedure. Installing a memory module with the computer's power on the base of today's popular applications. Your computer comes with your system or visit accessories.toshiba.com. You may be hot. Before you install or remove a memory module, turn off the computer using the Start menu.
..., the memory module may want to follow these directions could result in Sleep or Hibernation mode, data will need a small Phillips screwdriver for this procedure. Installing a memory module with the computer's power on the base of today's popular applications. Your computer comes with your system or visit accessories.toshiba.com. You may be hot. Before you install or remove a memory module, turn off the computer using the Start menu.

Resource Guide for Tecra A7
Page 29
... Reconnect the cables. 18 Restart the computer. Removing a memory module If you turn it using the screw. 15 Re-insert the main battery. In either of computer Memory slots (Sample Illustration) Inserting the memory module into the slot 14 Replace the memory module slot cover and secure it on . You can damage the computer and the memory module. Adding memory (optional) 29 Front of the above cases, the Sleep configuration will be saved...
... Reconnect the cables. 18 Restart the computer. Removing a memory module If you turn it using the screw. 15 Re-insert the main battery. In either of computer Memory slots (Sample Illustration) Inserting the memory module into the slot 14 Replace the memory module slot cover and secure it on . You can damage the computer and the memory module. Adding memory (optional) 29 Front of the above cases, the Sleep configuration will be saved...

Resource Guide for Tecra A7
Page 30
... Windows® should boot back up normally. If your system has the memory modules stacked on top of one another, you may need to scan your hard drive for the computer to go into Safe Mode, then shut down and restart the system, at least one of the slot. 4 Replace the memory module slot cover and secure it using the screw. 5 Re-insert the main battery. When Safe Mode...
... Windows® should boot back up normally. If your system has the memory modules stacked on top of one another, you may need to scan your hard drive for the computer to go into Safe Mode, then shut down and restart the system, at least one of the slot. 4 Replace the memory module slot cover and secure it using the screw. 5 Re-insert the main battery. When Safe Mode...
Resource Guide for Tecra A7
Page 50
... 22 power cord/cable 23 printer 24 control buttons TouchPad 33 D DC-IN 23 display problems screen is blank 46 E eject button 50 optical drive 34 error messages program has performed an illegal operation 44 F files backing up 32 saving 32 I inserting CD/DVD 35 PC Cards 31 installing main battery 39, 40 memory module 25 K keyboard unexpected characters 46 keyboard problems not working 45 L lights AC power 22 M main battery changing 39 installing 39, 40 removing 39 memory module installing...
... 22 power cord/cable 23 printer 24 control buttons TouchPad 33 D DC-IN 23 display problems screen is blank 46 E eject button 50 optical drive 34 error messages program has performed an illegal operation 44 F files backing up 32 saving 32 I inserting CD/DVD 35 PC Cards 31 installing main battery 39, 40 memory module 25 K keyboard unexpected characters 46 keyboard problems not working 45 L lights AC power 22 M main battery changing 39 installing 39, 40 removing 39 memory module installing...


