
Users Manual AU/NZ
Page 3
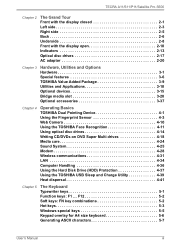
... characters 5-7 User's Manual iii TECRA A11/S11/P11/Satellite Pro S500 Chapter 2 The Grand Tour Front with the display closed 2-1 Left side 2-3 Right side 2-5 Back 2-6 Underside 2-8 Front with the display open 2-10 Indicators 2-13 Optical disc drives 2-17 AC adaptor 2-20 Chapter 3 Hardware, Utilities and Options Hardware 3-1 Special features 3-6 TOSHIBA Value Added Package 3-9 Utilities and Applications 3-10 Optional devices 3-15 Bridge media slot 3-20 Optional accessories 3-37 Chapter 4 Operating Basics TOSHIBA Dual Pointing Device 4-1 Using the Fingerprint...
... characters 5-7 User's Manual iii TECRA A11/S11/P11/Satellite Pro S500 Chapter 2 The Grand Tour Front with the display closed 2-1 Left side 2-3 Right side 2-5 Back 2-6 Underside 2-8 Front with the display open 2-10 Indicators 2-13 Optical disc drives 2-17 AC adaptor 2-20 Chapter 3 Hardware, Utilities and Options Hardware 3-1 Special features 3-6 TOSHIBA Value Added Package 3-9 Utilities and Applications 3-10 Optional devices 3-15 Bridge media slot 3-20 Optional accessories 3-37 Chapter 4 Operating Basics TOSHIBA Dual Pointing Device 4-1 Using the Fingerprint...
Users Manual AU/NZ
Page 4
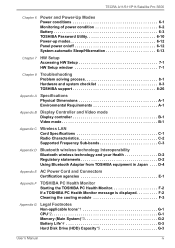
... wireless technology Interoperability Bluetooth wireless technology and your Health D-2 Regulatory statements D-2 Using Bluetooth Adaptor from TOSHIBA equipment in Japan . . . . D-4 Appendix E AC Power Cord and Connectors Certification agencies E-1 Appendix F TOSHIBA PC Health Monitor Starting the TOSHIBA PC Health Monitor F-2 If a TOSHIBA PC Health Monitor message is displayed F-2 Cleaning the cooling module F-3 Appendix G Legal Footnotes Non-applicable Icons*1 G-1 CPU*2 G-1 Memory (Main System)*3 G-2 Battery Life*4 G-3 Hard Disk Drive (HDD) Capacity*5 G-3 User's Manual...
... wireless technology Interoperability Bluetooth wireless technology and your Health D-2 Regulatory statements D-2 Using Bluetooth Adaptor from TOSHIBA equipment in Japan . . . . D-4 Appendix E AC Power Cord and Connectors Certification agencies E-1 Appendix F TOSHIBA PC Health Monitor Starting the TOSHIBA PC Health Monitor F-2 If a TOSHIBA PC Health Monitor message is displayed F-2 Cleaning the cooling module F-3 Appendix G Legal Footnotes Non-applicable Icons*1 G-1 CPU*2 G-1 Memory (Main System)*3 G-2 Battery Life*4 G-3 Hard Disk Drive (HDD) Capacity*5 G-3 User's Manual...
Users Manual AU/NZ
Page 6
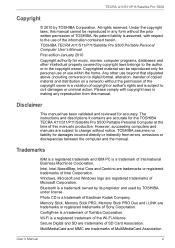
.... TOSHIBA TECRA A11/S11/P11/Satellite Pro S500 Portable Personal Computer User's Manual First edition January 2010 Copyright authority for accuracy. Memory Stick, Memory Stick PRO, Memory Stick PRO Duo and i.LINK are trademarks or registered trademarks of SD Card Association. No patent liability is assumed, with copyright laws in any reproduction from errors, omissions or discrepancies between the computer and the manual. Windows, Microsoft and Windows...
.... TOSHIBA TECRA A11/S11/P11/Satellite Pro S500 Portable Personal Computer User's Manual First edition January 2010 Copyright authority for accuracy. Memory Stick, Memory Stick PRO, Memory Stick PRO Duo and i.LINK are trademarks or registered trademarks of SD Card Association. No patent liability is assumed, with copyright laws in any reproduction from errors, omissions or discrepancies between the computer and the manual. Windows, Microsoft and Windows...
Users Manual AU/NZ
Page 11
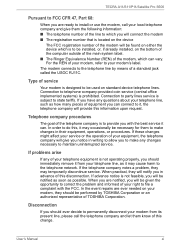
... them to make any changes necessary to maintain uninterrupted service. Type of service Your modem is not operating properly, you should ever decide to the telephone line by TOSHIBA Corporation or an authorized representative of this , it may temporarily discontinue service. Connection to telephone company-provided coin service (central office implemented systems) is subject to state tariffs. TECRA A11/S11/P11/Satellite Pro S500...
... them to make any changes necessary to maintain uninterrupted service. Type of service Your modem is not operating properly, you should ever decide to the telephone line by TOSHIBA Corporation or an authorized representative of this , it may temporarily discontinue service. Connection to telephone company-provided coin service (central office implemented systems) is subject to state tariffs. TECRA A11/S11/P11/Satellite Pro S500...
Users Manual AU/NZ
Page 24
... your TECRA A11/S11/P11Satellite Pro S500 computer. Read Chapter 3, Hardware, Utilities and Options if connecting optional products or external devices. User's Manual xxii This powerful notebook computer provides excellent expansion capability, includes multimedia functionality, and is organized, then become acquainted with the computer's features, components and accessory devices. Then read the Special features section in Chapter 3, Hardware, Utilities and Options to set up your computer, basic operations and care, using your...
... your TECRA A11/S11/P11Satellite Pro S500 computer. Read Chapter 3, Hardware, Utilities and Options if connecting optional products or external devices. User's Manual xxii This powerful notebook computer provides excellent expansion capability, includes multimedia functionality, and is organized, then become acquainted with the computer's features, components and accessory devices. Then read the Special features section in Chapter 3, Hardware, Utilities and Options to set up your computer, basic operations and care, using your...
Users Manual AU/NZ
Page 38
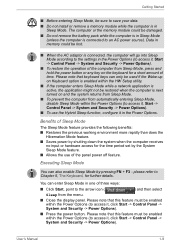
... Start -> Control Panel -> System and Security -> Power Options). ■ Press the power button. User's Manual 1-9 Executing Sleep Mode You can also enable Sleep Mode by the System Sleep Mode feature. ■ Allows the use the Hybrid Sleep function, configure it in one of three ways: ■ Click Start, point to Chapter 5, The Keyboard, for a short amount of time. Getting Started ■ Before entering Sleep Mode, be sure to save your data. ■ Do not install or remove a memory module while...
... Start -> Control Panel -> System and Security -> Power Options). ■ Press the power button. User's Manual 1-9 Executing Sleep Mode You can also enable Sleep Mode by the System Sleep Mode feature. ■ Allows the use the Hybrid Sleep function, configure it in one of three ways: ■ Click Start, point to Chapter 5, The Keyboard, for a short amount of time. Getting Started ■ Before entering Sleep Mode, be sure to save your data. ■ Do not install or remove a memory module while...

Users Manual AU/NZ
Page 46
... 3, Hardware, Utilities and Options. Follow the instruction of your medical device when using any wireless functionality. ■ Always turn off wireless functionality if the computer is near automatic control equipment or appliances such as screws, staples and paper clips, out of the Bridge media slot. The Grand Tour System indicators Bridge media slot These LED indicators allow you insert an SD™/SDHC™ memory card, miniSD™/microSD™ Card, Memory Stick...
... 3, Hardware, Utilities and Options. Follow the instruction of your medical device when using any wireless functionality. ■ Always turn off wireless functionality if the computer is near automatic control equipment or appliances such as screws, staples and paper clips, out of the Bridge media slot. The Grand Tour System indicators Bridge media slot These LED indicators allow you insert an SD™/SDHC™ memory card, miniSD™/microSD™ Card, Memory Stick...
Users Manual AU/NZ
Page 50
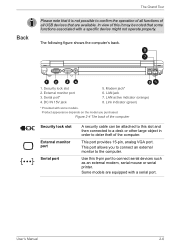
... external modem, serial mouse or serial printer. Figure 2-4 The back of the computer Security lock slot External monitor port Serial port A security cable can be noted that some models. In view of this it is not possible to confirm the operation of all functions of all USB devices that are equipped with a specific device might not operate properly. Modem jack* 6. Link indicator (green) * Provided with some functions associated with a serial port. This port allows you purchased. User's Manual 2-6 External monitor port...
... external modem, serial mouse or serial printer. Figure 2-4 The back of the computer Security lock slot External monitor port Serial port A security cable can be noted that some models. In view of this it is not possible to confirm the operation of all functions of all USB devices that are equipped with a specific device might not operate properly. Modem jack* 6. Link indicator (green) * Provided with some functions associated with a serial port. This port allows you purchased. User's Manual 2-6 External monitor port...
Users Manual AU/NZ
Page 66
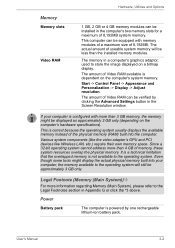
... be less than the installed memory modules. Various system components (like the video adapter's GPU and PCI devices like Wireless LAN, etc.) require their own memory space. Power Battery pack The computer is dependent on the computer's system memory. User's Manual 3-2 The amount of Video RAM available is powered by clicking the Advanced Settings button in the Screen Resolution window. Legal Footnote (Memory (Main System))*3 For more information regarding Memory (Main System), please...
... be less than the installed memory modules. Various system components (like the video adapter's GPU and PCI devices like Wireless LAN, etc.) require their own memory space. Power Battery pack The computer is dependent on the computer's system memory. User's Manual 3-2 The amount of Video RAM available is powered by clicking the Advanced Settings button in the Screen Resolution window. Legal Footnote (Memory (Main System))*3 For more information regarding Memory (Main System), please...
Users Manual AU/NZ
Page 78
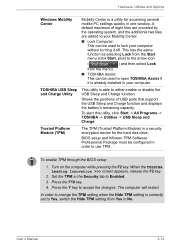
... either enable or disable the USB Sleep and Charge function. Press the F10 key. 4. User's Manual 3-14 Shows the positions of eight tiles are provided by the operating system, and the additional two tiles are added to your computer without turning it is already installed in one window. To enable TPM through the BIOS setup: 1. A default maximum of USB ports that support the USB Sleep and Charge function and displays the battery's remaining capacity. TOSHIBA USB Sleep and Charge Utility This utility...
... either enable or disable the USB Sleep and Charge function. Press the F10 key. 4. User's Manual 3-14 Shows the positions of eight tiles are provided by the operating system, and the additional two tiles are added to your computer without turning it is already installed in one window. To enable TPM through the BIOS setup: 1. A default maximum of USB ports that support the USB Sleep and Charge function and displays the battery's remaining capacity. TOSHIBA USB Sleep and Charge Utility This utility...
Users Manual AU/NZ
Page 88
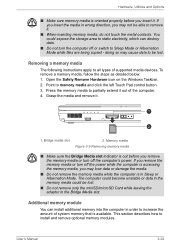
... all types of supported media devices. Hardware, Utilities and Options ■ Make sure memory media is in Sleep or Hibernation Mode. Press the memory media to remove it . 1 2 1. Bridge media slot 2. This section describes how to memory media and click the left Touch Pad control button. 3. If you insert the media in wrong direction, you remove the memory media or turn the computer off the computer's power. To remove a memory media, follow the steps as detailed below: 1. Open the Safely Remove Hardware icon on the Windows Taskbar. 2. User's Manual...
... all types of supported media devices. Hardware, Utilities and Options ■ Make sure memory media is in Sleep or Hibernation Mode. Press the memory media to remove it . 1 2 1. Bridge media slot 2. This section describes how to memory media and click the left Touch Pad control button. 3. If you insert the media in wrong direction, you remove the memory media or turn the computer off the computer's power. To remove a memory media, follow the steps as detailed below: 1. Open the Safely Remove Hardware icon on the Windows Taskbar. 2. User's Manual...
Users Manual AU/NZ
Page 92
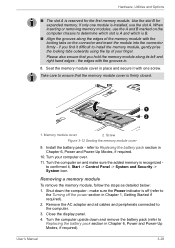
... . 8. Hardware, Utilities and Options ■ The slot A is reserved for expanded memory. Memory module cover 2. Turn the computer upside down the computer - Seat the memory module cover in place and secure it difficult to the computer. 3. Install the battery pack - refer to determine which slot is A and which is recognized to Replacing the battery pack section in Chapter 1, Getting Started if required). 2. Turn your finger. When inserting or removing memory modules, use the slot...
... . 8. Hardware, Utilities and Options ■ The slot A is reserved for expanded memory. Memory module cover 2. Turn the computer upside down the computer - Seat the memory module cover in place and secure it difficult to the computer. 3. Install the battery pack - refer to determine which slot is A and which is recognized to Replacing the battery pack section in Chapter 1, Getting Started if required). 2. Turn your finger. When inserting or removing memory modules, use the slot...
Users Manual AU/NZ
Page 99
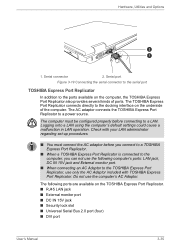
...; Security lock slot ■ Universal Serial Bus 2.0 port (four) ■ DVI port User's Manual 3-35 The computer must connect the AC adaptor before connecting to a LAN. The following computer's ports: LAN jack, DC IN 15V jack and External monitor port. ■ When connecting an AC Adaptor to the docking interface on the underside of ports. Serial port Figure 3-19 Connecting the serial connector to the serial port TOSHIBA Express Port Replicator In addition to a power source. Serial connector 2. Hardware, Utilities and Options...
...; Security lock slot ■ Universal Serial Bus 2.0 port (four) ■ DVI port User's Manual 3-35 The computer must connect the AC adaptor before connecting to a LAN. The following computer's ports: LAN jack, DC IN 15V jack and External monitor port. ■ When connecting an AC Adaptor to the docking interface on the underside of ports. Serial port Figure 3-19 Connecting the serial connector to the serial port TOSHIBA Express Port Replicator In addition to a power source. Serial connector 2. Hardware, Utilities and Options...
Users Manual AU/NZ
Page 171
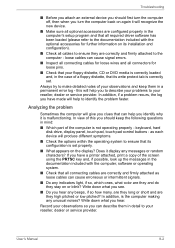
... or random characters? keyboard, hard disk drive, display panel, touch pad, touch pad control buttons - Write down what you see. ■ Do you hear any unusual noises? as loose cables can describe them in a permanent error log - Write down what you hear. Troubleshooting ■ Before you attach an external device you should keep them in detail to identify the problem faster. Always try to make detailed notes of this...
... or random characters? keyboard, hard disk drive, display panel, touch pad, touch pad control buttons - Write down what you see. ■ Do you hear any unusual noises? as loose cables can describe them in a permanent error log - Write down what you hear. Troubleshooting ■ Before you attach an external device you should keep them in detail to identify the problem faster. Always try to make detailed notes of this...
Users Manual AU/NZ
Page 176
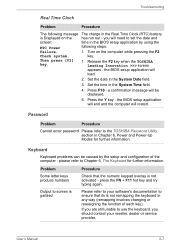
... need to ensure that the numeric keypad overlay is not activated - User's Manual 8-7 Troubleshooting Real Time Clock Problem Procedure The following steps: Failure. 1. please refer to use the keyboard, you should contact your software's documentation to set the date and screen: time in the BIOS setup application by the setup and configuration of each key). If you will be caused by using the RTC Power following message The charge...
... need to ensure that the numeric keypad overlay is not activated - User's Manual 8-7 Troubleshooting Real Time Clock Problem Procedure The following steps: Failure. 1. please refer to use the keyboard, you should contact your software's documentation to set the date and screen: time in the BIOS setup application by the setup and configuration of each key). If you will be caused by using the RTC Power following message The charge...

Users Manual AU/NZ
Page 188
... use the "USB Sleep and Charge function". User's Manual 8-19 Troubleshooting USB device In addition to the information in this section, please also refer to the documentation supplied with your reseller, dealer or service provider. USB Sleep and Charge function For more information and settings, please refer to restore the function. If you are connected. USB Sleep and Charge function may be disabled. Select the "Enable USB Sleep and Charge" check box in order to enable this you are properly installed...
... use the "USB Sleep and Charge function". User's Manual 8-19 Troubleshooting USB device In addition to the information in this section, please also refer to the documentation supplied with your reseller, dealer or service provider. USB Sleep and Charge function For more information and settings, please refer to restore the function. If you are connected. USB Sleep and Charge function may be disabled. Select the "Enable USB Sleep and Charge" check box in order to enable this you are properly installed...
Users Manual AU/NZ
Page 192
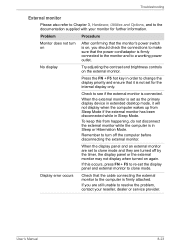
User's Manual 8-23 No display Try adjusting the contrast and brightness controls on , you are turned off the computer before disconnecting the external monitor. If you should check the connections to make sure that the monitor's power switch is set the display panel and external monitor to clone mode. To keep this occurs, press FN + F5 to re-set as the primary display device in Sleep or Hibernation Mode. Check to see if the external monitor is in...
User's Manual 8-23 No display Try adjusting the contrast and brightness controls on , you are turned off the computer before disconnecting the external monitor. If you should check the connections to make sure that the monitor's power switch is set the display panel and external monitor to clone mode. To keep this occurs, press FN + F5 to re-set as the primary display device in Sleep or Hibernation Mode. Check to see if the external monitor is in...
Users Manual AU/NZ
Page 226
...: The set of video and other high-density files. DVD-RAM: A Digital Versatile Disc-Random Access Memory is arranged on concentric tracks much like a phonograph record. dialog box: A window that accepts user input to the computer's memory. The DVD-ROM drive uses a laser to read -write head. delete: To remove data from a disk or other information. disk drive: The device that lets you or the program do not provide instructions...
...: The set of video and other high-density files. DVD-RAM: A Digital Versatile Disc-Random Access Memory is arranged on concentric tracks much like a phonograph record. dialog box: A window that accepts user input to the computer's memory. The DVD-ROM drive uses a laser to read -write head. delete: To remove data from a disk or other information. disk drive: The device that lets you or the program do not provide instructions...
Users Manual AU/NZ
Page 229
... the program, for example, the keyboard or a menu. I /O: Input/output. See also byte and megabyte. L2 cache: Memory cache installed on the key. Light Emitting Diode (LED): A semiconductor device that transmits a specific code to the computer. Refers to acceptance and transfer of data to 1024 bytes. User's Manual Glossary-9 Each keystroke activates a switch that emits light when a current is , in turn, representative of the (ASCII) character...
... the program, for example, the keyboard or a menu. I /O: Input/output. See also byte and megabyte. L2 cache: Memory cache installed on the key. Light Emitting Diode (LED): A semiconductor device that transmits a specific code to the computer. Refers to acceptance and transfer of data to 1024 bytes. User's Manual Glossary-9 Each keystroke activates a switch that emits light when a current is , in turn, representative of the (ASCII) character...
Detailed Specs for Tecra A11 PTSE1A-09P012 AU/NZ; English
Page 2
... BIOS Support, Boot Device, TSETUP 1 Year limited international parts and labour warranty,Australia and New Zealand warrantyincludes complimentarycourier pick-up and return service Yes 75W Worldwide AC Adaptor Biometric securitywith advanced Fingerprint sensor with Toshiba Fingerprint Utility, Hard Disk password prevents unauthorised access to the Hard Drive and can be synchronised with the user password, Kensington® cable lock slot for optional theft protection devices, Toshiba EasyGuard HDD protection with 3D motion sensors, Trusted Platform Module...
... BIOS Support, Boot Device, TSETUP 1 Year limited international parts and labour warranty,Australia and New Zealand warrantyincludes complimentarycourier pick-up and return service Yes 75W Worldwide AC Adaptor Biometric securitywith advanced Fingerprint sensor with Toshiba Fingerprint Utility, Hard Disk password prevents unauthorised access to the Hard Drive and can be synchronised with the user password, Kensington® cable lock slot for optional theft protection devices, Toshiba EasyGuard HDD protection with 3D motion sensors, Trusted Platform Module...


