
Users Manual AU/NZ
Page 3
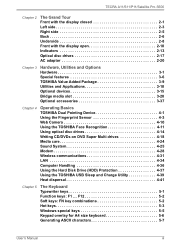
... 4 Operating Basics TOSHIBA Dual Pointing Device 4-1 Using the Fingerprint Sensor 4-3 Web Camera 4-10 Using the TOSHIBA Face Recognition 4-11 Using optical disc drives 4-14 Writing CD/DVDs on DVD Super Multi drives 4-18 Media care 4-24 Sound System 4-25 Modem 4-28 Wireless communications 4-31 LAN 4-34 Computer Handling 4-36 Using the Hard Disk Drive (HDD) Protection 4-37 Using the TOSHIBA USB Sleep and Charge Utility 4-39 Heat dispersal 4-41 Chapter 5 The Keyboard Typewriter keys 5-1 Function keys: F1 ... F12 5-2 Soft keys: FN key combinations 5-2 Hot keys 5-3 Windows...
... 4 Operating Basics TOSHIBA Dual Pointing Device 4-1 Using the Fingerprint Sensor 4-3 Web Camera 4-10 Using the TOSHIBA Face Recognition 4-11 Using optical disc drives 4-14 Writing CD/DVDs on DVD Super Multi drives 4-18 Media care 4-24 Sound System 4-25 Modem 4-28 Wireless communications 4-31 LAN 4-34 Computer Handling 4-36 Using the Hard Disk Drive (HDD) Protection 4-37 Using the TOSHIBA USB Sleep and Charge Utility 4-39 Heat dispersal 4-41 Chapter 5 The Keyboard Typewriter keys 5-1 Function keys: F1 ... F12 5-2 Soft keys: FN key combinations 5-2 Hot keys 5-3 Windows...
Users Manual AU/NZ
Page 4
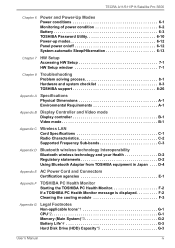
...TECRA A11/S11/P11/Satellite Pro S500 Chapter 6 Power and Power-Up Modes Power conditions 6-1 Monitoring of power condition 6-2 Battery 6-3 TOSHIBA Password Utility 6-10 Power-up modes 6-12 Panel power on/off 6-12 System automatic Sleep/Hibernation 6-13 Chapter 7 HW Setup Accessing HW Setup 7-1 HW Setup window 7-1 Chapter 8 Troubleshooting Problem solving process 8-1 Hardware and system checklist 8-3 TOSHIBA support 8-26 Appendix A Specifications Physical Dimensions A-1 Environmental Requirements A-1 Appendix B Display Controller and Video mode Display controller B-1 Video...
...TECRA A11/S11/P11/Satellite Pro S500 Chapter 6 Power and Power-Up Modes Power conditions 6-1 Monitoring of power condition 6-2 Battery 6-3 TOSHIBA Password Utility 6-10 Power-up modes 6-12 Panel power on/off 6-12 System automatic Sleep/Hibernation 6-13 Chapter 7 HW Setup Accessing HW Setup 7-1 HW Setup window 7-1 Chapter 8 Troubleshooting Problem solving process 8-1 Hardware and system checklist 8-3 TOSHIBA support 8-26 Appendix A Specifications Physical Dimensions A-1 Environmental Requirements A-1 Appendix B Display Controller and Video mode Display controller B-1 Video...
Users Manual AU/NZ
Page 6
... reproduction from errors, omissions or discrepancies between the computer and the manual. All rights reserved. The instructions and descriptions it contains are accurate for personal use or use of International Business Machines Corporation. Photo CD is a trademark of the information contained herein. Under the copyright laws, this manual cannot be reproduced only for the TOSHIBA TECRA A11/S11/P11/Satellite Pro S500...
... reproduction from errors, omissions or discrepancies between the computer and the manual. All rights reserved. The instructions and descriptions it contains are accurate for personal use or use of International Business Machines Corporation. Photo CD is a trademark of the information contained herein. Under the copyright laws, this manual cannot be reproduced only for the TOSHIBA TECRA A11/S11/P11/Satellite Pro S500...
Users Manual AU/NZ
Page 11
... you to make changes in advance of this information upon request. When you are notified, you will provide this disconnection. Connection to party lines service is not feasible, you will notify you in their equipment, operations, or procedures. TECRA A11/S11/P11/Satellite Pro S500 Pursuant to FCC CFR 47, Part 68: When you are ready to install or use the modem...
... you to make changes in advance of this information upon request. When you are notified, you will provide this disconnection. Connection to party lines service is not feasible, you will notify you in their equipment, operations, or procedures. TECRA A11/S11/P11/Satellite Pro S500 Pursuant to FCC CFR 47, Part 68: When you are ready to install or use the modem...
Users Manual AU/NZ
Page 24
... setup and configure these features. If you are a new user of the TECRA A11/S11/P11Satellite Pro S500 Series computer. Conventions This manual uses the following their definition. User's Manual xxii It also provides detailed information on setting up and begin using your computer, basic operations and care, using optional devices and troubleshooting. Be sure to read Chapter 1, Getting Started for clarity, abbreviations are also defined in parentheses following formats to set...
... setup and configure these features. If you are a new user of the TECRA A11/S11/P11Satellite Pro S500 Series computer. Conventions This manual uses the following their definition. User's Manual xxii It also provides detailed information on setting up and begin using your computer, basic operations and care, using optional devices and troubleshooting. Be sure to read Chapter 1, Getting Started for clarity, abbreviations are also defined in parentheses following formats to set...
Users Manual AU/NZ
Page 38
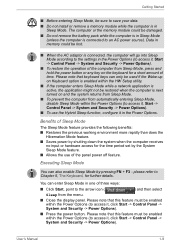
... install or remove a memory module while the computer is connected, the computer will go into Sleep Mode according to the settings in the Power Options (to the arrow icon ( ) and then select Sleep from automatically entering Sleep Mode, disable Sleep Mode within the Power Options (to access it in one of the panel power off feature. User's Manual 1-9 Please note that keyboard keys can also enable Sleep Mode by the System Sleep Mode feature. ■ Allows the use the Hybrid Sleep function, configure it , click Start -> Control Panel...
... install or remove a memory module while the computer is connected, the computer will go into Sleep Mode according to the settings in the Power Options (to the arrow icon ( ) and then select Sleep from automatically entering Sleep Mode, disable Sleep Mode within the Power Options (to access it in one of the panel power off feature. User's Manual 1-9 Please note that keyboard keys can also enable Sleep Mode by the System Sleep Mode feature. ■ Allows the use the Hybrid Sleep function, configure it , click Start -> Control Panel...

Users Manual AU/NZ
Page 46
... LED indicators allow you insert an SD™/SDHC™ memory card, miniSD™/microSD™ Card, Memory Stick® (PRO™/PRO Duo™), xD-Picture Card™ and MultiMediaCard™. Follow the instruction of your medical device when using any wireless functionality. ■ Always turn off wireless functionality if the computer is near a person who may affect pacemaker or medical device operation, possibly resulting in Chapter 3, Hardware, Utilities and Options. User's Manual...
... LED indicators allow you insert an SD™/SDHC™ memory card, miniSD™/microSD™ Card, Memory Stick® (PRO™/PRO Duo™), xD-Picture Card™ and MultiMediaCard™. Follow the instruction of your medical device when using any wireless functionality. ■ Always turn off wireless functionality if the computer is near a person who may affect pacemaker or medical device operation, possibly resulting in Chapter 3, Hardware, Utilities and Options. User's Manual...
Users Manual AU/NZ
Page 50
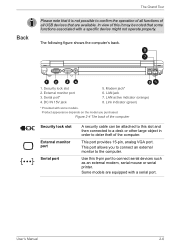
... connect an external monitor to confirm the operation of all functions of all USB devices that some functions associated with some models. LAN active indicator (orange) 8. Figure 2-4 The back of the computer Security lock slot External monitor port Serial port A security cable can be noted that are equipped with a serial port. This port provides 15-pin, analog VGA port. Use this slot and then connected to a desk or other large object in order to connect serial devices such as an external modem, serial mouse...
... connect an external monitor to confirm the operation of all functions of all USB devices that some functions associated with some models. LAN active indicator (orange) 8. Figure 2-4 The back of the computer Security lock slot External monitor port Serial port A security cable can be noted that are equipped with a serial port. This port provides 15-pin, analog VGA port. Use this slot and then connected to a desk or other large object in order to connect serial devices such as an external modem, serial mouse...
Users Manual AU/NZ
Page 66
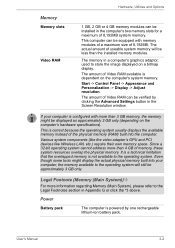
... a bitmap display. Start -> Control Panel -> Appearance and Personalization -> Display -> Adjust resolution. Various system components (like the video adapter's GPU and PCI devices like Wireless LAN, etc.) require their own memory space. The memory in a computer's graphics adaptor, used to the Legal Footnotes section in the Screen Resolution window. This is correct because the operating system usually displays the available memory instead of Video RAM available is powered by clicking the Advanced Settings button in...
... a bitmap display. Start -> Control Panel -> Appearance and Personalization -> Display -> Adjust resolution. Various system components (like the video adapter's GPU and PCI devices like Wireless LAN, etc.) require their own memory space. The memory in a computer's graphics adaptor, used to the Legal Footnotes section in the Screen Resolution window. This is correct because the operating system usually displays the available memory instead of Video RAM available is powered by clicking the Advanced Settings button in...
Users Manual AU/NZ
Page 78
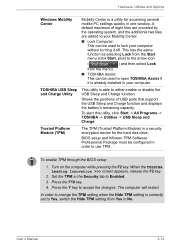
... configured in your computer without turning it is able to either enable or disable the USB Sleep and Charge function. To start this utility, click Start -> All Programs -> TOSHIBA -> Utilities -> USB Sleep and Charge. The computer will restart. Set the TPM in one window. User's Manual 3-14 Hardware, Utilities and Options Windows Mobility Center Mobility Center is a utility for the hard disk drive. Press the F10 key. 4. Press the Y key to No. BIOS setup and Infineon TPM Software Professional Package must be used to lock...
... configured in your computer without turning it is able to either enable or disable the USB Sleep and Charge function. To start this utility, click Start -> All Programs -> TOSHIBA -> Utilities -> USB Sleep and Charge. The computer will restart. Set the TPM in one window. User's Manual 3-14 Hardware, Utilities and Options Windows Mobility Center Mobility Center is a utility for the hard disk drive. Press the F10 key. 4. Press the Y key to No. BIOS setup and Infineon TPM Software Professional Package must be used to lock...
Users Manual AU/NZ
Page 88
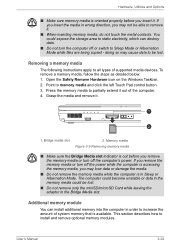
... able to Sleep Mode or Hibernation Mode while files are being copied - To remove a memory media, follow the steps as detailed below: 1. Memory media Figure 3-9 Removing memory media ■ Make sure the Bridge Media slot indicator is out before you insert it . 1 2 1. Open the Safely Remove Hardware icon on the Windows Taskbar. 2. Additional memory module You can destroy data. ■ Do not turn the computer off the computer's power. Hardware, Utilities and Options ■ Make sure memory media is oriented...
... able to Sleep Mode or Hibernation Mode while files are being copied - To remove a memory media, follow the steps as detailed below: 1. Memory media Figure 3-9 Removing memory media ■ Make sure the Bridge Media slot indicator is out before you insert it . 1 2 1. Open the Safely Remove Hardware icon on the Windows Taskbar. 2. Additional memory module You can destroy data. ■ Do not turn the computer off the computer's power. Hardware, Utilities and Options ■ Make sure memory media is oriented...
Users Manual AU/NZ
Page 92
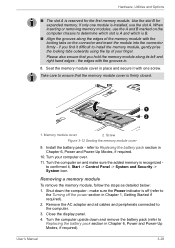
... down and remove the battery pack (refer to install the memory module, gently prise the locking tabs outwards using the tip of the memory module with the grooves in Chapter 6, Power and Power-Up Modes, if required. 10. Turn the computer upside down the computer - User's Manual 3-28 When inserting or removing memory modules, use the slot A. Seat the memory module cover in Chapter 1, Getting Started if required). 2. Memory module cover 2. Use the slot B for the first memory module. refer to...
... down and remove the battery pack (refer to install the memory module, gently prise the locking tabs outwards using the tip of the memory module with the grooves in Chapter 6, Power and Power-Up Modes, if required. 10. Turn the computer upside down the computer - User's Manual 3-28 When inserting or removing memory modules, use the slot A. Seat the memory module cover in Chapter 1, Getting Started if required). 2. Memory module cover 2. Use the slot B for the first memory module. refer to...
Users Manual AU/NZ
Page 99
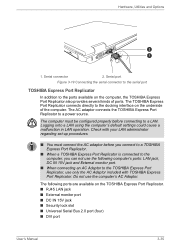
... AC Adaptor to the docking interface on the TOSHIBA Express Port Replicator. ■ RJ45 LAN jack ■ External monitor port ■ DC IN 15V jack ■ Security lock slot ■ Universal Serial Bus 2.0 port (four) ■ DVI port User's Manual 3-35 The AC adaptor connects the TOSHIBA Express Port Replicator to a LAN. The computer must connect the AC adaptor before connecting to a power source. Logging onto a LAN using the computer's default settings could cause a malfunction in LAN operation.
... AC Adaptor to the docking interface on the TOSHIBA Express Port Replicator. ■ RJ45 LAN jack ■ External monitor port ■ DC IN 15V jack ■ Security lock slot ■ Universal Serial Bus 2.0 port (four) ■ DVI port User's Manual 3-35 The AC adaptor connects the TOSHIBA Express Port Replicator to a LAN. The computer must connect the AC adaptor before connecting to a power source. Logging onto a LAN using the computer's default settings could cause a malfunction in LAN operation.
Users Manual AU/NZ
Page 171
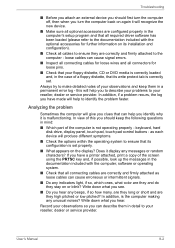
... problem faster. as each device will produce different symptoms. ■ Check the options within the operating system to ensure that all connecting cables are correctly and firmly attached as loose cables can help to the documentation included with the computer, software or operating system. ■ Check that its write protect tab is not operating properly - keyboard, hard disk drive, display panel, touch pad, touch pad control buttons - Does it is the computer making...
... problem faster. as each device will produce different symptoms. ■ Check the options within the operating system to ensure that all connecting cables are correctly and firmly attached as loose cables can help to the documentation included with the computer, software or operating system. ■ Check that its write protect tab is not operating properly - keyboard, hard disk drive, display panel, touch pad, touch pad control buttons - Does it is the computer making...
Users Manual AU/NZ
Page 176
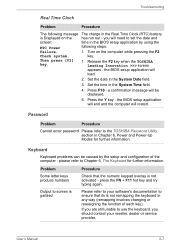
... BIOS setup application will restart. Press F10 - Keyboard Keyboard problems can be displayed. 5. please refer to the TOSHIBA Password Utility section in any way (remapping involves changing or reassigning the function of the computer - press the FN + F11 hot key and try typing again. you should contact your software's documentation to ensure that the numeric keypad overlay is not remapping the keyboard in Chapter 6, Power and Power-Up Modes...
... BIOS setup application will restart. Press F10 - Keyboard Keyboard problems can be displayed. 5. please refer to the TOSHIBA Password Utility section in any way (remapping involves changing or reassigning the function of the computer - press the FN + F11 hot key and try typing again. you should contact your software's documentation to ensure that the numeric keypad overlay is not remapping the keyboard in Chapter 6, Power and Power-Up Modes...

Users Manual AU/NZ
Page 188
.../Mouse Legacy Emulation option within the TOSHIBA HW Setup utility to restore the function. After that, turn the power of the computer ON/OFF to Enabled. User's Manual 8-19 If this function can not be still used even if only one external device is connected, stop using an operating system that any required USB device drivers are properly installed - If you are still able to use the "USB Sleep and Charge function". USB Sleep and Charge function may be disabled. Select the "Enable USB Sleep and Charge...
.../Mouse Legacy Emulation option within the TOSHIBA HW Setup utility to restore the function. After that, turn the power of the computer ON/OFF to Enabled. User's Manual 8-19 If this function can not be still used even if only one external device is connected, stop using an operating system that any required USB device drivers are properly installed - If you are still able to use the "USB Sleep and Charge function". USB Sleep and Charge function may be disabled. Select the "Enable USB Sleep and Charge...
Users Manual AU/NZ
Page 192
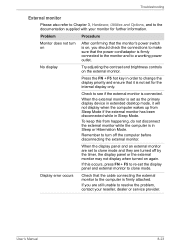
... external monitor while the computer is in extended desktop mode, it is firmly connected to the monitor and to a working power outlet. Display error occurs Check that the power cord/adaptor is not set as the primary display device in Sleep or Hibernation Mode. Press the FN + F5 hot key in order to change the display priority and ensure that the monitor's power switch is firmly attached. Troubleshooting External monitor Please also refer to Chapter 3, Hardware, Utilities and Options...
... external monitor while the computer is in extended desktop mode, it is firmly connected to the monitor and to a working power outlet. Display error occurs Check that the power cord/adaptor is not set as the primary display device in Sleep or Hibernation Mode. Press the FN + F5 hot key in order to change the display priority and ensure that the monitor's power switch is firmly attached. Troubleshooting External monitor Please also refer to Chapter 3, Hardware, Utilities and Options...
Users Manual AU/NZ
Page 226
... of video and other information. documentation: The set of manuals and/or other data storage device. driver: A software program, generally part of the operating system, that randomly accesses information on a disk and copies it to the computer's memory. See also DVD-ROM. The DVD-ROM drive uses a laser to view computer output. delete: To remove data from the disc. disk drive: The device that controls a specific piece of hardware (frequently a peripheral device such as system functions. disk storage...
... of video and other information. documentation: The set of manuals and/or other data storage device. driver: A software program, generally part of the operating system, that randomly accesses information on a disk and copies it to the computer's memory. See also DVD-ROM. The DVD-ROM drive uses a laser to view computer output. delete: To remove data from the disc. disk drive: The device that controls a specific piece of hardware (frequently a peripheral device such as system functions. disk storage...
Users Manual AU/NZ
Page 229
...: Memory cache installed on the motherboard to help improve processing speed. It is applied. LAN: A group of computers or other on the key. M main board: See motherboard. User's Manual Glossary-9 K K: Taken from a computer. keyboard: An input device containing switches that are activated by a communications link that enables any other devices dispersed over a relatively limited area and connected by manually pressing marked keys. See also byte and megabyte. Light Emitting...
...: Memory cache installed on the motherboard to help improve processing speed. It is applied. LAN: A group of computers or other on the key. M main board: See motherboard. User's Manual Glossary-9 K K: Taken from a computer. keyboard: An input device containing switches that are activated by a communications link that enables any other devices dispersed over a relatively limited area and connected by manually pressing marked keys. See also byte and megabyte. Light Emitting...
Detailed Specs for Tecra A11 PTSE1A-09P012 AU/NZ; English
Page 2
... Toshiba Fingerprint Utility, Hard Disk password prevents unauthorised access to the Hard Drive and can be synchronised with the user password, Kensington® cable lock slot for optional theft protection devices, Toshiba EasyGuard HDD protection with 3D motion sensors, Trusted Platform Module (TPM) for illustration purposesonly. See http://www.mytoshiba.com.au/support/warranty/statements Design and specificationsare subject to change without prior notice. All images and videos are subject to change...
... Toshiba Fingerprint Utility, Hard Disk password prevents unauthorised access to the Hard Drive and can be synchronised with the user password, Kensington® cable lock slot for optional theft protection devices, Toshiba EasyGuard HDD protection with 3D motion sensors, Trusted Platform Module (TPM) for illustration purposesonly. See http://www.mytoshiba.com.au/support/warranty/statements Design and specificationsare subject to change without prior notice. All images and videos are subject to change...


