User Guide
Page 18
...trademarks or registered trademarks of their respective owners. 18 Trademarks Satellite, Satellite Pro, and eco Utility are either registered trademarks or trademarks of Microsoft Corporation in a single article. Adobe and Photoshop are owned by Toshiba is a trademark of DTS, Inc. ©DTS,... was encoded by a consumer engaged in the United States and other countries. Microsoft, Outlook, Windows, and Windows Media are trademarks or registered trademarks of Toshiba America Information Systems, Inc. and any other product regardless of the licenses extend to this product...
...trademarks or registered trademarks of their respective owners. 18 Trademarks Satellite, Satellite Pro, and eco Utility are either registered trademarks or trademarks of Microsoft Corporation in a single article. Adobe and Photoshop are owned by Toshiba is a trademark of DTS, Inc. ©DTS,... was encoded by a consumer engaged in the United States and other countries. Microsoft, Outlook, Windows, and Windows Media are trademarks or registered trademarks of Toshiba America Information Systems, Inc. and any other product regardless of the licenses extend to this product...
User Guide
Page 22
... 75 Using a computer lock 75 Chapter 3: Learning the Basics 77 Computing tips 77 Using the keyboard 79 Function keys 80 Special Windows® keys 80 Backlit keyboard 80 Touch screen 81 Touch screen navigation 81 Mouse properties 82 Starting an app 82 Starting an app...optical media 87 Removing a disc with the computer on ......... 88 Removing a disc with the computer off ......... 89 Toshiba's online resources 89 Chapter 4: Mobile Computing 90 Toshiba's energy-saver design 90 Running the computer on battery power 90 Battery Notice 91 Power management 92 Charging batteries 92 ...
... 75 Using a computer lock 75 Chapter 3: Learning the Basics 77 Computing tips 77 Using the keyboard 79 Function keys 80 Special Windows® keys 80 Backlit keyboard 80 Touch screen 81 Touch screen navigation 81 Mouse properties 82 Starting an app 82 Starting an app...optical media 87 Removing a disc with the computer on ......... 88 Removing a disc with the computer off ......... 89 Toshiba's online resources 89 Chapter 4: Mobile Computing 90 Toshiba's energy-saver design 90 Running the computer on battery power 90 Battery Notice 91 Power management 92 Charging batteries 92 ...
User Guide
Page 23
... 5: Exploring Your Computer's Features.... 107 Exploring the Start screen 107 Charms 108 Tiles 109 Exploring the desktop 109 Finding your way around the desktop ......... 109 Windows® Store 111 Setting up for communications 112 Connecting your computer to a network ..... 113 Exploring audio features 113 Recording sounds 113 Using external speakers or...
... 5: Exploring Your Computer's Features.... 107 Exploring the Start screen 107 Charms 108 Tiles 109 Exploring the desktop 109 Finding your way around the desktop ......... 109 Windows® Store 111 Setting up for communications 112 Connecting your computer to a network ..... 113 Exploring audio features 113 Recording sounds 113 Using external speakers or...
User Guide
Page 24
...133 Power supply mode settings 133 Sleep and Music 134 HDD Protection Utility 135 Function Key 136 Recovery Media Creator 137 Service Station 137 TOSHIBA Application Installer 138 Chapter 7: If Something Goes Wrong 139 Problems that are easy to fix 139 Problems when you turn on the computer... ........ 140 The Windows® operating system is not working 142 Using Startup options to fix problems ......... 143 Internet problems 145 The Windows® operating system can help you 146 Fixing a problem with Device Manager 146 ...
...133 Power supply mode settings 133 Sleep and Music 134 HDD Protection Utility 135 Function Key 136 Recovery Media Creator 137 Service Station 137 TOSHIBA Application Installer 138 Chapter 7: If Something Goes Wrong 139 Problems that are easy to fix 139 Problems when you turn on the computer... ........ 140 The Windows® operating system is not working 142 Using Startup options to fix problems ......... 143 Internet problems 145 The Windows® operating system can help you 146 Fixing a problem with Device Manager 146 ...
User Guide
Page 25
... operating problems 159 Develop good computing habits 160 Data and system configuration backup in the Windows® operating system ........ 161 If you need further assistance 166 Contacting Toshiba 167 Other Toshiba Internet Web sites 167 Toshiba's worldwide offices 167 Appendix A: TOSHIBA Function Keys 169 Functions 169 Help file 170 Display brightness 170 Output (Display switch...
... operating problems 159 Develop good computing habits 160 Data and system configuration backup in the Windows® operating system ........ 161 If you need further assistance 166 Contacting Toshiba 167 Other Toshiba Internet Web sites 167 Toshiba's worldwide offices 167 Appendix A: TOSHIBA Function Keys 169 Functions 169 Help file 170 Display brightness 170 Output (Display switch...
User Guide
Page 28
... information about the features and specifications on your computer, or to stay current with the various computer software or hardware options, visit Toshiba's Web site at the time of publication to ensure the accuracy of contents and the index to end. ❖ Skim through ... This guide NOTE The product specifications and configuration information are all the features and specifications listed or illustrated. While Toshiba has made every effort at support.toshiba.com. You can: ❖ Read the entire guide from beginning to find specific information. Your particular model may...
... information about the features and specifications on your computer, or to stay current with the various computer software or hardware options, visit Toshiba's Web site at the time of publication to ensure the accuracy of contents and the index to end. ❖ Skim through ... This guide NOTE The product specifications and configuration information are all the features and specifications listed or illustrated. While Toshiba has made every effort at support.toshiba.com. You can: ❖ Read the entire guide from beginning to find specific information. Your particular model may...
User Guide
Page 33
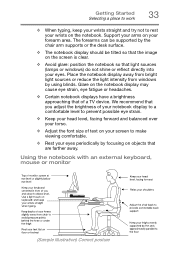
Place the notebook display away from bright light sources or reduce the light intensity from windows by the chair arm supports or the desk surface. ❖ The notebook display should be tilted so that the image on the notebook display may ...; Adjust the font size of a TV device. Glare on the screen is clear. ❖ Avoid glare: position the notebook so that light sources (lamps or windows) do not shine or reflect directly into your eyes. Getting Started Selecting a place to work 33 ❖ When typing, keep your wrists straight and try...
Place the notebook display away from bright light sources or reduce the light intensity from windows by the chair arm supports or the desk surface. ❖ The notebook display should be tilted so that the image on the notebook display may ...; Adjust the font size of a TV device. Glare on the screen is clear. ❖ Avoid glare: position the notebook so that light sources (lamps or windows) do not shine or reflect directly into your eyes. Getting Started Selecting a place to work 33 ❖ When typing, keep your wrists straight and try...
User Guide
Page 43
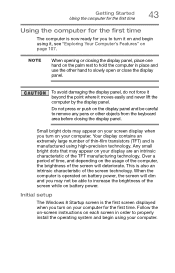
... screen will deteriorate. Small bright dots may appear on your computer. Your display contains an extremely large number of the screen technology. Initial setup The Windows 8 Startup screen is manufactured using it moves easily and never lift the computer by the display panel. This is also an intrinsic characteristic of thin...
... screen will deteriorate. Small bright dots may appear on your computer. Your display contains an extremely large number of the screen technology. Initial setup The Windows 8 Startup screen is manufactured using it moves easily and never lift the computer by the display panel. This is also an intrinsic characteristic of thin...

User Guide
Page 44
Follow the onscreen instructions. Registering your computer with Toshiba Setting up your software. When the Windows® charms appear, click or touch the Search ( ) charm and, in from the right edge. In the list that appears, click or touch Registration... The first time you through steps to your Product. NOTE The names of windows displayed, and the order in which windows appear, may vary according to the upper-right corner of three methods: 1 From the Toshiba Web site at register.toshiba.com: Type in the requested information and complete the registration process. 2 From...
Follow the onscreen instructions. Registering your computer with Toshiba Setting up your software. When the Windows® charms appear, click or touch the Search ( ) charm and, in from the right edge. In the list that appears, click or touch Registration... The first time you through steps to your Product. NOTE The names of windows displayed, and the order in which windows appear, may vary according to the upper-right corner of three methods: 1 From the Toshiba Web site at register.toshiba.com: Type in the requested information and complete the registration process. 2 From...

User Guide
Page 45
... . Shut down option Power (Sample Image) Shut down 4 Highlight Shut down while holding the Shift key, and then click or touch the Shut down the Windows® operating system could cause you may lose data or damage the disk/disc and/or drive. 3 In the lower right of the screen click... the Start or Desktop screen, move your pointer to the upper-right corner of the screen or swipe in from the right edge. 2 When the Windows® charms appear, click or touch the Settings ( ) charm. If you turn off the power while a disk/disc is being accessed, you to lose your...
... . Shut down option Power (Sample Image) Shut down 4 Highlight Shut down while holding the Shift key, and then click or touch the Shut down the Windows® operating system could cause you may lose data or damage the disk/disc and/or drive. 3 In the lower right of the screen click... the Start or Desktop screen, move your pointer to the upper-right corner of the screen or swipe in from the right edge. 2 When the Windows® charms appear, click or touch the Settings ( ) charm. If you turn off the power while a disk/disc is being accessed, you to lose your...

User Guide
Page 46
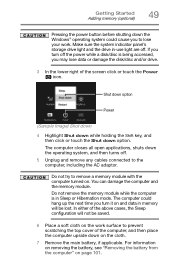
... lower right of the screen click or touch the Power ( ) icon. 46 Getting Started To place your computer in from the right edge. 2 When the Windows® charms appear, click or touch the Settings ( ) charm. To place your computer in Sleep mode 1 From the Start or Desktop screen, move your pointer...
... lower right of the screen click or touch the Power ( ) icon. 46 Getting Started To place your computer in from the right edge. 2 When the Windows® charms appear, click or touch the Settings ( ) charm. To place your computer in Sleep mode 1 From the Start or Desktop screen, move your pointer...

User Guide
Page 48
... must be hot. Installing a memory module with the computer's power on the underside of the screen or swipe in from the right edge. 2 When the Windows® charms appear, click or touch the Settings ( ) charm. The computer has two memory slots-Slot A and Slot B. If the computer has been running recently...
... must be hot. Installing a memory module with the computer's power on the underside of the screen or swipe in from the right edge. 2 When the Windows® charms appear, click or touch the Settings ( ) charm. The computer has two memory slots-Slot A and Slot B. If the computer has been running recently...
User Guide
Page 49
.... Shut down option Power (Sample Image) Shut down 4 Highlight Shut down while holding the Shift key, and then click or touch the Shut down the Windows® operating system could hang up the next time you to remove a memory module with the computer turned on the work . Do not try to...
.... Shut down option Power (Sample Image) Shut down 4 Highlight Shut down while holding the Shift key, and then click or touch the Shut down the Windows® operating system could hang up the next time you to remove a memory module with the computer turned on the work . Do not try to...
User Guide
Page 55
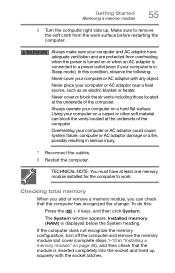
... injury. 7 Reconnect the cables. 8 Restart the computer. Getting Started Removing a memory module 55 6 Turn the computer right side up squarely with any object. The System window appears. Always operate your computer or AC adaptor with the socket latches. Make sure to remove the soft cloth from overheating when the power is...
... injury. 7 Reconnect the cables. 8 Restart the computer. Getting Started Removing a memory module 55 6 Turn the computer right side up squarely with any object. The System window appears. Always operate your computer or AC adaptor with the socket latches. Make sure to remove the soft cloth from overheating when the power is...
User Guide
Page 56
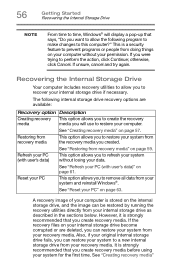
...internal storage drive if necessary. See "Creating recovery media" 56 Getting Started Recovering the Internal Storage Drive NOTE From time to time, Windows® will use to restore your PC (with user's data)" on page 59. Recovering the Internal Storage Drive Your computer includes recovery...you will display a pop-up that you can be restored by running the recovery utilities directly from your system and reinstall Windows®. This is strongly recommended that you can restore your system from doing things on your computer without losing your computer ...
...internal storage drive if necessary. See "Creating recovery media" 56 Getting Started Recovering the Internal Storage Drive NOTE From time to time, Windows® will use to restore your PC (with user's data)" on page 59. Recovering the Internal Storage Drive Your computer includes recovery...you will display a pop-up that you can be restored by running the recovery utilities directly from your system and reinstall Windows®. This is strongly recommended that you can restore your system from doing things on your computer without losing your computer ...

User Guide
Page 57
... 84. NOTE During the recovery process your computer must be connected to separately back up the files you can be connected to external media using Windows® or another backup program. Also, if your system to the external media and can restore your system from your internal storage drive become corrupted...
... 84. NOTE During the recovery process your computer must be connected to separately back up the files you can be connected to external media using Windows® or another backup program. Also, if your system to the external media and can restore your system from your internal storage drive become corrupted...
User Guide
Page 58
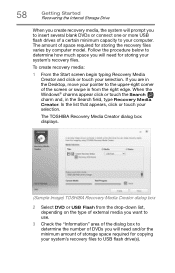
...move your pointer to the upper-right corner of space required for storing the recovery files varies by computer model. The TOSHIBA Recovery Media Creator dialog box displays. (Sample Image) TOSHIBA Recovery Media Creator dialog box 2 Select DVD or USB Flash from the right edge. In the list that appears, ... to insert several blank DVDs or connect one or more USB flash drives of storage space required for storing your system's recovery files. When the Windows® charms appear click or touch the Search ( ) charm and, in from the drop-down list, depending on the type of external media...
...move your pointer to the upper-right corner of space required for storing the recovery files varies by computer model. The TOSHIBA Recovery Media Creator dialog box displays. (Sample Image) TOSHIBA Recovery Media Creator dialog box 2 Select DVD or USB Flash from the right edge. In the list that appears, ... to insert several blank DVDs or connect one or more USB flash drives of storage space required for storing your system's recovery files. When the Windows® charms appear click or touch the Search ( ) charm and, in from the drop-down list, depending on the type of external media...
User Guide
Page 60
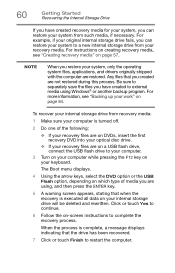
...: ❖ If your recovery files are on DVDs, insert the first recovery DVD into your optical disc drive. ❖ If your recovery files are using Windows® or another backup program. Any files that you are on a USB flash drive, connect the USB flash drive to your computer. 3 Turn on your...
...: ❖ If your recovery files are on DVDs, insert the first recovery DVD into your optical disc drive. ❖ If your recovery files are using Windows® or another backup program. Any files that you are on a USB flash drive, connect the USB flash drive to your computer. 3 Turn on your...
User Guide
Page 61
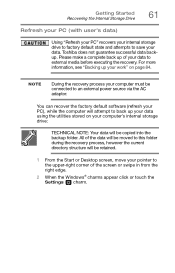
... default state and attempts to save your pointer to the upper-right corner of the screen or swipe in from the right edge. 2 When the Windows® charms appear click or touch the Settings ( ) charm. Toshiba does not guarantee successful data backup.
... default state and attempts to save your pointer to the upper-right corner of the screen or swipe in from the right edge. 2 When the Windows® charms appear click or touch the Settings ( ) charm. Toshiba does not guarantee successful data backup.
User Guide
Page 62
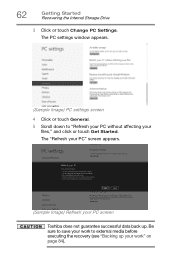
The "Refresh your PC" screen appears. (Sample Image) Refresh your work to "Refresh your PC without affecting your files," and click or touch Get Started. Be sure to save your work " on page 84). The PC settings window appears. (Sample Image) PC settings screen 4 Click or touch General. 5 Scroll down to external media before executing the recovery (see "Backing up your PC screen Toshiba does not guarantee successful data back up. 62 Getting Started Recovering the Internal Storage Drive 3 Click or touch Change PC Settings.
The "Refresh your PC" screen appears. (Sample Image) Refresh your work to "Refresh your PC without affecting your files," and click or touch Get Started. Be sure to save your work " on page 84). The PC settings window appears. (Sample Image) PC settings screen 4 Click or touch General. 5 Scroll down to external media before executing the recovery (see "Backing up your PC screen Toshiba does not guarantee successful data back up. 62 Getting Started Recovering the Internal Storage Drive 3 Click or touch Change PC Settings.


