
Users Manual Canada; English
Page 20
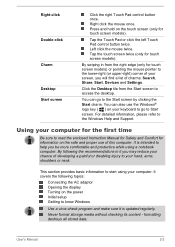
... (or upper-right) corner of charms: Search, Share, Start, Devices and Settings. Right click the mouse once. Tap the Touch Pad or click the left Touch Pad control button twice. By following topics: Connecting the AC adaptor Opening the display Turning on the touch screen (only for information on the safe and proper use of developing a painful or disabling injury to Start screen. This section provides basic information to access the desktop. User's Manual 2-2
... (or upper-right) corner of charms: Search, Share, Start, Devices and Settings. Right click the mouse once. Tap the Touch Pad or click the left Touch Pad control button twice. By following topics: Connecting the AC adaptor Opening the display Turning on the touch screen (only for information on the safe and proper use of developing a painful or disabling injury to Start screen. This section provides basic information to access the desktop. User's Manual 2-2
Users Manual Canada; English
Page 27
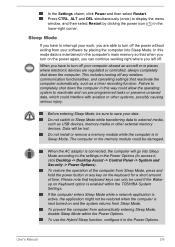
... Power Options. This includes turning off any key on the power again, you have to turn off the power without exiting from automatically entering Sleep Mode, disable Sleep Mode within the TOSHIBA System Settings. Data will go into Sleep Mode. To restore the operation of the computer from Sleep Mode, press and hold the power button or any wireless communication functionalities, and cancelling settings that when you turn off . To use the Hybrid Sleep function, configure it , click Desktop -> Desktop Assist -> Control Panel...
... Power Options. This includes turning off any key on the power again, you have to turn off the power without exiting from automatically entering Sleep Mode, disable Sleep Mode within the TOSHIBA System Settings. Data will go into Sleep Mode. To restore the operation of the computer from Sleep Mode, press and hold the power button or any wireless communication functionalities, and cancelling settings that when you turn off . To use the Hybrid Sleep function, configure it , click Desktop -> Desktop Assist -> Control Panel...
Users Manual Canada; English
Page 29
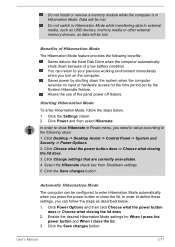
...: 1. Starting Hibernation Mode To enter Hibernation Mode, follow the steps as data will be lost . Click Desktop -> Desktop Assist -> Control Panel -> System and Security -> Power Options. 2. Click the Save changes button. Do not switch to Hibernation Mode while transferring data to external media, such as USB devices, memory media or other external memory devices, as described below . 1. Allows the use of a low battery condition. Click Power and then select Hibernate. In order to define these settings...
...: 1. Starting Hibernation Mode To enter Hibernation Mode, follow the steps as data will be lost . Click Desktop -> Desktop Assist -> Control Panel -> System and Security -> Power Options. 2. Click the Save changes button. Do not switch to Hibernation Mode while transferring data to external media, such as USB devices, memory media or other external memory devices, as described below . 1. Allows the use of a low battery condition. Click Power and then select Hibernate. In order to define these settings...

Users Manual Canada; English
Page 44
... Windows restore time from Sleep Mode automatically functions are regulated or controlled, always power off your computer goes into the Sleep Mode. Hold down the F2 key and then release this key one second after your computer. User's Manual 3-14 In the Settings charm, click Power and then select Restart. 2. When Intel® Rapid Start Technology is power on the Solid State Drive for Windows 8. You can use BIOS Setup to enable/disable the function...
... Windows restore time from Sleep Mode automatically functions are regulated or controlled, always power off your computer goes into the Sleep Mode. Hold down the F2 key and then release this key one second after your computer. User's Manual 3-14 In the Settings charm, click Power and then select Restart. 2. When Intel® Rapid Start Technology is power on the Solid State Drive for Windows 8. You can use BIOS Setup to enable/disable the function...
Users Manual Canada; English
Page 51
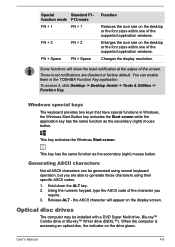
... the supported application windows. function mode F12 mode FN + 1 FN + 1 FN + 2 FN + 2 FN + Space FN + Space Function Reduces the icon size on the display screen. Windows special keys The keyboard provides two keys that have special functions in the TOSHIBA Function Key application. Release ALT - To access it, click Desktop -> Desktop Assist -> Tools & Utilities -> Function Key. Optical disc drives The computer may be generated using their specific ASCII codes. 1. User's Manual 4-5 You can be installed with a DVD Super Multi drive...
... the supported application windows. function mode F12 mode FN + 1 FN + 1 FN + 2 FN + 2 FN + Space FN + Space Function Reduces the icon size on the display screen. Windows special keys The keyboard provides two keys that have special functions in the TOSHIBA Function Key application. Release ALT - To access it, click Desktop -> Desktop Assist -> Tools & Utilities -> Function Key. Optical disc drives The computer may be generated using their specific ASCII codes. 1. User's Manual 4-5 You can be installed with a DVD Super Multi drive...
Users Manual Canada; English
Page 66
... when the switching occurs. - Furthermore, you may automatically switch into 2D if you perform any other content created by -Side and Interleave 3D video formats are highly recommended. Opening windows or pop-ups such as [Right-Click Menu], [Settings Window], [File Select] or [Error Message]. - Please position yourself directly in between individuals. Due to work on an external display connected using HDMI "with 3D playback feature enabled. User's Manual 4-20
... when the switching occurs. - Furthermore, you may automatically switch into 2D if you perform any other content created by -Side and Interleave 3D video formats are highly recommended. Opening windows or pop-ups such as [Right-Click Menu], [Settings Window], [File Select] or [Error Message]. - Please position yourself directly in between individuals. Due to work on an external display connected using HDMI "with 3D playback feature enabled. User's Manual 4-20
Users Manual Canada; English
Page 72
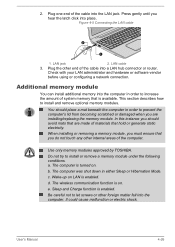
Figure 4-5 Connecting the LAN cable 2 1 1. Check with your LAN administrator and hardware or software vendor before using or configuring a network connection. This section describes how to install or remove a memory module under the following conditions. Use only memory modules approved by TOSHIBA. The computer is on. It could cause malfunction or electric shock. User's Manual 4-26 LAN jack 2. c. The wireless communication function is turned on LAN is enabled. Plug one end of the cable into place. Press gently until...
Figure 4-5 Connecting the LAN cable 2 1 1. Check with your LAN administrator and hardware or software vendor before using or configuring a network connection. This section describes how to install or remove a memory module under the following conditions. Use only memory modules approved by TOSHIBA. The computer is on. It could cause malfunction or electric shock. User's Manual 4-26 LAN jack 2. c. The wireless communication function is turned on LAN is enabled. Plug one end of the cable into place. Press gently until...
Users Manual Canada; English
Page 81
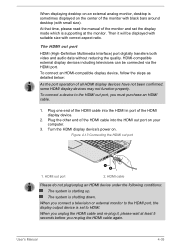
... HDMI display devices may not function properly. Figure 4-13 Connecting the HDMI out port 1 2 1. When you connect a television or external monitor to the HDMI out port, you must purchase an HDMI cable. 1. User's Manual 4-35 HDMI cable Please do not plug/unplug an HDMI device under the following conditions: The system is shutting down. When you re-plug the HDMI cable again. HDMI out port 2. To connect a device to the HDMI port, the display output device is set the display mode which is supporting...
... HDMI display devices may not function properly. Figure 4-13 Connecting the HDMI out port 1 2 1. When you connect a television or external monitor to the HDMI out port, you must purchase an HDMI cable. 1. User's Manual 4-35 HDMI cable Please do not plug/unplug an HDMI device under the following conditions: The system is shutting down. When you re-plug the HDMI cable again. HDMI out port 2. To connect a device to the HDMI port, the display output device is set the display mode which is supporting...
Users Manual Canada; English
Page 83
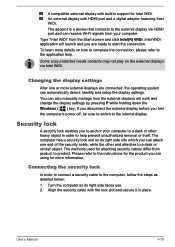
... methods used for Intel WiDi. Align the security cable with the lock slot and secure it in order to help . User's Manual 4-37 The adaptor is a device that connects to the external display via Intel WiDi. Security lock A security lock enables you . 2. The computer has a security lock slot on its right side faces you to anchor your computer. A compatible external display with built-in support for attaching security cables differ...
... methods used for Intel WiDi. Align the security cable with the lock slot and secure it in order to help . User's Manual 4-37 The adaptor is a device that connects to the external display via Intel WiDi. Security lock A security lock enables you . 2. The computer has a security lock slot on its right side faces you to anchor your computer. A compatible external display with built-in support for attaching security cables differ...
Users Manual Canada; English
Page 98
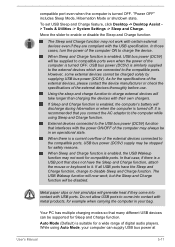
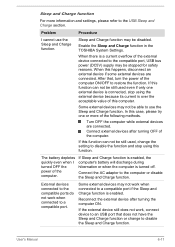
... when the computer is enabled, the USB Wakeup function may not work for compatible ports. "Power OFF" includes Sleep Mode, Hibernation Mode or shutdown state. In those cases, turn the power of the external devices thoroughly before use. If Sleep and Charge function is enabled, the computer's battery will be supported for the specifications of the external devices, please contact the device manufacturer or check the specifications of the computer ON to enable or disable the Sleep and Charge function.
... when the computer is enabled, the USB Wakeup function may not work for compatible ports. "Power OFF" includes Sleep Mode, Hibernation Mode or shutdown state. In those cases, turn the power of the external devices thoroughly before use. If Sleep and Charge function is enabled, the computer's battery will be supported for the specifications of the external devices, please contact the device manufacturer or check the specifications of the computer ON to enable or disable the Sleep and Charge function.
Users Manual Canada; English
Page 108
... of the computer is the computer making any error messages against the operating system documentation. Write down what you hear. Inspect all connecting cables for loose wires and all connectors for loose pins. keyboard, Hard Disk Drive, display panel, Touch Pad, Touch Pad control buttons - Software The problems may be damaged or the program might be caused by your problems to TOSHIBA Support. In view of the software if possible. Write down what...
... of the computer is the computer making any error messages against the operating system documentation. Write down what you hear. Inspect all connecting cables for loose wires and all connectors for loose pins. keyboard, Hard Disk Drive, display panel, Touch Pad, Touch Pad control buttons - Software The problems may be damaged or the program might be caused by your problems to TOSHIBA Support. In view of the software if possible. Write down what...
Users Manual Canada; English
Page 110
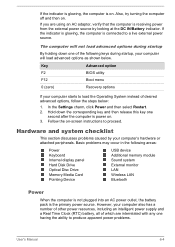
... areas: Power Keyboard Internal display panel Hard Disk Drive Optical Disc Drive Memory Media Card Pointing Device USB device Additional memory module Sound system External monitor LAN Wireless LAN Bluetooth Power When the computer is not plugged into an AC power outlet, the battery pack is power on . Basic problems may occur in the following keys during startup By holding down the corresponding key and then release this key one having the ability to produce apparent power problems. User's Manual 6-4 However, your computer starts to load the Operating System instead...
... areas: Power Keyboard Internal display panel Hard Disk Drive Optical Disc Drive Memory Media Card Pointing Device USB device Additional memory module Sound system External monitor LAN Wireless LAN Bluetooth Power When the computer is not plugged into an AC power outlet, the battery pack is power on . Basic problems may occur in the following keys during startup By holding down the corresponding key and then release this key one having the ability to produce apparent power problems. User's Manual 6-4 However, your computer starts to load the Operating System instead...
Users Manual Canada; English
Page 113
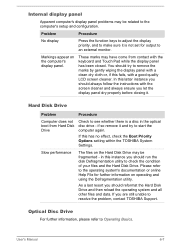
... check the condition of your files and the Hard Disk Drive. in the optical disc drive - Internal display panel Apparent computer's display panel problems may be fragmented - In this instance you let the display panel dry properly before closing it. If you should run the disk Defragmentation utility to an external monitor. User's Manual 6-7 Problem Procedure No display Press the function keys to adjust the display priority, and to make sure it and try to Operating Basics.
... check the condition of your files and the Hard Disk Drive. in the optical disc drive - Internal display panel Apparent computer's display panel problems may be fragmented - In this instance you let the display panel dry properly before closing it. If you should run the disk Defragmentation utility to an external monitor. User's Manual 6-7 Problem Procedure No display Press the function keys to adjust the display priority, and to make sure it and try to Operating Basics.

Users Manual Canada; English
Page 114
... to a memory media card Remove the memory media card from reading the disc. Touch Pad Problem Procedure The Touch Pad does Check the Device Select settings. Disc™ in order to Operating Basics. A foreign object in water or a neutral cleaner. not work. Click Desktop -> Desktop Assist -> Control Panel -> Hardware and Sound -> Mouse. You cannot read a file Check to both the USB mouse section and the documentation supplied with your mouse. User's Manual 6-8 Problem Procedure You cannot access a Make sure the drive's disc tray is...
... to a memory media card Remove the memory media card from reading the disc. Touch Pad Problem Procedure The Touch Pad does Check the Device Select settings. Disc™ in order to Operating Basics. A foreign object in water or a neutral cleaner. not work. Click Desktop -> Desktop Assist -> Control Panel -> Hardware and Sound -> Mouse. You cannot read a file Check to both the USB mouse section and the documentation supplied with your mouse. User's Manual 6-8 Problem Procedure You cannot access a Make sure the drive's disc tray is...

Users Manual Canada; English
Page 116
... you are properly installed - To access this utility, click Desktop -> Desktop Assist -> Control Panel -> Hardware and Sound -> Mouse. 2. Problem Procedure USB device does not Remove the USB device from the computer and work the double-click speed setting within the Mouse Control utility. 1. Set the double-click speed as required and click OK. Within the Mouse Properties window, click the Pointer Options tab. 3. Set the pointer speed as required and click OK. User's Manual 6-10 please...
... you are properly installed - To access this utility, click Desktop -> Desktop Assist -> Control Panel -> Hardware and Sound -> Mouse. 2. Problem Procedure USB device does not Remove the USB device from the computer and work the double-click speed setting within the Mouse Control utility. 1. Set the double-click speed as required and click OK. Within the Mouse Properties window, click the Pointer Options tab. 3. Set the pointer speed as required and click OK. User's Manual 6-10 please...
Users Manual Canada; English
Page 117
... port if the Sleep and Charge function is enabled. Connect external devices after turning the computer ON. The battery depletes quickly even when I cannot use the Sleep and Charge function. Reconnect the external device after turning OFF of the computer. Sleep and Charge function may be disabled. In this case, please try one external device is connected, stop using the external device because its current is turned off. If this computer. Some external devices may not work when connected to the compatible port, USB bus power...
... port if the Sleep and Charge function is enabled. Connect external devices after turning the computer ON. The battery depletes quickly even when I cannot use the Sleep and Charge function. Reconnect the external device after turning OFF of the computer. Sleep and Charge function may be disabled. In this case, please try one external device is connected, stop using the external device because its current is turned off. If this computer. Some external devices may not work when connected to the compatible port, USB bus power...

Users Manual Canada; English
Page 118
... software volume settings. please refer to Sound System and Video mode for ports that does not have the USB Sleep and Charge function or change to the documentation supplied with your audio device. Problem The "USB Wakeup function" does not work for further information. Please check to see if Mute is turned to Off Check to make sure the headphone connection is heard In this section, please also refer to disable Sleep and Charge function...
... software volume settings. please refer to Sound System and Video mode for ports that does not have the USB Sleep and Charge function or change to the documentation supplied with your audio device. Problem The "USB Wakeup function" does not work for further information. Please check to see if Mute is turned to Off Check to make sure the headphone connection is heard In this section, please also refer to disable Sleep and Charge function...
Users Manual Canada; English
Page 119
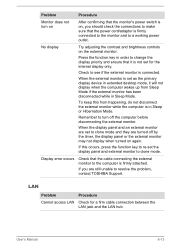
... connections to make sure that the monitor's power switch is firmly connected to the monitor and to clone mode. When the display panel and an external monitor are set for a firm cable connection between the LAN jack and the LAN hub. Remember to resolve the problem, contact TOSHIBA Support. Display error occurs Check that it will not display when the computer wakes up from happening, do not disconnect the external monitor while the computer is connected. Problem Procedure Monitor...
... connections to make sure that the monitor's power switch is firmly connected to the monitor and to clone mode. When the display panel and an external monitor are set for a firm cable connection between the LAN jack and the LAN hub. Remember to resolve the problem, contact TOSHIBA Support. Display error occurs Check that it will not display when the computer wakes up from happening, do not disconnect the external monitor while the computer is connected. Problem Procedure Monitor...

Users Manual Canada; English
Page 120
... persist, contact your LAN administrator. User's Manual 6-14 Bluetooth Problem Cannot access Bluetooth device Procedure Check to the external Bluetooth device is turned on LAN does not work Procedure Make sure the AC adaptor is connected. Wireless LAN Problem Cannot access Wireless LAN Procedure Make sure the computer's Wireless communication function is on . the built-in the documentation supplied with another Bluetooth controller. Before contacting TOSHIBA, try the following: Review troubleshooting sections in Bluetooth hardware cannot operate simultaneously with your...
... persist, contact your LAN administrator. User's Manual 6-14 Bluetooth Problem Cannot access Bluetooth device Procedure Check to the external Bluetooth device is turned on LAN does not work Procedure Make sure the AC adaptor is connected. Wireless LAN Problem Cannot access Wireless LAN Procedure Make sure the computer's Wireless communication function is on . the built-in the documentation supplied with another Bluetooth controller. Before contacting TOSHIBA, try the following: Review troubleshooting sections in Bluetooth hardware cannot operate simultaneously with your...

Detailed Specs for Satellite L50-A PSKLSC-01100Q English
Page 1
... HDMI USB 3.0 Toshiba HDD Accelerator Toshiba HDD Shock Protection Toshiba Sleep and Charge DTS Studio Sound™ Memory Standard Memory: 4GB DDR3L + 4GB DDR3L (1600 MHz) Maximum Memory: 16GB DDR3L Expansion Modules: 2 GB DDR3L, 4GB DDR3L, 8GB DDR3L Modules Hard Disk Drive 750GB (5400 RPM); For complete details on password, supervisor password, HDD password Environmental Specifications Temperature: Operating 5to 35C (41 to 95F); Bluetooth V2.1+EDR USB Adaptor PA3927C-1PRP- Toshiba External ODD Part Number/UPC code PSKLSC-01100Q...
... HDMI USB 3.0 Toshiba HDD Accelerator Toshiba HDD Shock Protection Toshiba Sleep and Charge DTS Studio Sound™ Memory Standard Memory: 4GB DDR3L + 4GB DDR3L (1600 MHz) Maximum Memory: 16GB DDR3L Expansion Modules: 2 GB DDR3L, 4GB DDR3L, 8GB DDR3L Modules Hard Disk Drive 750GB (5400 RPM); For complete details on password, supervisor password, HDD password Environmental Specifications Temperature: Operating 5to 35C (41 to 95F); Bluetooth V2.1+EDR USB Adaptor PA3927C-1PRP- Toshiba External ODD Part Number/UPC code PSKLSC-01100Q...


