User Guide
Page 5
... make any changes necessary to maintain uninterrupted service. Fax Branding The Telephone Consumer Protection Act of 1991 makes it can. Contact the state public utility commission, public service commission or corporation commission for any person to use a computer or other electronic device, including Fax machines, to send any message unless such message clearly contains in their equipment, operations or procedures. 5 Connection...
... make any changes necessary to maintain uninterrupted service. Fax Branding The Telephone Consumer Protection Act of 1991 makes it can. Contact the state public utility commission, public service commission or corporation commission for any person to use a computer or other electronic device, including Fax machines, to send any message unless such message clearly contains in their equipment, operations or procedures. 5 Connection...
User Guide
Page 29
... Charging the main battery 48 Using the computer for the first time 49 Opening the display panel 49 Your computer's features and specifications ....50 Turning on the power 50 Adding memory (optional 51 Installing a memory module 52 Removing a memory module 57 Checking total memory 59 Using the TouchPad 60 Scrolling with the TouchPad 60 Control buttons 60 Disabling or enabling the TouchPad 61 Using external display devices 61 Directing the display output when you turn on the computer 61 Adjusting the quality of the external display...
... Charging the main battery 48 Using the computer for the first time 49 Opening the display panel 49 Your computer's features and specifications ....50 Turning on the power 50 Adding memory (optional 51 Installing a memory module 52 Removing a memory module 57 Checking total memory 59 Using the TouchPad 60 Scrolling with the TouchPad 60 Control buttons 60 Disabling or enabling the TouchPad 61 Using external display devices 61 Directing the display output when you turn on the computer 61 Adjusting the quality of the external display...
User Guide
Page 52
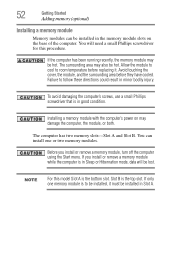
The surrounding area may also be hot. Before you install or remove a memory module while the computer is in Sleep or Hibernation mode, data will need a small Phillips screwdriver for this model Slot A is in the memory module slots on may damage the computer, the module, or both. If you install or remove a memory module, turn off the computer using the Start menu. To avoid damaging the computer's screws, use a small Phillips screwdriver that...
The surrounding area may also be hot. Before you install or remove a memory module while the computer is in Sleep or Hibernation mode, data will need a small Phillips screwdriver for this model Slot A is in the memory module slots on may damage the computer, the module, or both. If you install or remove a memory module, turn off the computer using the Start menu. To avoid damaging the computer's screws, use a small Phillips screwdriver that...
User Guide
Page 54
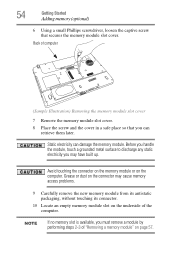
... memory module. 54 Getting Started Adding memory (optional) 6 Using a small Phillips screwdriver, loosen the captive screw that you may cause memory access problems. 9 Carefully remove the new memory module from its antistatic packaging, without touching its connector. 10 Locate an empty memory module slot on the underside of the computer. Back of computer (Sample Illustration) Removing the memory module slot cover 7 Remove the memory module slot cover. 8 Place the screw and the cover in a safe place so that secures the memory module slot cover...
... memory module. 54 Getting Started Adding memory (optional) 6 Using a small Phillips screwdriver, loosen the captive screw that you may cause memory access problems. 9 Carefully remove the new memory module from its antistatic packaging, without touching its connector. 10 Locate an empty memory module slot on the underside of the computer. Back of computer (Sample Illustration) Removing the memory module slot cover 7 Remove the memory module slot cover. 8 Place the screw and the cover in a safe place so that secures the memory module slot cover...
User Guide
Page 57
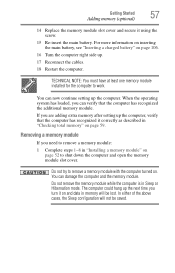
... it using the screw. 15 Re-insert the main battery. Do not remove the memory module while the computer is in "Installing a memory module" on . In either of the above cases, the Sleep configuration will be saved. TECHNICAL NOTE: You must have at least one memory module installed for the computer to remove a memory module: 1 Complete steps 1-8 in Sleep or Hibernation mode. Getting Started 57 Adding memory (optional) 14 Replace the memory module slot cover and...
... it using the screw. 15 Re-insert the main battery. Do not remove the memory module while the computer is in "Installing a memory module" on . In either of the above cases, the Sleep configuration will be saved. TECHNICAL NOTE: You must have at least one memory module installed for the computer to remove a memory module: 1 Complete steps 1-8 in Sleep or Hibernation mode. Getting Started 57 Adding memory (optional) 14 Replace the memory module slot cover and...
User Guide
Page 59
... the computer to perform the action, click Continue; Checking total memory When you add or remove a memory module, you were trying to work. The System window appears. 2 The total memory is inserted completely into the socket and lined up . 7 Reconnect the cables. 8 Restart the computer. Getting Started 59 Adding memory (optional) 4 Replace the memory module slot cover and secure it using the screw. 5 Re-insert the main battery.
... the computer to perform the action, click Continue; Checking total memory When you add or remove a memory module, you were trying to work. The System window appears. 2 The total memory is inserted completely into the socket and lined up . 7 Reconnect the cables. 8 Restart the computer. Getting Started 59 Adding memory (optional) 4 Replace the memory module slot cover and secure it using the screw. 5 Re-insert the main battery.
User Guide
Page 61
Getting Started 61 Using external display devices Disabling or enabling the TouchPad™ The TouchPad™ is to a live electrical outlet. 4 Turn on the external device. Using external display devices Your computer comes with display options. 5 Select the settings you need to install new software. 2 Connect the monitor's video cable to the RGB (monitor) port on the side of the computer. 3 Connect the device's power cable to use the internal display only, the external device only, or both simultaneously. NOTE In the future you can change the display settings by pressing Fn...
Getting Started 61 Using external display devices Disabling or enabling the TouchPad™ The TouchPad™ is to a live electrical outlet. 4 Turn on the external device. Using external display devices Your computer comes with display options. 5 Select the settings you need to install new software. 2 Connect the monitor's video cable to the RGB (monitor) port on the side of the computer. 3 Connect the device's power cable to use the internal display only, the external device only, or both simultaneously. NOTE In the future you can change the display settings by pressing Fn...
User Guide
Page 117
... as Digital Subscriber Lines (DSL), cable, and satellite links. Exploring Your Computer's Features An overview of using the Internet 117 An overview of using the Internet The following sections give a quick introduction to the Internet and some of computers around the world connected by using a specific Internet protocol called Web browsers are specifically designed to work together to , and downloading files from anywhere in the...
... as Digital Subscriber Lines (DSL), cable, and satellite links. Exploring Your Computer's Features An overview of using the Internet 117 An overview of using the Internet The following sections give a quick introduction to the Internet and some of computers around the world connected by using a specific Internet protocol called Web browsers are specifically designed to work together to , and downloading files from anywhere in the...
User Guide
Page 134
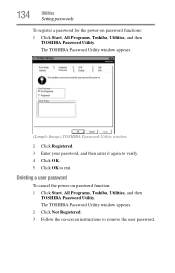
... the power-on -screen instructions to exit. The TOSHIBA Password Utility window appears. 2 Click Not Registered. 3 Follow the on password function: 1 Click Start, All Programs, Toshiba, Utilities, and then TOSHIBA Password Utility. The TOSHIBA Password Utility window appears. (Sample Image) TOSHIBA Password Utility window 2 Click Registered. 3 Enter your password, and then enter it again to verify. 4 Click OK. 5 Click OK to remove the user password. 134 Utilities Setting passwords To register a password for the power-on password functions: 1 Click Start, All Programs, Toshiba, Utilities...
... the power-on -screen instructions to exit. The TOSHIBA Password Utility window appears. 2 Click Not Registered. 3 Follow the on password function: 1 Click Start, All Programs, Toshiba, Utilities, and then TOSHIBA Password Utility. The TOSHIBA Password Utility window appears. (Sample Image) TOSHIBA Password Utility window 2 Click Registered. 3 Enter your password, and then enter it again to verify. 4 Click OK. 5 Click OK to remove the user password. 134 Utilities Setting passwords To register a password for the power-on password functions: 1 Click Start, All Programs, Toshiba, Utilities...
User Guide
Page 145
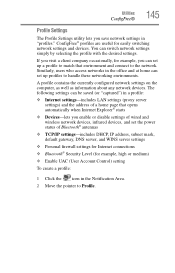
..., IP address, subnet mask, default gateway, DNS server, and WINS server settings ❖ Personal firewall settings for Internet connections ❖ Bluetooth® Security Level (for easily switching network settings and devices. Similarly, users who access networks in the Notification Area. 2 Move the pointer to handle these networking environments. ConfigFree® profiles are useful for example, high or medium) ❖ Enable UAC (User Account Control) setting To create a profile: 1 Click the...
..., IP address, subnet mask, default gateway, DNS server, and WINS server settings ❖ Personal firewall settings for Internet connections ❖ Bluetooth® Security Level (for easily switching network settings and devices. Similarly, users who access networks in the Notification Area. 2 Move the pointer to handle these networking environments. ConfigFree® profiles are useful for example, high or medium) ❖ Enable UAC (User Account Control) setting To create a profile: 1 Click the...
User Guide
Page 151
... plug fits correctly in the Startup menu. To do this, use the options in some way such as installing a new program or adding a device. The Windows® operating system is not working Once you change your computer model. Unless a hardware device has failed, problems usually occur when you are familiar with Networking If Something Goes Wrong The Windows® operating system is not working 151 5 Verify that the AC...
... plug fits correctly in the Startup menu. To do this, use the options in some way such as installing a new program or adding a device. The Windows® operating system is not working Once you change your computer model. Unless a hardware device has failed, problems usually occur when you are familiar with Networking If Something Goes Wrong The Windows® operating system is not working 151 5 Verify that the AC...
User Guide
Page 155
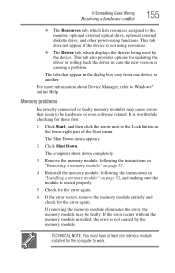
... Device Manager, refer to the monitor, optional external optical drive, optional external diskette drive, and other power-using functions. TECHNICAL NOTE: You must have at least one device to work. It is causing a problem. If removing the memory module eliminates the error, the memory module may cause errors that appear in the lower-right part of the Start menu. Memory problems Incorrectly connected or faulty memory modules may be hardware or even software related. If the error recurs without the memory module installed, the error is not using...
... Device Manager, refer to the monitor, optional external optical drive, optional external diskette drive, and other power-using functions. TECHNICAL NOTE: You must have at least one device to work. It is causing a problem. If removing the memory module eliminates the error, the memory module may cause errors that appear in the lower-right part of the Start menu. Memory problems Incorrectly connected or faulty memory modules may be hardware or even software related. If the error recurs without the memory module installed, the error is not using...
User Guide
Page 158
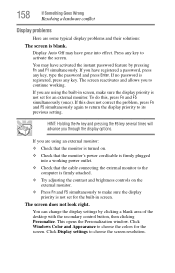
... the screen. Press any key, type the password and press Enter. The screen reactivates and allows you are using an external monitor: ❖ Check that the monitor is turned on the external monitor. ❖ Press Fn and F5 simultaneously to its previous setting. This opens the Personalization window. Display Auto Off may have registered a password, press any key to the computer is firmly attached. ❖ Try adjusting the contrast and brightness controls...
... the screen. Press any key, type the password and press Enter. The screen reactivates and allows you are using an external monitor: ❖ Check that the monitor is turned on the external monitor. ❖ Press Fn and F5 simultaneously to its previous setting. This opens the Personalization window. Display Auto Off may have registered a password, press any key to the computer is firmly attached. ❖ Try adjusting the contrast and brightness controls...
User Guide
Page 166
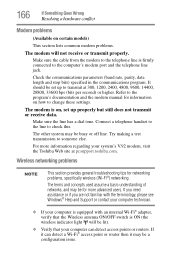
... lists common modem problems. The modem will be lit). ❖ Verify that the Wireless antenna ON/OFF switch is on how to the computer's modem port and the telephone line jack. The modem is ON (the wireless indicator light will not receive or transmit properly. The terms and concepts used assume a basic understanding of networks, and may be a configuration issue. If you need...
... lists common modem problems. The modem will be lit). ❖ Verify that the Wireless antenna ON/OFF switch is on how to the computer's modem port and the telephone line jack. The modem is ON (the wireless indicator light will not receive or transmit properly. The terms and concepts used assume a basic understanding of networks, and may be a configuration issue. If you need...

User Guide
Page 202
... turned off . Memory cache installed on the network. A feature of many Toshiba computers that provides electronic mail, the World Wide Web, and other line of using a pointing device such as the battery save mode. (2) A key or combination of data. See also Sleep, Suspend. See also diskette. hot key - (1) A feature in combination with any device to the internal storage drive the current state of your work , including all open...
... turned off . Memory cache installed on the network. A feature of many Toshiba computers that provides electronic mail, the World Wide Web, and other line of using a pointing device such as the battery save mode. (2) A key or combination of data. See also Sleep, Suspend. See also diskette. hot key - (1) A feature in combination with any device to the internal storage drive the current state of your work , including all open...
User Guide
Page 208
... 79 battery changing 104 charge indicator light 48, 98 charge not lasting 157 charging 46, 48 conserving power 101 disposal 109 low charge 100 monitoring power 48, 98 not charging 156 208 notifications 100 power plan 184 power plan hot key 103 real-time clock (RTC) 95 removing 104 BIOS Setup see TOSHIBA Hardware Setup Bridge Media Adapter inserting memory media 123 removing memory media 124 button power 51 start 113 C character keys 80 charging the battery 48 checking device properties 154 click 60 communications network connection 115 set...
... 79 battery changing 104 charge indicator light 48, 98 charge not lasting 157 charging 46, 48 conserving power 101 disposal 109 low charge 100 monitoring power 48, 98 not charging 156 208 notifications 100 power plan 184 power plan hot key 103 real-time clock (RTC) 95 removing 104 BIOS Setup see TOSHIBA Hardware Setup Bridge Media Adapter inserting memory media 123 removing memory media 124 button power 51 start 113 C character keys 80 charging the battery 48 checking device properties 154 click 60 communications network connection 115 set...
User Guide
Page 209
... disk or disk error message 150 not accessing disk drives 149 running on battery power 94 setting up 43, 53 warning resume failure message 149 computer lock 77 computing tips 78 ConfigFree® 143 connecting to a power source 46 connection set up 115 control buttons 60 Ctrl keys 80 D desktop creating new icon 112 major features 112 desktop exploration 111 desktop icons 112 Device Manager 154 checking properties 154 devices keyboard 63 mouse 63 Disk...
... disk or disk error message 150 not accessing disk drives 149 running on battery power 94 setting up 43, 53 warning resume failure message 149 computer lock 77 computing tips 78 ConfigFree® 143 connecting to a power source 46 connection set up 115 control buttons 60 Ctrl keys 80 D desktop creating new icon 112 major features 112 desktop exploration 111 desktop icons 112 Device Manager 154 checking properties 154 devices keyboard 63 mouse 63 Disk...
User Guide
Page 210
... Support Windows® operating system 153 Hibernation mode 66 configuring 70 starting again from 72 hot key display brightness 188 Hibernation mode 186 keyboard overlays 192 Lock (Instant security) 183 Output (Display switch) 187 power plan 184 Sleep mode 185 volume mute 182 Zoom (Display resolution) 191 zooming 192 Hot Key Cards 178 Hot key functions 182 hot key power plan 103 http 117 I icon 112 desktop 112 moving to desktop 112 recycle bin 112 safety 38 installation memory module 52 installing memory modules 51 mouse...
... Support Windows® operating system 153 Hibernation mode 66 configuring 70 starting again from 72 hot key display brightness 188 Hibernation mode 186 keyboard overlays 192 Lock (Instant security) 183 Output (Display switch) 187 power plan 184 Sleep mode 185 volume mute 182 Zoom (Display resolution) 191 zooming 192 Hot Key Cards 178 Hot key functions 182 hot key power plan 103 http 117 I icon 112 desktop 112 moving to desktop 112 recycle bin 112 safety 38 installation memory module 52 installing memory modules 51 mouse...

User Guide
Page 211
... monitor 61 connecting 61 not working 158 mouse installing 63 mouse utility 136 N network accessing 115 Connect to the Internet 115 networking wireless 114 Notification Area 113 O Opening the display panel 49 optical disc positioning 90 optical discs caring for 93 handling 90 inserting 89 removing 92 optical drive DVD, using 87 problems 161 troubleshooting 161 optical media recording 91 other documentation 39 P password deleting a supervisor 133 disabling a user 134 setting a user 133 supervisor set up 132 types 131 passwords instant, using 131 setting 131 port...
... monitor 61 connecting 61 not working 158 mouse installing 63 mouse utility 136 N network accessing 115 Connect to the Internet 115 networking wireless 114 Notification Area 113 O Opening the display panel 49 optical disc positioning 90 optical discs caring for 93 handling 90 inserting 89 removing 92 optical drive DVD, using 87 problems 161 troubleshooting 161 optical media recording 91 other documentation 39 P password deleting a supervisor 133 disabling a user 134 setting a user 133 supervisor set up 132 types 131 passwords instant, using 131 setting 131 port...
User Guide
Page 212
... 163 error occurs 165 hot swapping fails 164 not recognized 164 slot appears dead 163 external display not working 159 external monitor 158 faulty memory 155 hardware conflict 153 high-pitched noise 163 Internet bookmarked site not found 152 Internet connection is slow 152 keyboard not responding 149 missing files/trouble accessing a disk 160 modem not receiving or transmitting 166 no sound 162 non-system disk or disk error 150 power and batteries...
... 163 error occurs 165 hot swapping fails 164 not recognized 164 slot appears dead 163 external display not working 159 external monitor 158 faulty memory 155 hardware conflict 153 high-pitched noise 163 Internet bookmarked site not found 152 Internet connection is slow 152 keyboard not responding 149 missing files/trouble accessing a disk 160 modem not receiving or transmitting 166 no sound 162 non-system disk or disk error 150 power and batteries...


