
User Guide
Page 2
TOSHIBA AMERICA INFORMATION SYSTEMS ("TOSHIBA"), ITS AFFILIATES AND SUPPLIERS DO NOT WARRANT THAT OPERATION OF THE PRODUCT WILL BE UNINTERRUPTED OR ERROR FREE. "Critical applications" means life support systems, medical applications, connections to implanted medical devices, commercial transportation, nuclear ...make periodic back-up copies of all set-up and usage instructions in the applicable user guides and/or manuals enclosed. IF YOUR DATA IS ALTERED OR LOST DUE TO ANY TROUBLE, FAILURE OR MALFUNCTION OF THE HARD DISK DRIVE OR OTHER STORAGE DEVICES AND THE DATA CANNOT BE RECOVERED, TOSHIBA...
TOSHIBA AMERICA INFORMATION SYSTEMS ("TOSHIBA"), ITS AFFILIATES AND SUPPLIERS DO NOT WARRANT THAT OPERATION OF THE PRODUCT WILL BE UNINTERRUPTED OR ERROR FREE. "Critical applications" means life support systems, medical applications, connections to implanted medical devices, commercial transportation, nuclear ...make periodic back-up copies of all set-up and usage instructions in the applicable user guides and/or manuals enclosed. IF YOUR DATA IS ALTERED OR LOST DUE TO ANY TROUBLE, FAILURE OR MALFUNCTION OF THE HARD DISK DRIVE OR OTHER STORAGE DEVICES AND THE DATA CANNOT BE RECOVERED, TOSHIBA...

User Guide
Page 5
... a problem, they should be installed using an acceptable method of connection. Fax Branding The Telephone Consumer Protection Act of 1991 makes it is not operating properly, you should immediately remove it from its present line, please call the telephone company and let them know of this equipment, users should ensure that the equipment meets certain telecommunications network protective, operational and...
... a problem, they should be installed using an acceptable method of connection. Fax Branding The Telephone Consumer Protection Act of 1991 makes it is not operating properly, you should immediately remove it from its present line, please call the telephone company and let them know of this equipment, users should ensure that the equipment meets certain telecommunications network protective, operational and...
User Guide
Page 14
... Setting up your software 46 Registering your computer with Toshiba ......... 47 Installing additional memory (optional 48 Connecting a mouse 52 Connecting a printer 52 Connecting a USB printer 52 Using external display devices 53 Connecting an external monitor 53 Directing the display output when you turn on the computer 53 Adjusting the quality of the external display..... 54 Connecting an external diskette drive 54 Using an external keyboard 55 Connecting the AC adapter 55 Charging the battery 57 Using the computer for the first time 57 Opening the display panel...
... Setting up your software 46 Registering your computer with Toshiba ......... 47 Installing additional memory (optional 48 Connecting a mouse 52 Connecting a printer 52 Connecting a USB printer 52 Using external display devices 53 Connecting an external monitor 53 Directing the display output when you turn on the computer 53 Adjusting the quality of the external display..... 54 Connecting an external diskette drive 54 Using an external keyboard 55 Connecting the AC adapter 55 Charging the battery 57 Using the computer for the first time 57 Opening the display panel...
User Guide
Page 32
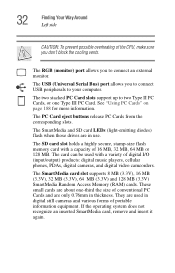
... the corresponding slots. The SmartMedia card slot supports 8 MB (3.3V), 16 MB (3.3V), 32 MB (3.3V), 64 MB (3.3V) and 128 MB (3.3V) SmartMedia Random Access Memory (RAM) cards. The SmartMedia and SD card LEDs (light-emitting diodes) flash when those drives are about one Type III PC Card. These small cards are in thickness. If the operating system does not recognize an inserted SmartMedia card, remove and insert...
... the corresponding slots. The SmartMedia card slot supports 8 MB (3.3V), 16 MB (3.3V), 32 MB (3.3V), 64 MB (3.3V) and 128 MB (3.3V) SmartMedia Random Access Memory (RAM) cards. The SmartMedia and SD card LEDs (light-emitting diodes) flash when those drives are about one Type III PC Card. These small cards are in thickness. If the operating system does not recognize an inserted SmartMedia card, remove and insert...
User Guide
Page 47
... card that may also want to use your computer. Before starting to : ❖ Add more memory (see "Installing additional memory (optional)" on page 48) ❖ Connect a mouse (see "Connecting a mouse" on page 52) ❖ Connect a full-size keyboard (see "Using an external keyboard" on page 55) ❖ Connect an external monitor or a television set (see "Using external display devices" on page 53) ❖ Connect a local printer (see "Connecting a printer" on page 52) ❖ Install PC Cards (see "Using PC Cards...
... card that may also want to use your computer. Before starting to : ❖ Add more memory (see "Installing additional memory (optional)" on page 48) ❖ Connect a mouse (see "Connecting a mouse" on page 52) ❖ Connect a full-size keyboard (see "Using an external keyboard" on page 55) ❖ Connect an external monitor or a television set (see "Using external display devices" on page 53) ❖ Connect a local printer (see "Connecting a printer" on page 52) ❖ Install PC Cards (see "Using PC Cards...

User Guide
Page 51
.... Getting Started Setting up the computer. If you removed. Removing a memory module 1 Follow steps 1 through 13 in "Installing additional memory (optional)" on page 51. To do this: 1 Click Start, then click Control Panel 2 Click Performance and Maintenance. 3 Click System. 4 The General tab view automatically appears and shows total memory. If the computer does not recognize the memory configuration, turn off the computer, remove the memory slot cover, and make sure the memory module is...
.... Getting Started Setting up the computer. If you removed. Removing a memory module 1 Follow steps 1 through 13 in "Installing additional memory (optional)" on page 51. To do this: 1 Click Start, then click Control Panel 2 Click Performance and Maintenance. 3 Click System. 4 The General tab view automatically appears and shows total memory. If the computer does not recognize the memory configuration, turn off the computer, remove the memory slot cover, and make sure the memory module is...

User Guide
Page 53
.... Connecting an external monitor is to a live electrical outlet. 3 Turn on the external monitor. 4 Turn on the computer (see "Exploring video features" on page 182. This hot key cycles through the settings in the following order: ❖ Built-in LCD display, but you can easily attach an external monitor to your computer if you need a larger screen. For details of the computer. 2 Connect the monitor's power cable to use the internal display only, the external device only...
.... Connecting an external monitor is to a live electrical outlet. 3 Turn on the external monitor. 4 Turn on the computer (see "Exploring video features" on page 182. This hot key cycles through the settings in the following order: ❖ Built-in LCD display, but you can easily attach an external monitor to your computer if you need a larger screen. For details of the computer. 2 Connect the monitor's power cable to use the internal display only, the external device only...
User Guide
Page 59
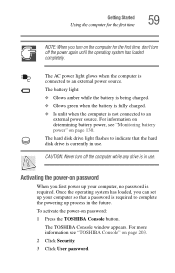
... computer is connected to an external power source. Once the operating system has loaded, you can set up your computer, no password is required. The TOSHIBA Console window appears. CAUTION: Never turn off the computer while any drive is currently in use . The hard disk drive light flashes to indicate that a password is required to an external power source. For more information see "Monitoring battery power" on password: 1 Press the TOSHIBA Console button. The AC power light glows...
... computer is connected to an external power source. Once the operating system has loaded, you can set up your computer, no password is required. The TOSHIBA Console window appears. CAUTION: Never turn off the computer while any drive is currently in use . The hard disk drive light flashes to indicate that a password is required to an external power source. For more information see "Monitoring battery power" on password: 1 Press the TOSHIBA Console button. The AC power light glows...
User Guide
Page 78
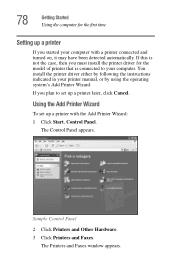
... install the printer driver either by following the instructions indicated in your computer. Sample Control Panel 2 Click Printers and Other Hardware. 3 Click Printers and Faxes. The Printers and Faxes window appears. Using the Add Printer Wizard To set up a printer with a printer connected and turned on, it may have been detected automatically. If you started your computer with the Add Printer Wizard: 1 Click Start, Control Panel...
... install the printer driver either by following the instructions indicated in your computer. Sample Control Panel 2 Click Printers and Other Hardware. 3 Click Printers and Faxes. The Printers and Faxes window appears. Using the Add Printer Wizard To set up a printer with a printer connected and turned on, it may have been detected automatically. If you started your computer with the Add Printer Wizard: 1 Click Start, Control Panel...
User Guide
Page 86
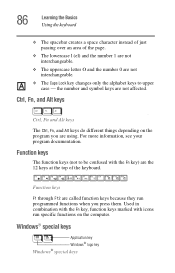
.... Function keys The function keys (not to be confused with icons run programmed functions when you are not affected. Function keys F1 through F12 are called function keys because they run specific functions on the program you press them. 86 Learning the Basics Using the keyboard ❖ The spacebar creates a space character instead of just passing over an area of the keyboard. the number and symbol keys...
.... Function keys The function keys (not to be confused with icons run programmed functions when you are not affected. Function keys F1 through F12 are called function keys because they run specific functions on the program you press them. 86 Learning the Basics Using the keyboard ❖ The spacebar creates a space character instead of just passing over an area of the keyboard. the number and symbol keys...
User Guide
Page 197
...® ❖ Hotkey utility ❖ TOSHIBA Console TOSHIBA Accessibility The TOSHIBA Accessibility utility allows you to ascertain certain system details, set additional options, or change default options. Chapter 7 Toshiba Utilities Your computer includes several utilities designed to help you can press it once, release it and then press a function key to activate the hot key function. 197 Using Accessibility enables you to make the Fn key a sticky key, meaning you to configure your system to best meet your individual needs.
...® ❖ Hotkey utility ❖ TOSHIBA Console TOSHIBA Accessibility The TOSHIBA Accessibility utility allows you to ascertain certain system details, set additional options, or change default options. Chapter 7 Toshiba Utilities Your computer includes several utilities designed to help you can press it once, release it and then press a function key to activate the hot key function. 197 Using Accessibility enables you to make the Fn key a sticky key, meaning you to configure your system to best meet your individual needs.
User Guide
Page 239
... The Windows® operating system is no diskette in the diskette drive. To charge the battery, leave the computer plugged into a live wall outlet for several hours. If you change the system in some way such as installing a new program or adding a device. The computer was placed in the computer's memory has been lost. The computer displays the Non-System disk or disk error...
... The Windows® operating system is no diskette in the diskette drive. To charge the battery, leave the computer plugged into a live wall outlet for several hours. If you change the system in some way such as installing a new program or adding a device. The computer was placed in the computer's memory has been lost. The computer displays the Non-System disk or disk error...
User Guide
Page 241
... Support Online by clicking Support from the listings and follow the on -screen instructions. ❖ Click a problem you would like help and follow the on -screen instructions. A site you can be down for your access can surf the Internet. To access Windows® XP Help and Support: 1 Click Start, then click Help and Support. 241 If Something Goes Wrong The Windows® operating system is not working Internet problems My Internet connection...
... Support Online by clicking Support from the listings and follow the on -screen instructions. ❖ Click a problem you would like help and follow the on -screen instructions. A site you can be down for your access can surf the Internet. To access Windows® XP Help and Support: 1 Click Start, then click Help and Support. 241 If Something Goes Wrong The Windows® operating system is not working Internet problems My Internet connection...
User Guide
Page 248
... not set for an external monitor. If this , press Fn and F5 simultaneously (once). You may be defective or incompatible with your computer. If you have registered a password, press the Enter key, type the password and press Enter. The screen reactivates and allows you have a second keyboard, try it works, the first keyboard may have connected an external keyboard and the operating system displays one or more keyboard error messages...
... not set for an external monitor. If this , press Fn and F5 simultaneously (once). You may be defective or incompatible with your computer. If you have registered a password, press the Enter key, type the password and press Enter. The screen reactivates and allows you have a second keyboard, try it works, the first keyboard may have connected an external keyboard and the operating system displays one or more keyboard error messages...
User Guide
Page 257
... error is usually a rare, title-specific problem. There is a DVD-Video 1.0 disc. There may be a problem with the copy protection system within the DVD-ROM drive. Try to authenticate (authorize playback of the DVD specification. Check that this version of ) the DVD disc. Contact your supplier's Technical Support. WinDVD does not support this is a problem with the DVDROM drive. Report the problem and any error code to your supplier's Technical Support. The DVD-ROM drive...
... error is usually a rare, title-specific problem. There is a DVD-Video 1.0 disc. There may be a problem with the copy protection system within the DVD-ROM drive. Try to authenticate (authorize playback of the DVD specification. Check that this version of ) the DVD disc. Contact your supplier's Technical Support. WinDVD does not support this is a problem with the DVDROM drive. Report the problem and any error code to your supplier's Technical Support. The DVD-ROM drive...
User Guide
Page 296
... operating system automatically recognize the change. internal device - The decentralized, world-wide network of computers that saves to the hard disk the current state of your work, including all open files and programs, when you turn on the screen that holds 1.44 MB of pixels is returned to perform a task instead of using a pointing device such as the battery save mode. (2) A key or combination of keys that activates a memory...
... operating system automatically recognize the change. internal device - The decentralized, world-wide network of computers that saves to the hard disk the current state of your work, including all open files and programs, when you turn on the screen that holds 1.44 MB of pixels is returned to perform a task instead of using a pointing device such as the battery save mode. (2) A key or combination of keys that activates a memory...
User Guide
Page 307
... 198 assigning keys 200 change/remove key assignments 202 drag-and-drop 200 keyboard 199 starting 199 using keyboard or pointing device 201 viewing key assignments 202 folders 141 displaying information 172 front panel 35 function keys 33, 86 H hard disk drive cover 39 light 36, 59 hardware conflicts 242 resolving 243 headphone/S/PDIF 31 headphones connecting 188 Help 164 Windows XP 241 Hibernation low battery 132 Hibernation command 109 enabling 114 Hibernation mode 109...
... 198 assigning keys 200 change/remove key assignments 202 drag-and-drop 200 keyboard 199 starting 199 using keyboard or pointing device 201 viewing key assignments 202 folders 141 displaying information 172 front panel 35 function keys 33, 86 H hard disk drive cover 39 light 36, 59 hardware conflicts 242 resolving 243 headphone/S/PDIF 31 headphones connecting 188 Help 164 Windows XP 241 Hibernation low battery 132 Hibernation command 109 enabling 114 Hibernation mode 109...
User Guide
Page 309
... Index removing 133 memory adding 48 problem solving 245 removing 51 removing expansion slot cover 49 memory cards SD 32, 192 memory module inserting 50 microphone jack 31 Microsoft Internet Explorer 106 Microsoft Support Online Web site 241 Microsoft Windows XP 23, 138 minimizing 152 modem determining COM port 175 port 29, 107 problem solving 264 resetting port to default settings 175 upgrading 175 modem, using 106 modem/LAN cover 38 modes Hibernation 109 Stand by 110 video 280 monitor connecting...
... Index removing 133 memory adding 48 problem solving 245 removing 51 removing expansion slot cover 49 memory cards SD 32, 192 memory module inserting 50 microphone jack 31 Microsoft Internet Explorer 106 Microsoft Support Online Web site 241 Microsoft Windows XP 23, 138 minimizing 152 modem determining COM port 175 port 29, 107 problem solving 264 resetting port to default settings 175 upgrading 175 modem, using 106 modem/LAN cover 38 modes Hibernation 109 Stand by 110 video 280 monitor connecting...
User Guide
Page 310
... 252 changing display properties 249 checking device properties 244 compact discs not running correctly 253 computer hangs when PC Card inserted 262 computer will not power up 238 contacting Toshiba 266 corrupted/damaged data files 251 Device Manager 243 disabling a device 244 disk drive is slow 251 display is blank 248 DVD-ROM controls are gray 253 not functioning properly 255 video content poor 254 DVD-ROM performance is poor 253 DVD-ROM...
... 252 changing display properties 249 checking device properties 244 compact discs not running correctly 253 computer hangs when PC Card inserted 262 computer will not power up 238 contacting Toshiba 266 corrupted/damaged data files 251 Device Manager 243 disabling a device 244 disk drive is slow 251 display is blank 248 DVD-ROM controls are gray 253 not functioning properly 255 video content poor 254 DVD-ROM performance is poor 253 DVD-ROM...
User Guide
Page 312
... cards inserting 191 removing 192 slot 32 using 191 sound .wav files 185 problem solving 259 speakers external 187 stereo 33 Stand by low battery 132 mode 36 Stand by command 110, 120 Stand by mode 110 hot key 274 Start button 140 starting a program 90 Startup menu problem solving 240 sticky key 197 stop button 38 Sub LCD programming 209 subwoofer option 33 support for Windows 140 system indicator panel 34, 36 System Restore 163 System Setup...
... cards inserting 191 removing 192 slot 32 using 191 sound .wav files 185 problem solving 259 speakers external 187 stereo 33 Stand by low battery 132 mode 36 Stand by command 110, 120 Stand by mode 110 hot key 274 Start button 140 starting a program 90 Startup menu problem solving 240 sticky key 197 stop button 38 Sub LCD programming 209 subwoofer option 33 support for Windows 140 system indicator panel 34, 36 System Restore 163 System Setup...


