User Guide
Page 5
... part of the product identifier that has the format US:AAAEQ##TXXXX. If these changes might affect your service or the operation of your right to a line, as possible. But if advanced notice is not practical, the telephone company will give you notice, in their equipment, operations or procedures. or an authorized representative of Toshiba, or the Toshiba Support...
... part of the product identifier that has the format US:AAAEQ##TXXXX. If these changes might affect your service or the operation of your right to a line, as possible. But if advanced notice is not practical, the telephone company will give you notice, in their equipment, operations or procedures. or an authorized representative of Toshiba, or the Toshiba Support...
User Guide
Page 20
...39 Turning on the power 39 Adding memory (optional 40 Installing a memory module 41 Removing a memory module 46 Checking total memory 47 Hard Drive Recovery Utilities 48 Creating Recovery CDs/DVDs 49 Hard Disk Drive Recovery Options 50 Installing drivers and applications 56 Using the TouchPad 56 Control buttons 57 Disabling or enabling the TouchPad 57 Using external display devices 57 Directing the display output when you turn on the computer 58 Adjusting the quality of the external display......59 Using an external keyboard 59 Using a mouse 59 Connecting a printer 59 Setting...
...39 Turning on the power 39 Adding memory (optional 40 Installing a memory module 41 Removing a memory module 46 Checking total memory 47 Hard Drive Recovery Utilities 48 Creating Recovery CDs/DVDs 49 Hard Disk Drive Recovery Options 50 Installing drivers and applications 56 Using the TouchPad 56 Control buttons 57 Disabling or enabling the TouchPad 57 Using external display devices 57 Directing the display output when you turn on the computer 58 Adjusting the quality of the external display......59 Using an external keyboard 59 Using a mouse 59 Connecting a printer 59 Setting...

User Guide
Page 22
... Internet Service Providers 110 Connecting to the Internet 110 Surfing the Internet 111 Internet features 111 Uploading to, and downloading files from, the Internet 112 Exploring audio features 112 Recording sounds 112 Using external speakers or headphones..........113 Using tablet mode 113 Preparing to use the tablet 113 Using tablet mode 115 Using the Toshiba tablet pen 116 Returning the computer to its original configuration 116 Using PC Cards 117 Inserting a PC Card...
... Internet Service Providers 110 Connecting to the Internet 110 Surfing the Internet 111 Internet features 111 Uploading to, and downloading files from, the Internet 112 Exploring audio features 112 Recording sounds 112 Using external speakers or headphones..........113 Using tablet mode 113 Preparing to use the tablet 113 Using tablet mode 115 Using the Toshiba tablet pen 116 Returning the computer to its original configuration 116 Using PC Cards 117 Inserting a PC Card...
User Guide
Page 23
... & Fix 123 Optimize 124 Toshiba Application Installer 125 Setting passwords 126 Using an instant password 126 Using a supervisor password 127 Using a user password 128 Deleting a user password 129 TOSHIBA Security Assist 130 TOSHIBA PC Diagnostic Tool Utility 132 TOSHIBA HDD Protection Utility 133 Mouse Utility 134 Toshiba Hardware Setup 135 TOSHIBA Zooming Utility 137 TOSHIBA Button Support 138 TOSHIBA Rotation Utility 139 Tablet PC Settings 140 Windows® Mobility Center 142 Toshiba Tablet Access Code Utility 143 Trusted Platform Module (TPM 144 TOSHIBA Accessibility...
... & Fix 123 Optimize 124 Toshiba Application Installer 125 Setting passwords 126 Using an instant password 126 Using a supervisor password 127 Using a user password 128 Deleting a user password 129 TOSHIBA Security Assist 130 TOSHIBA PC Diagnostic Tool Utility 132 TOSHIBA HDD Protection Utility 133 Mouse Utility 134 Toshiba Hardware Setup 135 TOSHIBA Zooming Utility 137 TOSHIBA Button Support 138 TOSHIBA Rotation Utility 139 Tablet PC Settings 140 Windows® Mobility Center 142 Toshiba Tablet Access Code Utility 143 Trusted Platform Module (TPM 144 TOSHIBA Accessibility...
User Guide
Page 41
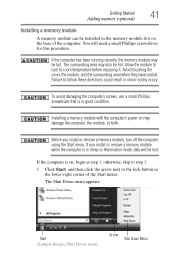
... cover, the module, and the surrounding area before replacing it. To avoid damaging the computer's screws, use a small Phillips screwdriver that is on, begin at step 1; Before you install or remove a memory module while the computer is in Sleep or Hibernation mode, data will need a small Phillips screwdriver for this procedure. Start (Sample Image) Shut Down menu Arrow Shut Down Menu If you install or remove a memory module, turn...
... cover, the module, and the surrounding area before replacing it. To avoid damaging the computer's screws, use a small Phillips screwdriver that is on, begin at step 1; Before you install or remove a memory module while the computer is in Sleep or Hibernation mode, data will need a small Phillips screwdriver for this procedure. Start (Sample Image) Shut Down menu Arrow Shut Down Menu If you install or remove a memory module, turn...
User Guide
Page 43
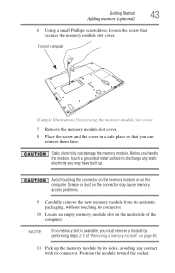
... the memory module slot cover 7 Remove the memory module slot cover. 8 Place the screw and the cover in a safe place so that secures the memory module slot cover. Front of "Removing a memory module" on page 46. 11 Pick up the memory module by its sides, avoiding any static electricity you may cause memory access problems. 9 Carefully remove the new memory module from its antistatic packaging, without touching its connector. Position the module toward the socket, Getting Started Adding memory (optional) 43 6 Using a small...
... the memory module slot cover 7 Remove the memory module slot cover. 8 Place the screw and the cover in a safe place so that secures the memory module slot cover. Front of "Removing a memory module" on page 46. 11 Pick up the memory module by its sides, avoiding any static electricity you may cause memory access problems. 9 Carefully remove the new memory module from its antistatic packaging, without touching its connector. Position the module toward the socket, Getting Started Adding memory (optional) 43 6 Using a small...
User Guide
Page 47
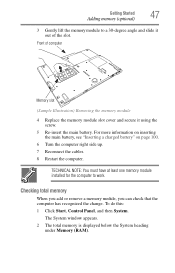
... window appears. 2 The total memory is displayed below the System heading under Memory (RAM). TECHNICAL NOTE: You must have at least one memory module installed for the computer to a 30-degree angle and slide it out of computer Memory slot (Sample Illustration) Removing the memory module 4 Replace the memory module slot cover and secure it using the screw. 5 Re-insert the main battery. Getting Started Adding memory (optional) 47 3 Gently lift the memory module to work...
... window appears. 2 The total memory is displayed below the System heading under Memory (RAM). TECHNICAL NOTE: You must have at least one memory module installed for the computer to a 30-degree angle and slide it out of computer Memory slot (Sample Illustration) Removing the memory module 4 Replace the memory module slot cover and secure it using the screw. 5 Re-insert the main battery. Getting Started Adding memory (optional) 47 3 Gently lift the memory module to work...
User Guide
Page 48
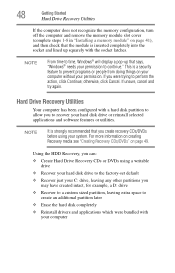
...; Recover to a custom sized partition, leaving extra space to create an additional partition later ❖ Erase the hard disk completely ❖ Reinstall drivers and applications which were bundled with a hard disk partition to allow you were trying to perform the action, click Continue; 48 Getting Started Hard Drive Recovery Utilities If the computer does not recognize the memory configuration, turn off the computer and remove the memory module slot cover (complete steps 1-8 in "Installing a memory module...
...; Recover to a custom sized partition, leaving extra space to create an additional partition later ❖ Erase the hard disk completely ❖ Reinstall drivers and applications which were bundled with a hard disk partition to allow you were trying to perform the action, click Continue; 48 Getting Started Hard Drive Recovery Utilities If the computer does not recognize the memory configuration, turn off the computer and remove the memory module slot cover (complete steps 1-8 in "Installing a memory module...
User Guide
Page 57
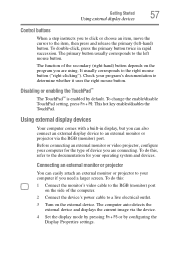
... the RGB (monitor) port. Connecting an external monitor or projector You can also connect an external display device to an external monitor or projector via the device. 4 Set the display mode by pressing Fn + F5 or by default. The function of the computer. 2 Connect the device's power cable to a live electrical outlet. 3 Turn on the program you are connecting. Using external display devices Your computer comes with a built-in rapid succession. Getting Started Using external display devices 57 Control buttons When a step instructs you can...
... the RGB (monitor) port. Connecting an external monitor or projector You can also connect an external display device to an external monitor or projector via the device. 4 Set the display mode by pressing Fn + F5 or by default. The function of the computer. 2 Connect the device's power cable to a live electrical outlet. 3 Turn on the program you are connecting. Using external display devices Your computer comes with a built-in rapid succession. Getting Started Using external display devices 57 Control buttons When a step instructs you can...
User Guide
Page 129
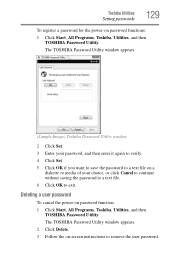
... Cancel to continue without saving the password to a text file. 6 Click OK to remove the user password. Deleting a user password To cancel the power-on password functions: 1 Click Start, All Programs, Toshiba, Utilities, and then TOSHIBA Password Utility. The TOSHIBA Password Utility window appears. (Sample Image) Toshiba Password Utility window 2 Click Set. 3 Enter your password, and then enter it again to verify. 4 Click Set. 5 Click OK if you want to save the password to a text file on -screen instructions to exit.
... Cancel to continue without saving the password to a text file. 6 Click OK to remove the user password. Deleting a user password To cancel the power-on password functions: 1 Click Start, All Programs, Toshiba, Utilities, and then TOSHIBA Password Utility. The TOSHIBA Password Utility window appears. (Sample Image) Toshiba Password Utility window 2 Click Set. 3 Enter your password, and then enter it again to verify. 4 Click Set. 5 Click OK if you want to save the password to a text file on -screen instructions to exit.
User Guide
Page 164
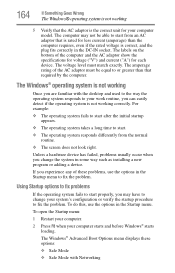
... system's configuration or verify the startup procedure to fix the problem. If you experience any of these options: ❖ Safe Mode ❖ Safe Mode with the desktop and used to the way the operating system responds to start from the normal routine. ❖ The screen does not look right. To open the Startup menu: 1 Restart your computer. 2 Press F8 when your work routine, you change your computer model. 164...
... system's configuration or verify the startup procedure to fix the problem. If you experience any of these options: ❖ Safe Mode ❖ Safe Mode with the desktop and used to the way the operating system responds to start from the normal routine. ❖ The screen does not look right. To open the Startup menu: 1 Restart your computer. 2 Press F8 when your work routine, you change your computer model. 164...
User Guide
Page 168
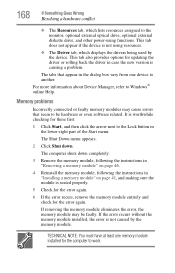
... Device Manager, refer to the monitor, optional external optical drive, optional external diskette drive, and other power-using resources. ❖ The Driver tab, which lists resources assigned to Windows® online Help. Memory problems Incorrectly connected or faulty memory modules may be hardware or even software related. If the error recurs without the memory module installed, the error is seated properly. 5 Check for the error again. 6 If the error recurs, remove the memory module entirely and check for the computer to work...
... Device Manager, refer to the monitor, optional external optical drive, optional external diskette drive, and other power-using resources. ❖ The Driver tab, which lists resources assigned to Windows® online Help. Memory problems Incorrectly connected or faulty memory modules may be hardware or even software related. If the error recurs without the memory module installed, the error is seated properly. 5 Check for the error again. 6 If the error recurs, remove the memory module entirely and check for the computer to work...
User Guide
Page 170
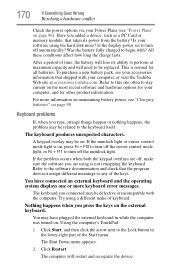
... the numlock light or cursor control mode light is not remapping the keyboard. This is normal for your software using the hard disk more? You have plugged the external keyboard in the lower-right part of the keys. The keyboard you connected may have connected an external keyboard and the operating system displays one or more information on maintaining battery power, see "Charging batteries" on page 90. You may be replaced. The computer will need to...
... the numlock light or cursor control mode light is not remapping the keyboard. This is normal for your software using the hard disk more? You have plugged the external keyboard in the lower-right part of the keys. The keyboard you connected may have connected an external keyboard and the operating system displays one or more information on maintaining battery power, see "Charging batteries" on page 90. You may be replaced. The computer will need to...

User Guide
Page 171
... 171 Display problems Here are some typical display problems and their solutions: The screen is registered, press any key. The screen does not look right. This opens the Personalization window. Click Display settings to continue working power outlet. ❖ Check that the monitor's power cord/cable is firmly plugged into effect. HINT: Holding the Fn key and pressing the F5 key several times will advance you are using an external monitor...
... 171 Display problems Here are some typical display problems and their solutions: The screen is registered, press any key. The screen does not look right. This opens the Personalization window. Click Display settings to continue working power outlet. ❖ Check that the monitor's power cord/cable is firmly plugged into effect. HINT: Holding the Fn key and pressing the F5 key several times will advance you are using an external monitor...
User Guide
Page 216
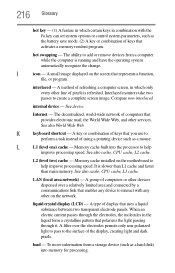
... key can set system options or control system parameters, such as a hard disk) into the processor to help improve processing speed. The decentralized, world-wide network of keys that polarizes the light passing through the electrodes, the molecules in which certain keys in combination with any other on the screen that enables any device to add or remove devices from a storage device (such as the battery save mode. (2) A key...
... key can set system options or control system parameters, such as a hard disk) into the processor to help improve processing speed. The decentralized, world-wide network of keys that polarizes the light passing through the electrodes, the molecules in which certain keys in combination with any other on the screen that enables any device to add or remove devices from a storage device (such as the battery save mode. (2) A key...
User Guide
Page 222
... low charge 94 monitoring power 36, 92 not charging 169 notification 94 222 power plan 198 power plan hot key 97 real-time clock (RTC) 89 removing 98 BIOS Setup see Toshiba Hardware Setup button power 40, 49 start 107 C character keys 77 charging the battery 37 checking device properties 167 click 57 communications network connection 108 set up 108 computer caring for 73 cleaning 73 moving 73 non-system disk or disk error message 163 not accessing disk drives...
... low charge 94 monitoring power 36, 92 not charging 169 notification 94 222 power plan 198 power plan hot key 97 real-time clock (RTC) 89 removing 98 BIOS Setup see Toshiba Hardware Setup button power 40, 49 start 107 C character keys 77 charging the battery 37 checking device properties 167 click 57 communications network connection 108 set up 108 computer caring for 73 cleaning 73 moving 73 non-system disk or disk error message 163 not accessing disk drives...
User Guide
Page 223
... running on battery power 88 setting up 33, 41 warning resume failure message 162 computer lock 73 computing tips 75 connecting to a power source 35 control buttons 57 Ctrl keys 78 D desktop creating new icon 106 major features 106 desktop exploration 105 desktop icons 106 Device Manager 167 checking properties 167 devices keyboard 59 mouse 59 Disk Defragmenter 173 disk drive corrupted/damaged data files 174 missing files/trouble accessing a disk 173...
... running on battery power 88 setting up 33, 41 warning resume failure message 162 computer lock 73 computing tips 75 connecting to a power source 35 control buttons 57 Ctrl keys 78 D desktop creating new icon 106 major features 106 desktop exploration 105 desktop icons 106 Device Manager 167 checking properties 167 devices keyboard 59 mouse 59 Disk Defragmenter 173 disk drive corrupted/damaged data files 174 missing files/trouble accessing a disk 173...

User Guide
Page 224
... and downloading files 112 URL address not found 165 using 109 Internet Explorer® icon 106 Internet Service Providers 110 ISPs 110 K keyboard character keys 77 function keys 78 hot keys 206 not working 162 overlay keys 79 special Windows® keys 78 troubleshooting 170 using 76 keyboard, external 59 keyboard, full-size 77 L lock computer, using 73 M main battery removing 98 memory adding 40 problem solving 168 removing expansion slot cover 43 memory module inserting 43 installation 41 removing 47 microphone 112 monitor 57 connecting...
... and downloading files 112 URL address not found 165 using 109 Internet Explorer® icon 106 Internet Service Providers 110 ISPs 110 K keyboard character keys 77 function keys 78 hot keys 206 not working 162 overlay keys 79 special Windows® keys 78 troubleshooting 170 using 76 keyboard, external 59 keyboard, full-size 77 L lock computer, using 73 M main battery removing 98 memory adding 40 problem solving 168 removing expansion slot cover 43 memory module inserting 43 installation 41 removing 47 microphone 112 monitor 57 connecting...
User Guide
Page 225
... O opening the display panel 38 optical drive troubleshooting 174 other documentation 29 overlay keys 79 P password deleting a supervisor 128 disabling a user 129 setting a user 128 supervisor set up 127 types 126 passwords instant, using 126 setting 126 PC Card checklist 176 computer stops working 177 configuring 118 errors 177 hot swapping fails 177 inserting 117 not recognized 177 problem solving 176 removing 118 setting up 118 port Ethernet LAN 108 RGB 57 power computer will not start 161 connecting cable...
... O opening the display panel 38 optical drive troubleshooting 174 other documentation 29 overlay keys 79 P password deleting a supervisor 128 disabling a user 129 setting a user 128 supervisor set up 127 types 126 passwords instant, using 126 setting 126 PC Card checklist 176 computer stops working 177 configuring 118 errors 177 hot swapping fails 177 inserting 117 not recognized 177 problem solving 176 removing 118 setting up 118 port Ethernet LAN 108 RGB 57 power computer will not start 161 connecting cable...
User Guide
Page 226
... battery power 88 S safety computer 104 disposing of batteries 103 icons 28 precautions 31 saving files 82 screen blank 171 does not look normal/flickers 171 rotating 71 secondary button 57 set up communications 108 setting up adding memory 40 computer 33, 41 Sleep mode 63 hot key 199 starting again from 71 sound problem solving 175 sounds recording 112 speakers using external 113 start button 107 Start Search field 82 starting...
... battery power 88 S safety computer 104 disposing of batteries 103 icons 28 precautions 31 saving files 82 screen blank 171 does not look normal/flickers 171 rotating 71 secondary button 57 set up communications 108 setting up adding memory 40 computer 33, 41 Sleep mode 63 hot key 199 starting again from 71 sound problem solving 175 sounds recording 112 speakers using external 113 start button 107 Start Search field 82 starting...


