
User Guide
Page 5
... a complaint with the best service it can. If trouble is experienced with this change. Fax Branding The Telephone Consumer Protection Act of your right to make any message unless such message clearly contains in writing, to allow you should ever decide to permanently disconnect your fax transmission, refer to the fax software instructions installed on the first page...
... a complaint with the best service it can. If trouble is experienced with this change. Fax Branding The Telephone Consumer Protection Act of your right to make any message unless such message clearly contains in writing, to allow you should ever decide to permanently disconnect your fax transmission, refer to the fax software instructions installed on the first page...
User Guide
Page 29
... Removing a memory module 56 Checking total memory 57 Hard Drive Recovery Utilities 57 Creating Recovery CDs/DVDs 58 Hard Disk Drive Recovery options 60 Hard Disk Drive Recovery using the Recovery media 64 Installing drivers and applications 65 Using the TouchPad 65 Scrolling with the TouchPad 66 Control buttons 66 Disabling or enabling the TouchPad 66 Using external display devices 67 Directing the display output when you turn on the computer 67 Adjusting the quality of the external display......68 Using an external keyboard 68 Using a mouse 68 Connecting a printer 69 Setting...
... Removing a memory module 56 Checking total memory 57 Hard Drive Recovery Utilities 57 Creating Recovery CDs/DVDs 58 Hard Disk Drive Recovery options 60 Hard Disk Drive Recovery using the Recovery media 64 Installing drivers and applications 65 Using the TouchPad 65 Scrolling with the TouchPad 66 Control buttons 66 Disabling or enabling the TouchPad 66 Using external display devices 67 Directing the display output when you turn on the computer 67 Adjusting the quality of the external display......68 Using an external keyboard 68 Using a mouse 68 Connecting a printer 69 Setting...
User Guide
Page 51
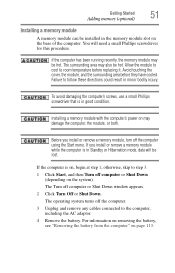
... remove a memory module while the computer is in the memory module slot on the base of the computer. The Turn off the computer using the Start menu. The surrounding area may be hot. Avoid touching the cover, the module, and the surrounding area before replacing it. Installing a memory module with the computer's power on page 113. otherwise, skip to step 3. 1 Click Start, and then Turn off the computer. 3 Unplug and remove any cables connected...
... remove a memory module while the computer is in the memory module slot on the base of the computer. The Turn off the computer using the Start menu. The surrounding area may be hot. Avoid touching the cover, the module, and the surrounding area before replacing it. Installing a memory module with the computer's power on page 113. otherwise, skip to step 3. 1 Click Start, and then Turn off the computer. 3 Unplug and remove any cables connected...
User Guide
Page 55
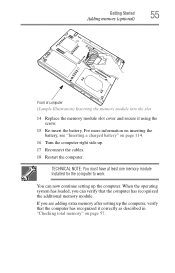
... memory module. If you can now continue setting up the computer. You can verify that the computer has recognized it using the screw. 15 Re-insert the battery. Getting Started 55 Adding memory (optional) Front of computer (Sample Illustration) Inserting the memory module into the slot 14 Replace the memory module slot cover and secure it correctly as described in "Checking total memory" on page 114. 16 Turn...
... memory module. If you can now continue setting up the computer. You can verify that the computer has recognized it using the screw. 15 Re-insert the battery. Getting Started 55 Adding memory (optional) Front of computer (Sample Illustration) Inserting the memory module into the slot 14 Replace the memory module slot cover and secure it correctly as described in "Checking total memory" on page 114. 16 Turn...
User Guide
Page 56
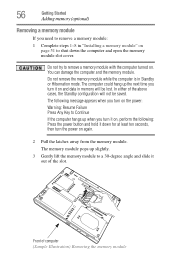
... the computer and open the memory module slot cover. In either of computer (Sample Illustration) Removing the memory module Do not remove the memory module while the computer is in Standby or Hibernation mode. The following message appears when you turn on the power: Warning: Resume Failure Press Any Key to Continue If the computer hangs up slightly. 3 Gently lift the memory module to remove a memory module with the computer...
... the computer and open the memory module slot cover. In either of computer (Sample Illustration) Removing the memory module Do not remove the memory module while the computer is in Standby or Hibernation mode. The following message appears when you turn on the power: Warning: Resume Failure Press Any Key to Continue If the computer hangs up slightly. 3 Gently lift the memory module to remove a memory module with the computer...

User Guide
Page 57
... up . 7 Reconnect the cables. 8 Restart the computer. For more information on inserting the battery, see "Creating Recovery CDs/DVDs" on certain models) Your computer has been configured with the socket latches. Hard Drive Recovery Utilities (Available on page 58. Checking total memory When you add or remove a memory module, you to work. Getting Started 57 Hard Drive Recovery Utilities 4 Replace the memory module slot cover and secure it using your hard disk drive or reinstall selected applications and software features or...
... up . 7 Reconnect the cables. 8 Restart the computer. For more information on inserting the battery, see "Creating Recovery CDs/DVDs" on certain models) Your computer has been configured with the socket latches. Hard Drive Recovery Utilities (Available on page 58. Checking total memory When you add or remove a memory module, you to work. Getting Started 57 Hard Drive Recovery Utilities 4 Replace the memory module slot cover and secure it using your hard disk drive or reinstall selected applications and software features or...

User Guide
Page 60
... recover your hard disk drive using the Hard Drive Recovery partition to the factory-set default, or recovering just your C: drive and leaving other partitions (for example, a D: drive) intact, or changing the size of your keyboard while powering on , the Toshiba Recovery Wizard screen displays. (Sample Image) Toshiba Recovery Wizard screen 60 Getting Started Hard Drive Recovery Utilities Hard Disk Drive Recovery options The following are the available hard disk drive recovery options: ❖ Hard Disk Drive Recovery using the recovery partition ❖ Recovering the original factory...
... recover your hard disk drive using the Hard Drive Recovery partition to the factory-set default, or recovering just your C: drive and leaving other partitions (for example, a D: drive) intact, or changing the size of your keyboard while powering on , the Toshiba Recovery Wizard screen displays. (Sample Image) Toshiba Recovery Wizard screen 60 Getting Started Hard Drive Recovery Utilities Hard Disk Drive Recovery options The following are the available hard disk drive recovery options: ❖ Hard Disk Drive Recovery using the recovery partition ❖ Recovering the original factory...
User Guide
Page 123
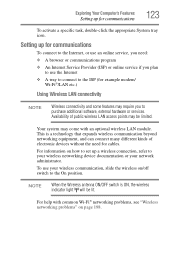
...® networking problems, see "Wireless networking problems" on /off switch to purchase additional software, external hardware or services. NOTE When the Wireless antenna ON/OFF switch is a technology that expands wireless communication beyond networking equipment, and can connect many different kinds of public wireless LAN access points may require you plan to use your network administrator. For help with an optional wireless LAN module. Setting up for example modem/ Wi-Fi®/LAN etc.) Using Wireless LAN connectivity NOTE Wireless connectivity and...
...® networking problems, see "Wireless networking problems" on /off switch to purchase additional software, external hardware or services. NOTE When the Wireless antenna ON/OFF switch is a technology that expands wireless communication beyond networking equipment, and can connect many different kinds of public wireless LAN access points may require you plan to use your network administrator. For help with an optional wireless LAN module. Setting up for example modem/ Wi-Fi®/LAN etc.) Using Wireless LAN connectivity NOTE Wireless connectivity and...
User Guide
Page 152
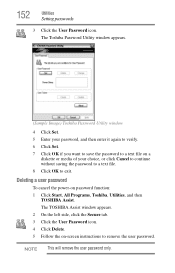
... saving the password to a text file. 8 Click OK to remove the user password. Deleting a user password To cancel the power-on -screen instructions to exit. The TOSHIBA Assist window appears. 2 On the left side, click the Secure tab. 3 Click the User Password icon. 4 Click Delete. 5 Follow the on password function: 1 Click Start, All Programs, Toshiba, Utilities, and then TOSHIBA Assist. 152 Utilities Setting passwords 3 Click the User Password icon. NOTE This will remove the user password only.
... saving the password to a text file. 8 Click OK to remove the user password. Deleting a user password To cancel the power-on -screen instructions to exit. The TOSHIBA Assist window appears. 2 On the left side, click the Secure tab. 3 Click the User Password icon. 4 Click Delete. 5 Follow the on password function: 1 Click Start, All Programs, Toshiba, Utilities, and then TOSHIBA Assist. 152 Utilities Setting passwords 3 Click the User Password icon. NOTE This will remove the user password only.
User Guide
Page 166
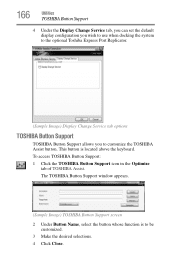
.... To access TOSHIBA Button Support: 1 Click the TOSHIBA Button Support icon in the Optimize tab of TOSHIBA Assist. The TOSHIBA Button Support window appears. (Sample Image) TOSHIBA Button Support screen 2 Under Button Name, select the button whose function is located above the keyboard. 166 Utilities TOSHIBA Button Support 4 Under the Display Change Service tab, you can set the default display configuration you wish to use when docking the system to the optional Toshiba Express Port Replicator. (Sample Image) Display Change Service tab options TOSHIBA Button Support TOSHIBA Button Support...
.... To access TOSHIBA Button Support: 1 Click the TOSHIBA Button Support icon in the Optimize tab of TOSHIBA Assist. The TOSHIBA Button Support window appears. (Sample Image) TOSHIBA Button Support screen 2 Under Button Name, select the button whose function is located above the keyboard. 166 Utilities TOSHIBA Button Support 4 Under the Display Change Service tab, you can set the default display configuration you wish to use when docking the system to the optional Toshiba Express Port Replicator. (Sample Image) Display Change Service tab options TOSHIBA Button Support TOSHIBA Button Support...
User Guide
Page 181
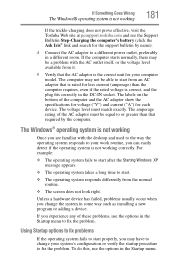
... is correct, and the plug fits correctly in the Startup menu to start from an AC adaptor that required by name). 4 Connect the AC adaptor to your computer model. If Something Goes Wrong The Windows® operating system is not working correctly. The labels on the bottom of these problems, use the options in some way such as installing a new program or adding a device.
... is correct, and the plug fits correctly in the Startup menu to start from an AC adaptor that required by name). 4 Connect the AC adaptor to your computer model. If Something Goes Wrong The Windows® operating system is not working correctly. The labels on the bottom of these problems, use the options in some way such as installing a new program or adding a device.
User Guide
Page 189
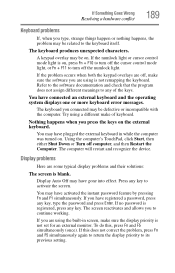
... device. The keyboard produces unexpected characters. The keyboard you press the keys on , press Fn + F10 to turn off the cursor control mode light, or Fn + F11 to continue working. Try using the built-in while the computer was turned on . Nothing happens when you connected may be related to its previous setting. Display Auto Off may have gone into effect. You may have activated...
... device. The keyboard produces unexpected characters. The keyboard you press the keys on , press Fn + F10 to turn off the cursor control mode light, or Fn + F11 to continue working. Try using the built-in while the computer was turned on . Nothing happens when you connected may be related to its previous setting. Display Auto Off may have gone into effect. You may have activated...
User Guide
Page 197
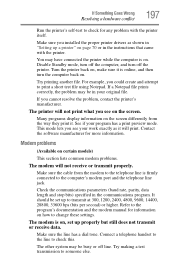
... bits) specified in the instructions that came with the printer itself. Make sure you installed the proper printer drivers as it . Disable Standby mode, turn off the computer, and turn the computer back on . Many programs display information on the screen differently from the modem to the telephone line is on . Contact the software manufacturer for any problem with the printer. The...
... bits) specified in the instructions that came with the printer itself. Make sure you installed the proper printer drivers as it . Disable Standby mode, turn off the computer, and turn the computer back on . Many programs display information on the screen differently from the modem to the telephone line is on . Contact the software manufacturer for any problem with the printer. The...
User Guide
Page 205
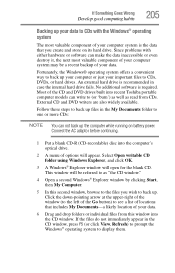
... Open writable CD folder using Windows Explorer, and click OK. 3 A Windows® Explorer window will be a recent backup of your data. External CD and DVD writers are also widely available. An external hard drive is required. Since problems with the Windows® operating system The most valuable component of your computer system may be referred to as "the CD window." 4 Open a second Windows® Explorer window by clicking Start...
... Open writable CD folder using Windows Explorer, and click OK. 3 A Windows® Explorer window will be a recent backup of your data. External CD and DVD writers are also widely available. An external hard drive is required. Since problems with the Windows® operating system The most valuable component of your computer system may be referred to as "the CD window." 4 Open a second Windows® Explorer window by clicking Start...
User Guide
Page 230
...® profiles are useful for easily switching network settings and devices.You can be saved (or "captured") in "profiles." If you visit a client company occasionally, for example, you enable or disable settings of wired and wireless network devices, infrared devices, and set up connection settings for the default connection ❖ File and printer sharing settings ❖ Printer settings for the default printer ❖ Bluetooth® Security Level (for Internet connections ❖ Dial-up...
...® profiles are useful for easily switching network settings and devices.You can be saved (or "captured") in "profiles." If you visit a client company occasionally, for example, you enable or disable settings of wired and wireless network devices, infrared devices, and set up connection settings for the default connection ❖ File and printer sharing settings ❖ Printer settings for the default printer ❖ Bluetooth® Security Level (for Internet connections ❖ Dial-up...

User Guide
Page 248
... keys in combination with any device to create a complete screen image. internal device - See also World Wide Web. Memory cache built into memory for processing. liquid crystal display (LCD) - Interlaced monitors take two passes to interact with the Fn key can set system options or control system parameters, such as the battery save mode. (2) A key or combination of keys that you use to perform a task instead of using a pointing device such as a hard disk...
... keys in combination with any device to create a complete screen image. internal device - See also World Wide Web. Memory cache built into memory for processing. liquid crystal display (LCD) - Interlaced monitors take two passes to interact with the Fn key can set system options or control system parameters, such as the battery save mode. (2) A key or combination of keys that you use to perform a task instead of using a pointing device such as a hard disk...

User Guide
Page 254
... up files 84 battery alarms 110 changing 112 charge indicator light 47, 107 charge not lasting 188 charging 45, 47 conserving power 110 disposal 118 low charge 109 monitoring power 47, 107 254 not charging 187 power profile 214 power profile hot key 112 real-time clock (RTC) 104 removing 113 BIOS Setup see TOSHIBA Hardware Setup Bridge Media Adapter inserting memory media 137 removing memory media 138 button power 50, 59 start 122 C CD creating 100 playing an audio 98 CD, using 94 channels...
... up files 84 battery alarms 110 changing 112 charge indicator light 47, 107 charge not lasting 188 charging 45, 47 conserving power 110 disposal 118 low charge 109 monitoring power 47, 107 254 not charging 187 power profile 214 power profile hot key 112 real-time clock (RTC) 104 removing 113 BIOS Setup see TOSHIBA Hardware Setup Bridge Media Adapter inserting memory media 137 removing memory media 138 button power 50, 59 start 122 C CD creating 100 playing an audio 98 CD, using 94 channels...
User Guide
Page 255
... a power source 45 connection set up 124 control buttons 66 Ctrl keys 86 D desktop creating new icon 121 major features 121 desktop exploration 120 desktop icons 121 Device Manager 185 checking properties 186 disabling a device 185 devices keyboard 68 mouse 68 Disk Defragmenter 192 disk drive corrupted/damaged data files 192 missing files/trouble accessing a disk 191 running slow 192 diskette drive cannot insert a diskette 192 cannot read a diskette 193 connecting 71 external, connecting 71 display...
... a power source 45 connection set up 124 control buttons 66 Ctrl keys 86 D desktop creating new icon 121 major features 121 desktop exploration 120 desktop icons 121 Device Manager 185 checking properties 186 disabling a device 185 devices keyboard 68 mouse 68 Disk Defragmenter 192 disk drive corrupted/damaged data files 192 missing files/trouble accessing a disk 191 running slow 192 diskette drive cannot insert a diskette 192 cannot read a diskette 193 connecting 71 external, connecting 71 display...
User Guide
Page 257
... J jack RJ-11 125 K keyboard character keys 85 function keys 86 hot keys 218 not working 179 overlay keys 87 troubleshooting 189 using 85 Windows® special keys 86 keyboard, external 68 keyboard, full-size 85 L lock computer, using 81 M memory adding 50 problem solving 186 removing memory module slot cover 52 memory module inserting 53 installation 51 removing 56 memory module slot 52 microphone 129 modem connecting to telephone line 124 problem solving 197 monitor 67 connecting 67 not working 190 mouse installing 68 mouse utility 161 N network accessing 124 Dial-Up Networking Wizard...
... J jack RJ-11 125 K keyboard character keys 85 function keys 86 hot keys 218 not working 179 overlay keys 87 troubleshooting 189 using 85 Windows® special keys 86 keyboard, external 68 keyboard, full-size 85 L lock computer, using 81 M memory adding 50 problem solving 186 removing memory module slot cover 52 memory module inserting 53 installation 51 removing 56 memory module slot 52 microphone 129 modem connecting to telephone line 124 problem solving 197 monitor 67 connecting 67 not working 190 mouse installing 68 mouse utility 161 N network accessing 124 Dial-Up Networking Wizard...

User Guide
Page 258
... Device Manager 185 disabling a device 185 disk drive is slow 192 display is blank 189 external display not working 191 external monitor 190 faulty memory 186 hardware conflict 183, 184 high-pitched noise 194 illegal operation 178 Internet bookmarked site not found 183 Internet connection is slow 182 keyboard not responding 179 missing files/trouble accessing a disk 191 modem not receiving or transmitting 197 no sound 194 non-system disk or disk error 180, 193 PC Card...
... Device Manager 185 disabling a device 185 disk drive is slow 192 display is blank 189 external display not working 191 external monitor 190 faulty memory 186 hardware conflict 183, 184 high-pitched noise 194 illegal operation 178 Internet bookmarked site not found 183 Internet connection is slow 182 keyboard not responding 179 missing files/trouble accessing a disk 191 modem not receiving or transmitting 197 no sound 194 non-system disk or disk error 180, 193 PC Card...


