User Manual
Page 15
...'s Manual xv A caution informs you that improper use two or more keys. A note is represented in is a hint or advice that appear on its display screen are to type in the typeface you see to the left . Messages Messages are used in this manual to bring important information to your attention...
...'s Manual xv A caution informs you that improper use two or more keys. A note is represented in is a hint or advice that appear on its display screen are to type in the typeface you see to the left . Messages Messages are used in this manual to bring important information to your attention...
User Manual
Page 24
... batteries when they are low. The universal AC adaptor provides power to your computer through the ports. Because it can receive a range of the on-screen pointer. L300/L300D series Pointing device Built-in A touchpad and control buttons in the palm rest enable control of AC voltage between 100 and 240...
... batteries when they are low. The universal AC adaptor provides power to your computer through the ports. Because it can receive a range of the on-screen pointer. L300/L300D series Pointing device Built-in A touchpad and control buttons in the palm rest enable control of AC voltage between 100 and 240...
User Manual
Page 27
...modify the system configuration directly from an AC adaptor. L300/L300D series Special features The following features are either unique to TOSHIBA computers or are available to prevent unauthorized access to your computer. HDD automatic power off This feature automatically cuts off ... a time specified. Power is restored when the hard disk is integrated into the keyboard. Instant security A hot key function blanks the screen and disables the computer providing data security. Power-on using the keypad overlay. To access the Power Options, click Start -> Control Panel...
...modify the system configuration directly from an AC adaptor. L300/L300D series Special features The following features are either unique to TOSHIBA computers or are available to prevent unauthorized access to your computer. HDD automatic power off This feature automatically cuts off ... a time specified. Power is restored when the hard disk is integrated into the keyboard. Instant security A hot key function blanks the screen and disables the computer providing data security. Power-on using the keypad overlay. To access the Power Options, click Start -> Control Panel...
User Manual
Page 39
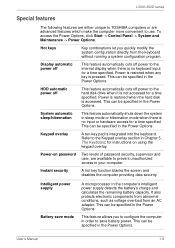
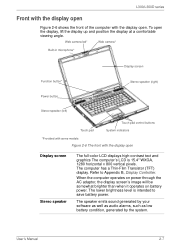
...is 15.4" WXGA, 1280 horizontal x 800 vertical pixels. Refer to save battery power. Web camera led* Web camera* Built-in microphone* Display screen Function button* Power button Stereo speaker (right) Stereo speaker (left) Touch pad Touch pad control buttons System indicators *Provided with some models Figure ... and position the display at a comfortable viewing angle. When the computer operates on power through the AC adaptor, the display screen's image will be somewhat brighter than when it operates on battery power. The computer has a Thin-Film Transistor (TFT) display. To open ...
...is 15.4" WXGA, 1280 horizontal x 800 vertical pixels. Refer to save battery power. Web camera led* Web camera* Built-in microphone* Display screen Function button* Power button Stereo speaker (right) Stereo speaker (left) Touch pad Touch pad control buttons System indicators *Provided with some models Figure ... and position the display at a comfortable viewing angle. When the computer operates on power through the AC adaptor, the display screen's image will be somewhat brighter than when it operates on battery power. The computer has a Thin-Film Transistor (TFT) display. To open ...
User Manual
Page 40
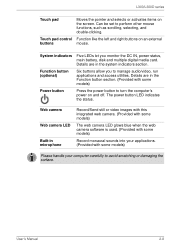
... power button LED indicates the status. Details are in the system indicators section. Touch pad control Function like the left and right buttons on the screen. Details are in the Function button section. (Provided with some models) Please handle your applications. (Provided with some models) Record monaural sounds into your computer...
... power button LED indicates the status. Details are in the system indicators section. Touch pad control Function like the left and right buttons on the screen. Details are in the Function button section. (Provided with some models) Please handle your applications. (Provided with some models) Record monaural sounds into your computer...
User Manual
Page 50
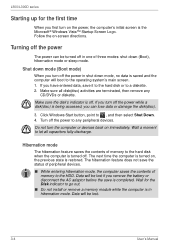
... computer is turned off . Hibernation mode The hibernation feature saves the contents of memory to the HDD. Data will boot to the operating system's main screen. 1. Follow the on , the previous state is restored. Turn off the power The power can lose data or damage the disk(disc). 3. Make ...sure all capacitors fully discharge. The next time the computer is turned on -screen directions. If you turn off the power while a disk(disc) is being accessed, you first turn the computer or devices back on the power,...
... computer is turned off . Hibernation mode The hibernation feature saves the contents of memory to the HDD. Data will boot to the operating system's main screen. 1. Follow the on , the previous state is restored. Turn off the power The power can lose data or damage the disk(disc). 3. Make ...sure all capacitors fully discharge. The next time the computer is turned on -screen directions. If you turn off the power while a disk(disc) is being accessed, you first turn the computer or devices back on the power,...
User Manual
Page 53
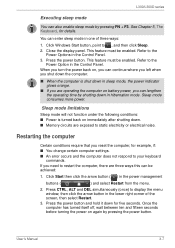
Refer to the Power Options in the Control Panel. 3. Sleep mode consumes more power. Click Start then click the arrow button ( ) in one of the screen, then select Restart. 3. User's Manual 3-7 This feature must be enabled. See Chapter 5, The Keyboard, for five seconds. You can enter sleep mode in the power ...
Refer to the Power Options in the Control Panel. 3. Sleep mode consumes more power. Click Start then click the arrow button ( ) in one of the screen, then select Restart. 3. User's Manual 3-7 This feature must be enabled. See Chapter 5, The Keyboard, for five seconds. You can enter sleep mode in the power ...
User Manual
Page 54
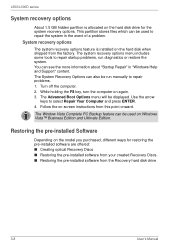
... can also be used to select Repair Your Computer and press ENTER. 4. Turn off the computer. 2. The Advanced Boot Options menu will be used on -screen instructions from this point onward. While holding the F8 key, turn the computer on the model you purchased, different ways for the system recovery options...
... can also be used to select Repair Your Computer and press ENTER. 4. Turn off the computer. 2. The Advanced Boot Options menu will be used on -screen instructions from this point onward. While holding the F8 key, turn the computer on the model you purchased, different ways for the system recovery options...
User Manual
Page 55
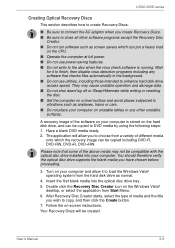
..., then disable virus detection programs including any other software programs except the Recovery Disc Creator. ■ Do not run software such as screen savers which the recovery image can be created. User's Manual 3-9 You should therefore verify the optical disc drive supports the blank media ...may not be copied to vibrations such as normal. 4. Have a blank DVD media ready. 2. Double click the Recovery Disc Creator icon on -screen instructions. Turn on your computer. Wait for it to load the Windows Vista® operating system from a variety of the above media may cause ...
..., then disable virus detection programs including any other software programs except the Recovery Disc Creator. ■ Do not run software such as screen savers which the recovery image can be created. User's Manual 3-9 You should therefore verify the optical disc drive supports the blank media ...may not be copied to vibrations such as normal. 4. Have a blank DVD media ready. 2. Double click the Recovery Disc Creator icon on -screen instructions. Turn on your computer. Wait for it to load the Windows Vista® operating system from a variety of the above media may cause ...
User Manual
Page 56
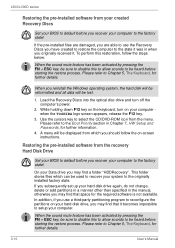
... factory state. If the pre-installed files are damaged, you are able to use a third-party partitioning program to reconfigure the partitions on -screen instructions. Load the Recovery Discs into the optical disc drive and turn on your hard disk drive again, do not change, delete or add ... it was in Chapter 7, HW Setup and Passwords, for the required software is not available. If you subsequently set up your computer when the TOSHIBA logo screen appears, release the F12 key. 3. When the sound mute feature has been activated by pressing the FN + ESC key, be sure to disable...
... factory state. If the pre-installed files are damaged, you are able to use a third-party partitioning program to reconfigure the partitions on -screen instructions. Load the Recovery Discs into the optical disc drive and turn on your hard disk drive again, do not change, delete or add ... it was in Chapter 7, HW Setup and Passwords, for the required software is not available. If you subsequently set up your computer when the TOSHIBA logo screen appears, release the F12 key. 3. When the sound mute feature has been activated by pressing the FN + ESC key, be sure to disable...

User Manual
Page 57
... to its factory state. Select your preferred keyboard layout and press Next. 5. Follow the on-screen instructions on the computer and when the TOSHIBA screen appears repeatedly press the F8 key. 3. Turn on the TOSHIBA HDD Recovery dialog. To access the recovery process please log on the System Recovery Options... screen. 7. Turn off the computer. 2. Click TOSHIBA HDD Recovery on as an enabled user with sufficent rights. 6. The computer will be displayed. Use the arrow keys to select ...
... to its factory state. Select your preferred keyboard layout and press Next. 5. Follow the on-screen instructions on the computer and when the TOSHIBA screen appears repeatedly press the F8 key. 3. Turn on the TOSHIBA HDD Recovery dialog. To access the recovery process please log on the System Recovery Options... screen. 7. Turn off the computer. 2. Click TOSHIBA HDD Recovery on as an enabled user with sufficent rights. 6. The computer will be displayed. Use the arrow keys to select ...
User Manual
Page 59
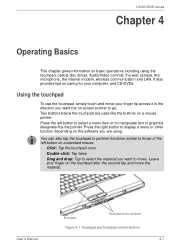
... a mouse pointer. Using the touchpad To use the touchpad, simply touch and move your finger tip across it in the direction you want the on-screen pointer to manipulate text or graphics designated by the pointer. Leave your computer, and CD/DVDs. Press the left button on a standard mouse. Double-click...
... a mouse pointer. Using the touchpad To use the touchpad, simply touch and move your finger tip across it in the direction you want the on-screen pointer to manipulate text or graphics designated by the pointer. Leave your computer, and CD/DVDs. Press the left button on a standard mouse. Double-click...
User Manual
Page 66
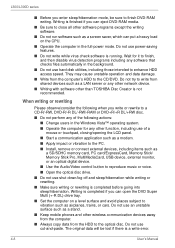
... going into sleep/hibernation. Do not use an unstable surface such as a LAN server or any other network device. ■ Writing with software other than TOSHIBA Disc Creator is finished if you write or rewrite to a CD-R/-RW, DVD-R/-R DL/-RW/-RAM or DVD+R/+R DL/+RW disc. ■ Do not perform... can eject DVD-RAM media. ■ Be sure to close all other software programs except the writing software. ■ Do not run software such as a screen saver, which can open the DVD Super Multi (+-R DL) drive tray. ■ Set the computer on the CPU. ■ Operate the computer in the full...
... going into sleep/hibernation. Do not use an unstable surface such as a LAN server or any other network device. ■ Writing with software other than TOSHIBA Disc Creator is finished if you write or rewrite to a CD-R/-RW, DVD-R/-R DL/-RW/-RAM or DVD+R/+R DL/+RW disc. ■ Do not perform... can eject DVD-RAM media. ■ Be sure to close all other software programs except the writing software. ■ Do not run software such as a screen saver, which can open the DVD Super Multi (+-R DL) drive tray. ■ Set the computer on the CPU. ■ Operate the computer in the full...
User Manual
Page 70
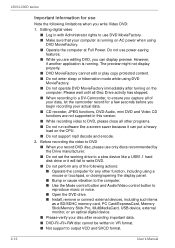
... written in with Administrator rights to use only discs recommended by the Drive manufacturer. ■ Do not set the working drive to a slow device like a screen saver because it can display preview. L300/L300D series Important information for use power-saving features. ■ While you are not supported in this version...
... written in with Administrator rights to use only discs recommended by the Drive manufacturer. ■ Do not set the working drive to a slow device like a screen saver because it can display preview. L300/L300D series Important information for use power-saving features. ■ While you are not supported in this version...
User Manual
Page 73
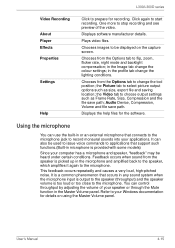
... microphone is picked up in the Master Volume panel. the Picture tab to prepare for recording. Displays the help files for details on the capture screen. This feedback occurs repeatedly and causes a very loud, high-pitched noise. One more to applications that connects to the microphone jack to start recording. It...
... microphone is picked up in the Master Volume panel. the Picture tab to prepare for recording. Displays the help files for details on the capture screen. This feedback occurs repeatedly and causes a very loud, high-pitched noise. One more to applications that connects to the microphone jack to start recording. It...
User Manual
Page 74
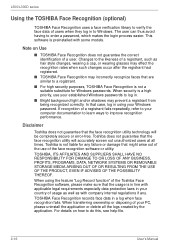
... your Windows password. This software is not a suitable substitute for any . When transferring ownership or disposing of the Toshiba Face Recognition software, please make sure that the face recognition utility technology will accurately screen out unauthorized users at all the logs created by the application. When using your established Windows passwords to...
... your Windows password. This software is not a suitable substitute for any . When transferring ownership or disposing of the Toshiba Face Recognition software, please make sure that the face recognition utility technology will accurately screen out unauthorized users at all the logs created by the application. When using your established Windows passwords to...
User Manual
Page 75
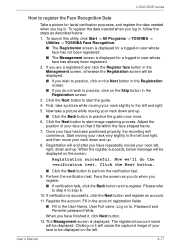
...step 8. 10. Fill in the account registration fields. ■ Fill in the Registration screen. 3. To launch this utility, click Start -> All Programs -> TOSHIBA -> Utilities -> TOSHIBA Face Recognition. ■ The Registration screen is displayed for a logged-in user whose face has already been registered. 2. User's...verification test. 9. If verification is displayed for a logged-in user whose face has not been registered. ■ The Management screen is successful, click the Next button and register an account. 11. Register the account. When you log in, follow the steps...
...step 8. 10. Fill in the account registration fields. ■ Fill in the Registration screen. 3. To launch this utility, click Start -> All Programs -> TOSHIBA -> Utilities -> TOSHIBA Face Recognition. ■ The Registration screen is displayed for a logged-in user whose face has already been registered. 2. User's...verification test. 9. If verification is displayed for a logged-in user whose face has not been registered. ■ The Management screen is successful, click the Next button and register an account. 11. Register the account. When you log in, follow the steps...
User Manual
Page 76
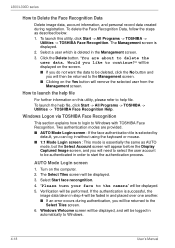
... is displayed. 2. If the authentication is essentially the same as described below: 1. Two authentication modes are about to the Management screen. ■ Clicking on this utility, click Start -> All Programs -> TOSHIBA -> Utilities -> TOSHIBA Face Recognition. will then be displayed. 5. To launch this utility, please refer to the camera" will be authenticated in and...
... is displayed. 2. If the authentication is essentially the same as described below: 1. Two authentication modes are about to the Management screen. ■ Clicking on this utility, click Start -> All Programs -> TOSHIBA -> Utilities -> TOSHIBA Face Recognition. will then be displayed. 5. To launch this utility, please refer to the camera" will be authenticated in and...
User Manual
Page 77
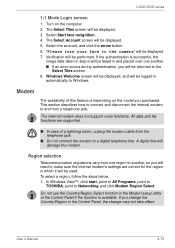
...model you purchased. Select Start face recignition. 4. The Select Account screen will damage the modem. A digital line will be displayed. 7. In Windows Vista™, click start, point to All Programs, point to TOSHIBA, point to the camera" will be displayed. 5. Do not use... is depending on the computer. 2. User's Manual 4-19 If you change may not take effect. L300/L300D series 1:1 Mode Login screen 1. Region selection Telecommunication regulations vary from one another , so you will be displayed. 3. Verification will be returned to and from the...
...model you purchased. Select Start face recignition. 4. The Select Account screen will damage the modem. A digital line will be displayed. 7. In Windows Vista™, click start, point to All Programs, point to TOSHIBA, point to the camera" will be displayed. 5. Do not use... is depending on the computer. 2. User's Manual 4-19 If you change may not take effect. L300/L300D series 1:1 Mode Login screen 1. Region selection Telecommunication regulations vary from one another , so you will be displayed. 3. Verification will be returned to and from the...
User Manual
Page 83
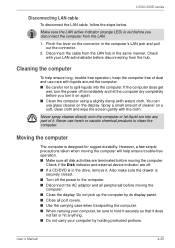
... the computer will help ensure long, trouble-free operation, keep the computer free of it . Pinch the lever on a soft, clean cloth and wipe the screen gently with your computer by its display panel. ■ Close all port covers. ■ Use the carrying case when transporting the computer. ■ When carrying...
... the computer will help ensure long, trouble-free operation, keep the computer free of it . Pinch the lever on a soft, clean cloth and wipe the screen gently with your computer by its display panel. ■ Close all port covers. ■ Use the carrying case when transporting the computer. ■ When carrying...


