
User Guide
Page 10
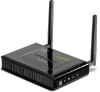
Click Setup Wizard button. 3. Read the License Agreement and click Next to continue the installation. Page 10 The Welcome screen appears on your CD-ROM drive. 2. Getting Started For a typical wireless setup at home or office, please do the following: 1. Insert Setup Wizard CD into your monitor.
Click Setup Wizard button. 3. Read the License Agreement and click Next to continue the installation. Page 10 The Welcome screen appears on your CD-ROM drive. 2. Getting Started For a typical wireless setup at home or office, please do the following: 1. Insert Setup Wizard CD into your monitor.
User Guide
Page 20
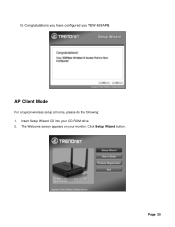
The Welcome screen appears on your CD-ROM drive. 2. Click Setup Wizard button. AP Client Mode For a typical wireless setup at home, please do the following: 1. Insert Setup Wizard CD into your monitor. Page 20 Congratulations you have configured you TEW-638APB. 15.
The Welcome screen appears on your CD-ROM drive. 2. Click Setup Wizard button. AP Client Mode For a typical wireless setup at home, please do the following: 1. Insert Setup Wizard CD into your monitor. Page 20 Congratulations you have configured you TEW-638APB. 15.

Quick Installation Guide
Page 4
The best place for the Access Point. Insert Driver CD-ROM. 2. Click Setup Wizard. 4. Click I accept the terms in the License Agreement and then click Next. 2 English Click Run Setup.exe (Windows Vista only) 3. For Windows Users 1. Hardware Installation Note: 1: Locate an optimum location for the Access Point is usually at the center of your wireless network. 2: Disable any anti-virus and firewall programs before starting hardware installation. 2.
The best place for the Access Point. Insert Driver CD-ROM. 2. Click Setup Wizard. 4. Click I accept the terms in the License Agreement and then click Next. 2 English Click Run Setup.exe (Windows Vista only) 3. For Windows Users 1. Hardware Installation Note: 1: Locate an optimum location for the Access Point is usually at the center of your wireless network. 2: Disable any anti-virus and firewall programs before starting hardware installation. 2.


