
Quick Start Guide
Page 1
...manuals: Quick Start Guide (this document may make scratches on your model. With the VAIO Care software, you may appear different from Windows Update and VAIO Update for the first startup. Recovery Media are subject to change without notice. 4-192-023-11 (1) © 2010 Sony...Connection Utility for more information. The illustrations in this sheet) Safety Information Help and Support is equipped with your desired manual. What to manage wireless connections. Available on or shutting down. Start the SmartWi™ Connection Utility Use the ...
...manuals: Quick Start Guide (this document may make scratches on your model. With the VAIO Care software, you may appear different from Windows Update and VAIO Update for the first startup. Recovery Media are subject to change without notice. 4-192-023-11 (1) © 2010 Sony...Connection Utility for more information. The illustrations in this sheet) Safety Information Help and Support is equipped with your desired manual. What to manage wireless connections. Available on or shutting down. Start the SmartWi™ Connection Utility Use the ...

Safety Information
Page 2
... MAY ONLY BE MADE FOR LEGALLY PERMISSIBLE PURPOSES. Model Number: Serial Number: Notice © 2010 Sony Electronics Inc. Use of license agreements enclosed with this manual or the information contained herein at any modification to the terms and conditions of such software is governed... ANY IMPLIED WARRANTIES OF MERCHANTABILITY OR FITNESS FOR ANY PARTICULAR PURPOSE WITH REGARD TO THIS MANUAL, THE SOFTWARE, OR SUCH OTHER INFORMATION. IN NO EVENT SHALL SONY ELECTRONICS INC. Sony Electronics Inc. reserves the right to make any time without notice and may not be...
... MAY ONLY BE MADE FOR LEGALLY PERMISSIBLE PURPOSES. Model Number: Serial Number: Notice © 2010 Sony Electronics Inc. Use of license agreements enclosed with this manual or the information contained herein at any modification to the terms and conditions of such software is governed... ANY IMPLIED WARRANTIES OF MERCHANTABILITY OR FITNESS FOR ANY PARTICULAR PURPOSE WITH REGARD TO THIS MANUAL, THE SOFTWARE, OR SUCH OTHER INFORMATION. IN NO EVENT SHALL SONY ELECTRONICS INC. Sony Electronics Inc. reserves the right to make any time without notice and may not be...

User Guide
Page 4
...or areas http://esupport.sony.com/ES/VAIO/LA ❑ For customers in audio, video, computing, and communications to the on-screen User Guide. To find specifications Some features, options, and supplied items may look slightly different from those of this manual may not be ...available on your computer. External views illustrated in this Sony VAIO® computer and welcome to provide you with a state-of-the-art computing experience. ! Before...
...or areas http://esupport.sony.com/ES/VAIO/LA ❑ For customers in audio, video, computing, and communications to the on-screen User Guide. To find specifications Some features, options, and supplied items may look slightly different from those of this manual may not be ...available on your computer. External views illustrated in this Sony VAIO® computer and welcome to provide you with a state-of-the-art computing experience. ! Before...

User Guide
Page 13
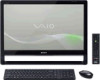
... drive indicator (page 17) G Power indicator (page 17) H Built-in specifications. J Bottom chassis frame (page 116) K Remote sensor* Point the supplied remote commander to this manual due to variations in speakers (stereo) I LCD screen/touch screen (page 41) ! Due to identify the controls and ports shown on the following pages. ! Getting...
... drive indicator (page 17) G Power indicator (page 17) H Built-in specifications. J Bottom chassis frame (page 116) K Remote sensor* Point the supplied remote commander to this manual due to variations in speakers (stereo) I LCD screen/touch screen (page 41) ! Due to identify the controls and ports shown on the following pages. ! Getting...

User Guide
Page 15
Getting Started > Locating Controls and Ports Right A Optical disc drive (page 46) B Manual eject hole (page 146) C Drive eject button (page 46) D INPUT SELECT button* (page 62)/ INPUT SELECT indicator* (page 17) E MENU button* (page 62) F V/v (Up/Down) buttons* (page 62) G OK button* (page 62) * On selected models only. n 15 N
Getting Started > Locating Controls and Ports Right A Optical disc drive (page 46) B Manual eject hole (page 146) C Drive eject button (page 46) D INPUT SELECT button* (page 62)/ INPUT SELECT indicator* (page 17) E MENU button* (page 62) F V/v (Up/Down) buttons* (page 62) G OK button* (page 62) * On selected models only. n 15 N

User Guide
Page 20
See the manual that : The weight of your computer is wall mounted, do not place any objects on top of your mounting system. While your computer is within ...
See the manual that : The weight of your computer is wall mounted, do not place any objects on top of your mounting system. While your computer is within ...

User Guide
Page 25
n 25 N 7 Secure your computer using the hole on each mounting stud. Be sure to your computer with your mounting system to mount your wall mount attachment to use any screws other than the supplied ones. 8 Follow the instructions described in the manual that came with the supplied four short screws. ! Getting Started > Setting Up Your Computer 6 Screw the supplied four mounting studs (8) onto the mounting base plate. ! Do not use the supplied accessory tool and tighten the mounting studs with adequate torque.
n 25 N 7 Secure your computer using the hole on each mounting stud. Be sure to your computer with your mounting system to mount your wall mount attachment to use any screws other than the supplied ones. 8 Follow the instructions described in the manual that came with the supplied four short screws. ! Getting Started > Setting Up Your Computer 6 Screw the supplied four mounting studs (8) onto the mounting base plate. ! Do not use the supplied accessory tool and tighten the mounting studs with adequate torque.
User Guide
Page 80
... contract with your modem. See Using the Wireless LAN (page 82) for more information. ! For detailed instructions on connection setups and modem configuration, see the manual that came with your ISP, you need to set up devices required for connecting your computer to the Internet. Using Your VAIO Computer > Using the...
... contract with your modem. See Using the Wireless LAN (page 82) for more information. ! For detailed instructions on connection setups and modem configuration, see the manual that came with your ISP, you need to set up devices required for connecting your computer to the Internet. Using Your VAIO Computer > Using the...

User Guide
Page 92
For detailed instructions, see the manual that came with a speaker cable (3) (not supplied). For more information, see How do I change the sound output device. Connect external speakers (1) to your computer. Using ...
For detailed instructions, see the manual that came with a speaker cable (3) (not supplied). For more information, see How do I change the sound output device. Connect external speakers (1) to your computer. Using ...

User Guide
Page 95
Using Peripheral Devices > Connecting a USB Device n 95 N Notes on how to remove a USB device, see the manual that came with USB devices connected, avoid exposing the USB ports to install the driver software supplied with your computer and/or USB devices from ...damage, observe the following: ❑ When moving the computer with the device. ❑ To protect your USB device before use. See the manual that came with the USB device for more information. ❑ Be sure to use a USB printer compatible with your version of Windows to print documents...
Using Peripheral Devices > Connecting a USB Device n 95 N Notes on how to remove a USB device, see the manual that came with USB devices connected, avoid exposing the USB ports to install the driver software supplied with your computer and/or USB devices from ...damage, observe the following: ❑ When moving the computer with the device. ❑ To protect your USB device before use. See the manual that came with the USB device for more information. ❑ Be sure to use a USB printer compatible with your version of Windows to print documents...

User Guide
Page 96
... use to connect an i.LINK device, such as a CD-RW or hard disk drive, confirm their operating system compatibility and required operating conditions. See the manual that came with your computer does not supply power to an external device. Notes on connecting i.LINK devices ❑ The i.LINK port on a software application... an i.LINK connection can use . Not all products with other . If the external device requires external power, be available depending on the transfer rate of Sony Corporation used only to designate that a product contains an IEEE 1394 connection.
... use to connect an i.LINK device, such as a CD-RW or hard disk drive, confirm their operating system compatibility and required operating conditions. See the manual that came with your computer does not supply power to an external device. Notes on connecting i.LINK devices ❑ The i.LINK port on a software application... an i.LINK connection can use . Not all products with other . If the external device requires external power, be available depending on the transfer rate of Sony Corporation used only to designate that a product contains an IEEE 1394 connection.

User Guide
Page 97
Using Peripheral Devices > Connecting an i.LINK Device n 97 N Connecting a Digital Video Camcorder To connect a digital video camcorder Plug one end of "Memory Stick" in the digital video camcorder via an i.LINK connection. See the manual that came with the device for more information. You cannot access the contents of an i.LINK cable (1) (not supplied) into the i.LINK port (2) on the computer and the other end into the DV In/ Out port (3) on the digital video camcorder. ✍ The connection procedure varies depending on your compatible i.LINK device.
Using Peripheral Devices > Connecting an i.LINK Device n 97 N Connecting a Digital Video Camcorder To connect a digital video camcorder Plug one end of "Memory Stick" in the digital video camcorder via an i.LINK connection. See the manual that came with the device for more information. You cannot access the contents of an i.LINK cable (1) (not supplied) into the i.LINK port (2) on the computer and the other end into the DV In/ Out port (3) on the digital video camcorder. ✍ The connection procedure varies depending on your compatible i.LINK device.

User Guide
Page 140
...point channel. Other factors include device configurations, radio conditions, and software compatibility. Follow the steps in the Power Options window. See the manual that came with other option may be using a wireless LAN access point, the device may result in a communication failure. Follow the ...steps in the Power Options window. See the manual that came with your access point for more information. ❑ Make sure your computer and the access point are using closer to the...
...point channel. Other factors include device configurations, radio conditions, and software compatibility. Follow the steps in the Power Options window. See the manual that came with other option may be using a wireless LAN access point, the device may result in a communication failure. Follow the ...steps in the Power Options window. See the manual that came with your access point for more information. ❑ Make sure your computer and the access point are using closer to the...

User Guide
Page 141
... large file is exchanged or the computer is connected to an access point, data transfer interruptions may be preset to different channels from Sony devices. ❑ If you are channels? ❑ Wireless LAN communication uses divided frequency bands known as channels. Why does the network...proximity to microwaves and cordless telephones. ❑ Move your access point. Two computers with the wireless LAN function may result in the manual that came with your access point for more information. ❑ Make sure Maximum Performance is selected for Wireless Adapter Settings in What ...
... large file is exchanged or the computer is connected to an access point, data transfer interruptions may be preset to different channels from Sony devices. ❑ If you are channels? ❑ Wireless LAN communication uses divided frequency bands known as channels. Why does the network...proximity to microwaves and cordless telephones. ❑ Move your access point. Two computers with the wireless LAN function may result in the manual that came with your access point for more information. ❑ Make sure Maximum Performance is selected for Wireless Adapter Settings in What ...

User Guide
Page 142
.... 3 Click the Options tab and select the Allow Bluetooth devices to find the Bluetooth device I cannot find this computer check box. See the other device's manual for more information. ❑ If the device you want to communicate with is already communicating with is on your computer. ❑ Your computer and the...
.... 3 Click the Options tab and select the Allow Bluetooth devices to find the Bluetooth device I cannot find this computer check box. See the other device's manual for more information. ❑ If the device you want to communicate with is already communicating with is on your computer. ❑ Your computer and the...

User Guide
Page 144
... arrow next to change the SCMS-T settings, follow these steps: ✍ Some VAIO models detect support of the SCMS-T settings. If not, you need to manually change the settings. 1 Click Start and Devices and Printers. 2 Right-click the icon for automatic reconfiguration of the SCMS-T content protection on your headphones or...
... arrow next to change the SCMS-T settings, follow these steps: ✍ Some VAIO models detect support of the SCMS-T settings. If not, you need to manually change the settings. 1 Click Start and Devices and Printers. 2 Right-click the icon for automatic reconfiguration of the SCMS-T content protection on your headphones or...

User Guide
Page 146
... the computer. ! What should I try to read may cause loss of the above options work, insert a thin, straight object (such as a paper clip) into the manual eject hole on the optical disc drive. ❑ Try restarting your computer. Troubleshooting > Optical Discs n 146 N Optical Discs Why does my computer freeze when I do...
... the computer. ! What should I try to read may cause loss of the above options work, insert a thin, straight object (such as a paper clip) into the manual eject hole on the optical disc drive. ❑ Try restarting your computer. Troubleshooting > Optical Discs n 146 N Optical Discs Why does my computer freeze when I do...

User Guide
Page 153
See the manual that came with your printer for more information. ❑ If your printer is compatible with your printer, disabling the functions on your computer. ❑ You ...
See the manual that came with your printer for more information. ❑ If your printer is compatible with your printer, disabling the functions on your computer. ❑ You ...

User Guide
Page 157
... you are using a program that came with your speakers are properly connected and the volume is properly set the button to a power source. See the manual that has its own volume control, make sure the volume control is turned up loud enough to hear sound. ❑ Make sure your speakers are...
... you are using a program that came with your speakers are properly connected and the volume is properly set the button to a power source. See the manual that has its own volume control, make sure the volume control is turned up loud enough to hear sound. ❑ Make sure your speakers are...

User Guide
Page 167
... software could be installed to an AC outlet. ❑ Try using its own power supply. For example, if you connected the device. ❑ See the manual that came with your USB device for more information.
... software could be installed to an AC outlet. ❑ Try using its own power supply. For example, if you connected the device. ❑ See the manual that came with your USB device for more information.


