
User Guide
Page 7
.../ ❑ For customers in Spanish-speaking Latin American countries or areas http://esupport.sony.com/ES/VAIO/LA ❑ For customers in Brazil http://esupport.sony.com/BR/ ❑ Operating system online support web site Your computer comes preinstalled with a Microsoft Windows operating system. For operating system support, you can visit Microsoft customer support...
.../ ❑ For customers in Spanish-speaking Latin American countries or areas http://esupport.sony.com/ES/VAIO/LA ❑ For customers in Brazil http://esupport.sony.com/BR/ ❑ Operating system online support web site Your computer comes preinstalled with a Microsoft Windows operating system. For operating system support, you can visit Microsoft customer support...

User Guide
Page 10
... indirect lighting to find the best position. You can reduce eye strain and muscle fatigue by adjusting the tilt of the display - Choose a location where windows and lights do not exert excessive pressure on the display. Adjust the brightness level of the main unit. Make sure you leave at least 4 inches...
... indirect lighting to find the best position. You can reduce eye strain and muscle fatigue by adjusting the tilt of the display - Choose a location where windows and lights do not exert excessive pressure on the display. Adjust the brightness level of the main unit. Make sure you leave at least 4 inches...

User Guide
Page 28
Your computer must be connected to the Internet to VAIO Web Support and then follow the on -screen instructions. ! Getting Started > Updating Your Computer n 28 N Updating Your Computer Be sure to install the latest updates on your computer with the following software applications so that the computer can run more efficiently. ❑ Windows Update Click Start, All Programs, and Windows Update and then follow the on -screen instructions. ❑ VAIO Update 4 Click Start, All Programs, VAIO Update 4, and Go to download the updates.
Your computer must be connected to the Internet to VAIO Web Support and then follow the on -screen instructions. ! Getting Started > Updating Your Computer n 28 N Updating Your Computer Be sure to install the latest updates on your computer with the following software applications so that the computer can run more efficiently. ❑ Windows Update Click Start, All Programs, and Windows Update and then follow the on -screen instructions. ❑ VAIO Update 4 Click Start, All Programs, VAIO Update 4, and Go to download the updates.
User Guide
Page 33
... off . Using Your VAIO Computer > Using the Keyboard n 33 N F Zoom buttons Change the size of power. (Caps lock): Turns on when Caps Lock mode is activated. (Connect): Blinks slowly while connection between the computer and the wireless keyboard is down, blinks rapidly when the keyboard is established. J Windows key Displays the Start... numeric keypad to type numbers or to make the view look bigger and closer (zoom in). M Directional arrow keys Move the pointer on the computer screen. H Volume control buttons* Increase (+) or decrease (-) the volume.
... off . Using Your VAIO Computer > Using the Keyboard n 33 N F Zoom buttons Change the size of power. (Caps lock): Turns on when Caps Lock mode is activated. (Connect): Blinks slowly while connection between the computer and the wireless keyboard is down, blinks rapidly when the keyboard is established. J Windows key Displays the Start... numeric keypad to type numbers or to make the view look bigger and closer (zoom in). M Directional arrow keys Move the pointer on the computer screen. H Volume control buttons* Increase (+) or decrease (-) the volume.

User Guide
Page 41
The Mouse Properties window appears. 3 Change the settings. Using Your VAIO Computer > Using the Mouse Adjusting the Mouse Functions 1 Click Start and Control Panel. 2 Click Mouse under Hardware and Sound. n 41 N
The Mouse Properties window appears. 3 Change the settings. Using Your VAIO Computer > Using the Mouse Adjusting the Mouse Functions 1 Click Start and Control Panel. 2 Click Mouse under Hardware and Sound. n 41 N

User Guide
Page 46
...with the appropriate software. ! For detailed information on the computer activates the built-in camera. Launching or exiting your desired icon in the properties window. Video conferences are using the built-in MOTION EYE camera. Do not place your computer into Sleep mode while you can perform the following:... 3, and WebCam Companion 3. 2 Click your instant messaging or video editing software does not activate or deactivate the built-in camera. Using Your VAIO Computer > Using the Built-in Camera n 46 N Using the Built-in Camera Your computer is equipped with a built-in camera.
...with the appropriate software. ! For detailed information on the computer activates the built-in camera. Launching or exiting your desired icon in the properties window. Video conferences are using the built-in MOTION EYE camera. Do not place your computer into Sleep mode while you can perform the following:... 3, and WebCam Companion 3. 2 Click your instant messaging or video editing software does not activate or deactivate the built-in camera. Using Your VAIO Computer > Using the Built-in Camera n 46 N Using the Built-in Camera Your computer is equipped with a built-in camera.

User Guide
Page 54
...enhance your audio and visual experience in this section may have one hybrid TV tuner board installed to find out about the configuration of TV, DVD, and video viewing, as well as music recording and playback. The Windows Media Center provides you must change your TV connection setup to... set up your computer. Features and options in conjunction with a wide range of your computer. Using Your VAIO Computer > Using the TV Function n 54 N Using the TV...
...enhance your audio and visual experience in this section may have one hybrid TV tuner board installed to find out about the configuration of TV, DVD, and video viewing, as well as music recording and playback. The Windows Media Center provides you must change your TV connection setup to... set up your computer. Features and options in conjunction with a wide range of your computer. Using Your VAIO Computer > Using the TV Function n 54 N Using the TV...
User Guide
Page 61
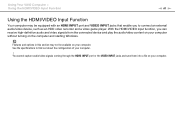
... port or the VIDEO INPUT jacks and save them into a file on the computer and starting Windows. With the HDMI/VIDEO input function, you to find out about the configuration of your computer. ! Using Your VAIO Computer > Using the HDMI/VIDEO Input Function n 61 N Using the HDMI/VIDEO Input Function Your computer...
... port or the VIDEO INPUT jacks and save them into a file on the computer and starting Windows. With the HDMI/VIDEO input function, you to find out about the configuration of your computer. ! Using Your VAIO Computer > Using the HDMI/VIDEO Input Function n 61 N Using the HDMI/VIDEO Input Function Your computer...

User Guide
Page 62
... HDMI input or the video input. ✍ You do not need an HDMI cable or an audio/video cable with triple RCA plugs. ! Using Your VAIO Computer > Using the HDMI/VIDEO Input Function n 62 N Connecting an External Audio/Video Device To connect an external audio/video device to the HDMI INPUT... to the HDMI INPUT port or the VIDEO INPUT jacks on the computer. 3 Turn on your computer 1 Plug one ready beforehand. To connect an external audio/video device to your computer and start Windows to use an HDMI cable approved by HDMI Licensing, LLC. The INPUT SELECT and HDMI/VIDEO indicator lights...
... HDMI input or the video input. ✍ You do not need an HDMI cable or an audio/video cable with triple RCA plugs. ! Using Your VAIO Computer > Using the HDMI/VIDEO Input Function n 62 N Connecting an External Audio/Video Device To connect an external audio/video device to the HDMI INPUT... to the HDMI INPUT port or the VIDEO INPUT jacks on the computer. 3 Turn on your computer 1 Plug one ready beforehand. To connect an external audio/video device to your computer and start Windows to use an HDMI cable approved by HDMI Licensing, LLC. The INPUT SELECT and HDMI/VIDEO indicator lights...

User Guide
Page 65
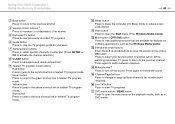
...the HDMI input, and the video input. Swapping the input signals between the main and sub windows. Enabling the PinP function 1 Select PinP and PinP MODE. 2 Select ON mode. 3 Press the OK button. Using Your VAIO Computer > Using the HDMI/VIDEO Input Function n 65 N Using the menu for the PinP ...and Swap functions The PinP function is enabled, you can additionally use the PinP A and Swap S buttons on the main window and switching the audio/video input source for...
...the HDMI input, and the video input. Swapping the input signals between the main and sub windows. Enabling the PinP function 1 Select PinP and PinP MODE. 2 Select ON mode. 3 Press the OK button. Using Your VAIO Computer > Using the HDMI/VIDEO Input Function n 65 N Using the menu for the PinP ...and Swap functions The PinP function is enabled, you can additionally use the PinP A and Swap S buttons on the main window and switching the audio/video input source for...

User Guide
Page 66
... manganese batteries are supplied with no assigned tasks are not described below. Before attempting to replace the batteries. Buttons with the remote commander. Using Your VAIO Computer > Using the Remote Commander n 66 N Using the Remote Commander If your computer supports the TV function (page 54), then a remote commander is not going... computer for an extended period of time, remove the batteries to avoid possible damage from the bottom of audio/video related software applications, including the Windows Media Center.
... manganese batteries are supplied with no assigned tasks are not described below. Before attempting to replace the batteries. Buttons with the remote commander. Using Your VAIO Computer > Using the Remote Commander n 66 N Using the Remote Commander If your computer supports the TV function (page 54), then a remote commander is not going... computer for an extended period of time, remove the batteries to avoid possible damage from the bottom of audio/video related software applications, including the Windows Media Center.

User Guide
Page 67
...above is in view, press to show a small sub window on the main window. Record z button Press to move media backward, for example, one audio track, one DVD chapter, and 30 seconds of TV or video. Skip B? Using Your VAIO Computer > Using the Remote Commander ✍ Some button functions... may not be available. While the sub window is the English remote commander as the INPUT SELECT button for example, one audio track, one DVD chapter, and 7 seconds of recorded TV ...
...above is in view, press to show a small sub window on the main window. Record z button Press to move media backward, for example, one audio track, one DVD chapter, and 30 seconds of TV or video. Skip B? Using Your VAIO Computer > Using the Remote Commander ✍ Some button functions... may not be available. While the sub window is the English remote commander as the INPUT SELECT button for example, one audio track, one DVD chapter, and 7 seconds of recorded TV ...
User Guide
Page 68
... switch between channels. Press again to move the pointer on the playback media, such as the Windows Media Center. Blue button Press to jump to the green shortcut link in teletext TV program mode. Using Your VAIO Computer > Using the Remote Commander n 68 N C Back button Press to return to change ... channels or enter text. (Press ENTER or OK to activate the channel selection.) H CLEAR button Press to open the main menu on the screen. N Muting button*2 Press to the yellow shortcut link in teletext TV program mode. Yellow button Press to jump to turn off the sound.
... switch between channels. Press again to move the pointer on the playback media, such as the Windows Media Center. Blue button Press to jump to the green shortcut link in teletext TV program mode. Using Your VAIO Computer > Using the Remote Commander n 68 N C Back button Press to return to change ... channels or enter text. (Press ENTER or OK to activate the channel selection.) H CLEAR button Press to open the main menu on the screen. N Muting button*2 Press to the yellow shortcut link in teletext TV program mode. Yellow button Press to jump to turn off the sound.

User Guide
Page 69
... return to the previous channel. (This button's actions are similar to using the OK button.) T APPLICATION SELECT button Press to close the active application window. *1 Pressing these buttons displays a message if your computer does not support the HDMI/VIDEO input function. *2 Available with the HDMI/VIDEO input function ...(page 61) as the Alt+Tab keys. This button works the same as well. Using Your VAIO Computer > Using the Remote Commander n 69 N R Teletext TV program mode selection button Press to activate/deactivate teletext TV program mode.
... return to the previous channel. (This button's actions are similar to using the OK button.) T APPLICATION SELECT button Press to close the active application window. *1 Pressing these buttons displays a message if your computer does not support the HDMI/VIDEO input function. *2 Available with the HDMI/VIDEO input function ...(page 61) as the Alt+Tab keys. This button works the same as well. Using Your VAIO Computer > Using the Remote Commander n 69 N R Teletext TV program mode selection button Press to activate/deactivate teletext TV program mode.

User Guide
Page 71
... on the desktop, click Start, Computer, and double-click the "Memory Stick" icon. The "Memory Stick" icon will appear in the Computer window after you insert "Memory Stick" into place. ✍ "Memory Stick" is automatically detected by your system and the contents of "Memory Stick"... are displayed. Using Your VAIO Computer > Using "Memory Stick" n 71 N Inserting and Removing "Memory Stick" To insert "Memory Stick" 1 Locate the "Memory Stick Duo" slot (page...
... on the desktop, click Start, Computer, and double-click the "Memory Stick" icon. The "Memory Stick" icon will appear in the Computer window after you insert "Memory Stick" into place. ✍ "Memory Stick" is automatically detected by your system and the contents of "Memory Stick"... are displayed. Using Your VAIO Computer > Using "Memory Stick" n 71 N Inserting and Removing "Memory Stick" To insert "Memory Stick" 1 Locate the "Memory Stick Duo" slot (page...

User Guide
Page 73
.... 1 Locate the "Memory Stick Duo" slot (page 15). 2 Carefully slide "Memory Stick" into place. 3 Click Start and Computer to open the Computer window. 4 Right-click the "Memory Stick" icon and select Format. 5 Click Restore device defaults. ! The size of the allocation unit and file system may cause...the media with your valuable data. Do not select NTFS from the slot while formatting. If you select Quick Format in Format options. Using Your VAIO Computer > Using "Memory Stick" n 73 N Formatting "Memory Stick" To format "Memory Stick" "Memory Stick" has been formatted by default ...
.... 1 Locate the "Memory Stick Duo" slot (page 15). 2 Carefully slide "Memory Stick" into place. 3 Click Start and Computer to open the Computer window. 4 Right-click the "Memory Stick" icon and select Format. 5 Click Restore device defaults. ! The size of the allocation unit and file system may cause...the media with your valuable data. Do not select NTFS from the slot while formatting. If you select Quick Format in Format options. Using Your VAIO Computer > Using "Memory Stick" n 73 N Formatting "Memory Stick" To format "Memory Stick" "Memory Stick" has been formatted by default ...

User Guide
Page 77
Do not force the card into place. The SD memory card icon will appear in the Computer window after you are inserting it in the proper direction. Using Your VAIO Computer > Using Other Modules / Memory Cards To insert an SD memory card 1 Locate the SD memory card slot (page 15). 2 Hold the SD memory card with the arrow pointing toward the slot. 3 Carefully slide the SD memory card into the slot until it clicks into the slot. n 77 N ✍ If the SD memory card does not go into the slot easily, remove it gently and verify you insert the card into the slot.
Do not force the card into place. The SD memory card icon will appear in the Computer window after you are inserting it in the proper direction. Using Your VAIO Computer > Using Other Modules / Memory Cards To insert an SD memory card 1 Locate the SD memory card slot (page 15). 2 Hold the SD memory card with the arrow pointing toward the slot. 3 Carefully slide the SD memory card into the slot until it clicks into the slot. n 77 N ✍ If the SD memory card does not go into the slot easily, remove it gently and verify you insert the card into the slot.

User Guide
Page 87
For setting up the Bluetooth function. Using Your VAIO Computer > Using the Bluetooth Function n 87 N Communicating with another Bluetooth device, you first need to a Bluetooth device such as another Bluetooth device To communicate with Another Bluetooth Device You can connect your computer to set up and using the Bluetooth function, search Windows Help and Support for Bluetooth information. To communicate with another computer, a mobile phone, a PDA, a headset, a mouse, or a digital camera without the use of any cables.
For setting up the Bluetooth function. Using Your VAIO Computer > Using the Bluetooth Function n 87 N Communicating with another Bluetooth device, you first need to a Bluetooth device such as another Bluetooth device To communicate with Another Bluetooth Device You can connect your computer to set up and using the Bluetooth function, search Windows Help and Support for Bluetooth information. To communicate with another computer, a mobile phone, a PDA, a headset, a mouse, or a digital camera without the use of any cables.
User Guide
Page 94
... connected. See the manual that came with the USB device for more information. ❑ Be sure to use a USB printer compatible with your version of Windows to print documents. ❑ For information on connecting a USB device ❑ You may need to install the driver software supplied with USB devices connected, avoid...
... connected. See the manual that came with the USB device for more information. ❑ Be sure to use a USB printer compatible with your version of Windows to print documents. ❑ For information on connecting a USB device ❑ You may need to install the driver software supplied with USB devices connected, avoid...

User Guide
Page 105
...not work in personal injury or equipment damage. ❑ ESD can damage electronic components. Before touching a memory module, ensure the following: ❑ The procedures described in the following pages. If... at an ESD workstation. The package protects the module from the computer. Upgrading Your VAIO Computer > Adding and Removing Memory n 105 N Adding and Removing Memory If you ...computer, you are compatible with your computer. Ground yourself by the computer or the Windows operating system becomes unstable, contact the sales dealer or the manufacturer of your memory ...
...not work in personal injury or equipment damage. ❑ ESD can damage electronic components. Before touching a memory module, ensure the following: ❑ The procedures described in the following pages. If... at an ESD workstation. The package protects the module from the computer. Upgrading Your VAIO Computer > Adding and Removing Memory n 105 N Adding and Removing Memory If you ...computer, you are compatible with your computer. Ground yourself by the computer or the Windows operating system becomes unstable, contact the sales dealer or the manufacturer of your memory ...


