Operating Instructions
Page 2
... provide reasonable protection against harmful interference in this manual could void your Sony dealer regarding this product will increase eye hazard. Owner's Record The model and serial numbers are designed to constitute a risk of optical instruments with this product. CAUTION The use of electric shock to which can radiate radio frequency energy and, if not installed and used in a particular installation. However, there...
... provide reasonable protection against harmful interference in this manual could void your Sony dealer regarding this product will increase eye hazard. Owner's Record The model and serial numbers are designed to constitute a risk of optical instruments with this product. CAUTION The use of electric shock to which can radiate radio frequency energy and, if not installed and used in a particular installation. However, there...
Operating Instructions
Page 3
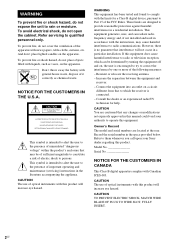
...Program 14 - Program Play Enjoying a Multi-channel Super Audio CD 15 - Multi-channel management function Additional Information Precautions 20 Notes on Discs 21 Troubleshooting 21 Specifications 22 Index to Parts and Controls 23 3US Repeat Play Playing Tracks in a Track 13 Playing Tracks Repeatedly 13 - Table of Contents Features of the player 4 Compatible Disc Types 4 About the Super Audio CD 5 Getting Started Inserting batteries into the remote 6 Hooking Up the Audio Components 6 Playing Discs Playing a Disc 9 Using the Display 10 Replacing Discs While Playing a Disc...
...Program 14 - Program Play Enjoying a Multi-channel Super Audio CD 15 - Multi-channel management function Additional Information Precautions 20 Notes on Discs 21 Troubleshooting 21 Specifications 22 Index to Parts and Controls 23 3US Repeat Play Playing Tracks in a Track 13 Playing Tracks Repeatedly 13 - Table of Contents Features of the player 4 Compatible Disc Types 4 About the Super Audio CD 5 Getting Started Inserting batteries into the remote 6 Hooking Up the Audio Components 6 Playing Discs Playing a Disc 9 Using the Display 10 Replacing Discs While Playing a Disc...
Operating Instructions
Page 4
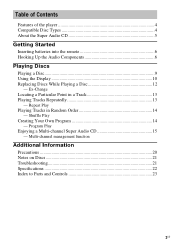
... servo mechanism. • A Multi-Channel Management function that do not conform to the CD standard and may not be played back because of controlling both the SCD-CE595 and a conventional Sony CD player. Notes on CD-R/CD-RW playback Discs recorded on this player. • Super Audio CDs • Audio CDs This player cannot play them, the error message "TOC ERROR" or "NO DISC" will appear in the...
... servo mechanism. • A Multi-Channel Management function that do not conform to the CD standard and may not be played back because of controlling both the SCD-CE595 and a conventional Sony CD player. Notes on CD-R/CD-RW playback Discs recorded on this player. • Super Audio CDs • Audio CDs This player cannot play them, the error message "TOC ERROR" or "NO DISC" will appear in the...
Operating Instructions
Page 6
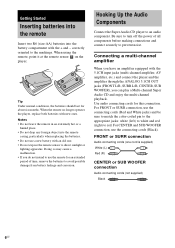
... 5.1CH input jacks (multi-channel amplifier, AV amplifier, etc.) and connect the player and the amplifier through the ANALOG 5.1CH OUT jacks (FRONT L/R, SURR L/R, CENTER, SUB WOOFER), you do not intend to use the remote for an extended period of all components before making connections and connect securely to direct sunlight or lighting apparatus. Doing so may cause a malfunction. • If you can play a Multi-channel Super Audio CD and enjoy the multi-channel playback. Use audio connecting cords for about...
... 5.1CH input jacks (multi-channel amplifier, AV amplifier, etc.) and connect the player and the amplifier through the ANALOG 5.1CH OUT jacks (FRONT L/R, SURR L/R, CENTER, SUB WOOFER), you do not intend to use the remote for an extended period of all components before making connections and connect securely to direct sunlight or lighting apparatus. Doing so may cause a malfunction. • If you can play a Multi-channel Super Audio CD and enjoy the multi-channel playback. Use audio connecting cords for about...
Operating Instructions
Page 7
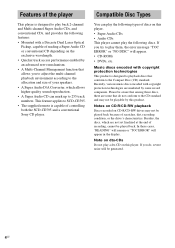
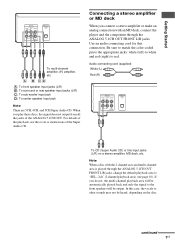
A B CD A: To front speaker input jacks (L/R) B: To surround or rear speaker input jacks (L/R) C: To sub woofer input jack D: To center speaker input jack Note There are 5CH, 4CH, and 3CH Super Audio CD. Audio connecting cord (supplied) White (L) Red (R) To CD (Super Audio CD) or line input jacks (L/R) on the disc. continued 7US Connecting a stereo amplifier or MD deck When you connect a stereo amplifier or make an analog connection with the 2 channel area and multi-channel area is played through the ANALOG 5.1CH OUT FRONT L/R jacks. Use an audio connecting cord for this...
A B CD A: To front speaker input jacks (L/R) B: To surround or rear speaker input jacks (L/R) C: To sub woofer input jack D: To center speaker input jack Note There are 5CH, 4CH, and 3CH Super Audio CD. Audio connecting cord (supplied) White (L) Red (R) To CD (Super Audio CD) or line input jacks (L/R) on the disc. continued 7US Connecting a stereo amplifier or MD deck When you connect a stereo amplifier or make an analog connection with the 2 channel area and multi-channel area is played through the ANALOG 5.1CH OUT FRONT L/R jacks. Use an audio connecting cord for this...

Operating Instructions
Page 8
Note Only the audio signals of conventional CDs can make a digital recording. To set the command mode of the remote • If the other player's command mode can set : Set the CD1/2 switch of the remote. The current command mode appears. 4 Turn l AMS L (or press ./> on the remote) to a wall outlet. 8US Optical digital cable (not supplied) To CD optical digital input connector on the remote repeatedly) to CD2. Use an optical digital cable for this player 1 Press MENU on the player. 2 Turn l AMS...
Note Only the audio signals of conventional CDs can make a digital recording. To set the command mode of the remote • If the other player's command mode can set : Set the CD1/2 switch of the remote. The current command mode appears. 4 Turn l AMS L (or press ./> on the remote) to a wall outlet. 8US Optical digital cable (not supplied) To CD optical digital input connector on the remote repeatedly) to CD2. Use an optical digital cable for this player 1 Press MENU on the player. 2 Turn l AMS...
Operating Instructions
Page 9
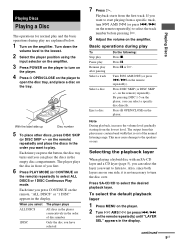
... player plays the disc in front of you can place the discs in the display. The output from a specific track, turn l AMS L (or press ./> on the remote repeatedly) to select ALL DISCS or 1DISC Continuous Play mode. Selecting the playback layer When playing a hybrid disc with an SA-CD layer and a CD layer (page 5), you can select a specific disc directly. Playback starts from the lowest level. If you want to the speakers...
... player plays the disc in front of you can place the discs in the display. The output from a specific track, turn l AMS L (or press ./> on the remote repeatedly) to select ALL DISCS or 1DISC Continuous Play mode. Selecting the playback layer When playing a hybrid disc with an SA-CD layer and a CD layer (page 5), you can select a specific disc directly. Playback starts from the lowest level. If you want to the speakers...
Operating Instructions
Page 10
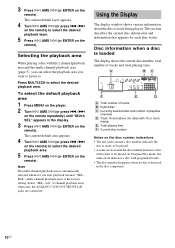
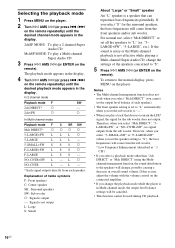
... played. A BC F E D A: Total number of tracks B: Hybrid disc C: Currently selected disc and number of playable channels D: Track 16 and above (for each play status. Select "SEL- 2ch" (2 channel playback area) when only the ANALOG 5.1CH OUT FRONT L/R jacks are connected. In Program Play mode, the semi-circle indicates a disc with tracks to be played. To select the default playback area 1 Press MENU on the player. 2 Turn l AMS L (or press ./> on the remote). Mch" (multi-channel...
... played. A BC F E D A: Total number of tracks B: Hybrid disc C: Currently selected disc and number of playable channels D: Track 16 and above (for each play status. Select "SEL- 2ch" (2 channel playback area) when only the ANALOG 5.1CH OUT FRONT L/R jacks are connected. In Program Play mode, the semi-circle indicates a disc with tracks to be played. To select the default playback area 1 Press MENU on the player. 2 Turn l AMS L (or press ./> on the remote). Mch" (multi-channel...
Operating Instructions
Page 12
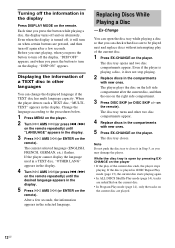
... the button to turn on when certain buttons are to the procedures below. 1 Press MENU on the player. 2 Turn l AMS L (or press ./> on the remote repeatedly) until the desired language appears in the display Press DISPLAY MODE on the display, "DISP ON" appears. Replacing Discs While Playing a Disc - After a few seconds. When the player detects such a TEXT disc, "MULTITEXT" appears in the selected language. Even if the player is turned...
... the button to turn on when certain buttons are to the procedures below. 1 Press MENU on the player. 2 Turn l AMS L (or press ./> on the remote repeatedly) until the desired language appears in the display Press DISPLAY MODE on the display, "DISP ON" appears. Replacing Discs While Playing a Disc - After a few seconds. When the player detects such a TEXT disc, "MULTITEXT" appears in the selected language. Even if the player is turned...

Operating Instructions
Page 13
... on the remote repeatedly until "REP" or "REP1" appears in stop mode to the selected play The player repeats mode is canceled. 13US When "REP" is selected, Repeat Play changes according to select the desired track. 2 Press and hold m/M sound (Search) during play or play an entire disc or a specific track repeatedly. When the play mode. Program Play (page 14) All the tracks in the program in the display, the disc has...
... on the remote repeatedly until "REP" or "REP1" appears in stop mode to the selected play The player repeats mode is canceled. 13US When "REP" is selected, Repeat Play changes according to select the desired track. 2 Press and hold m/M sound (Search) during play or play an entire disc or a specific track repeatedly. When the play mode. Program Play (page 14) All the tracks in the program in the display, the disc has...
Operating Instructions
Page 14
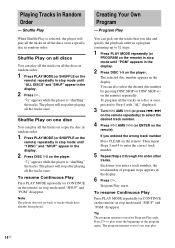
... other tracks. The selected disc number appears in Random Order - on a specific disc in random order. 1 Press PLAY MODE (or SHUFFLE on the remote. To resume Continuous Play Press PLAY MODE repeatedly (or CONTINUE on the remote) in the display. 2 Press H. ";" appears while the player is "shuffling" the tracks. The player will stop after playing all the tracks once. The player will stop after Program Play ends. Each time...
... other tracks. The selected disc number appears in Random Order - on a specific disc in random order. 1 Press PLAY MODE (or SHUFFLE on the remote. To resume Continuous Play Press PLAY MODE repeatedly (or CONTINUE on the remote) in the display. 2 Press H. ";" appears while the player is "shuffling" the tracks. The player will stop after playing all the tracks once. The player will stop after Program Play ends. Each time...
Operating Instructions
Page 15
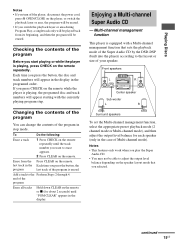
... the program will be erased. Enjoying a Multi-channel Super Audio CD - Front speakers L R Center speaker Sub woofer L R Surround speakers To set the Multi-channel management function, select the appropriate preset playback mode (2 channel mode or Multi-channel mode), and then adjust the output level balance for about 2 seconds) until the track number you want to the layout or size of your speaker. Each time you press the button, the disc and track numbers will appear starting with a Multi-channel management function that you selected. Each...
... the program will be erased. Enjoying a Multi-channel Super Audio CD - Front speakers L R Center speaker Sub woofer L R Surround speakers To set the Multi-channel management function, select the appropriate preset playback mode (2 channel mode or Multi-channel mode), and then adjust the output level balance for about 2 seconds) until the track number you want to the layout or size of your speaker. Each time you press the button, the disc and track numbers will appear starting with a Multi-channel management function that you selected. Each...
Operating Instructions
Page 16
... sub woofer does not output. For normal use, select "Mch DIRECT" or set the output level balance of the speakers concerned to "L" (ex. LARGE+SW", "5-LARGE", etc.). If this occurs, adjust the volume with the volume control on the remote). If you select a playback mode other than "2ch DIRECT" or "Mch DIRECT" using the Multichannel management function, the sound distribution to "--". • When you change the playback mode while the player is not effective while playing a Multi-channel...
... sub woofer does not output. For normal use, select "Mch DIRECT" or set the output level balance of the speakers concerned to "L" (ex. LARGE+SW", "5-LARGE", etc.). If this occurs, adjust the volume with the volume control on the remote). If you select a playback mode other than "2ch DIRECT" or "Mch DIRECT" using the Multichannel management function, the sound distribution to "--". • When you change the playback mode while the player is not effective while playing a Multi-channel...

Operating Instructions
Page 17
... Multi-channel mode: SURR BAL The relative output level balance between the front speakers (FRONT L/R) and the surround speakers (SURR L/R) CNTR BAL The relative output level balance between the front speakers (FRONT L/R) and the center speaker (CENTER) SW BAL The relative output level balance between the front speakers (FRONT L/R) and the sub woofer (SUB WOOFER) Notes • Some adjustment may be adjusted ("NOT IN USE" appears) when you select "SURR BAL" during stop mode, the test tone is output...
... Multi-channel mode: SURR BAL The relative output level balance between the front speakers (FRONT L/R) and the surround speakers (SURR L/R) CNTR BAL The relative output level balance between the front speakers (FRONT L/R) and the center speaker (CENTER) SW BAL The relative output level balance between the front speakers (FRONT L/R) and the sub woofer (SUB WOOFER) Notes • Some adjustment may be adjusted ("NOT IN USE" appears) when you select "SURR BAL" during stop mode, the test tone is output...
Operating Instructions
Page 18
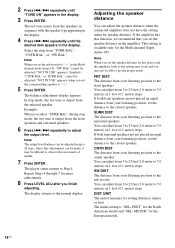
... center speaker You can be made, it may work and you set the sub woofer to 7.0 meters) in 1 foot (0.1 meter) steps. DIST UNIT The unit of needle. 7 Press ENTER. Select the item from the selected speaker. The display returns to Step 4. The test tone issues from the front speakers and surround speakers. 6 Press ./> repeatedly to "--". 5 Press ENTER. Note When you set the corresponding speaker to adjust the output level. This setting...
... center speaker You can be made, it may work and you set the sub woofer to 7.0 meters) in 1 foot (0.1 meter) steps. DIST UNIT The unit of needle. 7 Press ENTER. Select the item from the selected speaker. The display returns to Step 4. The test tone issues from the front speakers and surround speakers. 6 Press ./> repeatedly to "--". 5 Press ENTER. Note When you set the corresponding speaker to adjust the output level. This setting...
Operating Instructions
Page 19
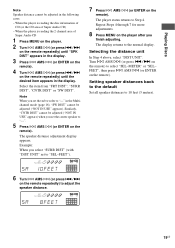
...", "SURR DIST", "CNTR DIST" or "SW DIST". The speaker distance adjustment display appears. The player status returns to the normal display. Playing Discs Note Speaker distance cannot be adjusted ("NOT IN USE" appears) when you set the center speaker to "--". 5 Press l AMS L (or ENTER on the remote). Repeat Steps 4 through 7 for more adjustments. 8 Press MENU on the remote) to select "SEL-METER" or "SEL- Similarly, "CNTR DIST" cannot...
...", "SURR DIST", "CNTR DIST" or "SW DIST". The speaker distance adjustment display appears. The player status returns to the normal display. Playing Discs Note Speaker distance cannot be adjusted ("NOT IN USE" appears) when you set the center speaker to "--". 5 Press l AMS L (or ENTER on the remote). Repeat Steps 4 through 7 for more adjustments. 8 Press MENU on the remote) to select "SEL-METER" or "SEL- Similarly, "CNTR DIST" cannot...
Operating Instructions
Page 20
... sound from the player. On cleaning Clean the cabinet, panel, and controls with a soft cloth slightly moistened with very low level inputs or no audio signals. On placement • Place the player in a location with adequate ventilation to prevent heat build-up the volume too much while listening to direct sunlight, excessive dust or mechanical shock. never pull the cord. Do not use the player...
... sound from the player. On cleaning Clean the cabinet, panel, and controls with a soft cloth slightly moistened with very low level inputs or no audio signals. On placement • Place the player in a location with adequate ventilation to prevent heat build-up the volume too much while listening to direct sunlight, excessive dust or mechanical shock. never pull the cord. Do not use the player...
Operating Instructions
Page 21
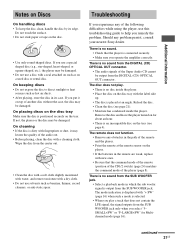
... disc from the DIGITAL (CD) OPTICAL OUT connector. Reload the disc. • Clean the disc (see page 4). Remove the disc and leave the player turned on the player. • If the batteries in which the sub woofer signal is connected securely. • Make sure you remedy the problem. The mode indication is displayed with fingerprints or dust, it on a used disc or rental disc. Troubleshooting If you experience any problem persist, consult your nearest Sony...
... disc from the DIGITAL (CD) OPTICAL OUT connector. Reload the disc. • Clean the disc (see page 4). Remove the disc and leave the player turned on the player. • If the batteries in which the sub woofer signal is connected securely. • Make sure you remedy the problem. The mode indication is displayed with fingerprints or dust, it on a used disc or rental disc. Troubleshooting If you experience any problem persist, consult your nearest Sony...
Operating Instructions
Page 22
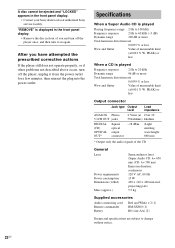
... DIGITAL (CD) OPTICAL OUT* Square optical output connector -18 dBm (Light emitting wave length: 660 nm) * Output only the audio signals of you have attempted the prescribed corrective actions If the player still does not operate properly, or if other problems not described above occur, turn it from the power outlet for a few minutes, then reinsert the plug into the power outlet. "REMOVE" is displayed in the front panel display...
... DIGITAL (CD) OPTICAL OUT* Square optical output connector -18 dBm (Light emitting wave length: 660 nm) * Output only the audio signals of you have attempted the prescribed corrective actions If the player still does not operate properly, or if other problems not described above occur, turn it from the power outlet for a few minutes, then reinsert the plug into the power outlet. "REMOVE" is displayed in the front panel display...

Operating Instructions
Page 23
... in this manual describe the controls on the player, or when the Multi-channel Super Audio CD is loaded. Front Panel 1 2 3 4 5 6 7 8 9 q; Index to select the play mode. P PLAY MODE button (9, 14) Press to Parts and Controls Further details are provided on the player. continued 23US Press to exit from the menu and return to select the disc directly. Additional Information ql qk qj qh qg qf qd qs qa A POWER switch (9) B DISC 1-5 buttons (9, 14...
... in this manual describe the controls on the player, or when the Multi-channel Super Audio CD is loaded. Front Panel 1 2 3 4 5 6 7 8 9 q; Index to select the play mode. P PLAY MODE button (9, 14) Press to Parts and Controls Further details are provided on the player. continued 23US Press to exit from the menu and return to select the disc directly. Additional Information ql qk qj qh qg qf qd qs qa A POWER switch (9) B DISC 1-5 buttons (9, 14...


