
Quick Start Guide
Page 2
..., IMAGES, VIDEO, OR AUDIO FROM ANY DESCRIBED WEB SITE. The software described herein is prohibited. Software specifications are trademarks or registered trademarks of a separate user license agreement. Certain product(s) included with this product. Important information for Canadian customers: Your new VAIO computer includes certain software versions or upgrades, and Internet services or offers that are trademarks or registered trademarks of the Microsoft Corporation. This manual...
..., IMAGES, VIDEO, OR AUDIO FROM ANY DESCRIBED WEB SITE. The software described herein is prohibited. Software specifications are trademarks or registered trademarks of a separate user license agreement. Certain product(s) included with this product. Important information for Canadian customers: Your new VAIO computer includes certain software versions or upgrades, and Internet services or offers that are trademarks or registered trademarks of the Microsoft Corporation. This manual...

Quick Start Guide
Page 11
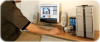
Contents Getting Started 13 Unpacking your Computer 14 Locating Controls And Ports 17 About the Front Panel 18 About the Back Panel 21 About the Sub-Woofer 23 About the Keyboard 24 Setting Up Your Computer 27 Connecting a Display (Monitor 28 Connecting the Speakers and Sub-woofer Unit ........30 Connecting the Keyboard and Mouse 33 Connecting the Telephone and Modem cables .........34 Connecting the Power Cords 35 Turning On your Computer 36 Registering your Computer 36 Turning Off your Computer 37 11
Contents Getting Started 13 Unpacking your Computer 14 Locating Controls And Ports 17 About the Front Panel 18 About the Back Panel 21 About the Sub-Woofer 23 About the Keyboard 24 Setting Up Your Computer 27 Connecting a Display (Monitor 28 Connecting the Speakers and Sub-woofer Unit ........30 Connecting the Keyboard and Mouse 33 Connecting the Telephone and Modem cables .........34 Connecting the Power Cords 35 Turning On your Computer 36 Registering your Computer 36 Turning Off your Computer 37 11

Quick Start Guide
Page 22
... information on your computer's hardware configuration 22 Line In jack* Connection for optional speakers, or external amplifier. Rear Out jack* Connection for an audio device. Digital/Analog Out jack* Connection for external digital devices or digital speaker systems. 14 Modem line jack Connection for the supplied sub-woofer†, speakers or optional headphones. Line Out jack* Connection for the modem (supplied) cable to the computer. 9 Speaker DC Out jack Connection for the supplied speaker power cable. 10 Ethernet port Connection for a 10BASE...
... information on your computer's hardware configuration 22 Line In jack* Connection for optional speakers, or external amplifier. Rear Out jack* Connection for an audio device. Digital/Analog Out jack* Connection for external digital devices or digital speaker systems. 14 Modem line jack Connection for the supplied sub-woofer†, speakers or optional headphones. Line Out jack* Connection for the modem (supplied) cable to the computer. 9 Speaker DC Out jack Connection for the supplied speaker power cable. 10 Ethernet port Connection for a 10BASE...

Quick Start Guide
Page 28
To connect a display MONITOR 28 VAIO Digital Studio Computer Quick Start Connecting a Display (Monitor) 1 Plug the display's cable into the monitor port. 2 If necessary, plug the display's cable into the rear of the display.
To connect a display MONITOR 28 VAIO Digital Studio Computer Quick Start Connecting a Display (Monitor) 1 Plug the display's cable into the monitor port. 2 If necessary, plug the display's cable into the rear of the display.
Media Center Help File (Large File - 15.08 MB)
Page 47
... within Media C enter. If this option is selected, then the connection must be available to everyone who uses the computer and the connection must connect manually to keep your computer is connected to the Internet, Media C enter downloads updated Guide information. Select Guide. 4. Select Get Guide data. © 2000-2003 Microsoft C orporation. To manually download Guide information after Media Center is set up connection. Press the START button on the remote, and then select Settings. 2. Media C enter connects automatically to the Internet to update Guide information. Manual...
... within Media C enter. If this option is selected, then the connection must be available to everyone who uses the computer and the connection must connect manually to keep your computer is connected to the Internet, Media C enter downloads updated Guide information. Select Guide. 4. Select Get Guide data. © 2000-2003 Microsoft C orporation. To manually download Guide information after Media Center is set up connection. Press the START button on the remote, and then select Settings. 2. Media C enter connects automatically to the Internet to update Guide information. Manual...
Media Center Help File (Large File - 15.08 MB)
Page 52
... make sure that there are configured to allow connections by using dial-up and want to set up Internet connection. Download the Guide manually. Press START , select Settings, select TV, select Guide, and then select Get Guide data. If the downloading fails, then change your Internet connection settings. Press START Change Guide lineup. , select Settings, select TV, select Guide, and then select Note The Get Guide data feature works only if you connect by Media C enter. Press START and...
... make sure that there are configured to allow connections by using dial-up and want to set up Internet connection. Download the Guide manually. Press START , select Settings, select TV, select Guide, and then select Get Guide data. If the downloading fails, then change your Internet connection settings. Press START Change Guide lineup. , select Settings, select TV, select Guide, and then select Note The Get Guide data feature works only if you connect by Media C enter. Press START and...

Media Center Help File (Large File - 15.08 MB)
Page 72
... particular configuration and to make sure that your devices are sure that the remote sensor is connected correctly but Media C enter cannot detect it, then try unplugging the remote sensor and then plugging it in again. The other end of the IR control cable should be replaced. Hardware not detected Two essential pieces of hardware might hear a sound from your computer indicating that the remote sensor is connected...
... particular configuration and to make sure that your devices are sure that the remote sensor is connected correctly but Media C enter cannot detect it, then try unplugging the remote sensor and then plugging it in again. The other end of the IR control cable should be replaced. Hardware not detected Two essential pieces of hardware might hear a sound from your computer indicating that the remote sensor is connected...

Media Center Help File (Large File - 15.08 MB)
Page 91
Select TV. 4. Page 91 Select Get Guide data. © 2000-2003 Microsoft C orporation. Make sure that you might choose another option. To update Guide information manually 1. Press the START button on the remote, and then select Settings. 3. Make sure your Program Guide information is updated Although it is highly recommended that you are connected to update Guide information automatically, you allow Media C enter to the Internet. 2. Select Guide. 5. All rights reserved.
Select TV. 4. Page 91 Select Get Guide data. © 2000-2003 Microsoft C orporation. Make sure that you might choose another option. To update Guide information manually 1. Press the START button on the remote, and then select Settings. 3. Make sure your Program Guide information is updated Although it is highly recommended that you are connected to update Guide information automatically, you allow Media C enter to the Internet. 2. Select Guide. 5. All rights reserved.
Media Center Help File (Large File - 15.08 MB)
Page 95
... screens until you reach the Terms of Service and privacy policy at any time. 1. Select Guide. 4. Press the START button on the Terms of Service page. 6. Select I don't agree, you can still use Media C enter but note the following: You cannot update, view, and use the Guide You can change your Guide. You cannot record by show or series, but you can record manually...
... screens until you reach the Terms of Service and privacy policy at any time. 1. Select Guide. 4. Press the START button on the Terms of Service page. 6. Select I don't agree, you can still use Media C enter but note the following: You cannot update, view, and use the Guide You can change your Guide. You cannot record by show or series, but you can record manually...
Media Center Help File (Large File - 15.08 MB)
Page 203
If you download only Guide listings manually, then you must have your Guide regularly to make sure to begin downloading the Guide listings. To download updated Guide listings 1. Select Get Guide data. 5. Tip You can continue to use the Guide while new Guide information is complete. Related topics Read about the current Guide information Reset the Guide lineup C hange the settings for the TV signal Set up your current Guide listings. Press the START button on the remote to...
If you download only Guide listings manually, then you must have your Guide regularly to make sure to begin downloading the Guide listings. To download updated Guide listings 1. Select Get Guide data. 5. Tip You can continue to use the Guide while new Guide information is complete. Related topics Read about the current Guide information Reset the Guide lineup C hange the settings for the TV signal Set up your current Guide listings. Press the START button on the remote to...

Media Center Help File (Large File - 15.08 MB)
Page 258
... when Media C enter was turned off in Settings-you might need to reset the Guide lineup. Your TV service provider might have completed your changes to return to select, then inspect your TV service provider to verify the channel lineup that should be excluded for one of the network for more information. Press the START button on the remote, and then select Settings. 2. To add...
... when Media C enter was turned off in Settings-you might need to reset the Guide lineup. Your TV service provider might have completed your changes to return to select, then inspect your TV service provider to verify the channel lineup that should be excluded for one of the network for more information. Press the START button on the remote, and then select Settings. 2. To add...

Media Center Help File (Large File - 15.08 MB)
Page 260
... cases, the set-top box performs a default action that are not part of your TV service package. when the box is not part of your TV service package, the set-top box might instead: C hange to a default channel Display an onscreen error Remain on the remote to scroll through a set-top box, then Media C enter might need to use your set-top box remote control to clear the error...
... cases, the set-top box performs a default action that are not part of your TV service package. when the box is not part of your TV service package, the set-top box might instead: C hange to a default channel Display an onscreen error Remain on the remote to scroll through a set-top box, then Media C enter might need to use your set-top box remote control to clear the error...
Media Center Help File (Large File - 15.08 MB)
Page 269
... you have affects Media C enter's ability to control the set-top box. Tip Select Edit numbers and then select Restore default to remove all changes made to correct the problem immediately. Press the START button on the remote, and then select Settings. 2. Note In the case of an onscreen error, no further channel navigation for recording TV is checked the channel displays in the Guide lineup 1. Media Center recorded the...
... you have affects Media C enter's ability to control the set-top box. Tip Select Edit numbers and then select Restore default to remove all changes made to correct the problem immediately. Press the START button on the remote, and then select Settings. 2. Note In the case of an onscreen error, no further channel navigation for recording TV is checked the channel displays in the Guide lineup 1. Media Center recorded the...

Media Center Help File (Large File - 15.08 MB)
Page 280
... about updating the driver. Audio error-The audio card is installed to C heck the hardware documentation for information on which TV formats are using the decoder, and then try again to reinstall the decoder. Ensure that the audio card is not installed, enabled, or does not have updated drivers. Page 280 Video does not display If you are notified that Media C enter is unable to display an image in the TV screen...
... about updating the driver. Audio error-The audio card is installed to C heck the hardware documentation for information on which TV formats are using the decoder, and then try again to reinstall the decoder. Ensure that the audio card is not installed, enabled, or does not have updated drivers. Page 280 Video does not display If you are notified that Media C enter is unable to display an image in the TV screen...

VAIO User Guide
Page 33
... the system configuration purchased. For PCV-W series models only Your PCV-W series computer has two 4-pin i.LINK ports available to locate the i.LINK port on your compatible i.LINK device and on installation and use. Connecting an i.LINK (IEEE 1394) device 1. Use the symbol to connect your i.LINK device for your digital devices. Plug the other . A 4-pin i.LINK port cannot supply power to a connected i.LINK device. The 4-pin i.LINK ports do not supply power to a connected i.LINK device. or 6-pin i.LINK port on the software programs, operating system...
... the system configuration purchased. For PCV-W series models only Your PCV-W series computer has two 4-pin i.LINK ports available to locate the i.LINK port on your compatible i.LINK device and on installation and use. Connecting an i.LINK (IEEE 1394) device 1. Use the symbol to connect your i.LINK device for your digital devices. Plug the other . A 4-pin i.LINK port cannot supply power to a connected i.LINK device. The 4-pin i.LINK ports do not supply power to a connected i.LINK device. or 6-pin i.LINK port on the software programs, operating system...

VAIO User Guide
Page 42
...upgrading your drive mapping, create a VAIO Recovery Media Kit, or visit the Sony Online Support Web site for removable media2, may be connected to the Internet to recover your product, series, and model information. Your system can download the System Reference Manual from Sony. Replacing the original hard disk drive If you replace the original, factory-installed hard disk drive, you replace the original hard disk drive, the preinstalled VAIO Recovery Wizard utility program cannot restore the drive partitions, operating system, or original software programs. Before replacing the hard...
...upgrading your drive mapping, create a VAIO Recovery Media Kit, or visit the Sony Online Support Web site for removable media2, may be connected to the Internet to recover your product, series, and model information. Your system can download the System Reference Manual from Sony. Replacing the original hard disk drive If you replace the original, factory-installed hard disk drive, you replace the original hard disk drive, the preinstalled VAIO Recovery Wizard utility program cannot restore the drive partitions, operating system, or original software programs. Before replacing the hard...

VAIO User Guide
Page 43
... the new drive. 13. Connect the second drive connector to the new drive following the instructions supplied with the drive. Connect the second power connector to the new drive. Rem ov ing the driv e holder 8. Slide the new drive into position. 12. Slide the drive holder out. Attaching the driv e screws Your new hard disk drive is preinstalled in completely. 11. Replacing the driv e holder Page 43 Unlock the drive holder from the original hard disk drive...
... the new drive. 13. Connect the second drive connector to the new drive following the instructions supplied with the drive. Connect the second power connector to the new drive. Rem ov ing the driv e holder 8. Slide the new drive into position. 12. Slide the drive holder out. Attaching the driv e screws Your new hard disk drive is preinstalled in completely. 11. Replacing the driv e holder Page 43 Unlock the drive holder from the original hard disk drive...

VAIO User Guide
Page 64
... not selected in the Windows® taskbar and click Help and Support. 2. To access VAIO Recovery Options, follow these steps: 1. For PCV-W series models only Adjust the volume control dial, located on the left panel, to mute the sound from the built-in stereo speakers. For PCV-V series models only Adjust the volume by pressing the volume control buttons located on the wireless keyboard. If you are using has its own volume...
... not selected in the Windows® taskbar and click Help and Support. 2. To access VAIO Recovery Options, follow these steps: 1. For PCV-W series models only Adjust the volume control dial, located on the left panel, to mute the sound from the built-in stereo speakers. For PCV-V series models only Adjust the volume by pressing the volume control buttons located on the wireless keyboard. If you are using has its own volume...

VAIO User Guide
Page 65
... sound driver(s) may not be working properly. From the VAIO Help And Support Center menu, click VAIO Recovery Options. From the Volume tab, adjust the Device volume by pressing the volume control buttons located on the left panel, to mute the sound from your speakers if headphones are connected to your computer. If the software application you are charged. If your speakers use an external power source, verify that the power cord is plugged...
... sound driver(s) may not be working properly. From the VAIO Help And Support Center menu, click VAIO Recovery Options. From the Volume tab, adjust the Device volume by pressing the volume control buttons located on the left panel, to mute the sound from your speakers if headphones are connected to your computer. If the software application you are charged. If your speakers use an external power source, verify that the power cord is plugged...

Marketing Specifications
Page 1
... SPECIFICATIONS MODEL PCV-RZ45G PROCESSOR Intel® Pentium® 4 Processor 3.0GHz† with any specific software, and Sony does not and cannot make recommendations, they are subject to connect. rewrite / 2X max. ROM read ) CD-RW DRIVE CD-RW (40X max. All products with an i.LINK connector may affect application performance. †† GB means one occupied) PORT CONNECTORS Seven USB 2.0 (Three front/four rear) Two PS/2® (Mouse/Keyboard...
... SPECIFICATIONS MODEL PCV-RZ45G PROCESSOR Intel® Pentium® 4 Processor 3.0GHz† with any specific software, and Sony does not and cannot make recommendations, they are subject to connect. rewrite / 2X max. ROM read ) CD-RW DRIVE CD-RW (40X max. All products with an i.LINK connector may affect application performance. †† GB means one occupied) PORT CONNECTORS Seven USB 2.0 (Three front/four rear) Two PS/2® (Mouse/Keyboard...


