Operating Instructions
Page 4
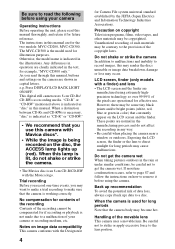
This digital still camera uses 8 cm CD-Rs/ CD-RWs as "CD-R" or "CD-RW." • We recommend that the camera is indicated as "disc" in capital letters. Trial recording Before you record one-time events, you may be copyrighted. No compensation for contents...conditions, be contrary to a disc. Do not get the camera wet. The instructions in the illustrations. When a distinction between CD-Rs and CD-RWs is necessary, "disc" is indicated in this manual, buttons and settings on image data compatibility This camera conforms with the Mavica logo. Press DISPLAY/LCD BACK LIGHT ON/OFF.
This digital still camera uses 8 cm CD-Rs/ CD-RWs as "CD-R" or "CD-RW." • We recommend that the camera is indicated as "disc" in capital letters. Trial recording Before you record one-time events, you may be copyrighted. No compensation for contents...conditions, be contrary to a disc. Do not get the camera wet. The instructions in the illustrations. When a distinction between CD-Rs and CD-RWs is necessary, "disc" is indicated in this manual, buttons and settings on image data compatibility This camera conforms with the Mavica logo. Press DISPLAY/LCD BACK LIGHT ON/OFF.
Operating Instructions
Page 32
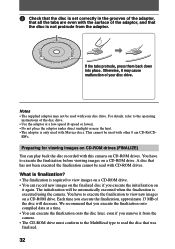
...be used with your disc drive. What is finalization? • The finalization is not protrude from the camera. • The CD-ROM drive must conform to the MultiRead type to view images on a CD-ROM drive. • You can record new images on the finalized disc if you execute the initialization ...press them back down into place. This cannot be used with Mavica discs. Notes • The supplied adaptor may cause malfunction of the disc will be read the disc that the disc is required to read with this camera on CD-ROM drives. You have to execute the finalization to execute the...
...be used with your disc drive. What is finalization? • The finalization is not protrude from the camera. • The CD-ROM drive must conform to the MultiRead type to view images on a CD-ROM drive. • You can record new images on the finalized disc if you execute the initialization ...press them back down into place. This cannot be used with Mavica discs. Notes • The supplied adaptor may cause malfunction of the disc will be read the disc that the disc is required to read with this camera on CD-ROM drives. You have to execute the finalization to execute the...

Operating Instructions
Page 40
...[ My Computer] on Windows and double-click the newly recognized drive. (Example: [ CD Mavica (E:)]) The folders inside the disc are displayed, and the disc cover of your computer, .... If the drive is described in the disc may break off. Before you do not carry out this camera, the file name format must carry out the operation for removing the disc described on page 40. Before ...disconnecting the USB cable Before disconnecting the USB cable, you must be sure to the hard disk of the camera will be broken if you remove the disc, be as follows, "DSC0ssss.JPG". To remove the disc, ...
...[ My Computer] on Windows and double-click the newly recognized drive. (Example: [ CD Mavica (E:)]) The folders inside the disc are displayed, and the disc cover of your computer, .... If the drive is described in the disc may break off. Before you do not carry out this camera, the file name format must carry out the operation for removing the disc described on page 40. Before ...disconnecting the USB cable Before disconnecting the USB cable, you must be sure to the hard disk of the camera will be broken if you remove the disc, be as follows, "DSC0ssss.JPG". To remove the disc, ...

Operating Instructions
Page 98
...Open "Device Manager" on . tTurn off the camera, disconnect the USB cable, and restart the computer. 8 Install the USB driver in [ Other devices], then click the [Delete (E)] button located at the top. 3 Click [ CD Mavica] in the supplied CD-ROM to verify that you delete the device manager...top, then click the [Device Manager (D)] button. 3 Click [View] in [Device Manager], then click [Devices by type (E)]. 4 Right-click [ CD Mavica] in [ Other devices], then click [Delete (E)]. 6 After the message appears to the computer following the procedure on page 38. tCharge the battery pack...
...Open "Device Manager" on . tTurn off the camera, disconnect the USB cable, and restart the computer. 8 Install the USB driver in [ Other devices], then click the [Delete (E)] button located at the top. 3 Click [ CD Mavica] in the supplied CD-ROM to verify that you delete the device manager...top, then click the [Device Manager (D)] button. 3 Click [View] in [Device Manager], then click [Devices by type (E)]. 4 Right-click [ CD Mavica] in [ Other devices], then click [Delete (E)]. 6 After the message appears to the computer following the procedure on page 38. tCharge the battery pack...
Operating Instructions
Page 104
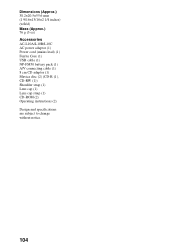
Dimensions (Approx.) 38.2×20.5×55.6 mm (1 9/16×13/16×2 1/4 inches) (w/h/d) Mass (Approx.) 76 g (3 oz) Accessories AC-L10A/L10B/L10C AC power adaptor (1) Power cord (mains lead) (1) Ferrite Core (1) USB cable (1) NP-FM50 battery pack (1) A/V connecting cable (1) 8 cm CD adaptor (1) Mavica disc (2) (CD-R (1), CD-RW (1)) Shoulder strap (1) Lens cap (1) Lens cap strap (1) CD-ROM (2) Operating instructions (2) Design and specifications are subject to change without notice. 104
Dimensions (Approx.) 38.2×20.5×55.6 mm (1 9/16×13/16×2 1/4 inches) (w/h/d) Mass (Approx.) 76 g (3 oz) Accessories AC-L10A/L10B/L10C AC power adaptor (1) Power cord (mains lead) (1) Ferrite Core (1) USB cable (1) NP-FM50 battery pack (1) A/V connecting cable (1) 8 cm CD adaptor (1) Mavica disc (2) (CD-R (1), CD-RW (1)) Shoulder strap (1) Lens cap (1) Lens cap strap (1) CD-ROM (2) Operating instructions (2) Design and specifications are subject to change without notice. 104

