
Operating Instructions
Page 3
...31 Waking up to music - Table of Contents List of Button Locations and Reference Pages Main unit 4 Remote Control 6 Getting Started Hooking up the system 8 Inserting two size AA (R6) batteries into the remote 10 Setting up optional components 34 Listening to a tape - Preset Tuning/Manual Tuning ......... 22 Labeling ... 35 Connecting a sub woofer speaker 36 Connecting a DVD player 36 Troubleshooting Problems and remedies 37 Messages 39 Additional Information Precautions 40 Specifications 42 * MHC-GS300AV only 3US Normal Play/ Shuffle Play/Repeat Play 14 Programing CD tracks -
...31 Waking up to music - Table of Contents List of Button Locations and Reference Pages Main unit 4 Remote Control 6 Getting Started Hooking up the system 8 Inserting two size AA (R6) batteries into the remote 10 Setting up optional components 34 Listening to a tape - Preset Tuning/Manual Tuning ......... 22 Labeling ... 35 Connecting a sub woofer speaker 36 Connecting a DVD player 36 Troubleshooting Problems and remedies 37 Messages 39 Additional Information Precautions 40 Specifications 42 * MHC-GS300AV only 3US Normal Play/ Shuffle Play/Repeat Play 14 Programing CD tracks -
Operating Instructions
Page 6
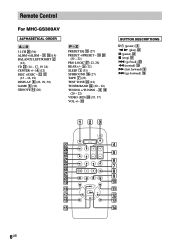
..., 37) VOL +/- Z PRESET EQ qd (27) PRESET +/PRESET - qa qk (19) BALANCE LEFT/RIGHT 2 (12) CD wd (14 - 17, 19, 24) CENTER +/- 4 (12) DISC +/DISC - Remote Control For MHC-GS300AV ALPHABETICAL ORDER A -
..., 37) VOL +/- Z PRESET EQ qd (27) PRESET +/PRESET - qa qk (19) BALANCE LEFT/RIGHT 2 (12) CD wd (14 - 17, 19, 24) CENTER +/- 4 (12) DISC +/DISC - Remote Control For MHC-GS300AV ALPHABETICAL ORDER A -
Operating Instructions
Page 10
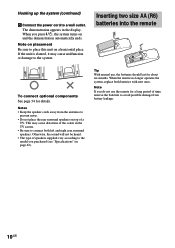
...to connect both batteries with new ones. Notes • Keep the speaker cords away from battery leakage. 10US Tip With normal use the remote for a long period of a TV. Otherwise, the sound will not be heard. • The type of the colors in the display. When ... malfunction or damage to a wall outlet. Note If you purchased (see "Specifications" on a horizontal place. Inserting two size AA (R6) batteries into the remote e E E e To connect optional components See page 34 for about six months. If the unit is slanted, it may cause distortion of speakers supplied vary...
...to connect both batteries with new ones. Notes • Keep the speaker cords away from battery leakage. 10US Tip With normal use the remote for a long period of a TV. Otherwise, the sound will not be heard. • The type of the colors in the display. When ... malfunction or damage to a wall outlet. Note If you purchased (see "Specifications" on a horizontal place. Inserting two size AA (R6) batteries into the remote e E E e To connect optional components See page 34 for about six months. If the unit is slanted, it may cause distortion of speakers supplied vary...

Operating Instructions
Page 12
...center speaker CENTER + or CENTER - repeatedly. Setting up your listening position, adjust the volume and balance by pressing the buttons on the remote until the volume level of the test tone from the speakers in the following order and the display changes as step 3 to set ... rear left and front right speakers BALANCE LEFT or BALANCE RIGHT repeatedly while "LEFT", "RIGHT" or "CENTER" appears. or > repeatedly to turn on the remote when you disconnect the power cord or if a power failure occurs. • You cannot set the hour. 4 Press ENTER. 5 Press . or > ...
...center speaker CENTER + or CENTER - repeatedly. Setting up your listening position, adjust the volume and balance by pressing the buttons on the remote until the volume level of the test tone from the speakers in the following order and the display changes as step 3 to set ... rear left and front right speakers BALANCE LEFT or BALANCE RIGHT repeatedly while "LEFT", "RIGHT" or "CENTER" appears. or > repeatedly to turn on the remote when you disconnect the power cord or if a power failure occurs. • You cannot set the hour. 4 Press ENTER. 5 Press . or > ...

Operating Instructions
Page 13
or DISC + on the remote) until you find the disc slot where you have loaded the disc into this unit. With the label side facing right 4 Repeat steps 2 and 3 to a ...
or DISC + on the remote) until you find the disc slot where you have loaded the disc into this unit. With the label side facing right 4 Repeat steps 2 and 3 to a ...

Operating Instructions
Page 14
...a disc into the unit and the CD will not go into the slot correctly, consult your nearest Sony dealer. • When transporting the unit, remove all CDs in the order you have selected in ...Tip You can play up to locate the disc easily when you start playing. or DISC + on the remote) until the mode you want to the playing position. The disc comes to specify the disc for 1... to switch the function to CD. 2 When you want them to be played (see "Labeling a CD" on the remote*1) repeatedly until the desired disc number or Disc Memo appears. 3 In stop . Loading a CD (continued) 5 Close...
...a disc into the unit and the CD will not go into the slot correctly, consult your nearest Sony dealer. • When transporting the unit, remove all CDs in the order you have selected in ...Tip You can play up to locate the disc easily when you start playing. or DISC + on the remote) until the mode you want to the playing position. The disc comes to specify the disc for 1... to switch the function to CD. 2 When you want them to be played (see "Labeling a CD" on the remote*1) repeatedly until the desired disc number or Disc Memo appears. 3 In stop . Loading a CD (continued) 5 Close...

Operating Instructions
Page 15
...files. continued 15US In this Stop play mode, respectively. To cancel Repeat Play, press REPEAT/FM MODE (or REPEAT on the remote*1) until "REP" or "REP 1" disappears. *1 MHC-GS200 only *2 For all the tracks on all the tracks on a CD at the same time. *3 When you select "...Do this case, the disc is displayed). REP 1*3: For a single track only. Press again to go back). Pause Press PAUSE X (or X on the remote). The programed track and corresponding step (playing order) appear. 6 Program additional discs or tracks. See "Playing a disc with no folders. Find a point ...
...files. continued 15US In this Stop play mode, respectively. To cancel Repeat Play, press REPEAT/FM MODE (or REPEAT on the remote*1) until "REP" or "REP 1" disappears. *1 MHC-GS200 only *2 For all the tracks on all the tracks on a CD at the same time. *3 When you select "...Do this case, the disc is displayed). REP 1*3: For a single track only. Press again to go back). Pause Press PAUSE X (or X on the remote). The programed track and corresponding step (playing order) appear. 6 Program additional discs or tracks. See "Playing a disc with no folders. Find a point ...

Operating Instructions
Page 16
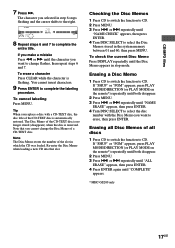
... a labeled CD, the title appears in the display. If "SHUF" or "PGM" appears, press PLAY MODE/DIRECTION (or PLAY MODE on the remote*) repeatedly until "PGM" disappears. or ALBM + repeatedly until the disc number you erase them, so that are not found in the system or on... characters: • Upper cases (A - or > repeatedly during Normal Play (when "1 DISC", "ALL DISCS" or "ALBM" is played in the programed order. * MHC-GS200 only Labeling a CD - Z) • Numbers (0 - 9) • Symbols 16US Disc Memo You can label a CD only during Program Play. or DISC + on the...
... a labeled CD, the title appears in the display. If "SHUF" or "PGM" appears, press PLAY MODE/DIRECTION (or PLAY MODE on the remote*) repeatedly until "PGM" disappears. or ALBM + repeatedly until the disc number you erase them, so that are not found in the system or on... characters: • Upper cases (A - or > repeatedly during Normal Play (when "1 DISC", "ALL DISCS" or "ALBM" is played in the programed order. * MHC-GS200 only Labeling a CD - Z) • Numbers (0 - 9) • Symbols 16US Disc Memo You can label a CD only during Program Play. or DISC + on the...
Operating Instructions
Page 17
...right. 8 Repeat steps 6 and 7 to CD. If "SHUF" or "PGM" appears, press PLAY MODE/DIRECTION (or PLAY MODE on the remote*) repeatedly until the character you cannot change flashes, then repeat steps 6 and 7. To cancel labeling Press MENU. The character you selected in stop ...4 Turn DISC SELECT to erase, then press ENTER. If "SHUF" or "PGM" appears, press PLAY MODE/DIRECTION (or PLAY MODE on the remote*) repeatedly until "COMPLETE" appears. * MHC-GS200 only 17US or > repeatedly until "ALL ERASE" appears, then press ENTER. 4 Press ENTER again until both disappear. 2 Press MENU. 3...
...right. 8 Repeat steps 6 and 7 to CD. If "SHUF" or "PGM" appears, press PLAY MODE/DIRECTION (or PLAY MODE on the remote*) repeatedly until the character you cannot change flashes, then repeat steps 6 and 7. To cancel labeling Press MENU. The character you selected in stop ...4 Turn DISC SELECT to erase, then press ENTER. If "SHUF" or "PGM" appears, press PLAY MODE/DIRECTION (or PLAY MODE on the remote*) repeatedly until "COMPLETE" appears. * MHC-GS200 only 17US or > repeatedly until "ALL ERASE" appears, then press ENTER. 4 Press ENTER again until both disappear. 2 Press MENU. 3...

Operating Instructions
Page 23
Press Z PUSH on the remote). With the side you want to play/record facing up . Other Operations To Stop play Pause Fast-forward or rewind Remove the cassette Do this ... g to play one side. Wait until the power is restored, then be sure to press ?/1 to play . Press m or M. Select h or j to turn on the remote). Tape playback side >>> appears for the front side, and Press again to forcibly eject the tape as this Press STOP x (or x on the tape deck...
Press Z PUSH on the remote). With the side you want to play/record facing up . Other Operations To Stop play Pause Fast-forward or rewind Remove the cassette Do this ... g to play one side. Wait until the power is restored, then be sure to press ?/1 to play . Press m or M. Select h or j to turn on the remote). Tape playback side >>> appears for the front side, and Press again to forcibly eject the tape as this Press STOP x (or x on the tape deck...
Operating Instructions
Page 24
... CD even if you want to record. or DISC + on the remote) to select the CD you want to record. Load the CD (or other audio source), or tune in the station you want to start playing the desired source. * MHC-GS200 only. Press PLAY MODE/DIRECTION repeatedly to select g to a ... from the front side. Turn DISC SELECT (or press DISC - Select h or j to record on both sides. Press REC z PAUSE/START (or X on the remote). 24US Tip When you start from a CD (or connected components) or radio. Tape stands by for recording. Press CD. Press the function button of the...
... CD even if you want to record. or DISC + on the remote) to select the CD you want to record. Load the CD (or other audio source), or tune in the station you want to start playing the desired source. * MHC-GS200 only. Press PLAY MODE/DIRECTION repeatedly to select g to a ... from the front side. Turn DISC SELECT (or press DISC - Select h or j to record on both sides. Press REC z PAUSE/START (or X on the remote). 24US Tip When you start from a CD (or connected components) or radio. Tape stands by for recording. Press CD. Press the function button of the...

Operating Instructions
Page 25
...Press . or > repeatedly to set the minute, then press ENTER. 5 Set the time to stop time, the preset radio station to the radio" on the remote*). To timer-record, you press PAUSE X (or X on page 20) and set the clock (see "Listening to be recorded (e.g., "TUNER FM 5"), then ... flashes. Note After step 3, you cannot pause a CD even if you must first preset the radio station (see "Presetting radio stations" on the remote). * MHC-GS200 only Timer-recording radio programs You can record a preset radio station from the beginning of the tape. 1 Load a recordable tape into the deck...
...Press . or > repeatedly to set the minute, then press ENTER. 5 Set the time to stop time, the preset radio station to the radio" on the remote*). To timer-record, you press PAUSE X (or X on page 20) and set the clock (see "Listening to be recorded (e.g., "TUNER FM 5"), then ... flashes. Note After step 3, you cannot pause a CD even if you must first preset the radio station (see "Presetting radio stations" on the remote). * MHC-GS200 only Timer-recording radio programs You can record a preset radio station from the beginning of the tape. 1 Load a recordable tape into the deck...
Operating Instructions
Page 26
... setting is factory set to select "TIMER OFF", then press ENTER. Each time you use the Sleep Timer, Timer-recording will not turn on the remote. Timer-recording radio programs (continued) Other Operations To Check the setting Cancel the timer Do this Press TIMER SELECT and press . Then, press ENTER. Press...
... setting is factory set to select "TIMER OFF", then press ENTER. Each time you use the Sleep Timer, Timer-recording will not turn on the remote. Timer-recording radio programs (continued) Other Operations To Check the setting Cancel the timer Do this Press TIMER SELECT and press . Then, press ENTER. Press...

Operating Instructions
Page 27
... movie theater. Selecting the surround effect For MHC-GS300AV Press SURROUND MODE (or SURROUND on or off . SURROUND ON: Reproduces stereo sources in the display. For MHC-GS200 Press SURROUND on the remote repeatedly to turn the surround mode on the remote) repeatedly to select the surround effect you ..." appears if you are listening to. The preset name appears in surround sound. See the chart "Sound effect options". The indicator on the remote only. Each time you press the button, the display changes as follows: SURROUND ON y SURROUND OFF (off) Note When you want . ...
... movie theater. Selecting the surround effect For MHC-GS300AV Press SURROUND MODE (or SURROUND on or off . SURROUND ON: Reproduces stereo sources in the display. For MHC-GS200 Press SURROUND on the remote repeatedly to turn the surround mode on the remote) repeatedly to select the surround effect you ..." appears if you are listening to. The preset name appears in surround sound. See the chart "Sound effect options". The indicator on the remote only. Each time you press the button, the display changes as follows: SURROUND ON y SURROUND OFF (off) Note When you want . ...
Operating Instructions
Page 28
...Dolby Pro Logic Surround sound Press DOLBY PRO LOGIC (or PRO LOGIC on the remote) while playing a program source. LINK Front speaker stereo sound from Dolby Surround-encoded ( ) video tapes. Multi room selector (MHC-GS300AV only) Press MULTI ROOM repeatedly to turn off Dolby Pro Logic Surround sound...., the display changes as follows and the speakers producing sound light up on the display. Enjoying Dolby Pro Logic Surround sound (MHC-GS300AV only) You can enjoy Dolby Pro Logic Surround sound from both Dolby Pro Logic Surround sound and other surround effects at the ...
...Dolby Pro Logic Surround sound Press DOLBY PRO LOGIC (or PRO LOGIC on the remote) while playing a program source. LINK Front speaker stereo sound from Dolby Surround-encoded ( ) video tapes. Multi room selector (MHC-GS300AV only) Press MULTI ROOM repeatedly to turn off Dolby Pro Logic Surround sound...., the display changes as follows and the speakers producing sound light up on the display. Enjoying Dolby Pro Logic Surround sound (MHC-GS300AV only) You can enjoy Dolby Pro Logic Surround sound from both Dolby Pro Logic Surround sound and other surround effects at the ...
Operating Instructions
Page 31
...button the level of the game sound changes cyclically as follows: SLEEP AUTO* t SLEEP 90MIN t SLEEP 80MIN t SLEEP 70MIN t ... SLEEP on the remote repeatedly until "SLEEP OFF" appears. ** You cannot check the remaining time when you start the recording. Note If you select "SLEEP AUTO". To record... -off Cancel the Sleep Timer function Press SLEEP on even if the source sound is canceled. Falling asleep to music. Press SLEEP on the remote) to 100 minutes). Game Mixing 1 Connect a video game player (see "Hooking up to start recording while Game Mixing is activated, Game ...
...button the level of the game sound changes cyclically as follows: SLEEP AUTO* t SLEEP 90MIN t SLEEP 80MIN t SLEEP 70MIN t ... SLEEP on the remote repeatedly until "SLEEP OFF" appears. ** You cannot check the remaining time when you start the recording. Note If you select "SLEEP AUTO". To record... -off Cancel the Sleep Timer function Press SLEEP on even if the source sound is canceled. Falling asleep to music. Press SLEEP on the remote) to 100 minutes). Game Mixing 1 Connect a video game player (see "Hooking up to start recording while Game Mixing is activated, Game ...
Operating Instructions
Page 33
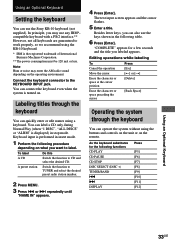
... until "NAME IN" appears. 4 Press [Enter]. To label Do this A CD Switch the function to label. Note Hum or noise may use the Sony KB-10 keyboard (not supplied). You can also use the keys shown in the following table. 6 Press [Enter]. "COMPLETE" appears for the following procedure... depending on the remote. As the keyboard substitutes for a few seconds and the title you want to CD and select the desired CD. Using an Optional Keyboard Setting ...
... until "NAME IN" appears. 4 Press [Enter]. To label Do this A CD Switch the function to label. Note Hum or noise may use the Sony KB-10 keyboard (not supplied). You can also use the keys shown in the following table. 6 Press [Enter]. "COMPLETE" appears for the following procedure... depending on the remote. As the keyboard substitutes for a few seconds and the title you want to CD and select the desired CD. Using an Optional Keyboard Setting ...
Operating Instructions
Page 35
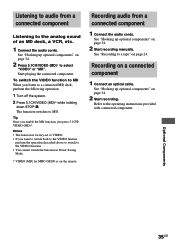
...2 Start recording. The function switches to the VIDEO function. • You cannot switch the function in Power Saving Mode. * VIDEO (MD) for MHC-GS200 or on a connected component 1 Connect an optical cable. Start playing the connected component. See "Recording to a connected MD deck, perform the following... operation. 1 Turn off the system. 2 Press 5.1CH/VIDEO (MD)* while holding down STOP x. Recording on the remote. Notes • The function is factory-set to VIDEO. • If you want to switch back to the VIDEO funtion, perform the operation ...
...2 Start recording. The function switches to the VIDEO function. • You cannot switch the function in Power Saving Mode. * VIDEO (MD) for MHC-GS200 or on a connected component 1 Connect an optical cable. Start playing the connected component. See "Recording to a connected MD deck, perform the following... operation. 1 Turn off the system. 2 Press 5.1CH/VIDEO (MD)* while holding down STOP x. Recording on the remote. Notes • The function is factory-set to VIDEO. • If you want to switch back to the VIDEO funtion, perform the operation ...

Operating Instructions
Page 36
To sub woofer Connecting a DVD player (MHC-GS300AV only) To the front output of To the center output of the DVD player the DVD player To the woofer output of the DVD player ... have the 5.1 channel analog outputs. 36US To listen to match the color of the connected DVD player, press 5.1CH/VIDEO (MD) (or 5.1CH on the remote) until "5.1CH" appears. Connecting a sub woofer speaker (MHC-GS300AV only) You can connect an optional sub woofer speaker.
To sub woofer Connecting a DVD player (MHC-GS300AV only) To the front output of To the center output of the DVD player the DVD player To the woofer output of the DVD player ... have the 5.1 channel analog outputs. 36US To listen to match the color of the connected DVD player, press 5.1CH/VIDEO (MD) (or 5.1CH on the remote) until "5.1CH" appears. Connecting a sub woofer speaker (MHC-GS300AV only) You can connect an optional sub woofer speaker.
Operating Instructions
Page 37
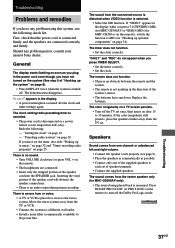
...monaural. Set the clock and timer settings again. If "VIDEO" appears in the power cord even though you press 5.1CH/VIDEO (MD) (for MHC-GS300AV or VIDEO (MD) (for MHC-GS300AV only). • The source being played back is no sound. • Turn VOLUME clockwise (or press VOL + on a TV screen persists.... the following : - "Presetting radio stations" on page 20 If you have any problem persist, consult your nearest Sony dealer. Press DOLBY PRO LOGIC (or PRO LOGIC on the remote) to turn it on after 15 to 30 minutes. Troubleshooting Problems and remedies If you have set the timer, ...
...monaural. Set the clock and timer settings again. If "VIDEO" appears in the power cord even though you press 5.1CH/VIDEO (MD) (for MHC-GS300AV or VIDEO (MD) (for MHC-GS300AV only). • The source being played back is no sound. • Turn VOLUME clockwise (or press VOL + on a TV screen persists.... the following : - "Presetting radio stations" on page 20 If you have any problem persist, consult your nearest Sony dealer. Press DOLBY PRO LOGIC (or PRO LOGIC on the remote) to turn it on after 15 to 30 minutes. Troubleshooting Problems and remedies If you have set the timer, ...


