
Operating Instructions
Page 3
... devices. . . . 14 Other functions Changing the sound settings 15 Adjusting the balance and fader - EQ lite 15 Adjusting setup items - SET 15 Using optional equipment 16 Auxiliary audio equipment 16 Additional Information Precautions 17 Notes on 12 Connecting a cellular phone... RM-X304 8 CD Display items 10 Repeat and shuffle play 10 Radio Storing and receiving stations 10 Storing automatically - BTM 10 Storing manually 10 Receiving the stored stations 10 Tuning automatically 11 Bluetooth function Bluetooth operations 11 Pairing 11 About Bluetooth icons 12 Connection ...
... devices. . . . 14 Other functions Changing the sound settings 15 Adjusting the balance and fader - EQ lite 15 Adjusting setup items - SET 15 Using optional equipment 16 Auxiliary audio equipment 16 Additional Information Precautions 17 Notes on 12 Connecting a cellular phone... RM-X304 8 CD Display items 10 Repeat and shuffle play 10 Radio Storing and receiving stations 10 Storing automatically - BTM 10 Storing manually 10 Receiving the stored stations 10 Tuning automatically 11 Bluetooth function Bluetooth operations 11 Pairing 11 About Bluetooth icons 12 Connection ...
Operating Instructions
Page 6
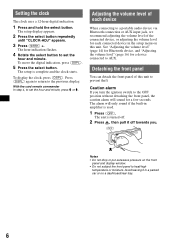
...select button. Press (DSPL) again to return to set the hour and minute, press M or m. See "Adjusting the volume level" (page 14) for Bluetooth device, and "Adjusting the volume level" (page 16) for a few seconds. Caution alarm If you . The unit is turned off towards you turn the...a dashboard/rear tray. 6 To display the clock, press (DSPL). Notes • Do not drop or put excessive pressure on this unit to AUX. The setup display appears. 2 Press the select button repeatedly until "CLOCK-ADJ" appears. 3 Press (SEEK) +. Setting the clock The clock uses a 12-hour digital ...
...select button. Press (DSPL) again to return to set the hour and minute, press M or m. See "Adjusting the volume level" (page 14) for Bluetooth device, and "Adjusting the volume level" (page 16) for a few seconds. Caution alarm If you . The unit is turned off towards you turn the...a dashboard/rear tray. 6 To display the clock, press (DSPL). Notes • Do not drop or put excessive pressure on this unit to AUX. The setup display appears. 2 Press the select button repeatedly until "CLOCK-ADJ" appears. 3 Press (SEEK) +. Setting the clock The clock uses a 12-hour digital ...

Operating Instructions
Page 8
... setup items (press and rotate); Location of controls and basic operations Main unit 12 3 4 56 78 OFF BLUETOOTH EQ SEEK BTM PUSH SELECT / SOURCE AUX SEEK MODE DIM DSPL ALBM 1 2 REP SHUF 3 4 5 PAUSE 6 SCRL 9 q; qa qs qd qj MEX-BT2500 ...qf qg qh qk RESET Card remote commander RM-X304 1 4 ql qd OFF ATT SOURCE SEL MODE + - C Volume control dial/select/ (handsfree) button 13, 15 To adjust volume (rotate); change the source (Radio/CD/ AUX/Bluetooth audio/Bluetooth phone). receive/end a call (press). B EQ (equalizer)/BLUETOOTH button 15 CD/Radio/Bluetooth...
... setup items (press and rotate); Location of controls and basic operations Main unit 12 3 4 56 78 OFF BLUETOOTH EQ SEEK BTM PUSH SELECT / SOURCE AUX SEEK MODE DIM DSPL ALBM 1 2 REP SHUF 3 4 5 PAUSE 6 SCRL 9 q; qa qs qd qj MEX-BT2500 ...qf qg qh qk RESET Card remote commander RM-X304 1 4 ql qd OFF ATT SOURCE SEL MODE + - C Volume control dial/select/ (handsfree) button 13, 15 To adjust volume (rotate); change the source (Radio/CD/ AUX/Bluetooth audio/Bluetooth phone). receive/end a call (press). B EQ (equalizer)/BLUETOOTH button 15 CD/Radio/Bluetooth...
Operating Instructions
Page 15
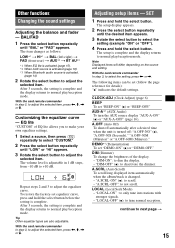
...*1 t HI*1 t BAL (left-right) t FAD (front-rear) t AUX*2 t BT AU*3 *1 When EQ lite is activated (page 15). *2 When AUX source is activated (page 16). *3 When Bluetooth audio source is complete and the display returns to normal play/reception mode. After 3 seconds, the setting is activated. (page 14) 2 Rotate the select button...
...*1 t HI*1 t BAL (left-right) t FAD (front-rear) t AUX*2 t BT AU*3 *1 When EQ lite is activated (page 15). *2 When AUX source is activated (page 16). *3 When Bluetooth audio source is complete and the display returns to normal play/reception mode. After 3 seconds, the setting is activated. (page 14) 2 Rotate the select button...


